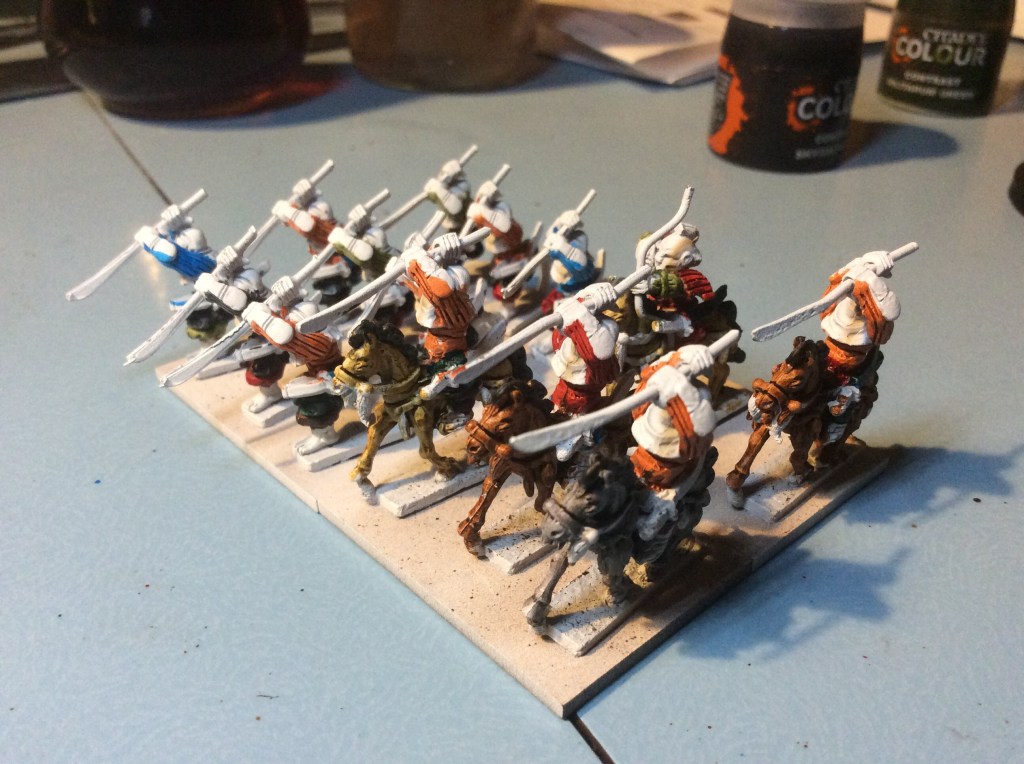
Tonight I pushed on and got these finished apart from the mounted archer who needs his hair painting. With these I decided that their robes were going to be different colours as opposed to just orange as they would look a bit samey.
I still have the Ashigaru to paint followed by the samurai but I do feel like I have made some more progress on these.
I will start on the Ashigaru tomorrow. Hopefully some progress will be made quickly on these.
I managed to get all the bits printed today…. well that isn’t exactly true… I finished printing all of the bits today. Each bit takes a good old while. The centre bit, for example, takes 2 hours 48 minutes to do, the corner is speedy in comparison at only 38 minutes. I have become a bit anal in recording everything, but it is really handy to know how long a particular print will take…
I just hope I don’t lose this book…
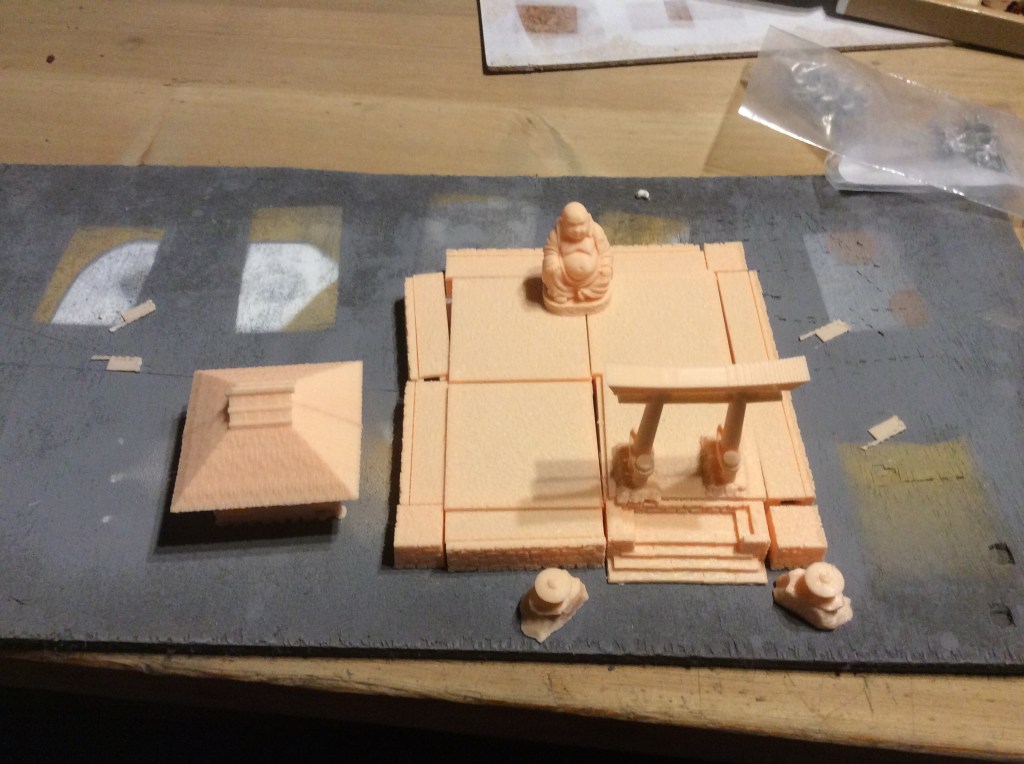
As can be seen I write all the times down, it makes life easier knowing that I can go and do the horse and get back before a print finishes. Anyway enough of this jibber jabber… here is where I have got to with the shrine so far.
The rear left corner is finished too.
I am in two minds whether to put the building on the raised section or leave it off. A second thought I had was to build a separate raised section connected by a bridge. This other section would have the Buddha on it.
I will glue this lot together tomorrow sometime ready for undercoating.
I decided that I would purchase some more bits and pieces from 3DALIENWORLDS. So I am now the proud owner of some bridges, some ponds and the large banners that came out today. I have kickstarted a couple of STL makers, one is making some Mighty Empire style tiles and another is making some interesting roadways. Luckily I have managed to sell my Lizardmen to pay for my new addiction!
I was hoping to get these finished tonight, but unfortunately one of the horses decided to walk through the electric fence so we had to go and get him then work out where the little bugger got through (we still haven’t) but in doing so my wife touched the fence and said it didn’t shock her. So we rested with the tester and it was working.
My children then decided they would test it themselves (even though we recommended that this was not a good idea). Eventually one did so and got zapped, much hilarity occurred, the second followed, more laughing and then my middle one, against all advice sat on the floor and touched it. Needless to say she won’t do that again. (Luckily no children were harmed in this evening of hysterical laughter).
It did mean we didn’t get in to watch the movie until 21.30.
Still a lot of white on these but I am getting there. To be fair the cowls are going to be white.. so less work than it looks 😉.
Still have the rest of the army to paint too, this is the tip of the iceberg.
Hopefully I will get some more done tomorrow evening.
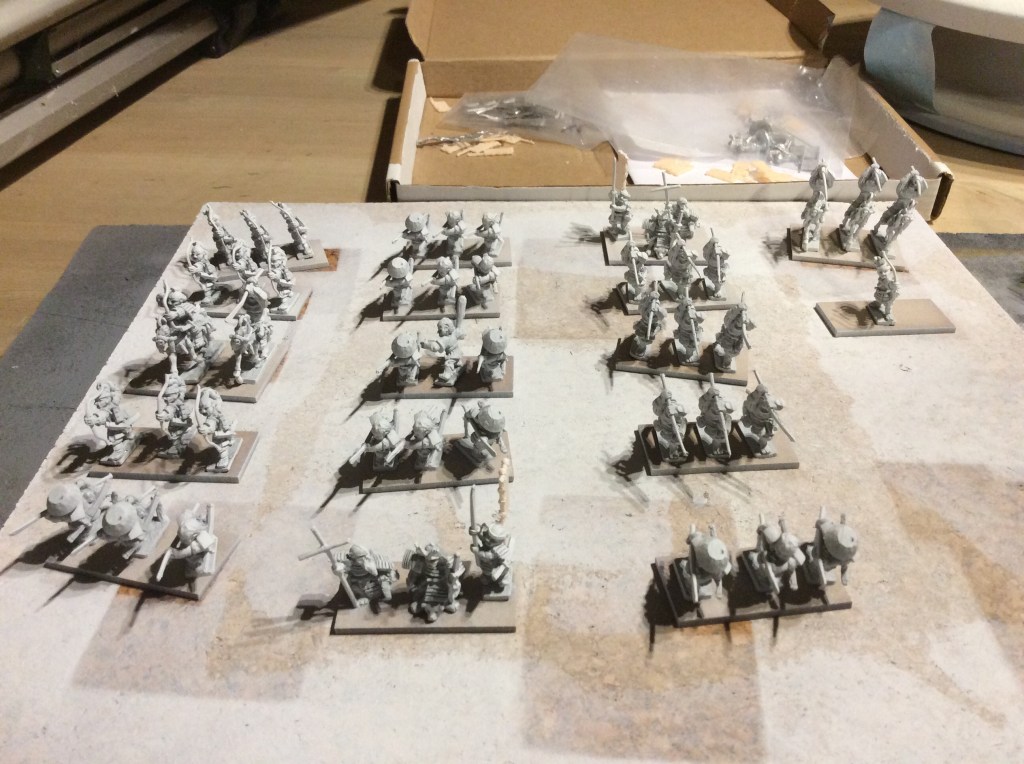
Today I got the other Samurai sprayed today and let them dry outside.
For some reason the white undercoat is not covering the PLA on the sashimono. The grey covered well, but this is covering the miniatures well enough but not the plastic. Now with this set I only shook the can for a little while and took it out of the shed, so it might explain things if I hadn’t sprayed a couple of them yesterday. With those ones the can was warmed and shaken for ages and it still didn’t cover well. I gave those two a second coat today and it definitely helped.
With the lot above I think I will just paint them white with a brush, it will save my last can of white spray.
I also managed to get some painting done whilst chatting on Discord this evening. I decided to start with the monks and peasants, I would have got a bit further but my paints are spread between two boxes and I was having to paint in the kitchen with a box file on my knees.
Hopefully I will get some more done tomorrow evening.
I printed a few more bits today and put bits together to test them out to see what I think about how it looks.
This is half the depth I want it, so the Buddha is a bit close to the front at the moment. The more astute of you will recall me talking about adding a tiled roof to this Torri gate…. errr I forgot and superglued it in place before I remembered!
The outer area will have a low hedge using clump foliage and where the Buddha is now will have the prayer wall. The whole thing will hopefully be surrounded by a stone wall with a gate.
I am hoping that it will fit in a box file as that is my storage option of choice as they stack easily. If not I will have to improvise. I did just have a bit of a daft thought. If I have the wall on one base and this on another then I will be able to Mitch and match what is within. Something I will have to think about or more likely- totally forget.
Yesterday I kept pressing print after shrinking the files down by 50%.
I printed another Torii gate. This one will have a tiled roof.
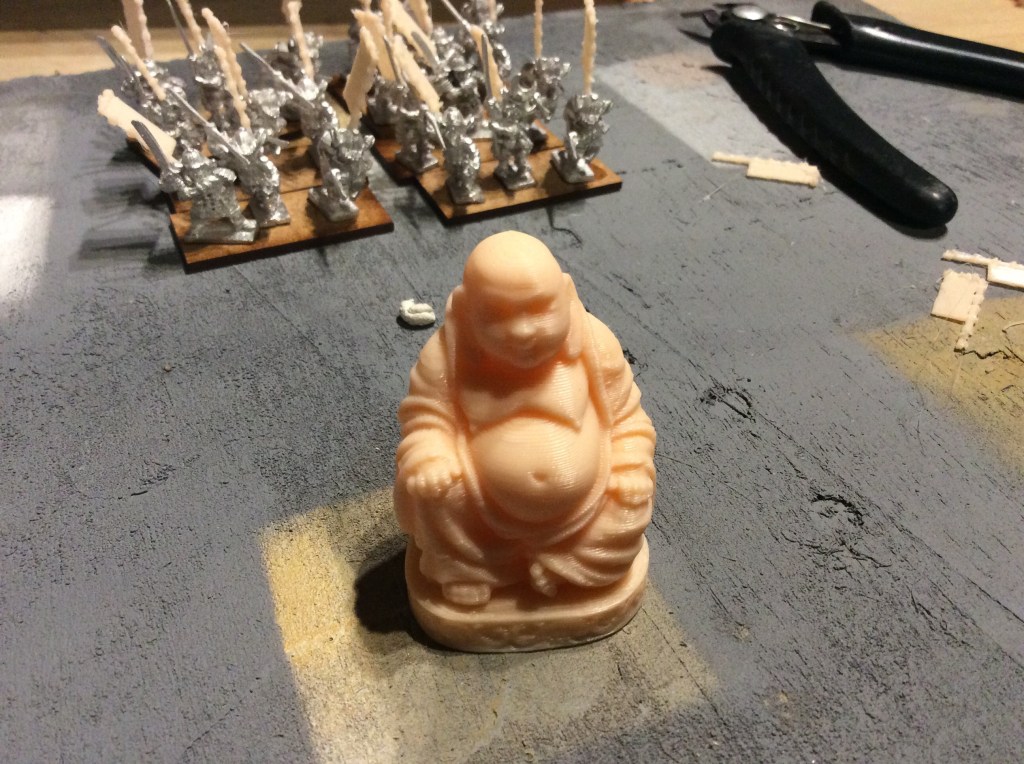
I also found a statue of the Buddha On Thingiverse to go in the shrine. I would like to point out I have no idea as to the accuracy of this. To be honest, it’s for a game and as such it will do for the time being.
He will look nice all golden.
The other thing I worked on was the start of the raised section. The biggest problem I am going to have is that as it stands right now it is too thin. I want the stairs to be in the middle so I will either have to print out two more straight sections, which might actually make it too wide. Or I will have to take a straight section and cut it in half in 3D builder. Another option is to forget about the building on it and leave it as is. Put the Torri gate at the base of the steps. I will keep you up to speed as to what I decided. The extra teahouse building won’t be wasted as I can give it to my mate as part of the terrain for his birthday present.
The hollow square will be used to raise the centre section a little bit. As can be seen at present, the centre tile sits at the same height as the surrounding layer. Because I am a pillock I grabbed all of the files that said centre and printed them. I forgot to read the instructions.. therefore I don’t actually know what it is for or where it goes!
I just added it and it looks fine slightly raised. This print takes a long time for what it is, this is due in part to all of the bumps on the top bit. Part of me is considering using 3D builder to just do a flat square with the same dimensions as the textured one.
On the upside 3DALIENWORLDS Have designed some Nobori flags which is something I was going to produce. That saves me a job 😁.
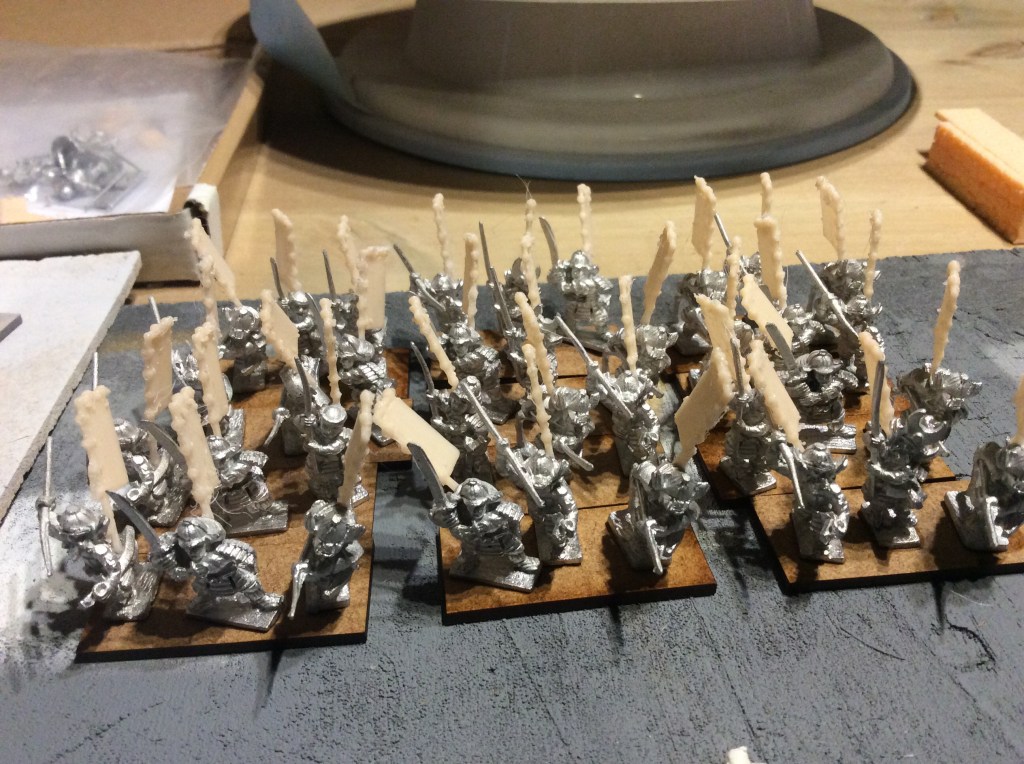
Today I decided to get the sashimonos stuck onto the samurai. I was originally going to put them the ashigaru too, but decided against it as it will allow them to be a part of a rebel force as well as allied to a Daimyo (not to mention the fact that I hate adding them).
This meant that I only needed to add them to 38 miniatures (luckily they didn’t fit on the samurai archers😉.
I managed to get 24 of them stuck on without many shenanigans. And then the next four took as long as the previous twenty four. Needless to say this made me somehow miffed!
I also managed to get the other half sprayed white.
Hopefully I will get the samurai sprayed white tomorrow and then make a start on painting the ones that I managed to get undercoated today.
I have decided to get rid of the Seraphon as to be honest I have fallen out of love with them. I have never played a game of Age if Sigmar so I. would need to buy and learn a new set of rules etc. There aren’t that many people who play it in the club too. Luckily one of the lads at the club said he was interested in buying them.
I did enjoy painting the ones I did, not to mention messing on with the printer to do those bits too. I was going to photograph everything for him tonight but unfortunately there has been a power cut.
Nope, fear not I have done anything wrong with the first one, that is still fit and well. I want to use the building part for my shrine and am printing off a second. The building should be just about finished in 10 minutes…
Today was spent printing the various bits for it, I printed the roof overnight and the building this evening. The only thing I need to print now is the water feature, as I seem to have messed up savings file. The stone bench is called water feature on the memory stick! As it took only 6 minutes to print I am not that bothered. I needed it anyway.
Apart from that I think I have got everything done to get the teahouse build in its entirety.
The other thing I printed last night was a doggy!
Down Boy! Where is Barbara Woodehouse when you need her!
Sadly he is now a three legged doggy as some pillock snapped one off today!
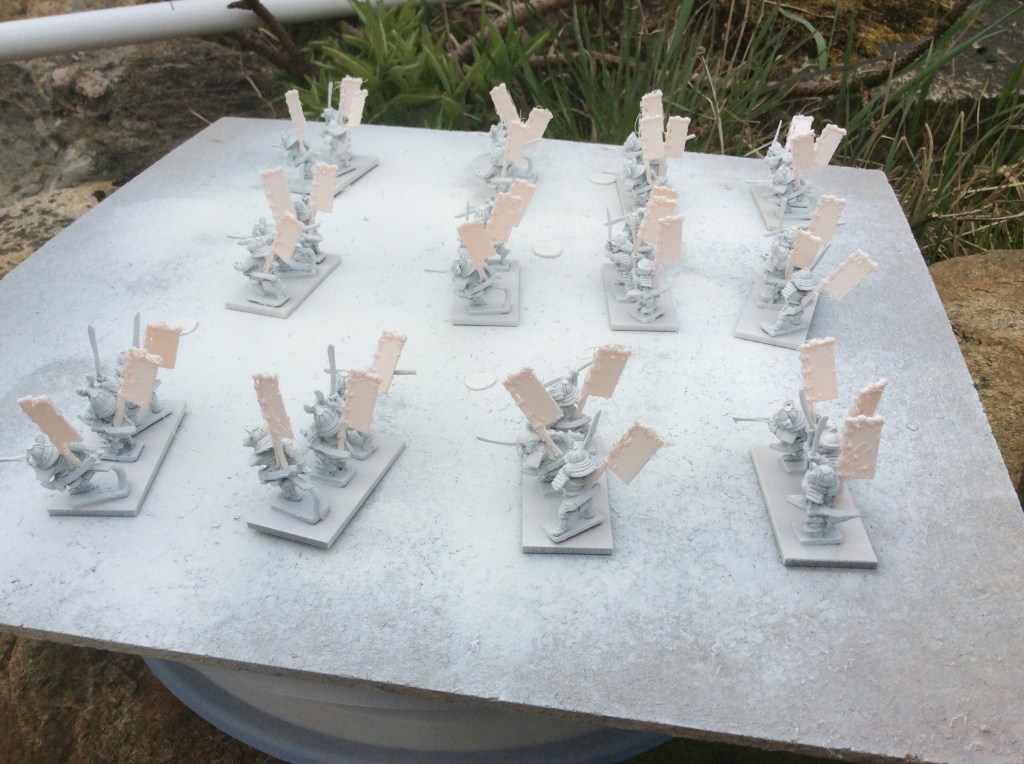
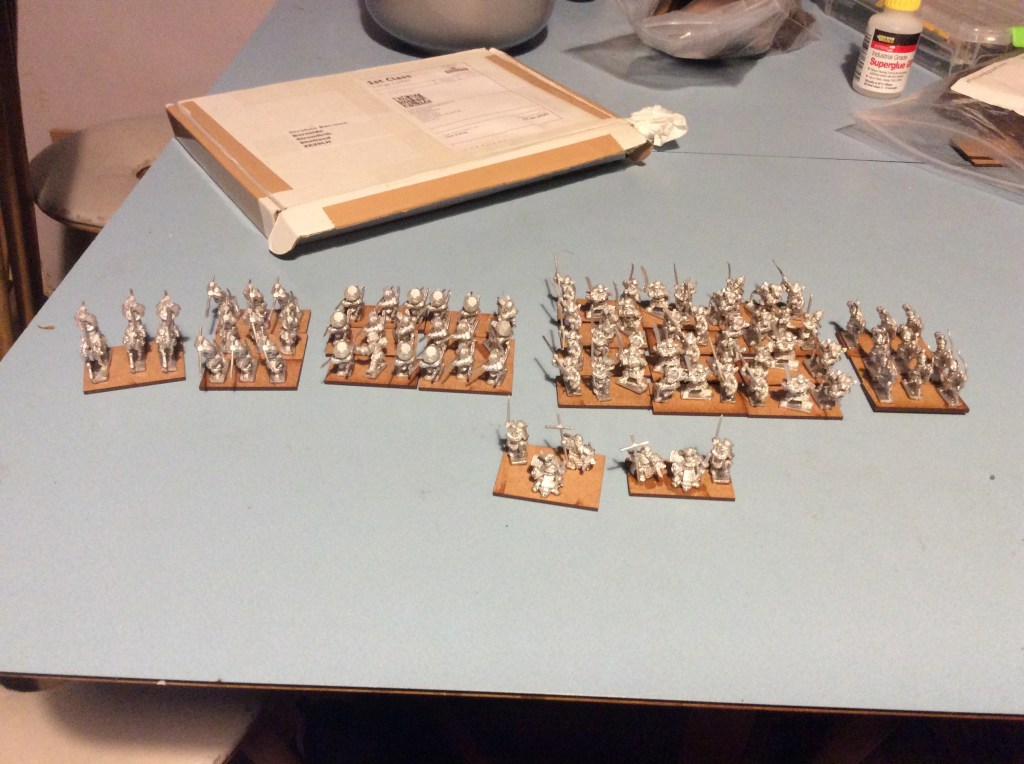
Tonight I didn’t get anything painted, but I managed to get all of the Tin Soldier samurai onto bases.
So from left to right we have:
Mounted monks
Foot monks
Ashigaru
Foot Samurai
Samurai bow
In the front:
General on the bigger base and a subordinate on the smaller base.
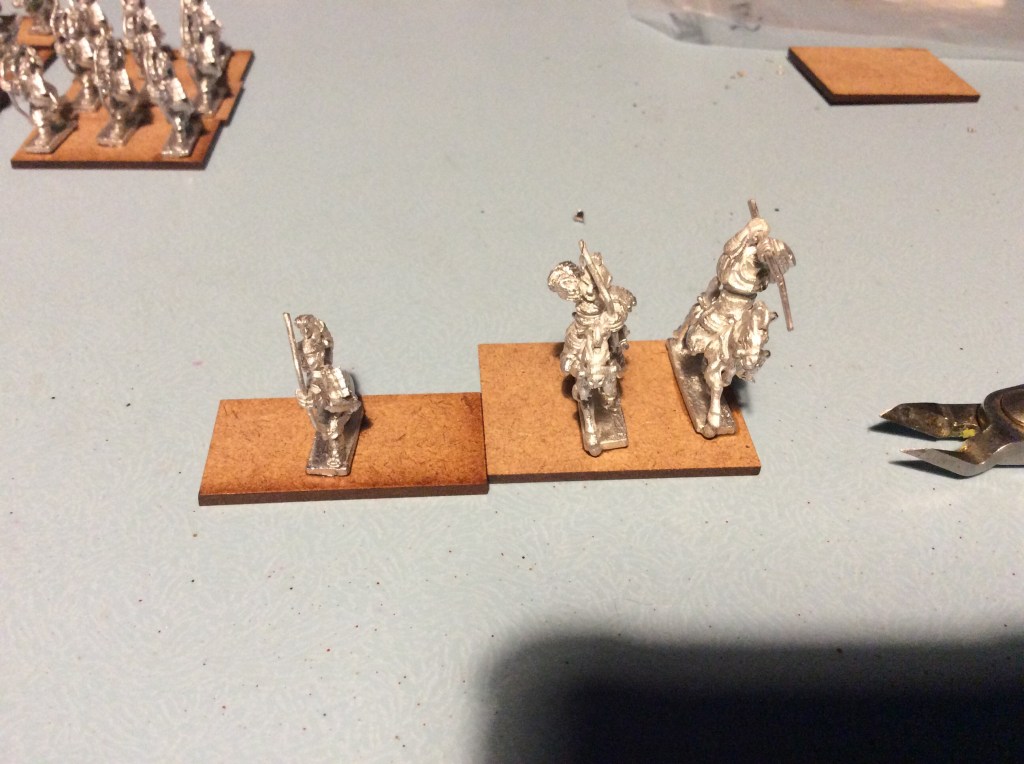
As I had already got some miniatures painted. I will be able to make one more base of mounted monks and one of samurai archers.
Once these are all dried I will attempt to glue sashimono to them all. Wish me luck. Once that is done I will get them sprayed and ready to go. I am on a bit of a tight schedule as it is my mates birthday on 22nd May. I bought him some miniatures for Sengoku Monster Hunter from Alternative Armies. I got him the first couple of sets so that there is a bit of alternatives to what is hunted and who is doing the hunted. I said I would paint them up for him too hence the need for speed. I will also do him some terrain to go with them.
Today I spent a long time printing the teahouse. Okay I did little more than press print. The roof took just over 5 hours to do and the building itself just under 4 hours in total the building took most of the day to print.
Once again theses are amazing models with lots of details. The set comes with all the bits you need for the teahouse. I made a start on the fence too. I got as far as the gate and a corner piece.
There are lanterns as well as water features and the interior in the set too.
As can be seen in the background I added gates to the wooden gateway…See below for a closer look.
Whoops one of the lanterns is sideways!
The other thing I printed was the test Sashimono at 100% this time.
The one on the left has a Tokugawa clan mon on it.
I had a punt at these as they only cost a couple of dollars so it was worth the test. I have enough of the ones from Thingiverse printed then I doubt I will use these ones. Having the mon on them would make my life easier, but it would mean more time on the printer for something I already have a lot of.
Tomorrow I will carry on with the teahouse fences as well as the other bits too. I will also need to start on the canal pieces for the raised area of the shrine. I will then need to find a Buddha or something similar to add.