Tonight, I really couldn’t be bothered to do anything. So I went through my pile of prints to sort out what was worth keeping and what wasn’t.
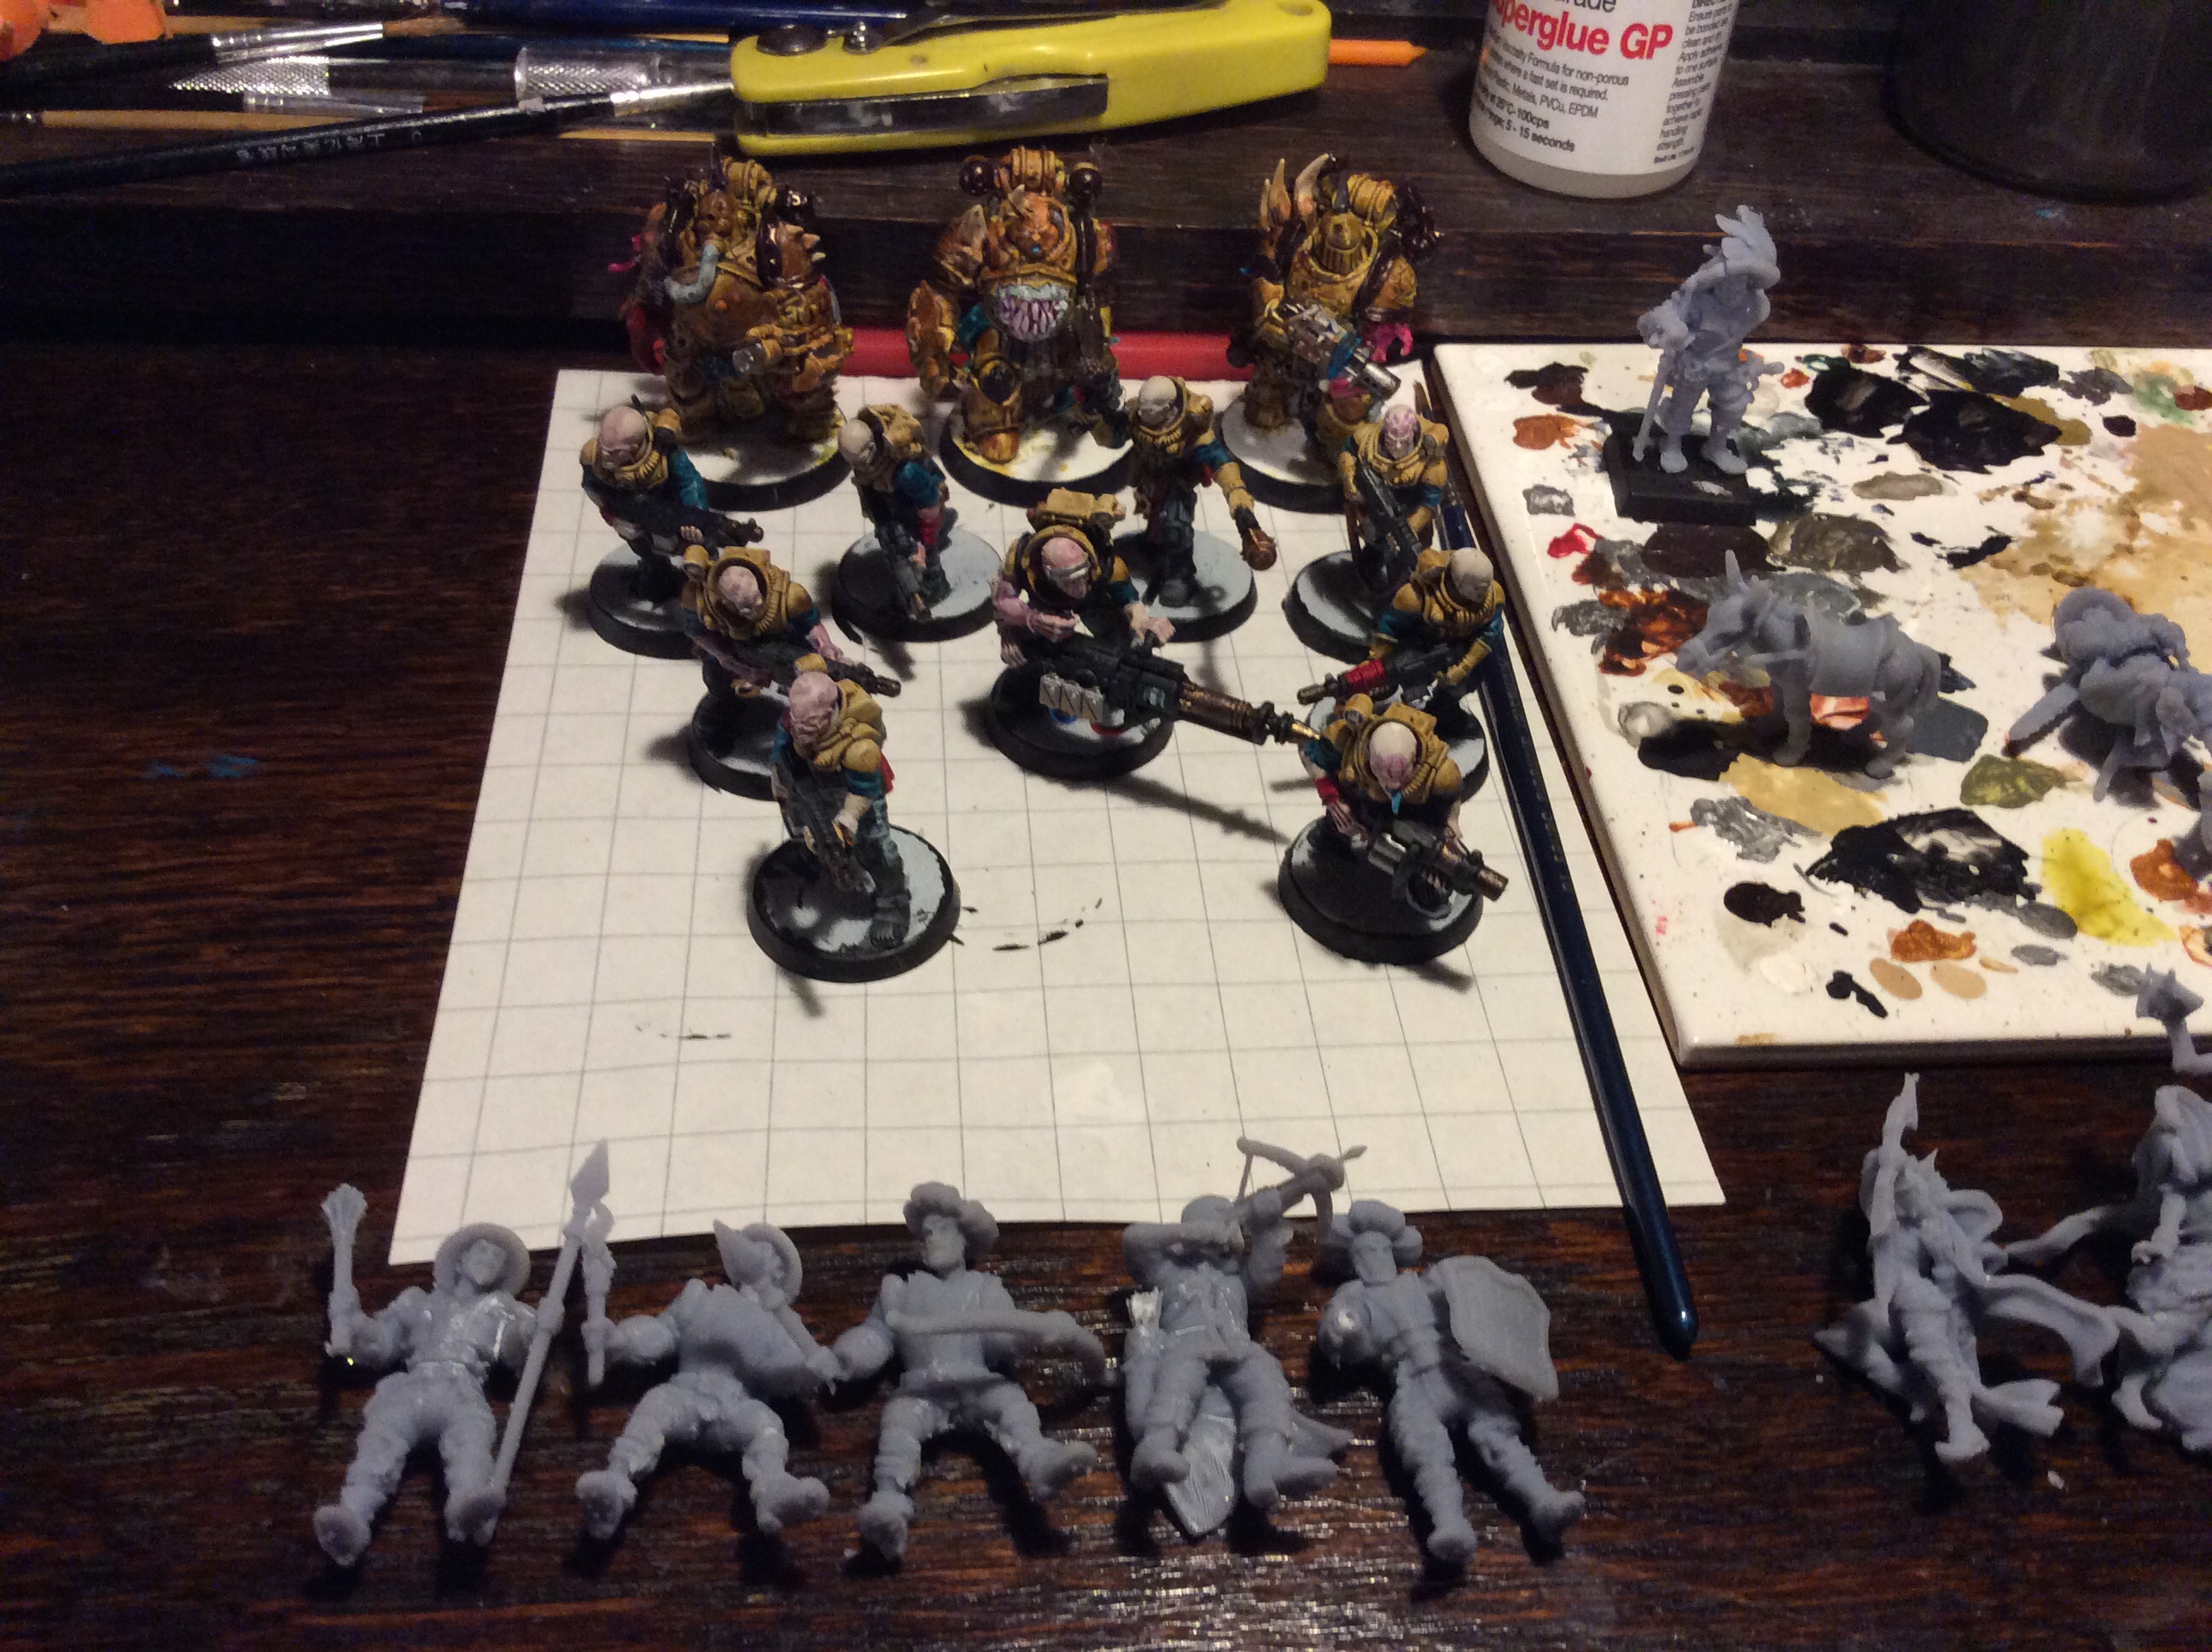
I also managed to get some black onto the 40K base edges…
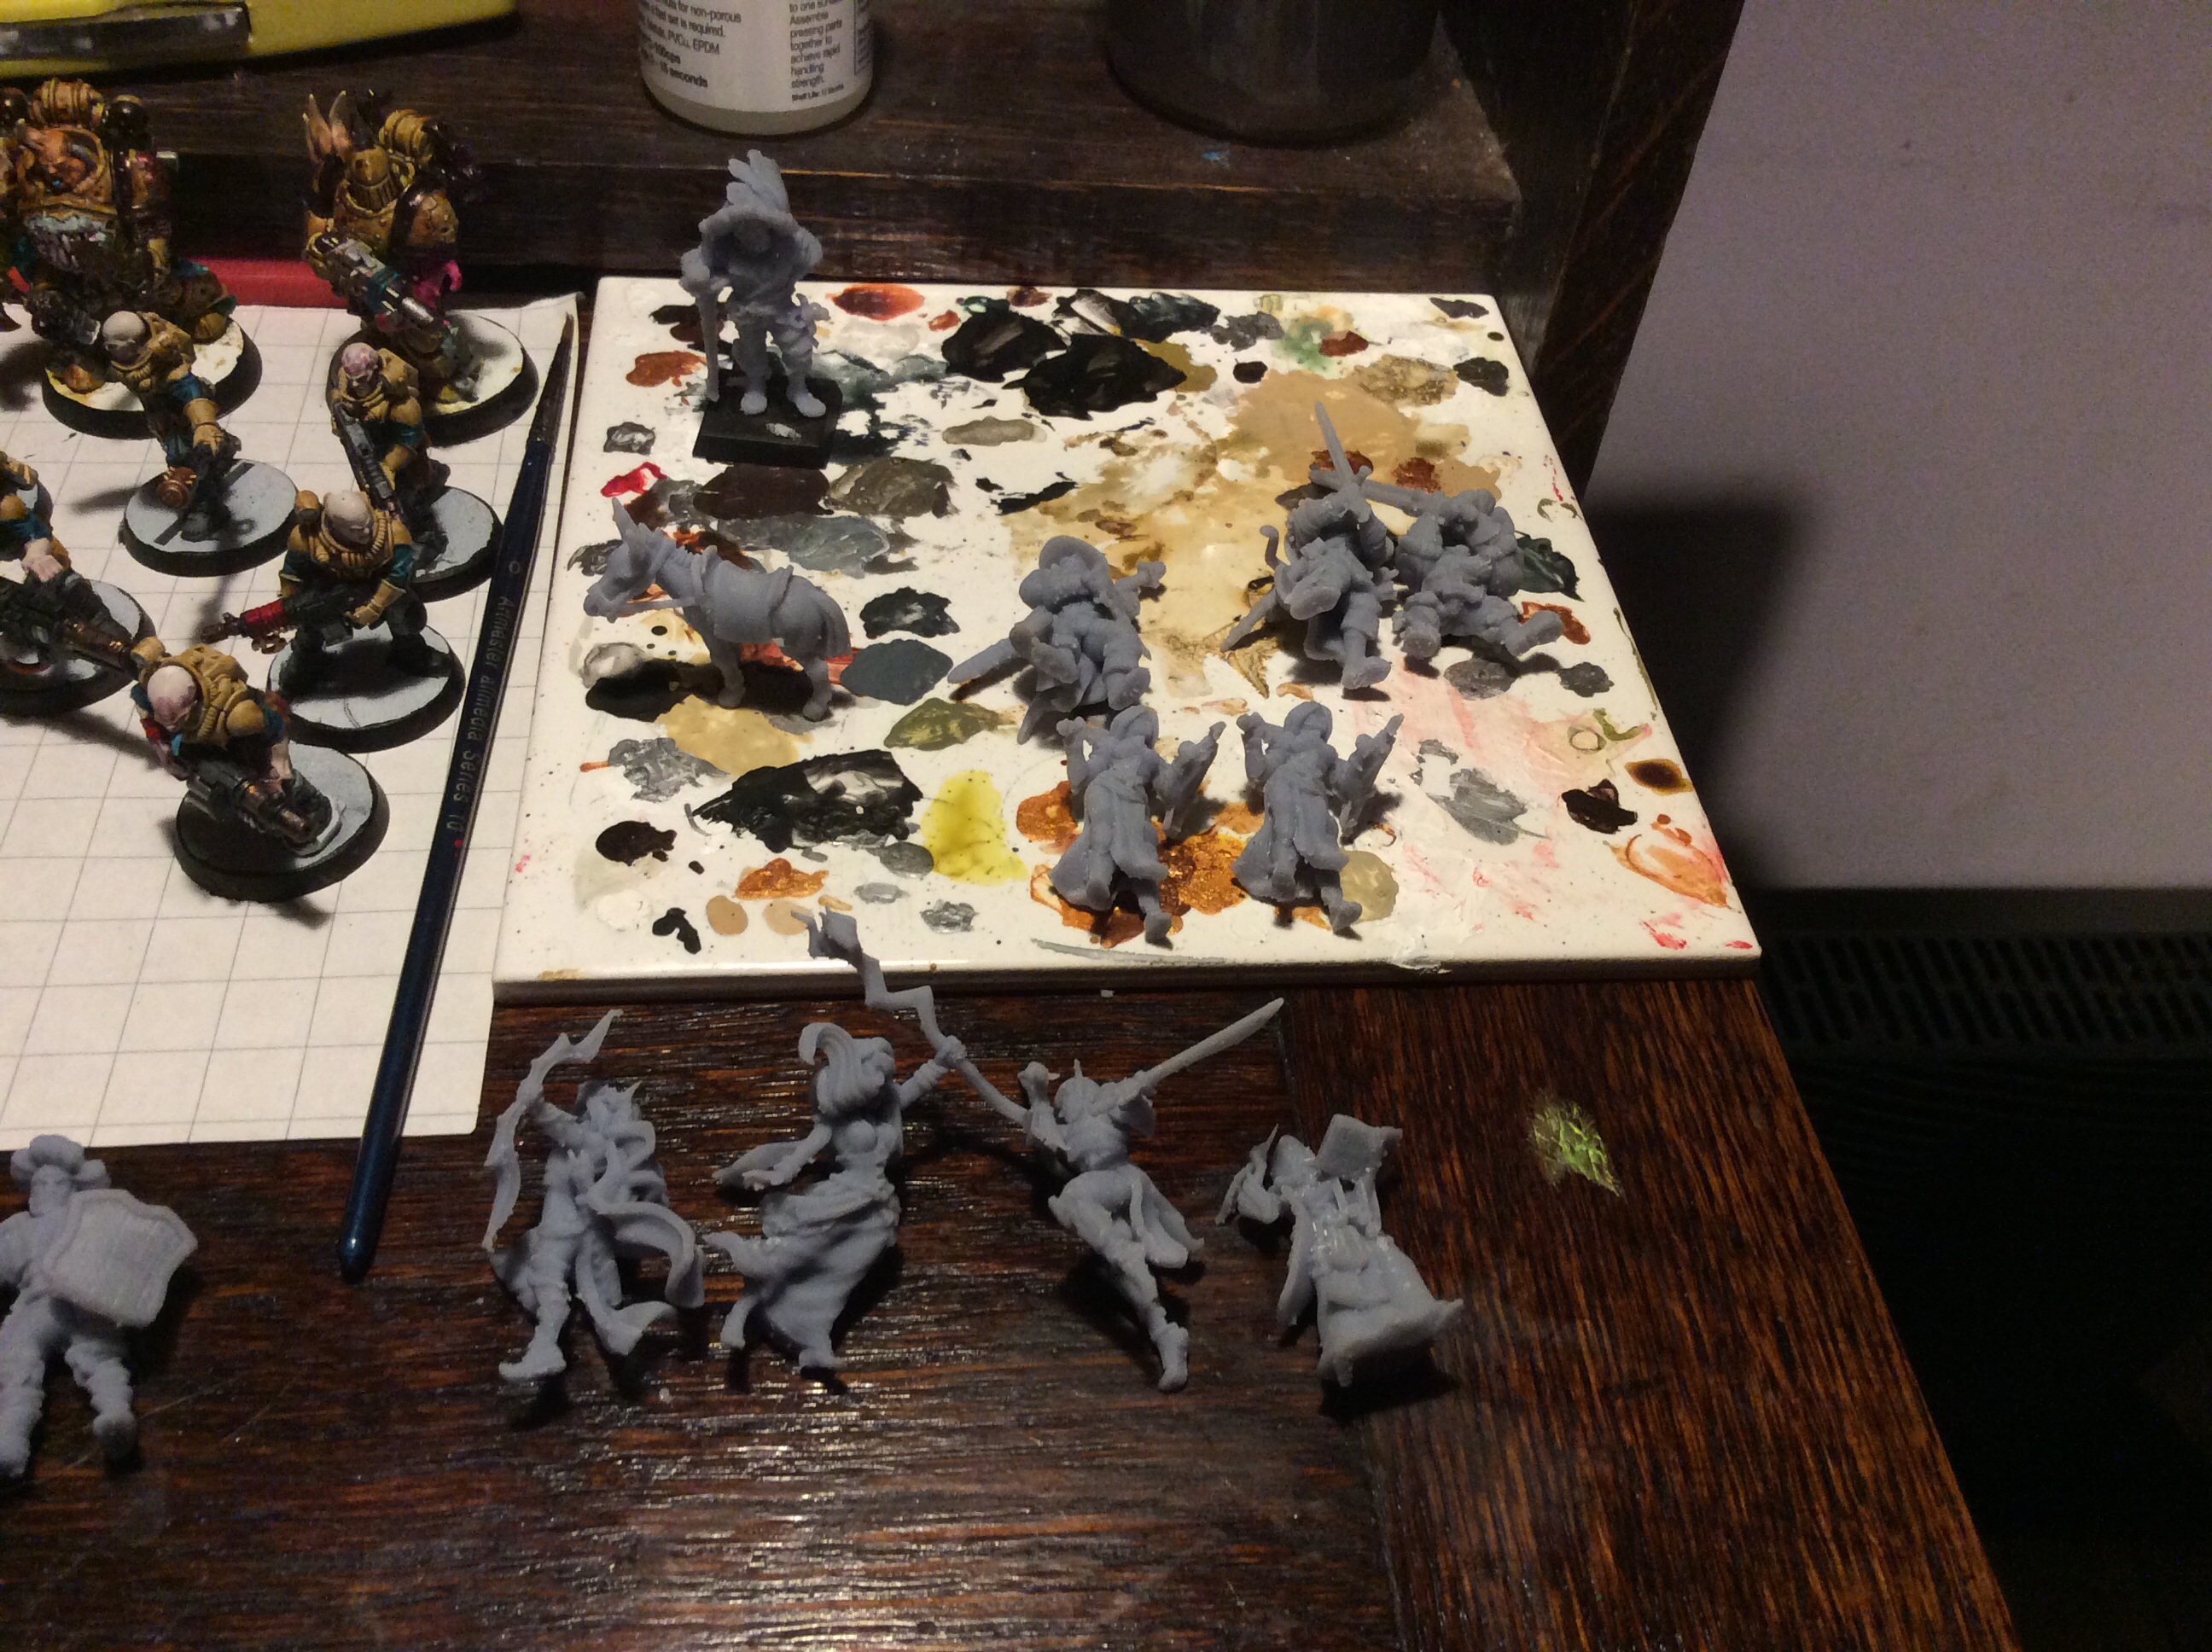
The hand holding the bow (from another set) took a bit of trimming, but it does give me a different missile weapon to the crossbow. I will have to get Mordheim out to see what things cost points wise.
I am printing the lion knight and some more militia bodies just now, but then I really do think I need to do something with them painting wise.
Talking of printing I realised that the ISO was getting pretty skanky so I decided to decant the two litres of it into my big jars and let it settle and pour off the cleaner stuff. But I, in my infinite wisdom, put it outside to avoid the smell… cleverly I forgot and came home this evening to something akin to Greek Yoghurt… Whoops!
Tomorrow I will try and print some bases for the models I have. I have an STL for cobblestones so that will do for my miniatures.
And Finally, I probably laughed far too much at this…
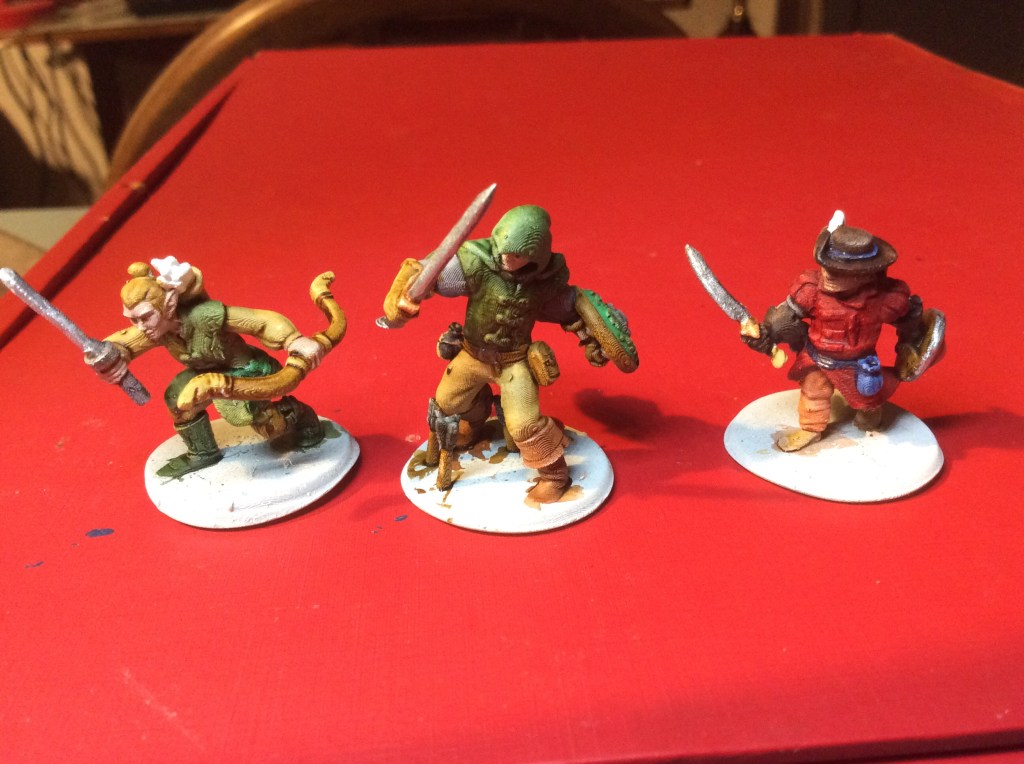
Look at that, 22.00 and I am already in bed… I spent most of the day trying to finish off the conservatory, but I did have time to rescue the mage and Fey archer…
Look, look she has two arms!
I am not sure why it worked this time, but I did add in some extra supports on the troublesome arm.
I also achieved a shield…. along with lots of weapons… as it worked, I did a second set and am printing a third now.
The small lumps are left and right hands to allow some left/right handed militia. Tomorrow I am going to do some heads and then some bodies. I am also going to try using some weapons from the riders set I have from Iain’s ranges.
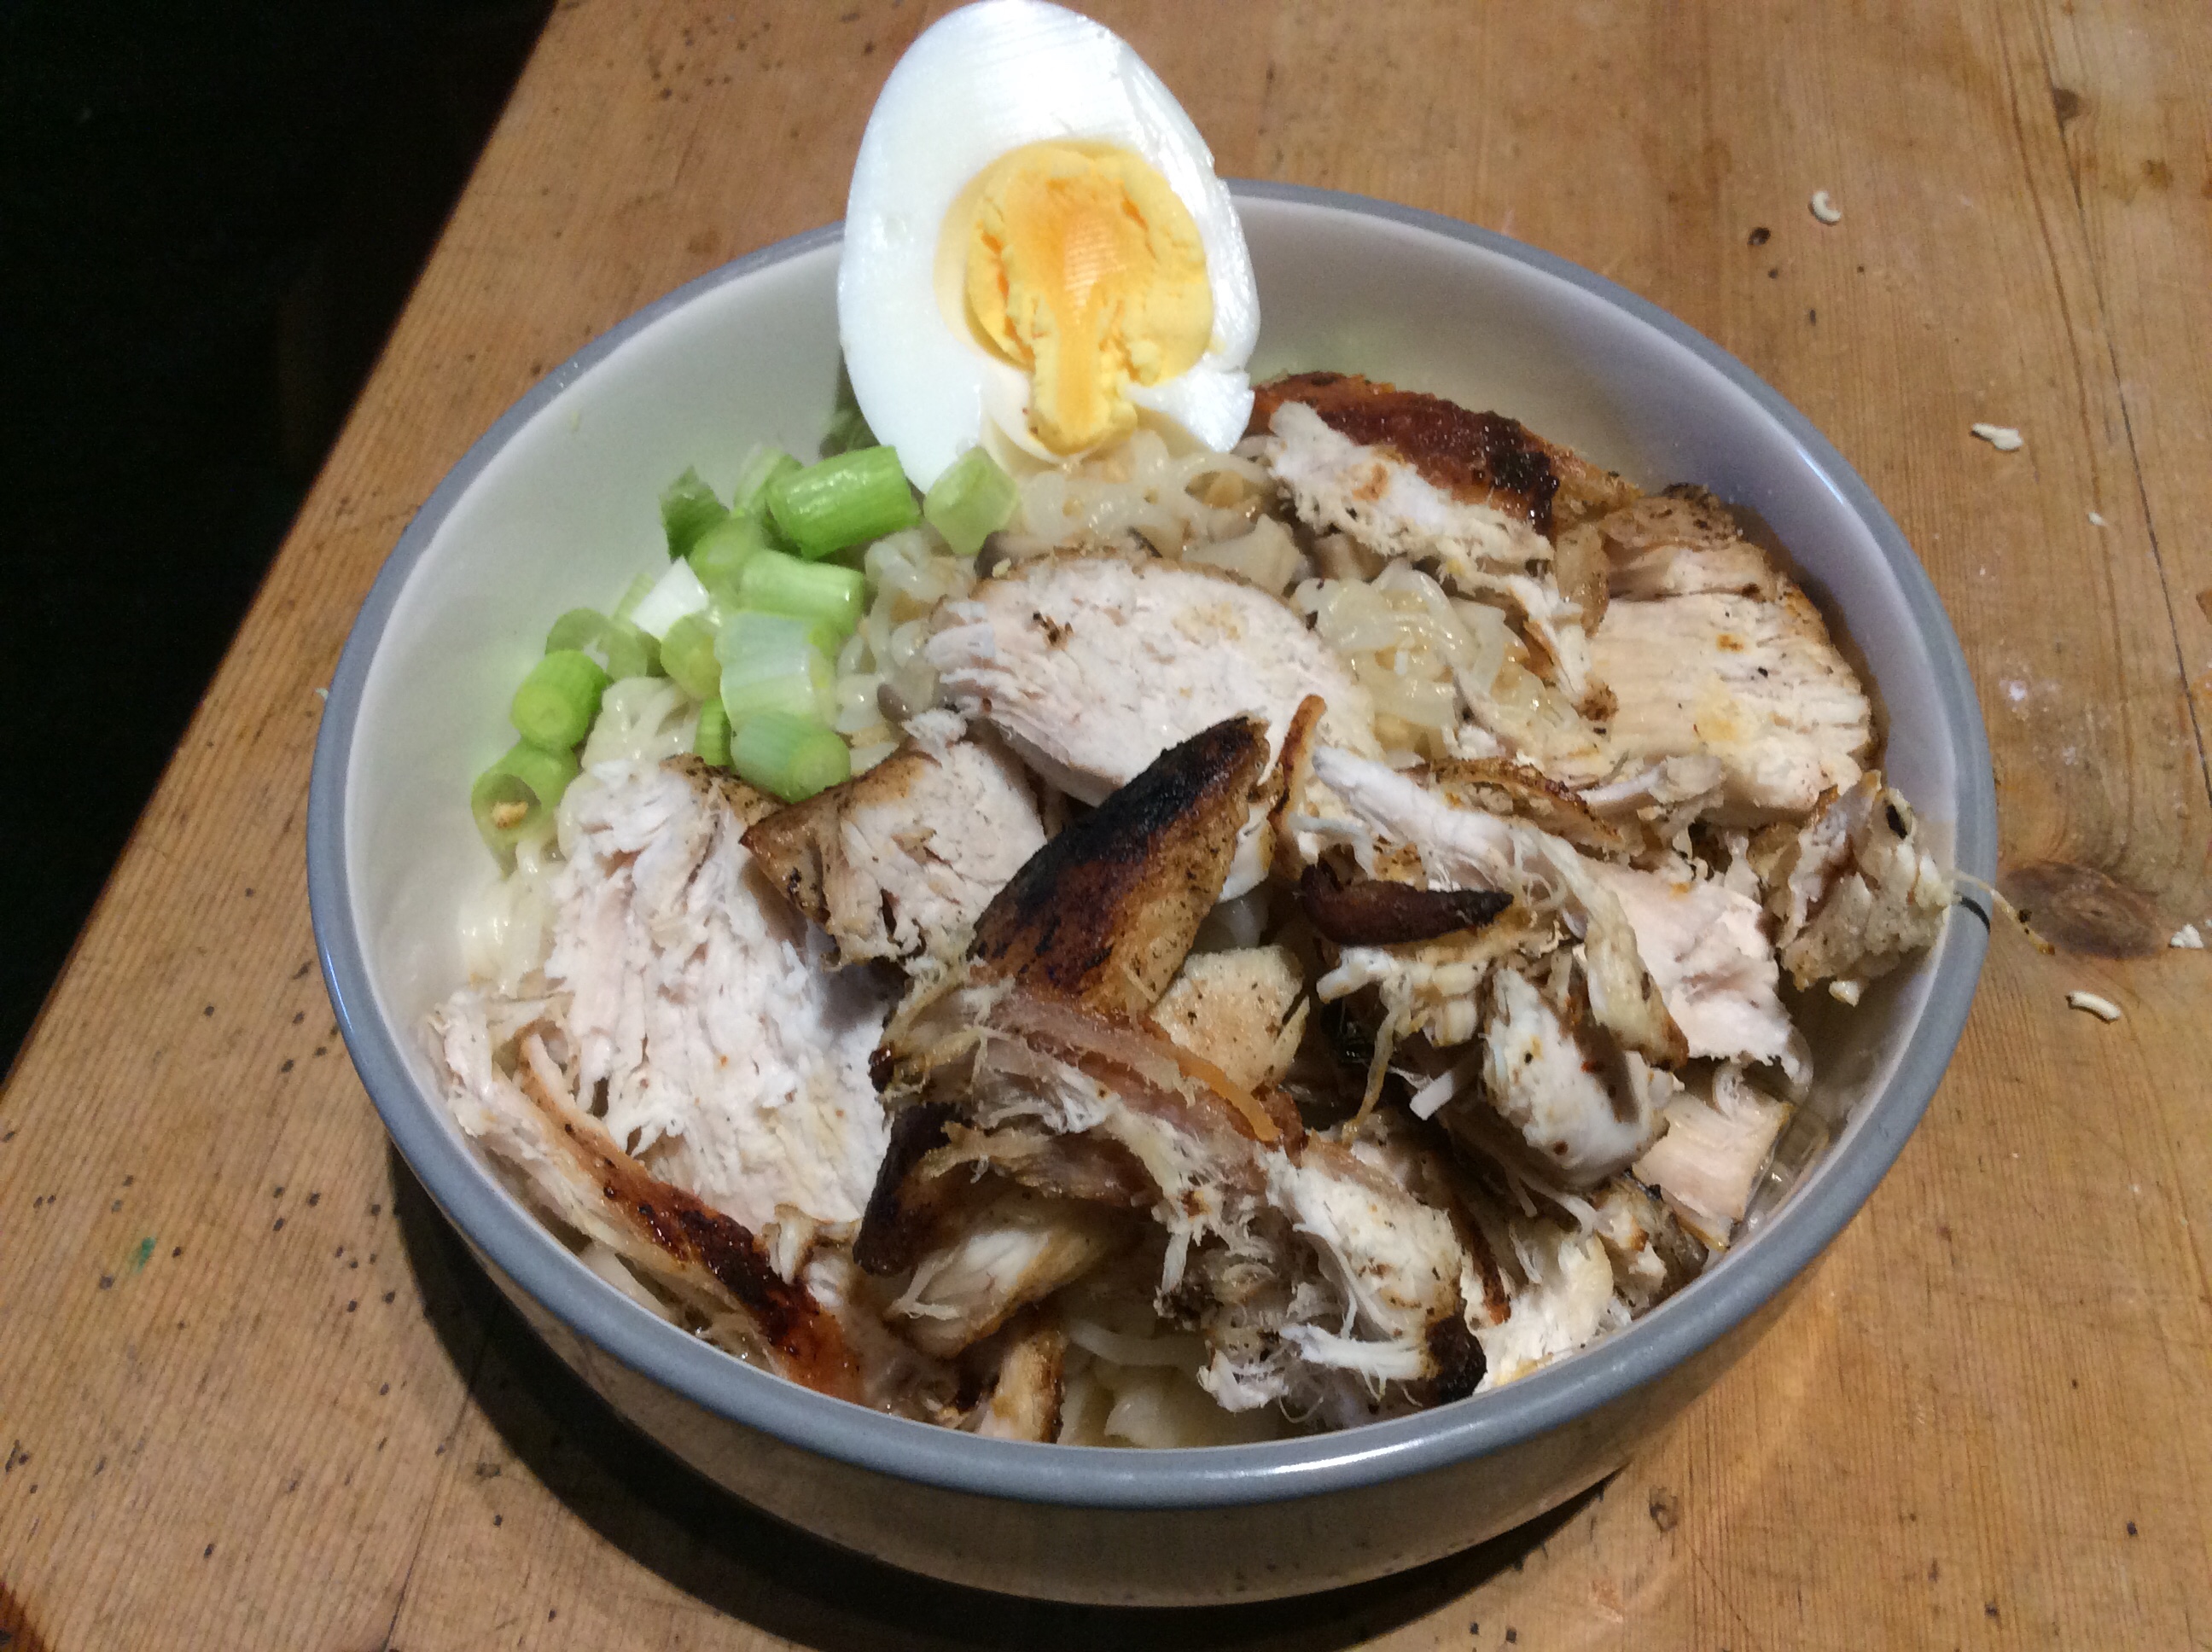
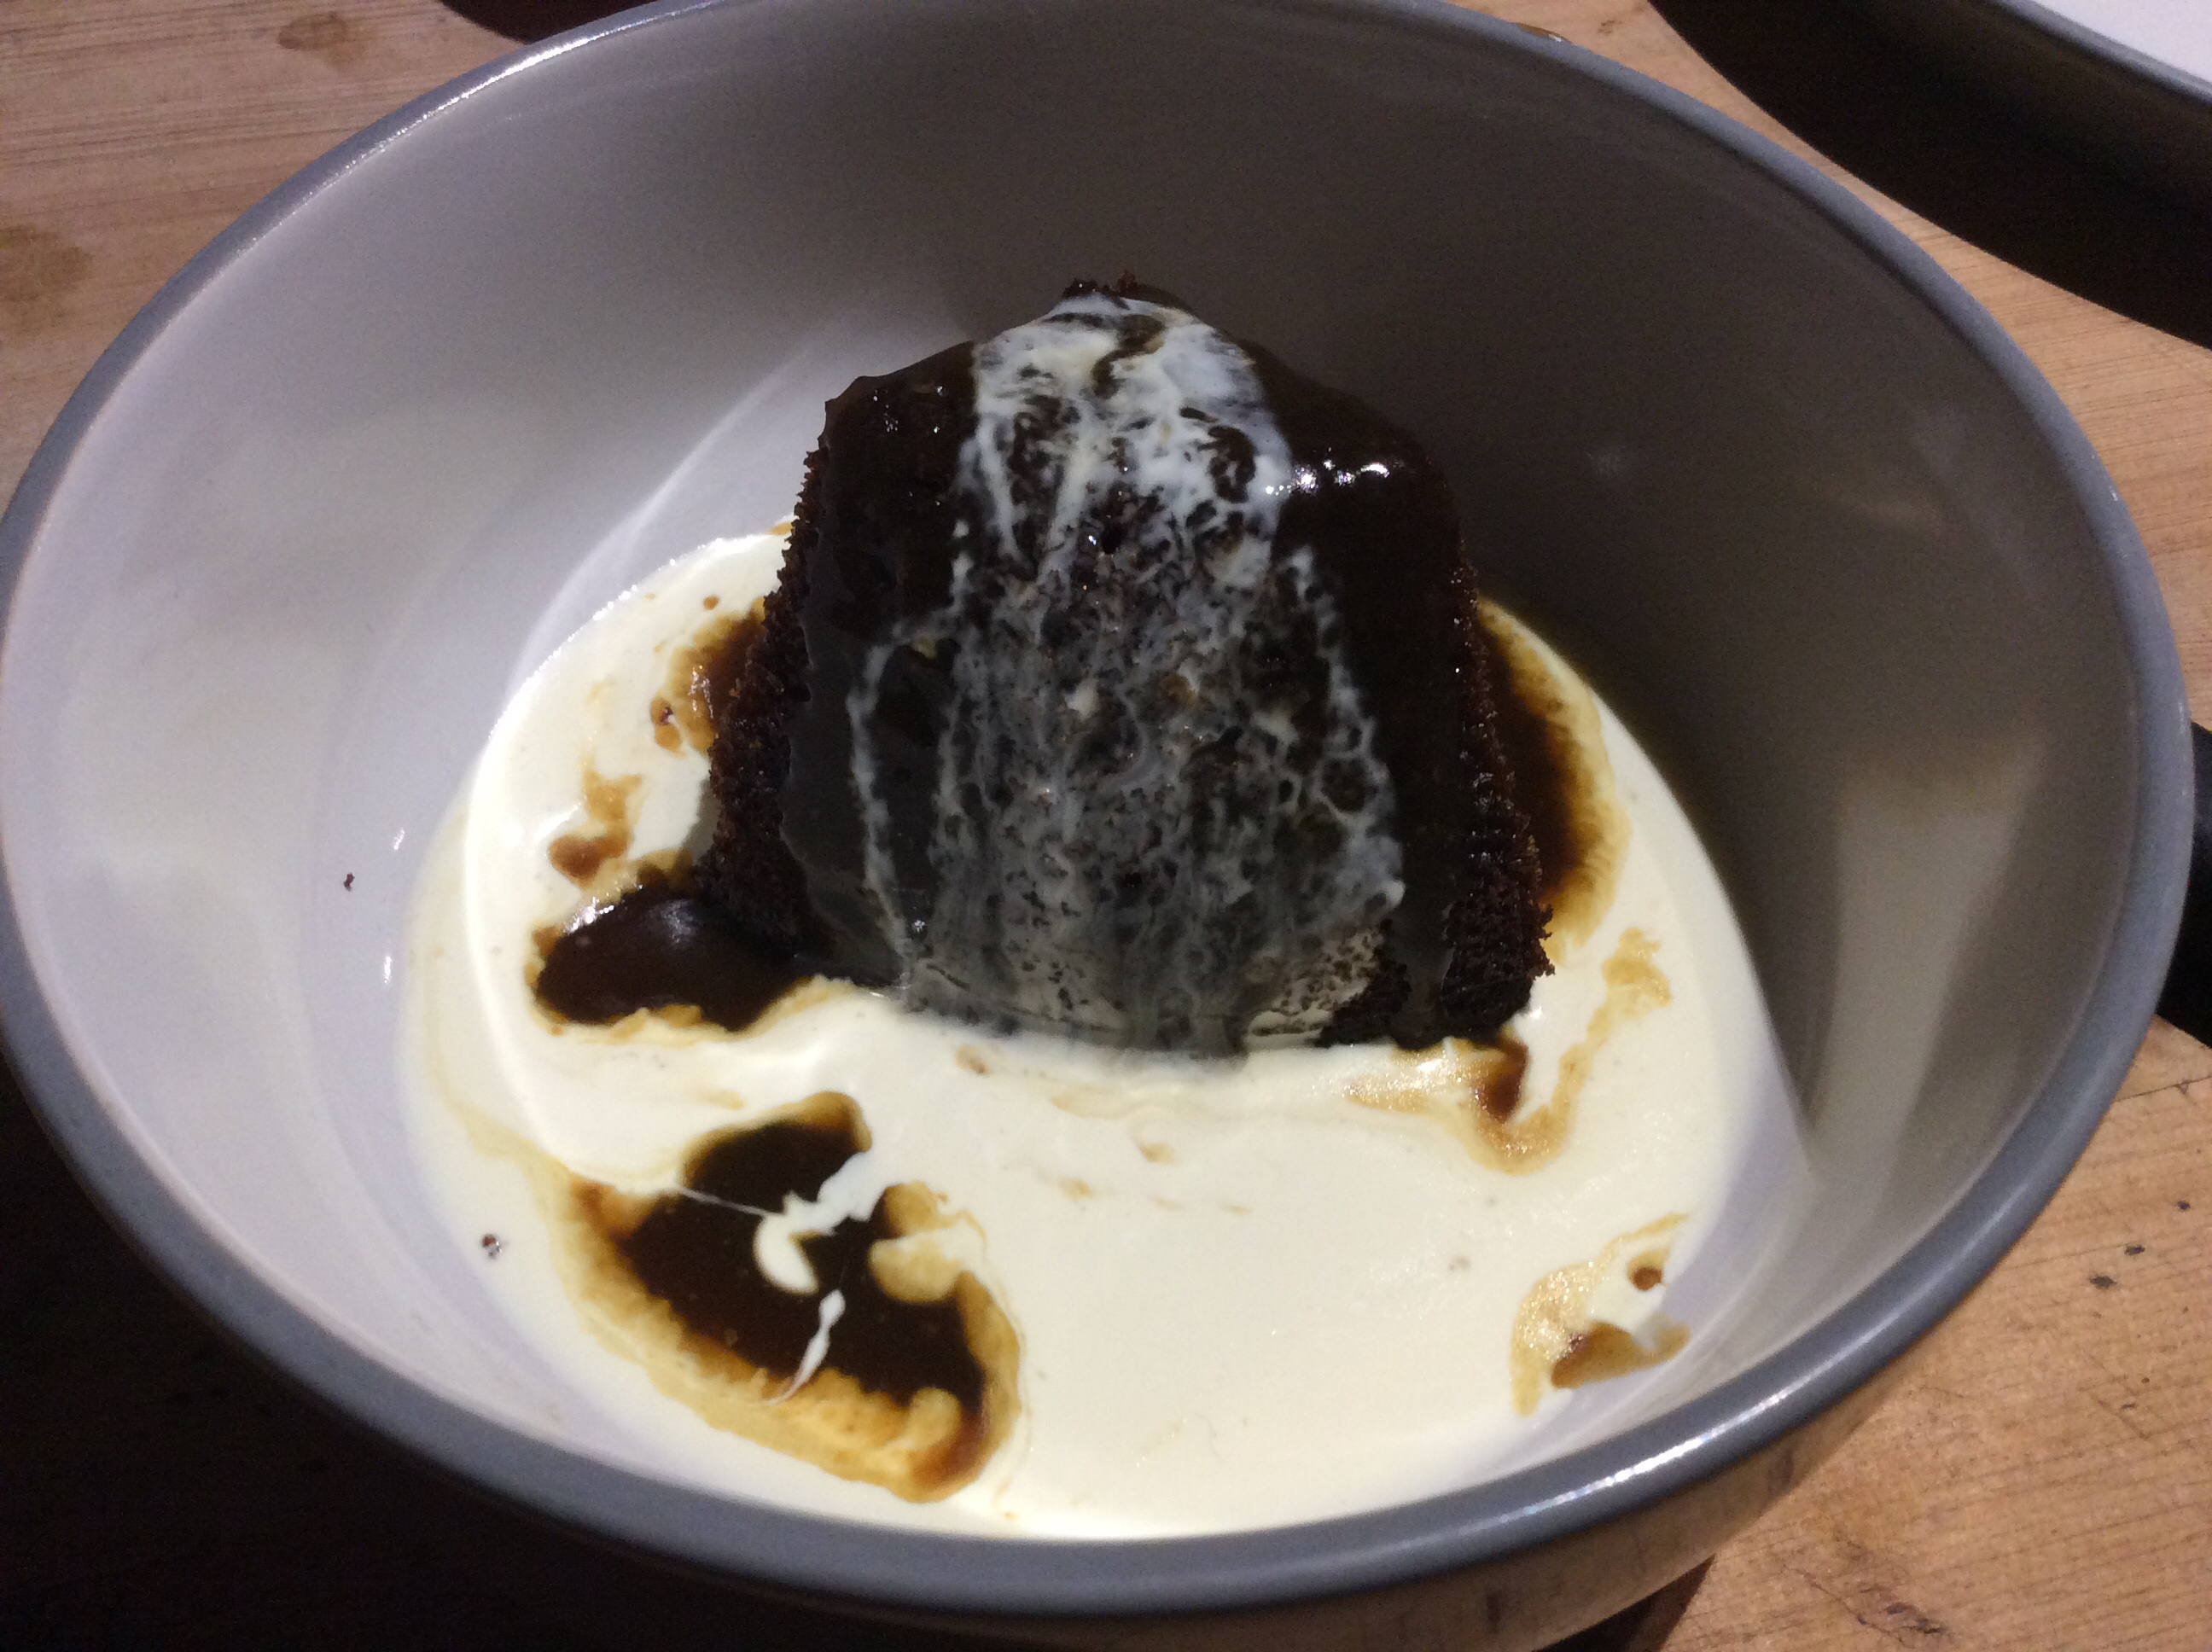
Back to work tomorrow so the kids decided on a pre school feast…
We had loaded potato skins for starters, Ramen as a main course then sticky toffee pudding for desert with a cheese/meat board with crackers later on.
Hopefully I will get something painted tomorrow… this made me chuckle…
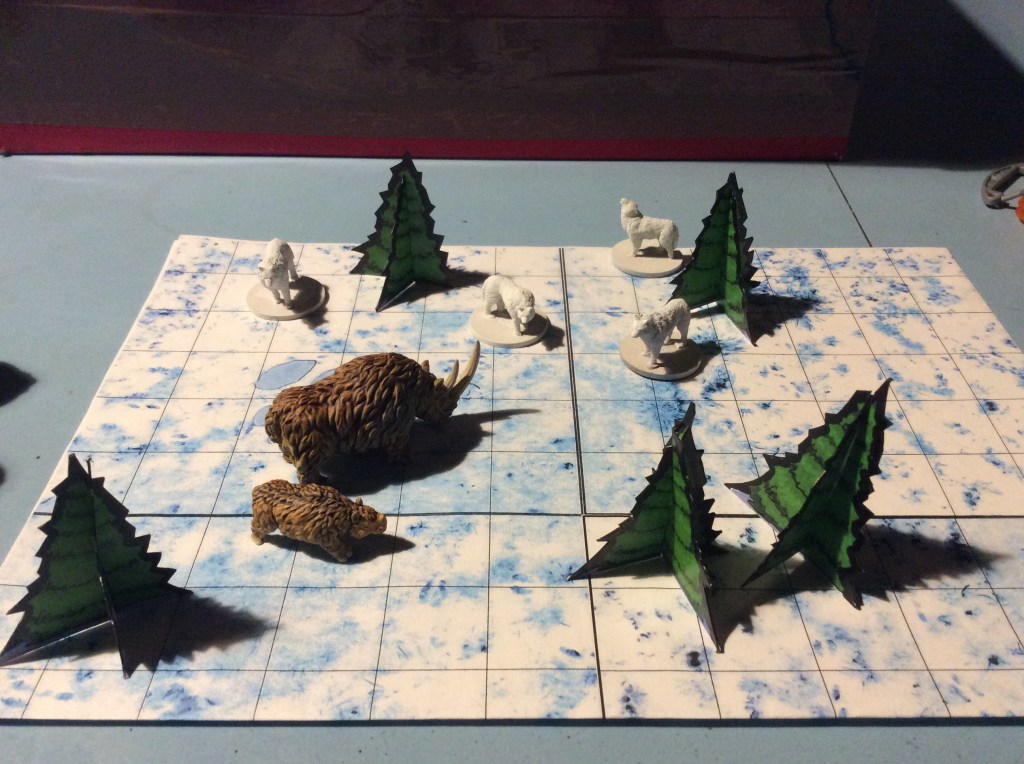
Tonight I bit the bullet and poked holes into the base work and then shoved the trees in. Thanks for all the positive comments as they really did help. What didn’t help was when I used my cutters to chop the stick size down. A whole pile of flock came from somewhere, I had visions of a totally bare tree on one side. Methinks it came from inside.
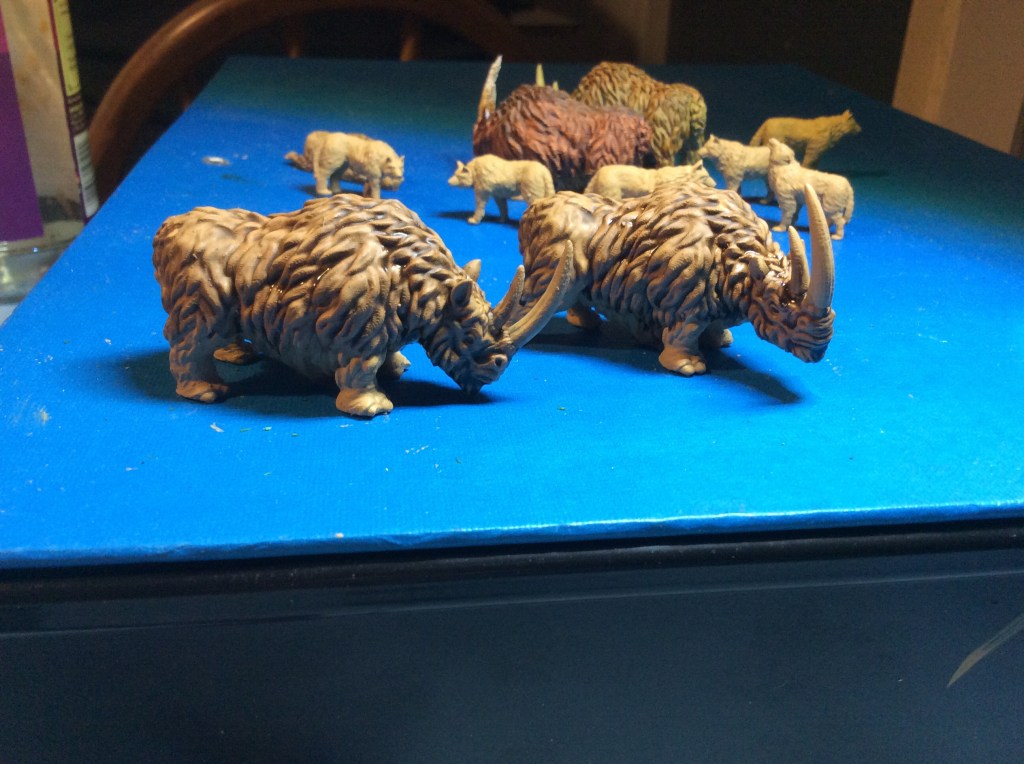
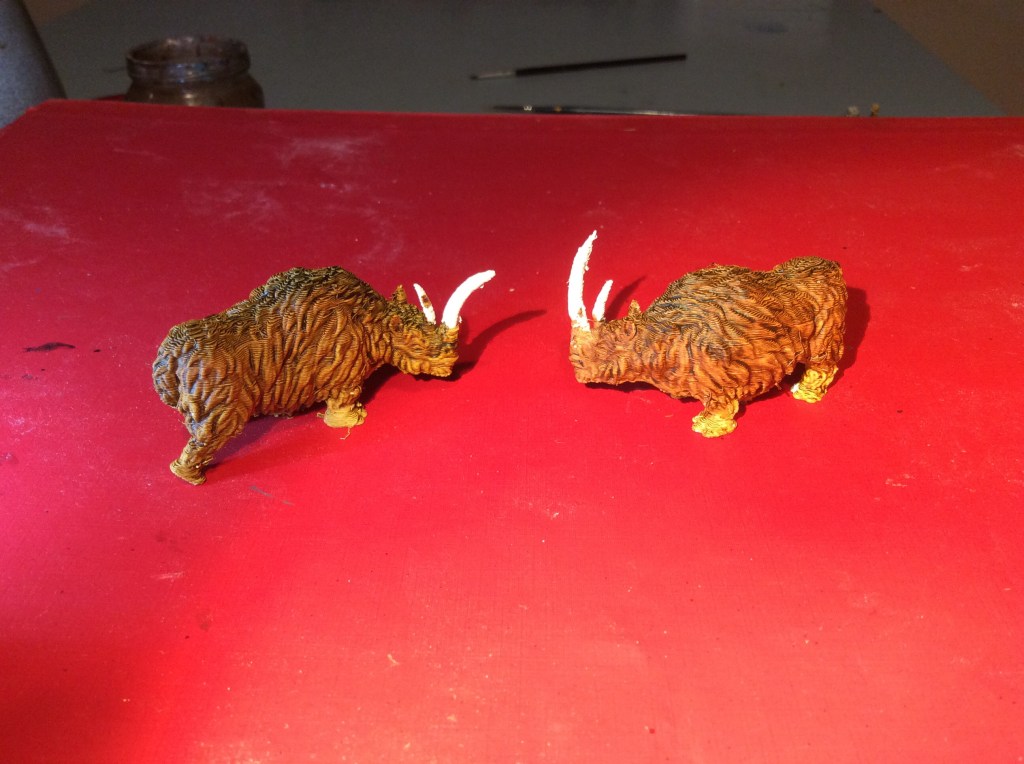
I also dry brushed the bright green tufts as well as most of the other ones as well to blend it all in. I also managed to do a bit of work on the rhino, basically getting a dark wash on them before dry bushing tomorrow.
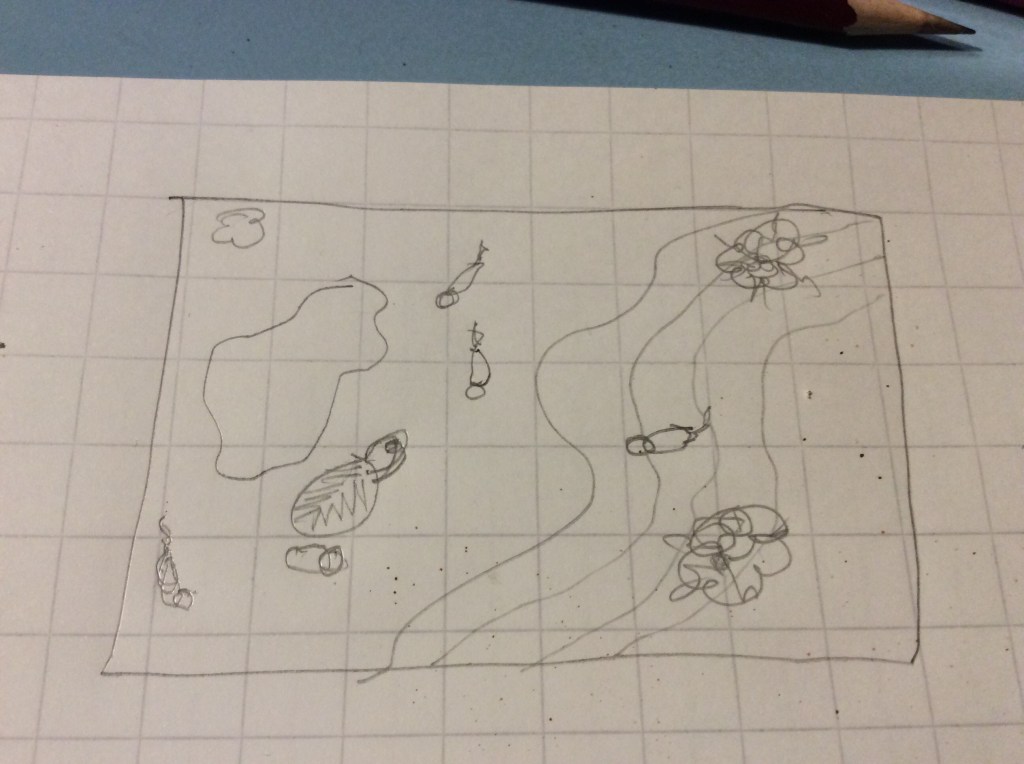
I also tested the miniatures to see what they would look like in situ and I think they will work…
Stunt rhino were used in this shot…still a bit of brighter green to tone down too.
So on the whole I am happy with this. If I were to do it again then I would build the base up by two layers to allow trees to be placed anywhere.
Hopefully I will get this finished by the end of the weekend. I am considering another one with hunters and a mammoth, but I will see how I feel after finishing this one and after checking on how much space I have to store it.
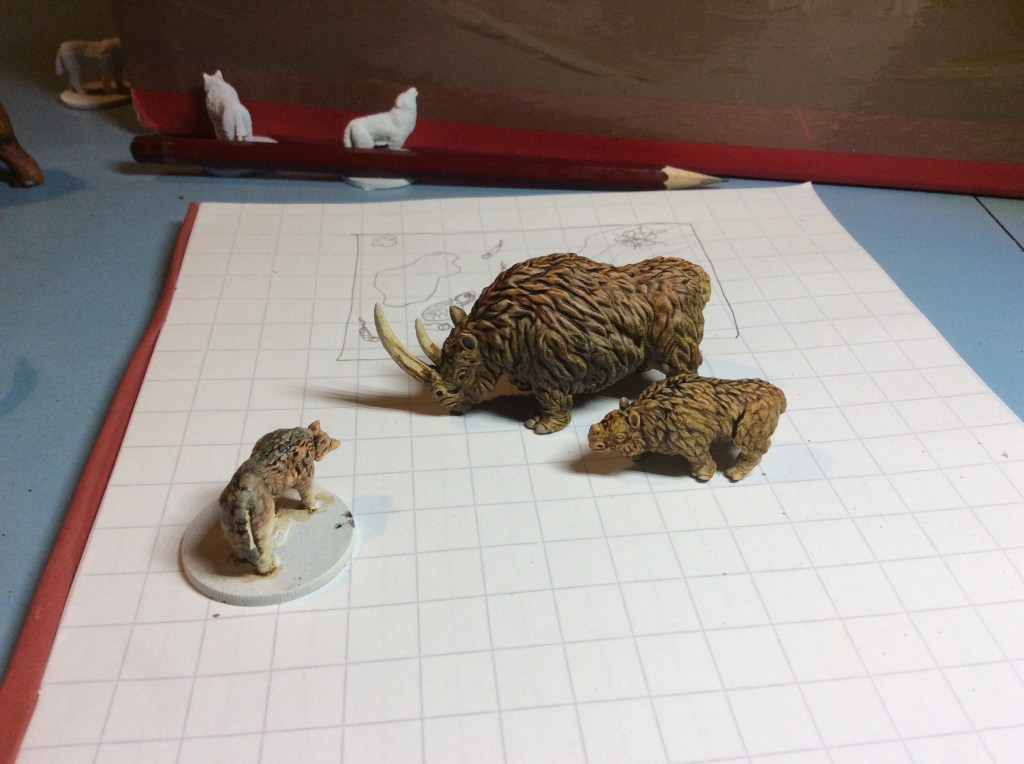
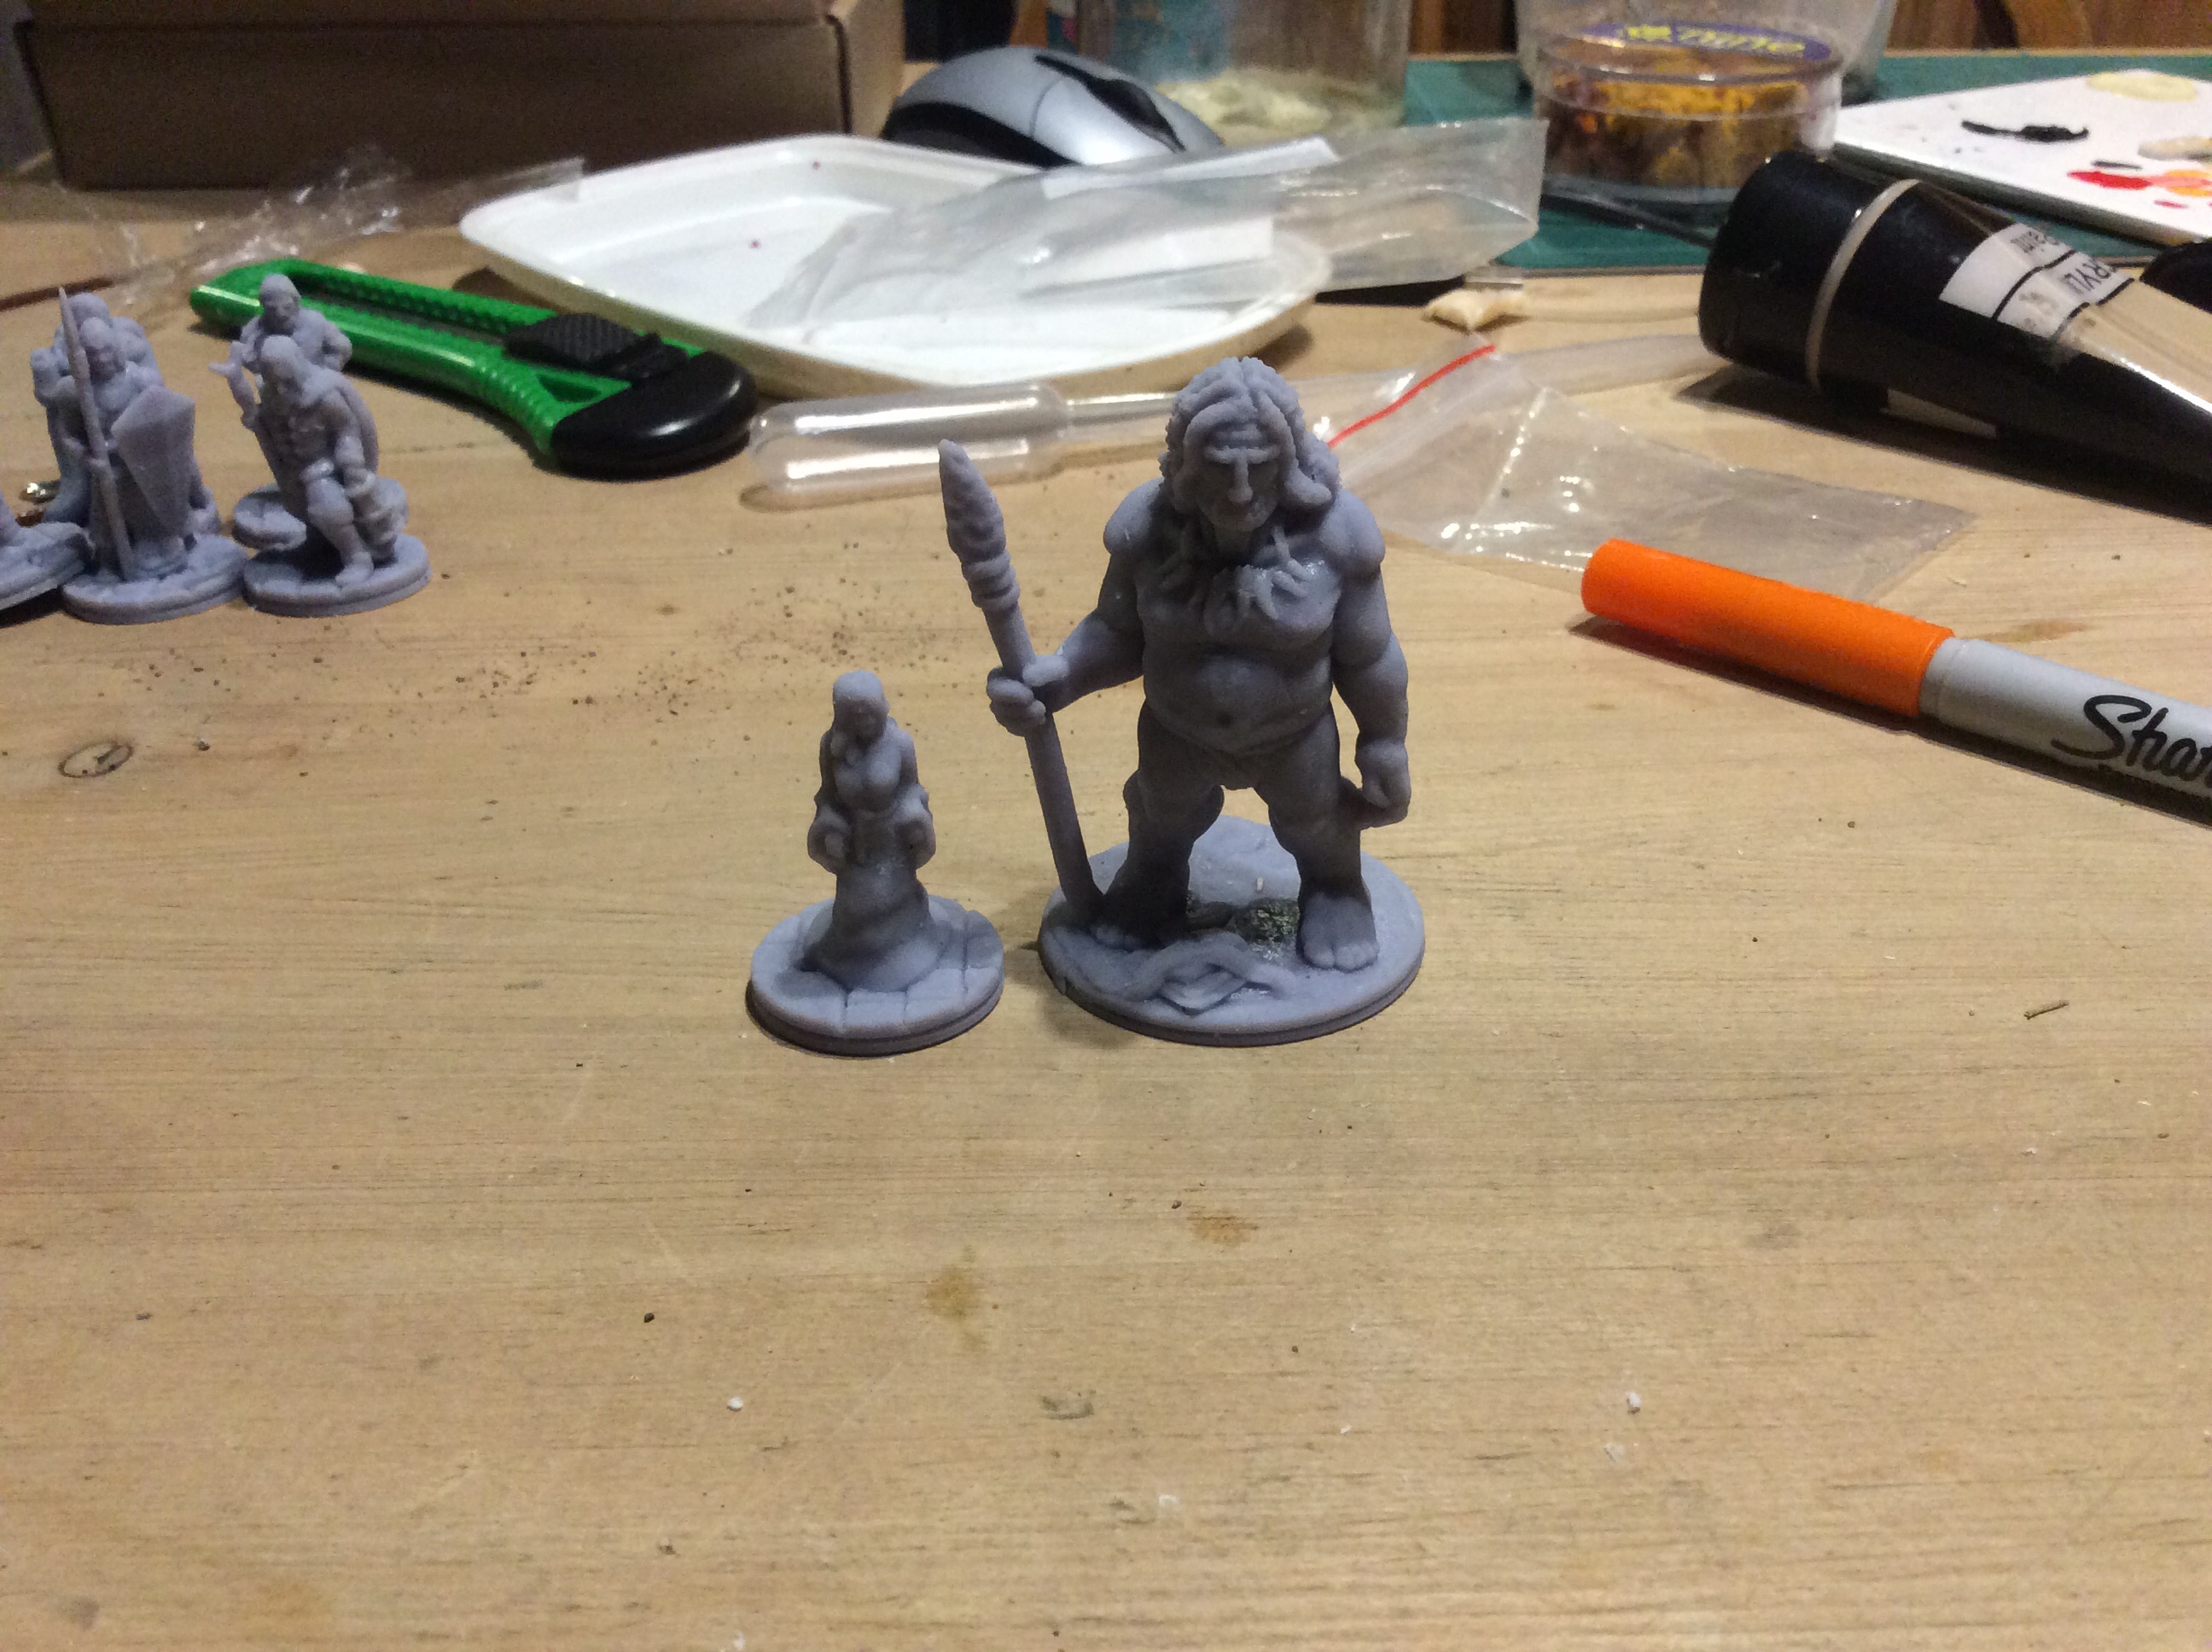
Tonight I started printing a pack of wolves for the diorama idea. I will print off the rhino tomorrow, but basically it is going to have about four or five wolves and a pair of rhino, with one being a calf.
I kind of mocked it up a bit using some bits and pieces I had lying around…
Voila…. finished
It is not going to be a snowy scene, but further into the summer as the calf has been born. I will have them near a water hole and Mum is trying to protect the calf from the wolves….
High quality artistry here!
I have a couple of options for the adult rhino. One is the above one, other option is the first one I ever printed with the head turning, there is also a ‘leaping’ one which I don’t think would work. I want more of a stand off than a charge.
I have mirrored and fiddled with the size of the wolf that looks like it is slinking, this will allow them to circle the pair in the middle.
I will see how I get on with this idea as I have bucket loads to paint and make, but I do like building terrain so it might just be fun.
I managed to finish the rhino tonight and had a fiddle with a Wolf’s colouring…
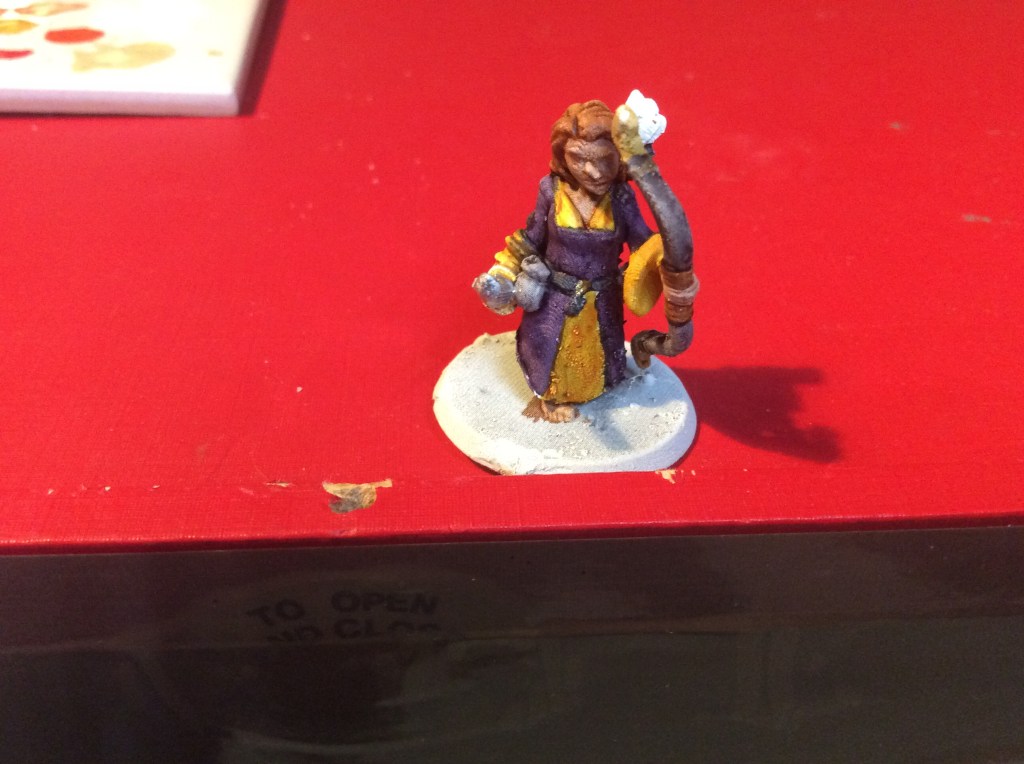
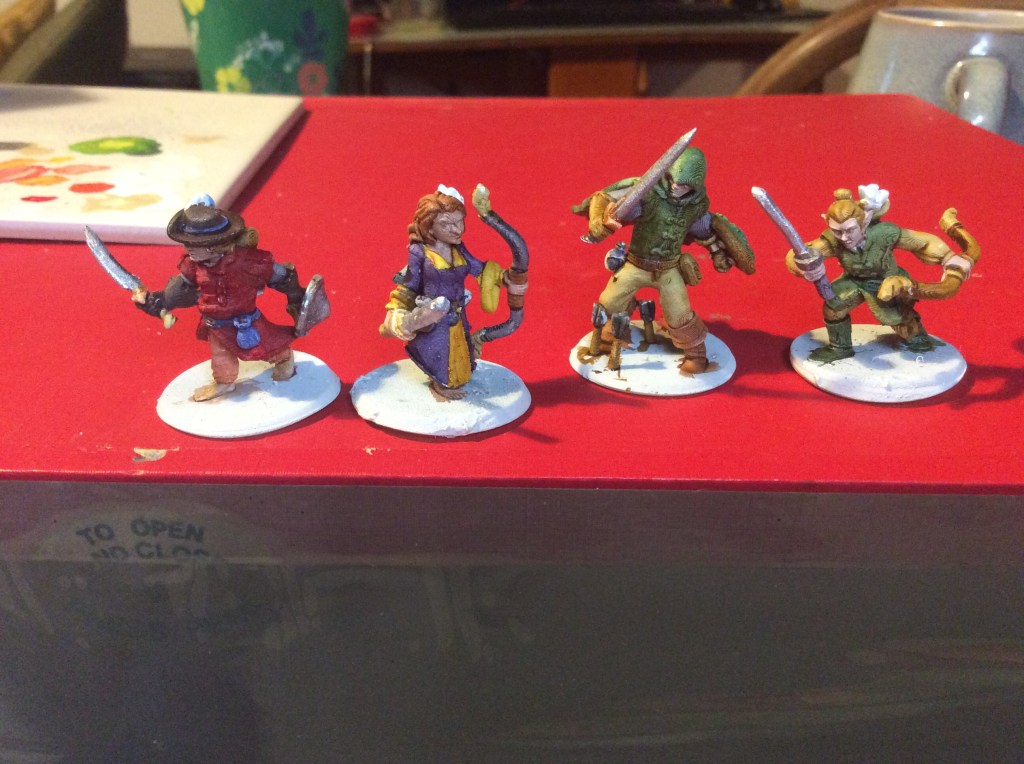
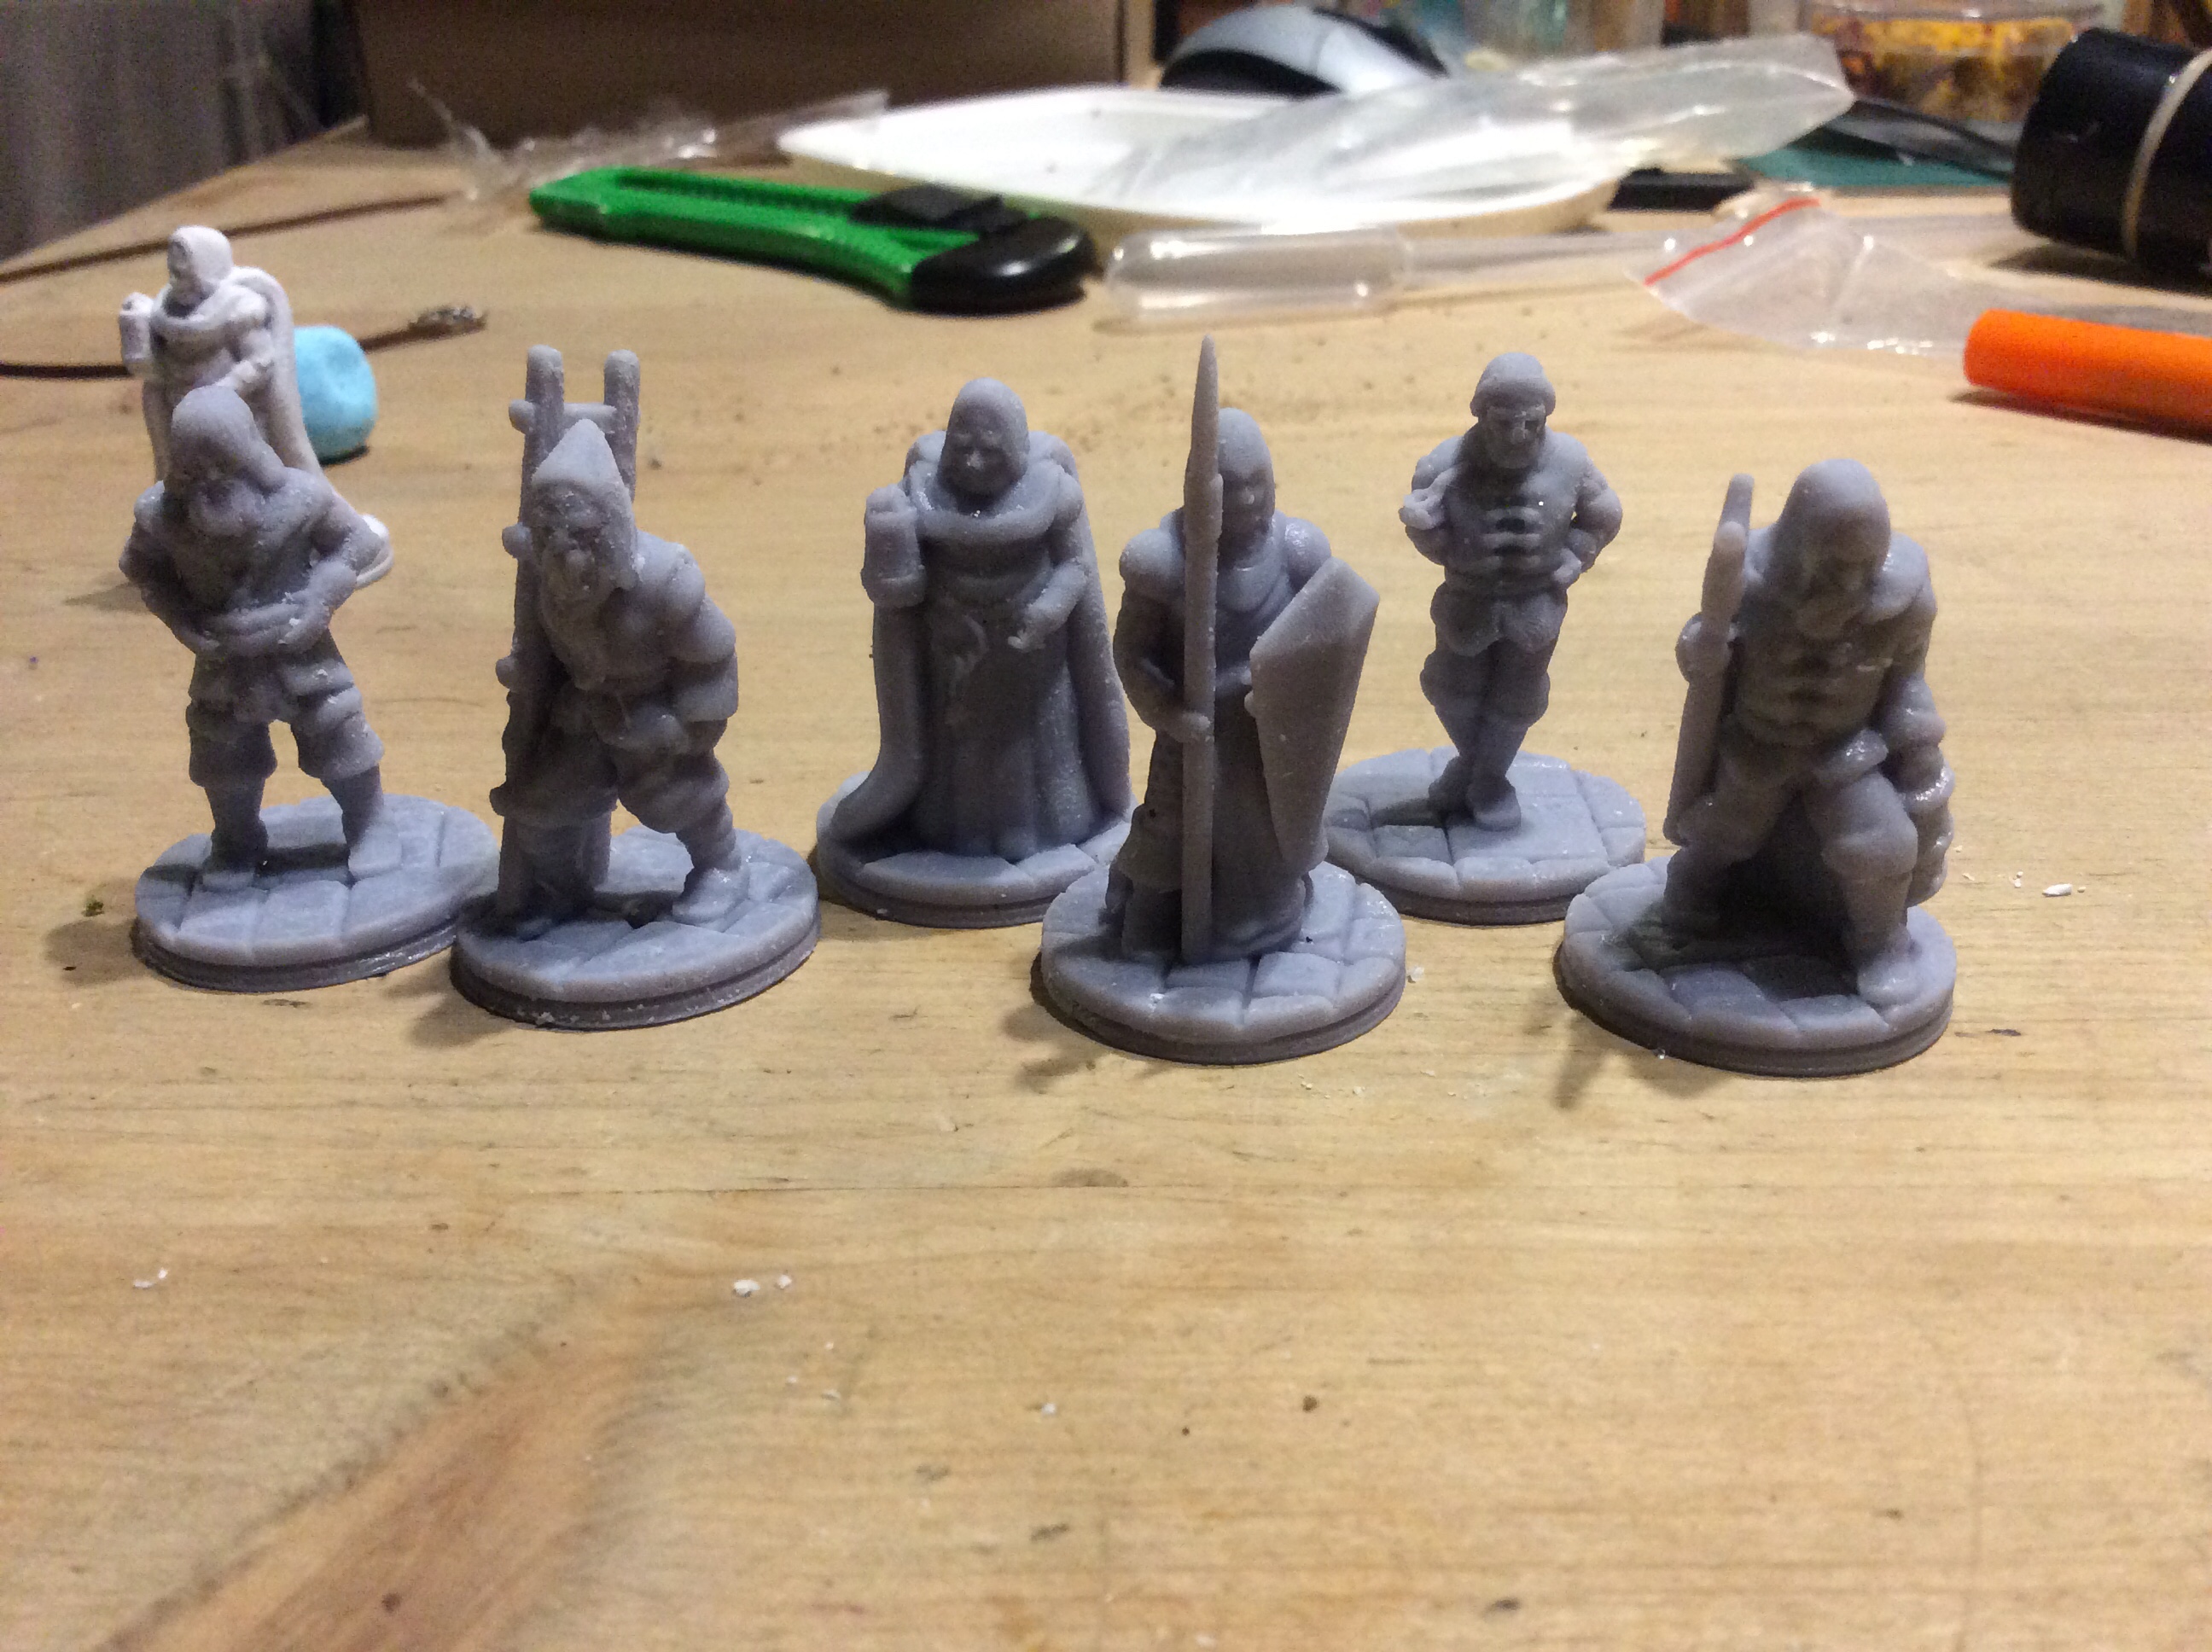
Allow me to introduce mistress Celandine. The final miniature for my players…
My friend, Maggie, likes purple hence the dress colour. Yellow and purple do go quite nicely together. I found this out ages ago when I painted up my vampire for Witchlands.
Here she is with the rest of the party…
Tomorrow I will print up some bases (or find some GW ones) and base these up.
The other day I decided to treat my players to their own miniatures of their characters. I got these of Hero Forge. I actually had great fun playing with the software, but in the end I came up with the four characters. Two hobbits, a Mirkwood Elf and a ranger.
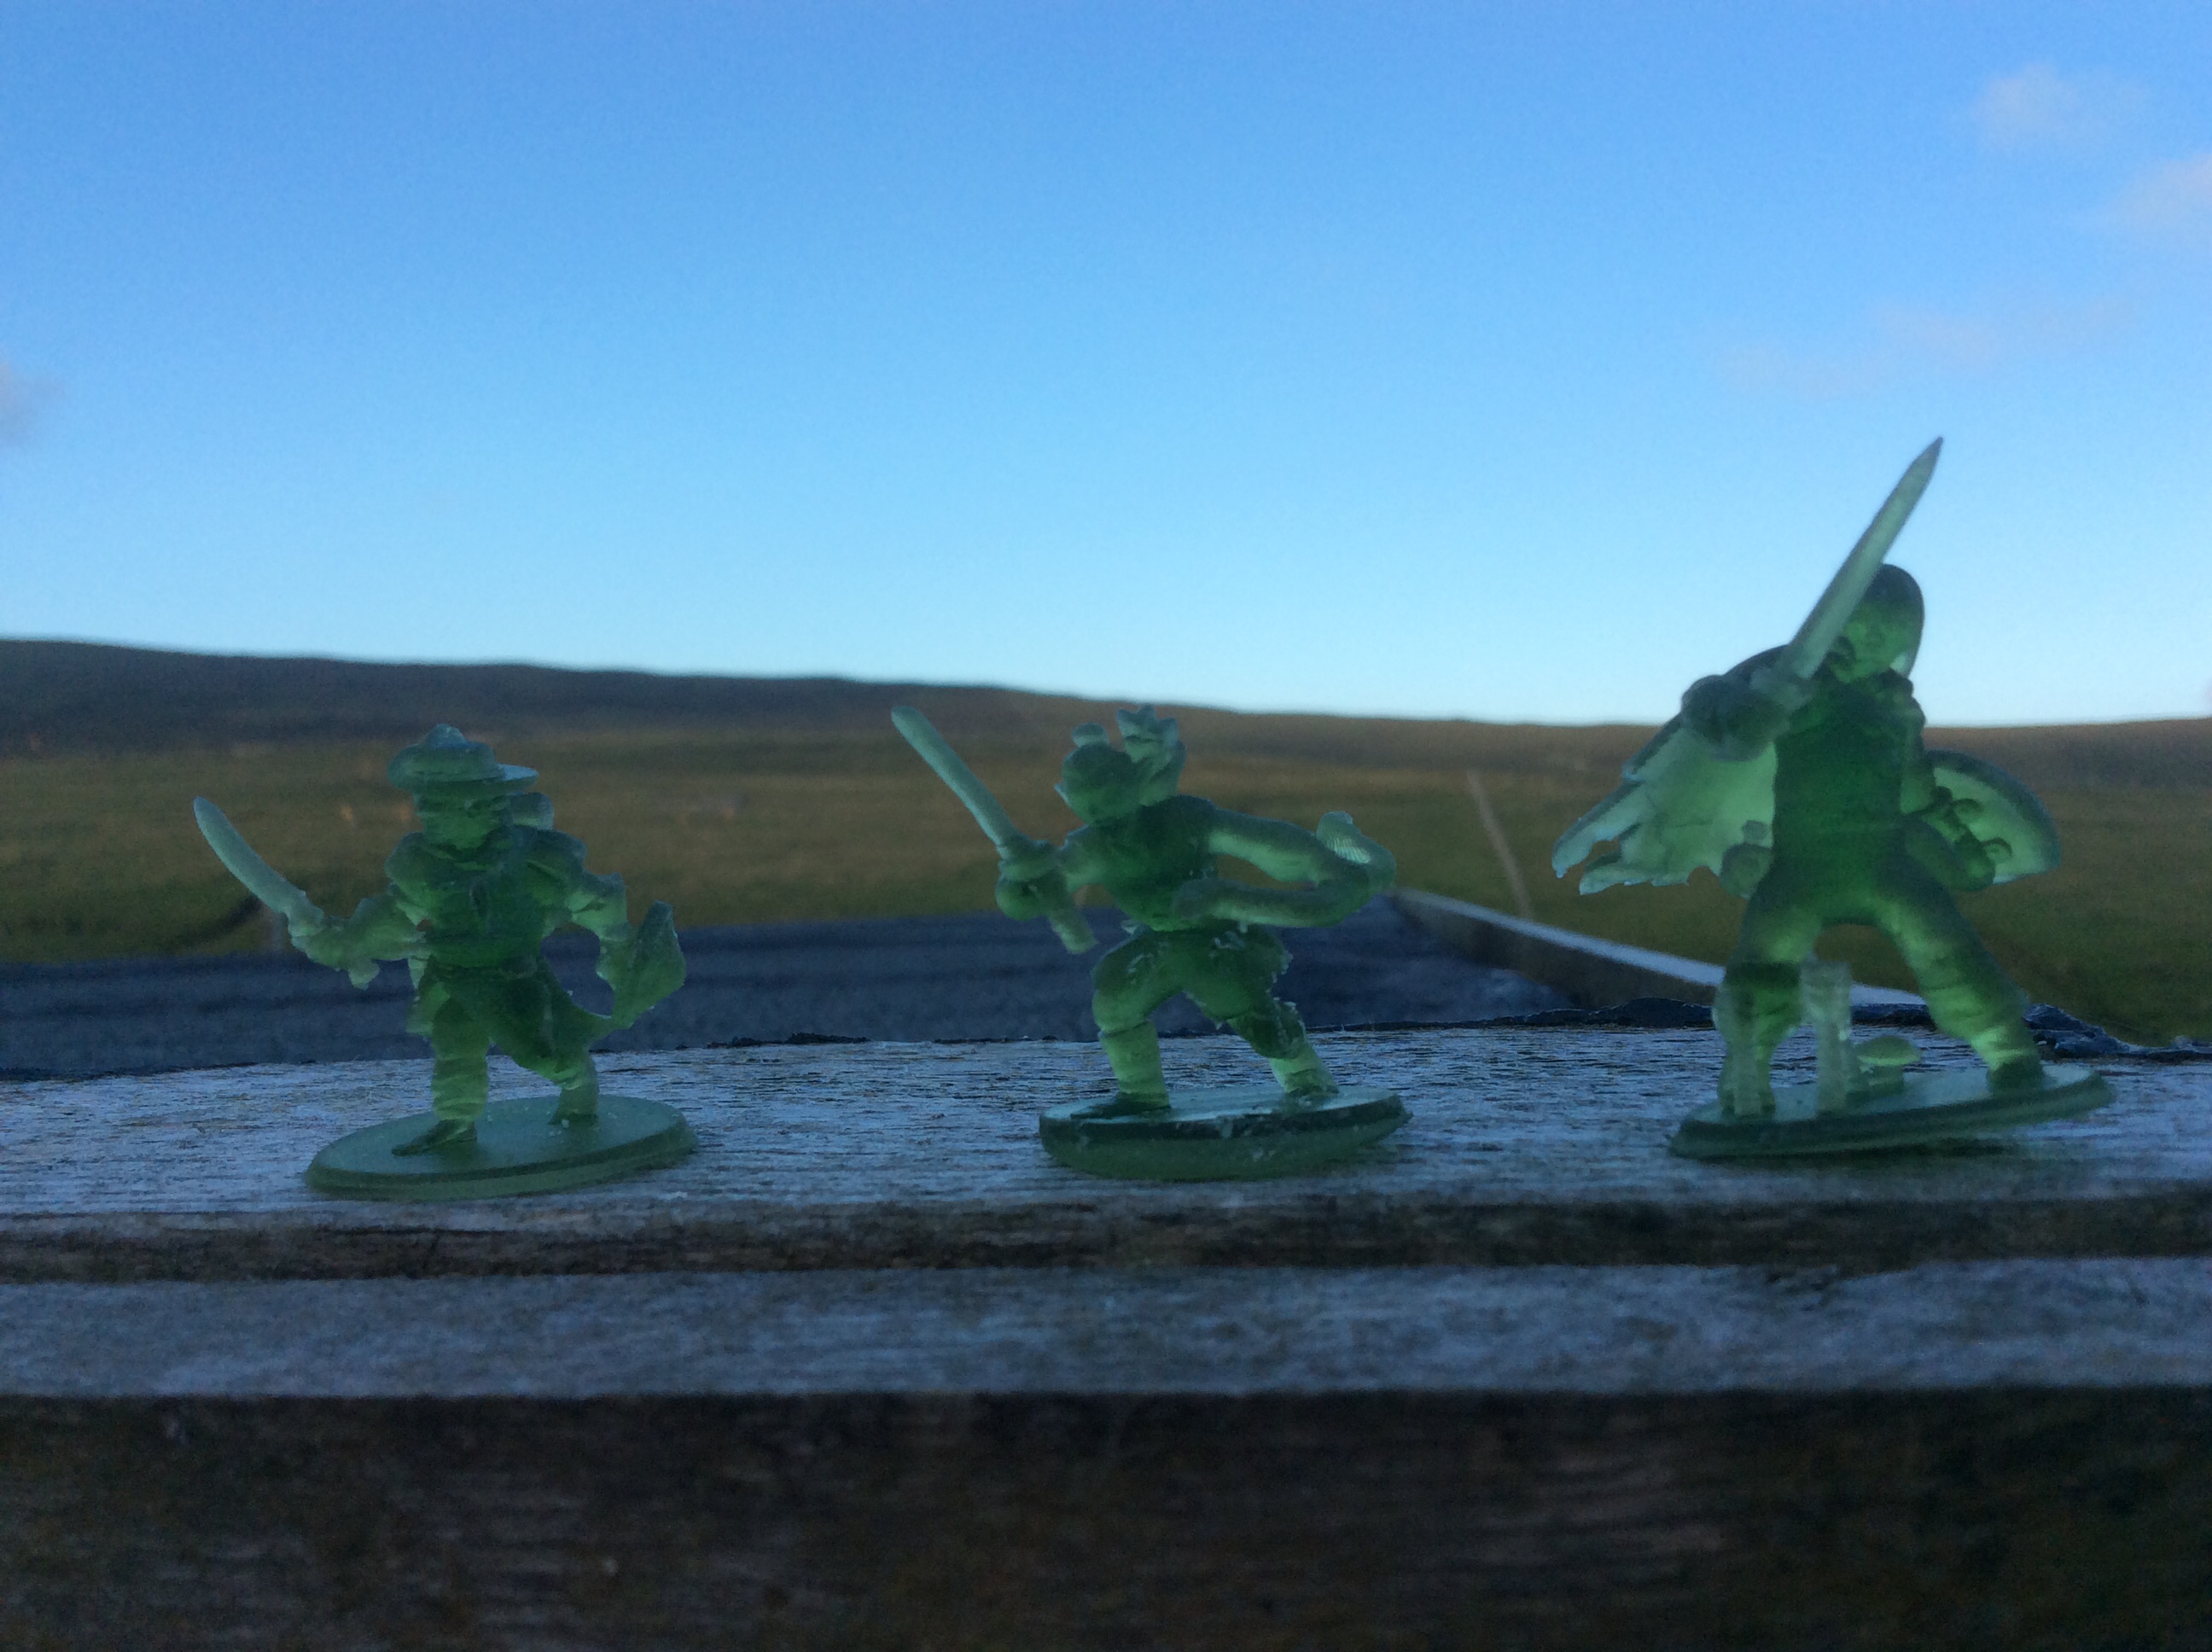
I bought the STL’s as I can print in both resin and filament (still cost over $7.00 each. But it was a present so I was willing to spurge in my mate’s and my eldest.
So I posted a picture of them yesterday in their raw state…
Sadly one of the hobbits failed to print properly, but the rest came out okay (ish). I reprinted them all today as the ranger had lost half of his shield and the elf lost their scabbard. Unfortunately on today’s print the ranger lost a different bit of their shield as did the hobbit, the elf still lost the scabbard, but luckily the other hobbit printed (even if she does seem to have very thin arms.
I decided to give the original ones a lick of paint tonight and here we are…
So left to right we have Tauriel, an elf of the woodland realm. Arador a ranger of the north and finally Hoban Underhill a hobbit of the Shire.
The poses were funky and as I said I enjoyed playing with all the different poses and equipment. I spent a couple of hours at least on the four of them. This is where it gets a bit interesting. There are some poses and equipment that do not work at all together. I decided to make a Samurai and Ninja. I felt the urge to make a diorama… I blame Dave and Pete for that! The Ninja was in a three point landing and the samurai was rushing forward with a spear. Whatever weapon I tried to put on the belt of the Samurai actually went through the armour. It would go on the right side of the body fine, but not the left. I then decided to do some experimenting with different figures and found similar things. The elf above has her hair in a bun, simply because if it was long it would go through her back quiver.
The other thing I found was that the resin actually has ridges on it as if it were done on a filament printer. They are faint, but they are there. At the distance you would normally see them on the table they are invisible, but they are definitely there. Now this is different resin, but the civilians I did a while back do not have these ridges. It makes me think that it could be the actual miniature itself. I have seen pictures of the Hero Forge stuff that people have bought as a miniature having them too.
Will I be rushing out to get any more, probably not. This was a one off experiment. I might fork out $16.00 for the two Japanese minis I built, but before I do I might see if I can find something from the various mini manufacturers out there.. to be honest it would probably be cheaper.
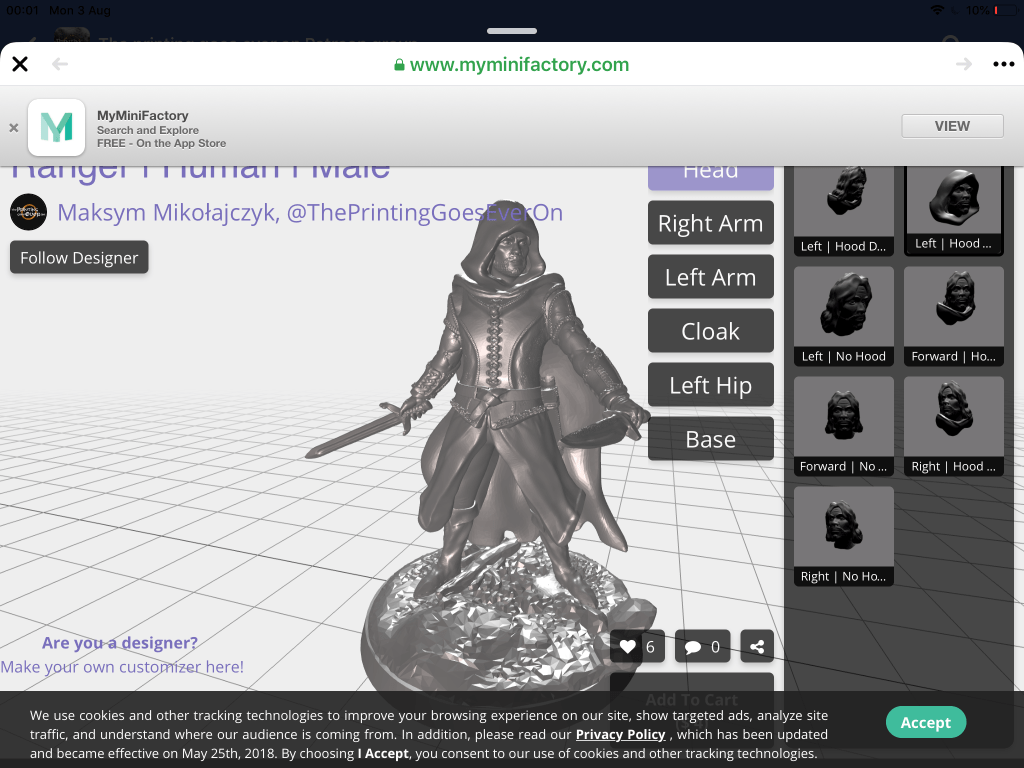
Talking of cheaper, the Up and coming Patreon that I said I was likely to follow, is more like definite now, but interestingly enough he shared a Link to a MyMiniFactory page, where I could make a ranger… okay I cannot have him doing back flips or other things like I could on Hero Forge, but it is really a nice miniature and I could have some weapon options etc. Plus they come with a full sized base, not a really thin one like the ones I just did.Price $4.00 just over half the price of the one above…
Today I did some more miniatures on the Resin Printer. The one thing I have learned is that I am going to have to up my game in the post printing stage. Although I was trying to avoid the ISO, I think I am going to need it to get rid of a lot more of the liquid resin off the miniatures.
I will do some more testing tomorrow with the meths and see if that will work and if not then I will need to get some more ISO in.
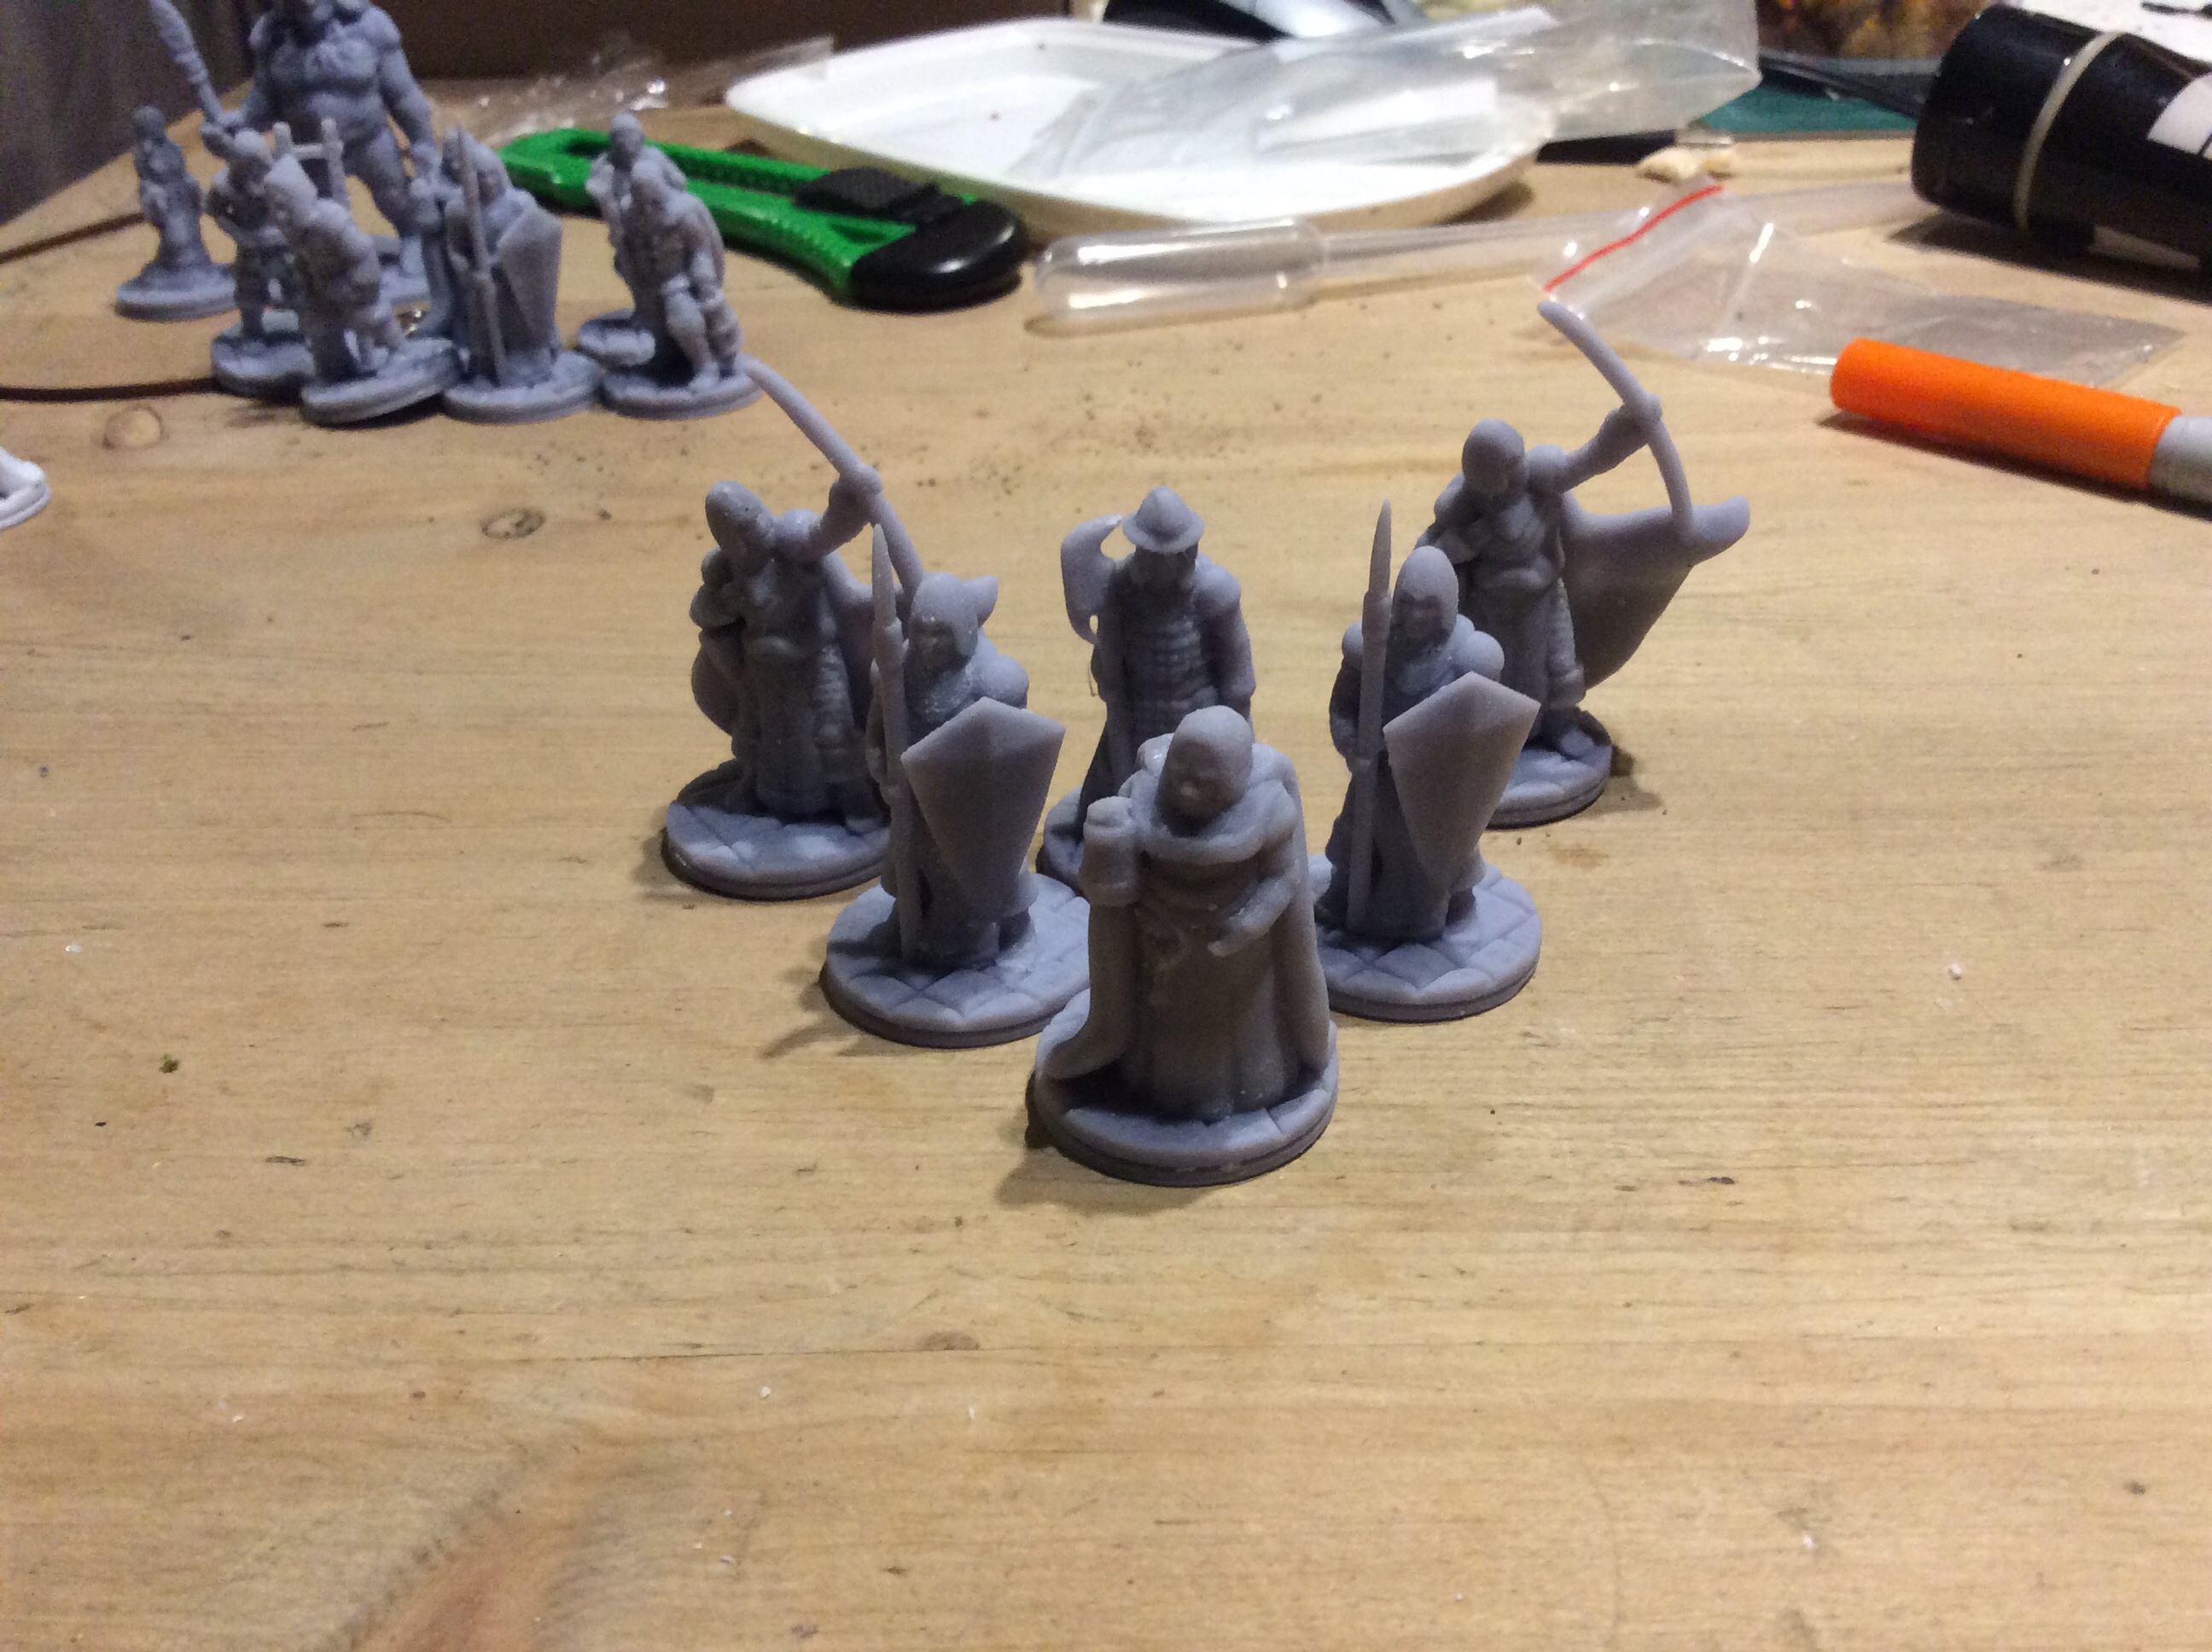
In the first picture we have a merchant, lamp lighter, jailer, spearman, sailor and rat catcher. In the second we have a villager and a troll thingy (brain dead and can’t think of the name) and then we have a mix of spearmint and archers with a lone guard and another jailer. The last lot were done at 10 seconds a layer.
Tomorrow I think I will do an individual figure at different time per layer. It will probably be something small (and faster) and really try to get things clean.
Wish me luck!
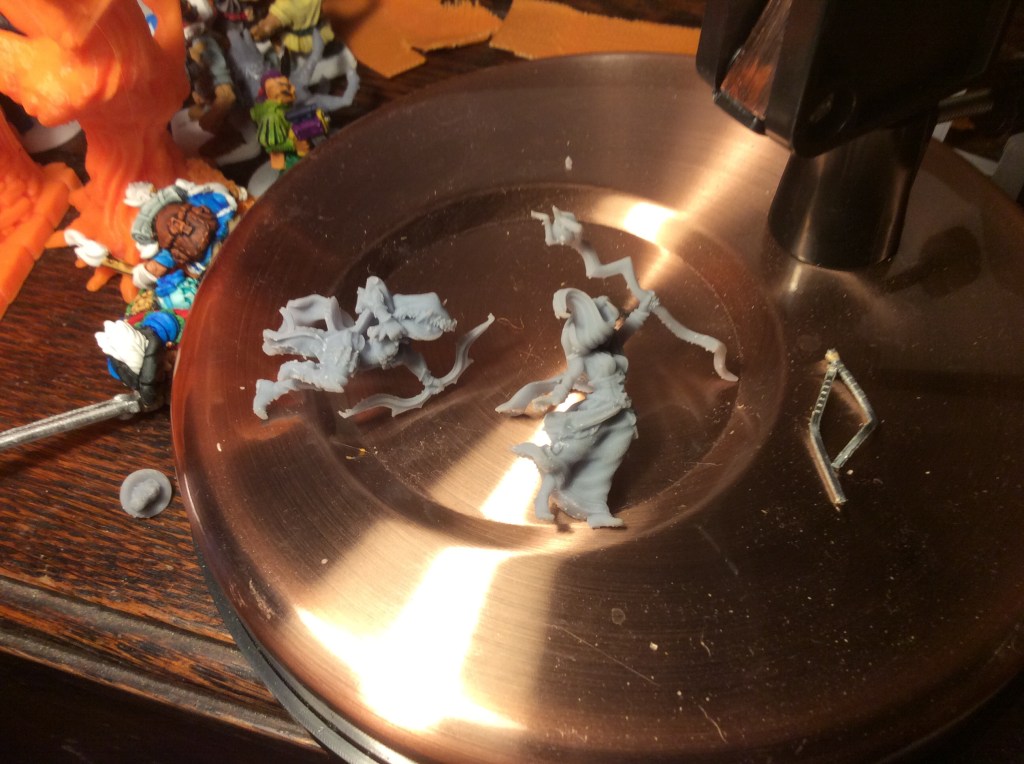
My eldest wanted to do some sea creatures today but unfortunately, I had a support failure. It was the first time I had tried supports, so that will be the next thing to master after cleaning things.
The one thing that just struck me as I was about to sign off is that I am still printing at the standard resolution for the printer. I haven’t actually tried higher resolution. Something to ponder the future.
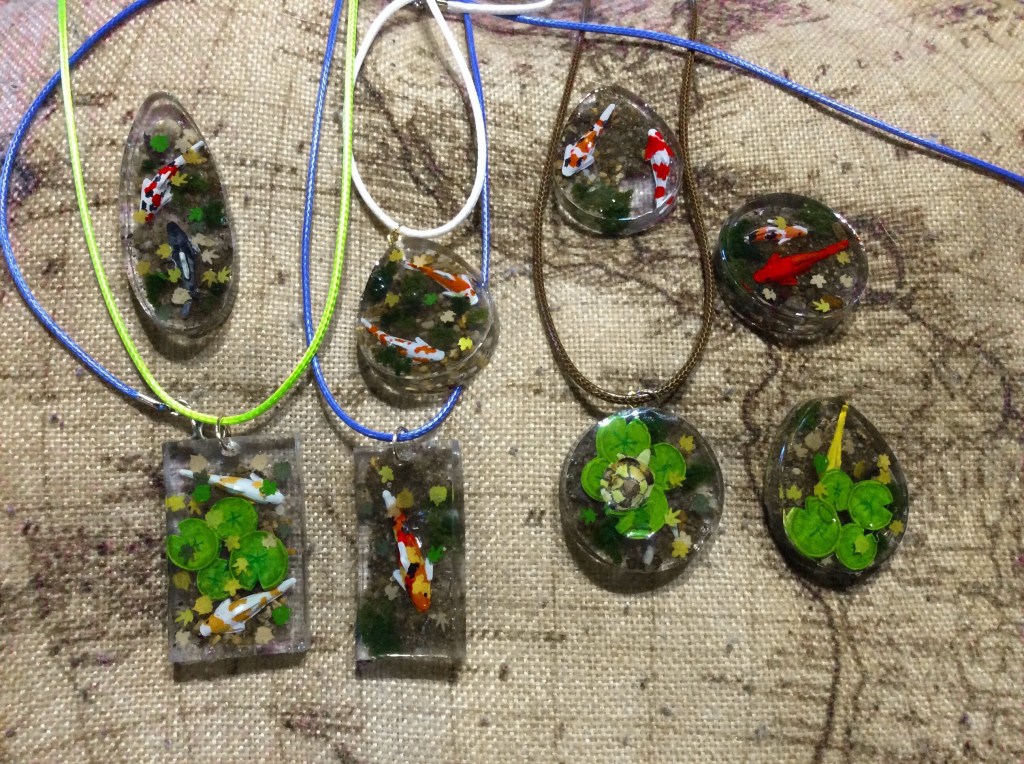
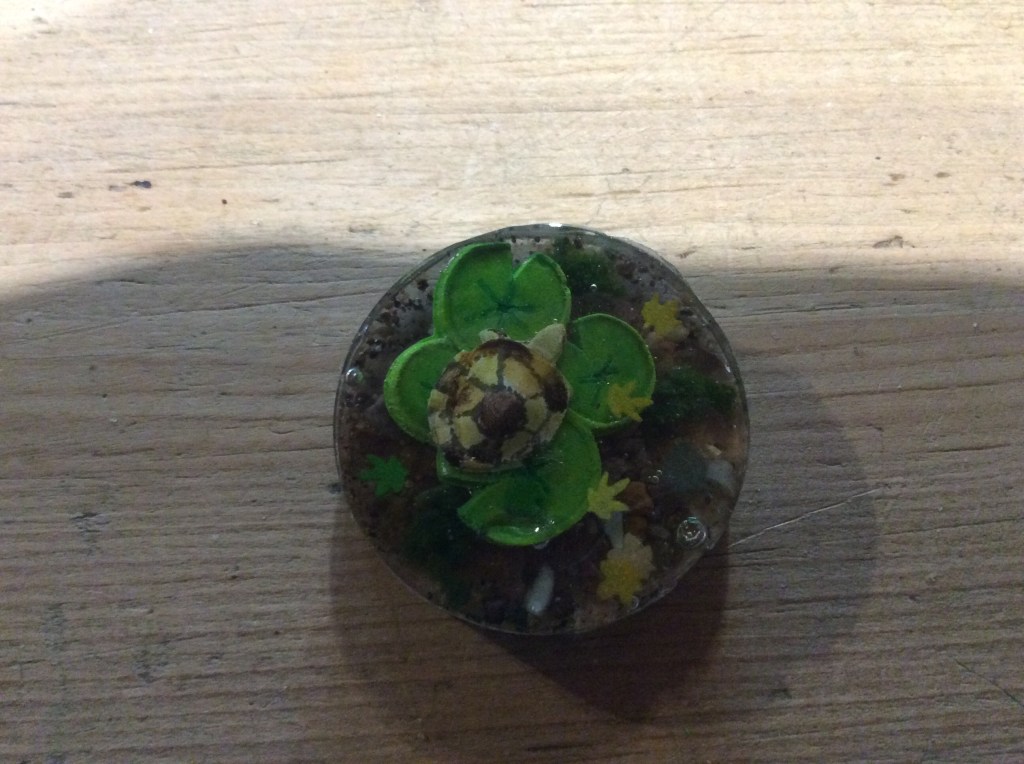
Today I put my resin fish to good use and made some jewellery.
I had a lot of fish (and a turtle) hence the number of pendants and soon to be pendants..
These were nice and relaxing to do.
Basically a layer of cured resin and then some basing sand, more resin then the fish or whatever with the foliage., more resin then some of the leaves I made ages ago and then topped off with more resin.
My favourite one.
Me doing this caused pretty much the rest of the family to want to do something too. So my youngest is going to do a pond inside a box. My wife and eldest are doing something in a couple of clean jars. So all in all my messing around ended up being a six hour crafting session.
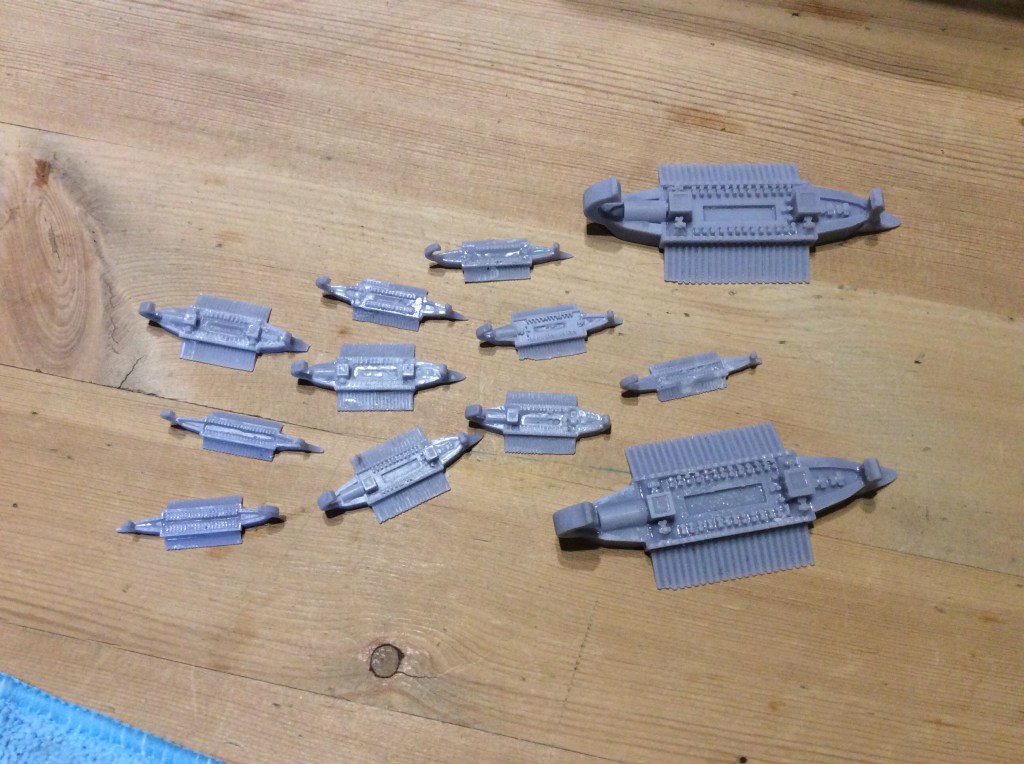
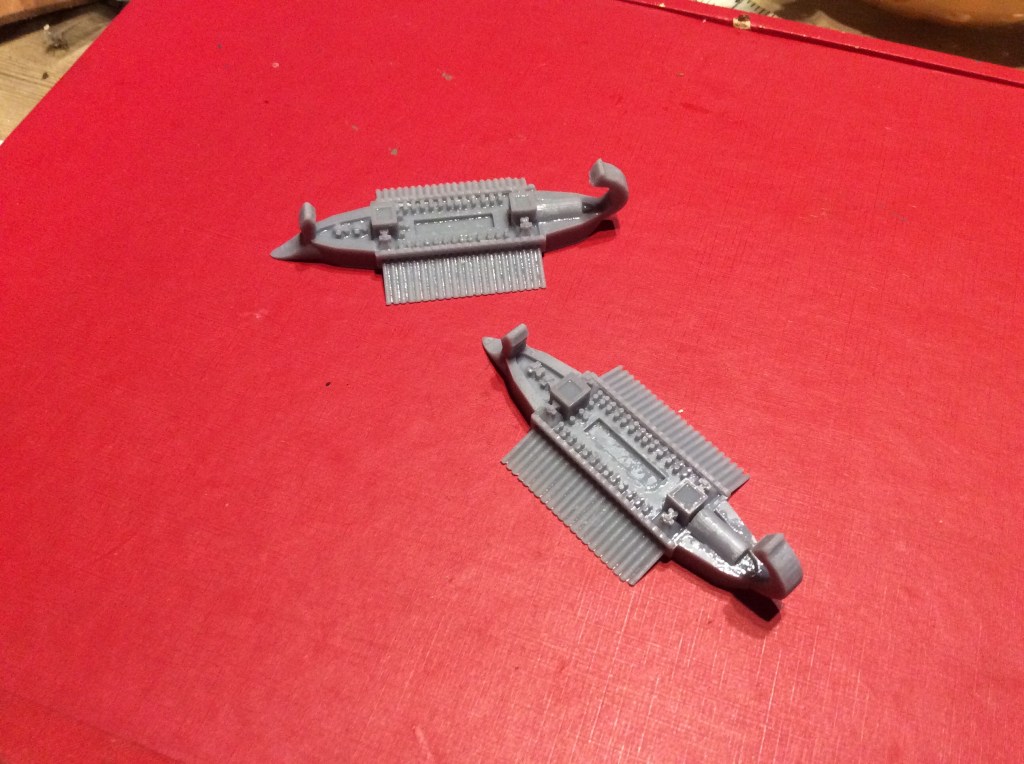
We today, I decided to try one of each of the different ships, there were in fact ten of them. This time I printed them at 50% size. These will come in handy for Poseidon’s warriors.
The one thing I must get the hang of is to clean things better. Some of these are a bit of a mess. I think it will come with practice and knowing where the resin will lurk. It also didn’t help that two of them stuck together.
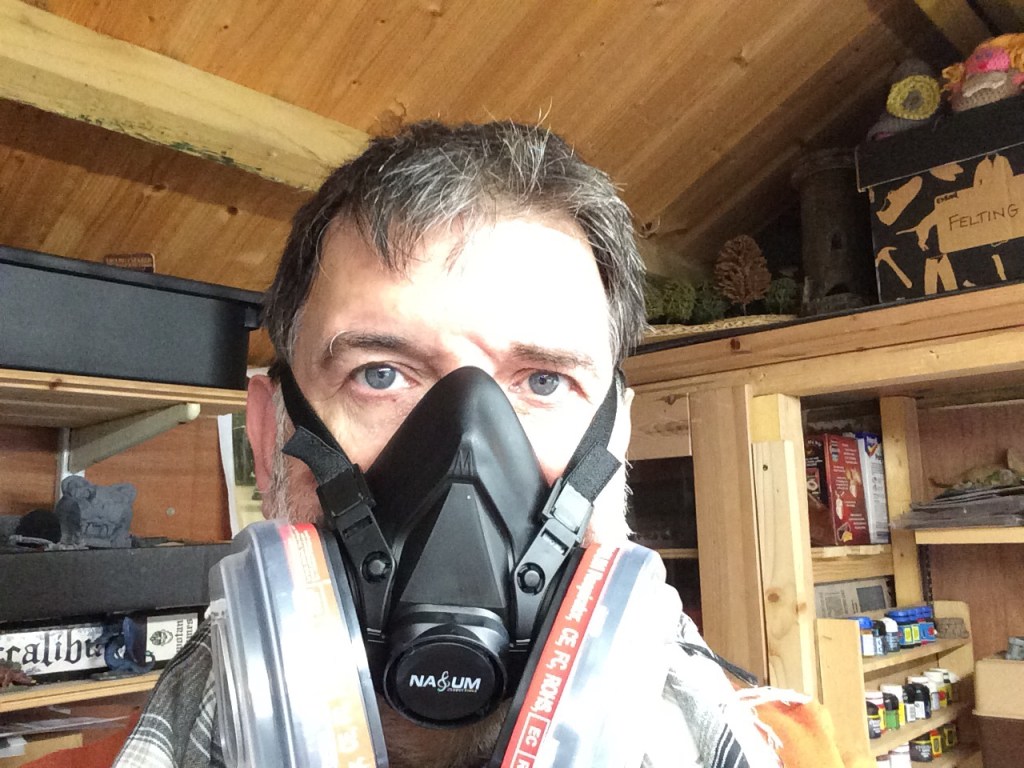
I decided to take my safety seriously and decided to wear my mask (that arrived this morning)
Maybe a bit over the top, but it works!
Tomorrow I will get the printer running again at ten seconds a layer. Nine is definitely better than eight so I will do another run of miniatures. I will put the jailer in there again so that I have a consistent figure to test the settings on.
I gave the Ender an airing today and it was an absolute sod. Changed the nozzle and also re levelled the bed, and fave the build plate a damn good clean before it would let me print anything.
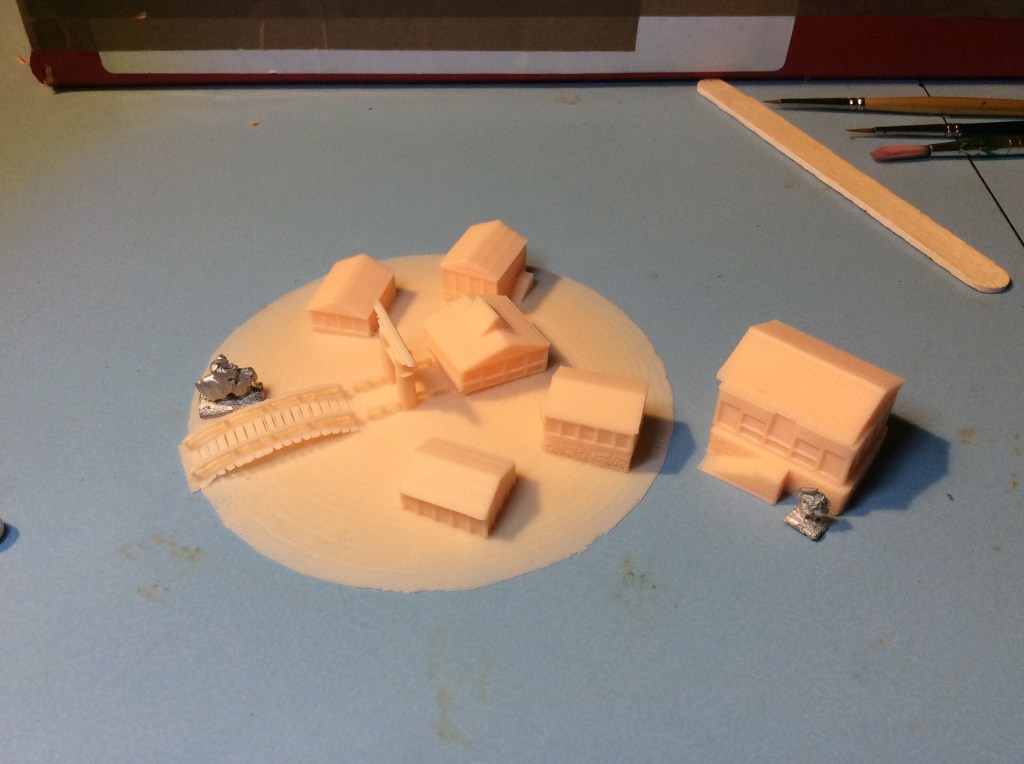
I ended up with a small samurai village and an individual house in three bits for my 6mm Forces.
I bought these at the same time as the galleys yesterday. The village comes on a circular base, and there are some individual houses too.luckily the Japanese ones are included. I had to shrink the singles by 50%, and I think they will definitely do. This set also came with a samurai castle.
The sets had various houses from Neolithic right they way up to ACW, so I should have a fair bit to play with. Sadly the individual ones came in at only three sets. Samurai, Tudor and Russian.
Today I was having a mooch like you do and ended up getting myself some Ancient Greek trireme (or something similar) I also got some 6mm buildings (which evidently aren’t)
But the boats are nice if a little large. I will drop the size down by half I think (if not by more) as I have Poseidon’s warriors rules, it seemed a good idea…
From what I remember there are ten different boats, I printed three off at this size as the vat still had resin in it.
I also set off to print the third set of townsfolk and somehow ended up printing the second lot again.
The printer also had a moment. For some reason when I put the plate back on and it tried to head down at an angle. Luckily it didn’t puncture the FEP film on the vat, but it had a damn good try.
I also had a moment. I was holding my sieve in a pot so merrily poured 300ml of cleaning water into a 100ml pot… needles to say it didn’t fit. Did I pour it in slowly? Did I bugger! Water everywhere! I also learned an important lesson, when you shove uncured miniatures into a water bath with cured resin in and swish it about then the cured resins merrily sticks to the uncured stuff. Hence the need of a water clean as mentioned above.
Tomorrow I will print off the third set of townsfolk and also see what actual size the building are…