So, I haven’t been posting much lately. This is in part due to laziness and part due to playing too much Ark Survival Evolved.
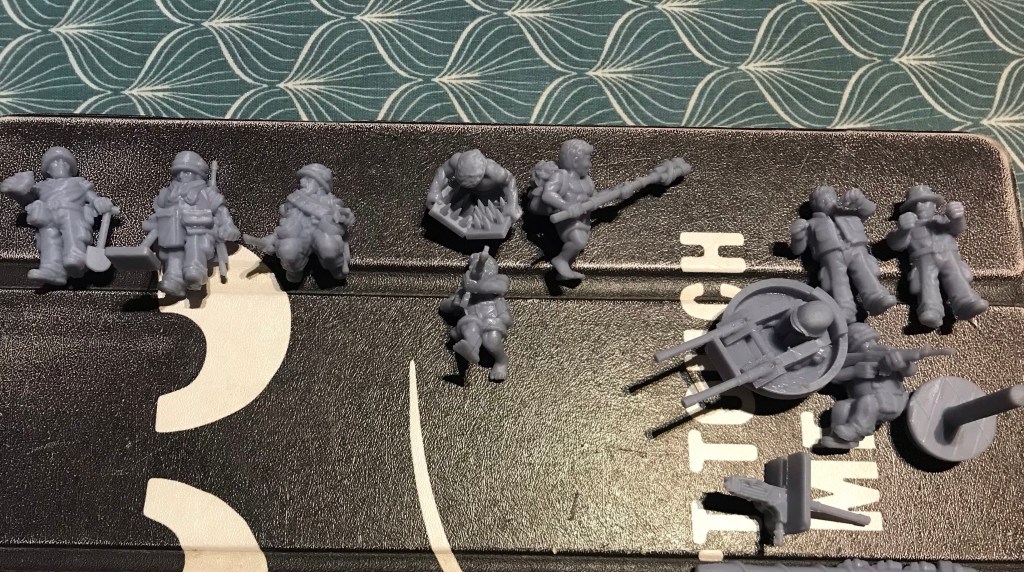
I did get this lot photographed this evening… the boat crew were printed about 3 weeks ago and the engineers and sappers about two. The latter were taken off the supports this evening and then left in the sun to cure.
This evening I also shrank down and printed some Samurai stuff from 3D Alien print. hopefully you will see a painted example tomorrow.
I actually got my butt into gear this evening and got some paint onto the Hog. To be honest there are so many things wrong with this miniature that it is going to become a test miniature… well unless I suddenly like it:)
I will carry on with this over the next while and see how it goes.
I am going to try and get hold of some decals to help with numbers etc.
Today I suddenly realised that I had a can of Army Painter green. Joe brought it back for me ages ago. But well done past me for asking for it.
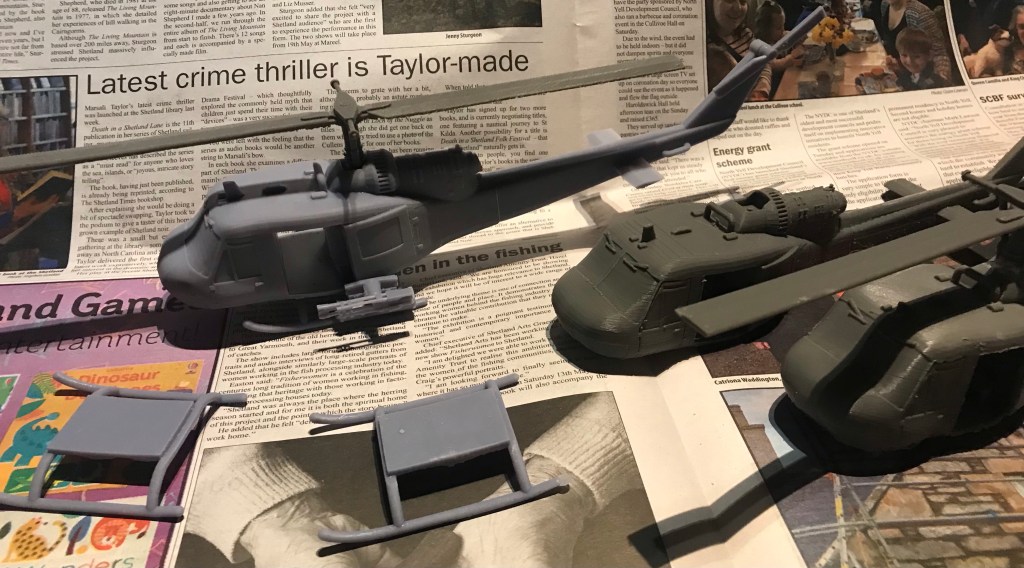
The Hog looks a bit better now that it is green.
Well this whole thing got me thinking, the rotor sticks out a long way forward and we will not even talk about much it would stick out sideways. So in my rather foolish brain I wondered about electronically boring out magnet holes in the rotor and the fuselage.
This would mean in game all of the rotors wouldn’t be bow/stern. There could be some variations.
Over the next few days I will work on this and see what I can come up with painting wise. I am actually going to have to use normal paint! Eek!
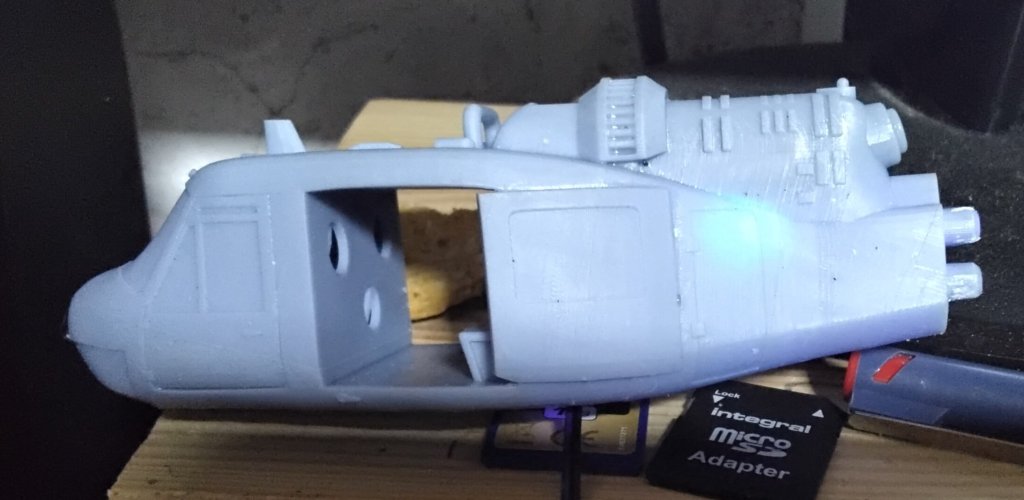
Well as promised I decided to prehollow out the huey before using the slicer to do it. It seems to have worked! I went to town by shoving a cylinder inside the rear compartment and then in the software subtracting it. This left a big cylindrical void that meant that it was a lighter model, but also that there are no places where the resin can pool.
The blue light you can see is a small uv light that I made to fit inside hollowed out models. This thing has more holes than a Swiss cheese. But it does allow the cleaner to get inside easily and to empty out easily too. I might cover up the holes, but there again I am going to be shoving various crew in there, so the holes won’t be as visible.
I also did some rotors on the filament machine and put them on a higher setting. They have come out very nicely.
This evening I managed to put the Huey Hog together. This is the first of them completely finished.
Now you may have noticed that there are a pair of skids sitting there and not actually attached to the two birds on the right… well that is due to a Rookie Error.
The resin and filament machines have different tolerances. The hole for the skids to fit in is too small. They are a snug fit on the resin version. So options I have are to redo the skids on the FDM machine and/or make some more Hueys on the resin machine. Would you like to guess which way I will go?
So I was having a bit of a mooch and of the 16000 Huey’s in the Nam only 1000 were the Hog. By all accounts early on people shoved on whatever they could. Early editions only had the rocket pods that held seven folding fin rockets because the 19 versions were too heavy. The birds I have are early edition ones as the rear door has only one window in it. Later editions have two. Interestingly enough the version I have has seven rockets visible.
My plan is to have four or five flyers, but in reality for my skirmish games one or two would suffice!
Talking of doing more, this time I will hollow out the rear fuselage separately before getting it anywhere near the resin slicing software.
Today everything hurt again so sadly no painting this evening. I did manage to slice some stuff to print. I decided to try the Huey on the resin printer… it fit, just! Sadly because I am a pillock I forgot to go to heavy supports so after my 3 hours of printing I had a Huey that was about 3mm high.
I redid it and hollowed it out too. It seems to have worked ok. The back end seems heavy so I am going to drill out the engine exhaust so I can do a drain hole. And to also allow my tiny UV light in there. We really don’t want it cracking open as the resin tries to escape.
I also did the crew and weapons for the PBR…
The guy in the Huey doorway is from the boat, but he works in there too.
We have had a blackbird singing outside of our house for the last few weeks… here he is…
Huzzah, the printer started again in the right spot and we now have things!
I think the Cura supports are a bit crude and didn’t need to be everywhere that they went, but hey I have some things to add to my pile of shame.
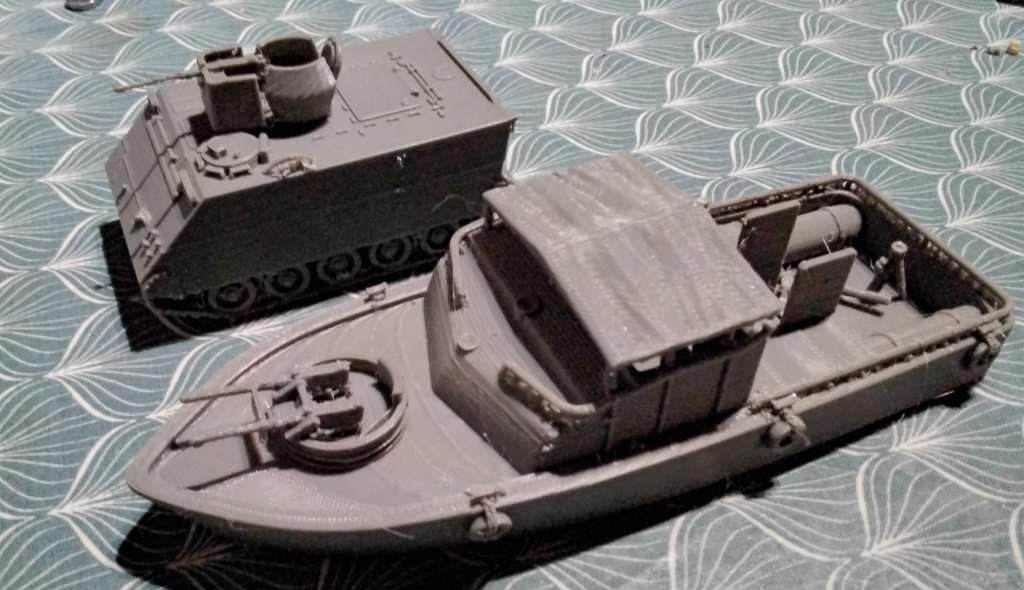
The only casualty of these is a bit of a bent 50 cal on the M113 and the flag on the PBR snapped off. The boat still needs things like its radar and rear M60 etc printing. I will probably do these on the resin printer along with the crew.
To be honest of the two the boat is my favourite, the M113 also comes with different weapon options including the 3 inch mortar carrier, this uses a different body for obvious reasons.
Until tomorrow and remember I love the smell of Napalm in the morning!
As soon as I got home I scampered down to the printer shed to see what my APC and boat looked like…. well it looked like this….
Although the power had returned to the house, the printer does not automatically restart. So I will probably have to wait until tomorrow to show you these.
After taking the photo I restarted the printer and fingers crossed it seems to be on track to complete them.
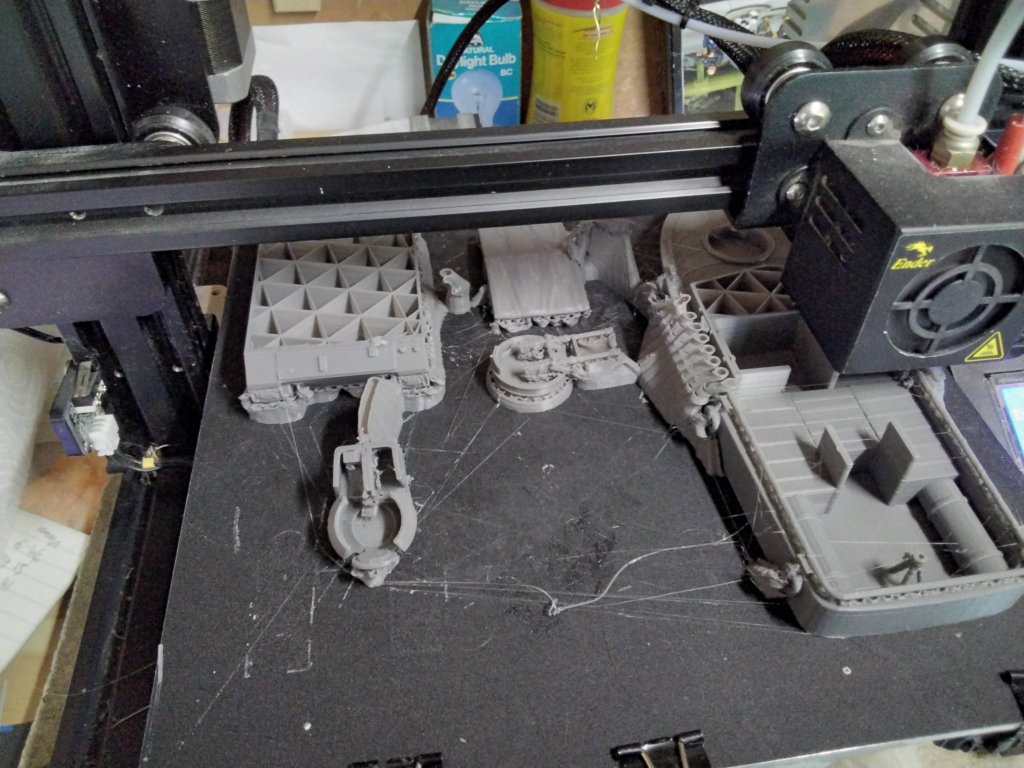
So I went for the tree supports and I have good news and bad news
So the good news… removal on the whole was easy peasy.
The rotor is still on the supports.
As you can see from the above photo the support on the floor will need a bit of work with a blade. So positives aside, this thing is going to take a long time with sandpaper to get ready for paint…
The above is what the bottom looks like. No doubt I could orientate the model to lessen this effect, but the worry is that it would be more noticeable in the easy to see areas.
I going to be honest I am printing on an old machine (an original ender3) the only upgrade was a metal extruder. I think I got this Christmas 2017 so it has done a fair bit of work. Further to this I generally still print on draft quality. Speeds up the process. I could go to town and print on super fine quality. Fat dragon games has some really good settings but it would take at least twice as long to print. One day I may give it a go.
I think I will start the M113 this evening. Because I am a twit, and there was space on the build plate then I am doing a PBR minus the crew and rear weapons.
Huey, Kilgore and now a PBR… definitely a smell of ‘Apocalypse Now’ going down.
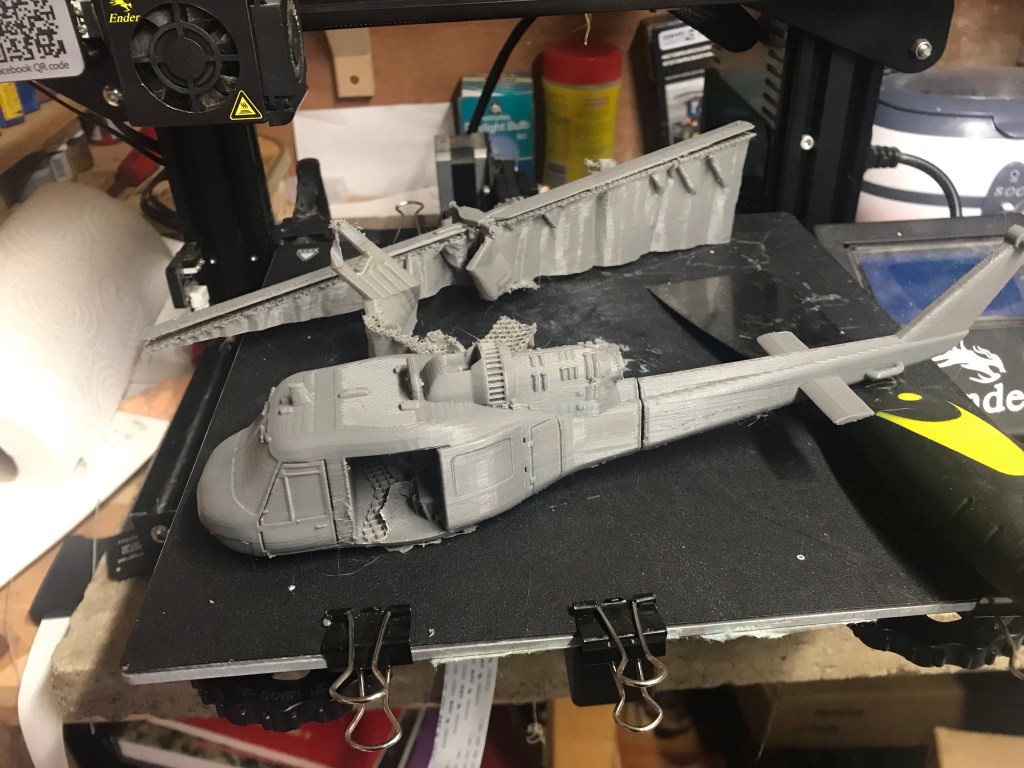
So I got the Huey of the printer and my heart sank… the supports weighed more than the model, never a good sign.
The rotor is meant to be fastened to the drive rod thingy. It snapped off removing the supports. I wish I had made the closed door variant. This was the internal support.
Note the damage to the body. I put it in hot water like I would with the resin… bad idea.
The internal supports filled the whole cabin… bloody nightmare. It took 20 minutes to remove the internal supports.
So I think I need to redo this again and check the supports. Sadly Cura doesn’t show them. I may even hollow it out and do it on the resin one.
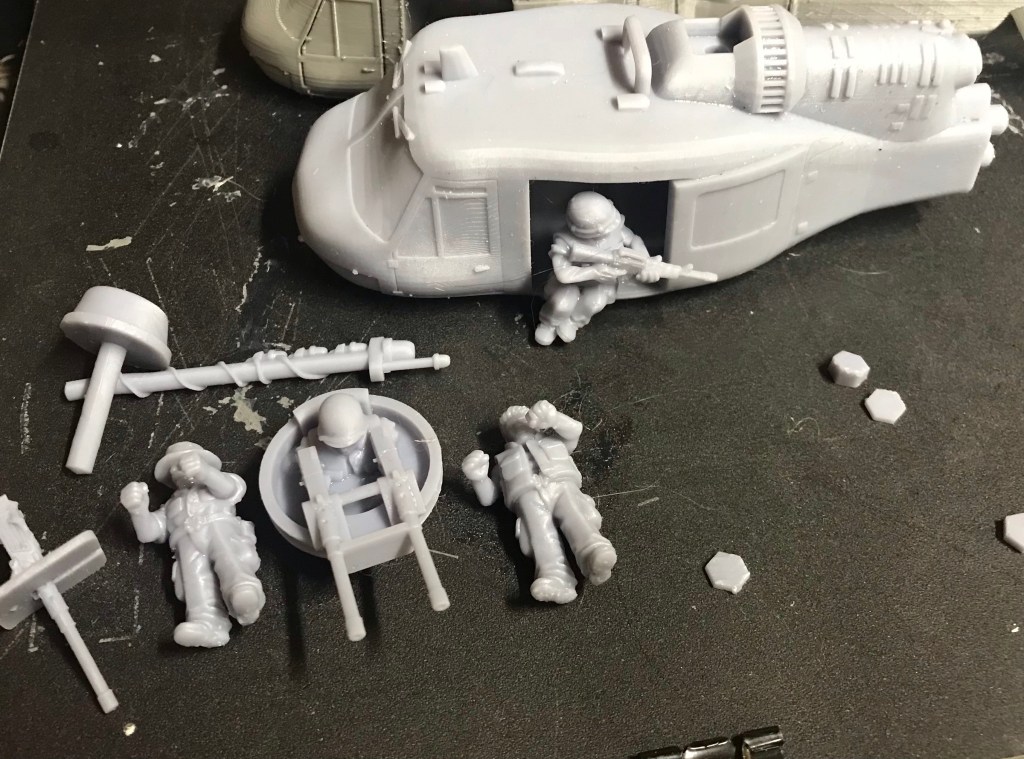
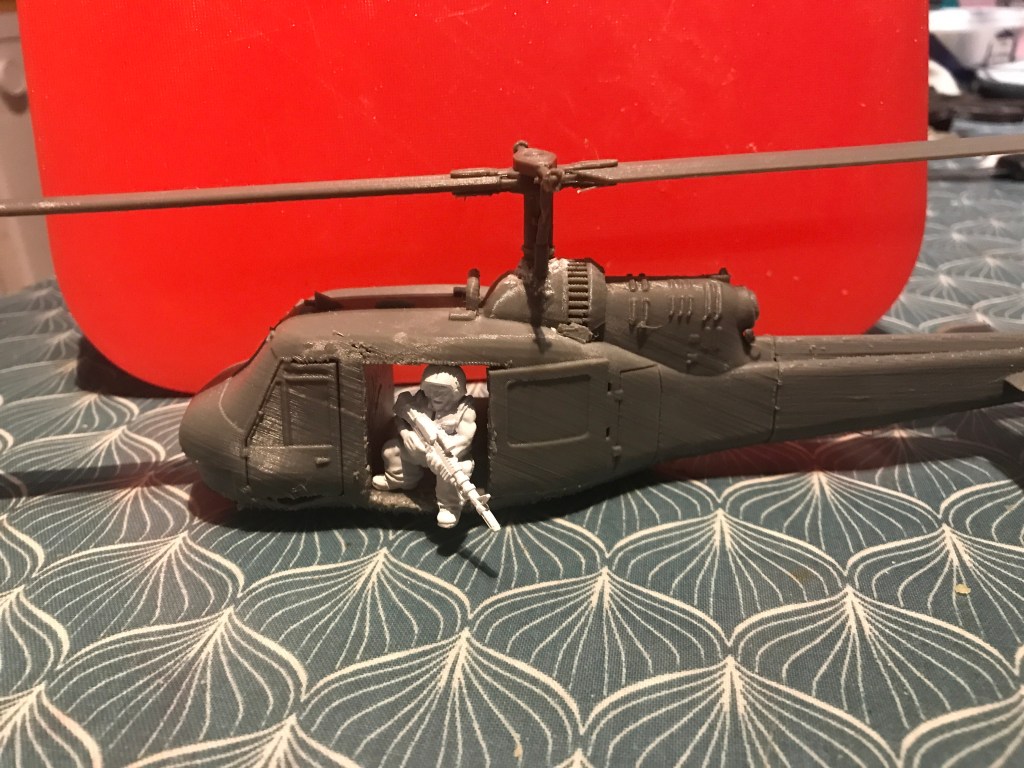
Door gunner in situ.
So as you can see he is a bit on the big side or the Huey is a bit on the small side.
I will have a play and see what I can come up with.