Graveyard With Grass

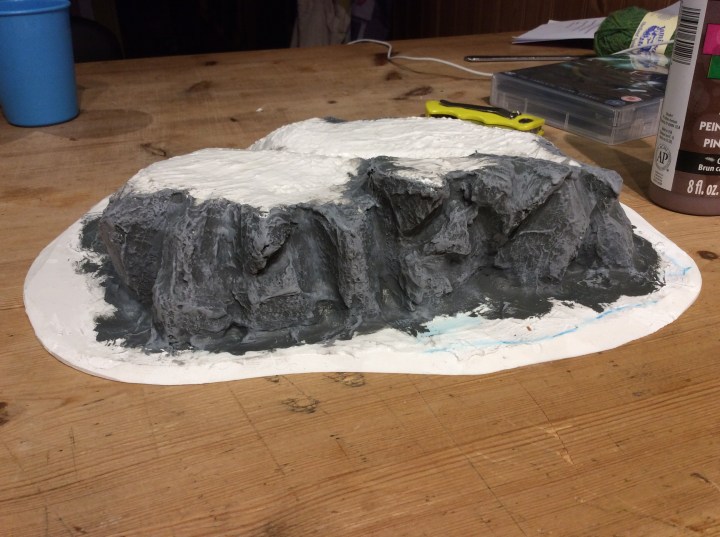
Well I started on the grass tonight… I did have a bit of a panic as I was running out of my small indoor pot. Luckily I still had a fair bit out in the shed. Why the panic? This was the flock I made myself and I haven’t a clue what colour I used to get the green.

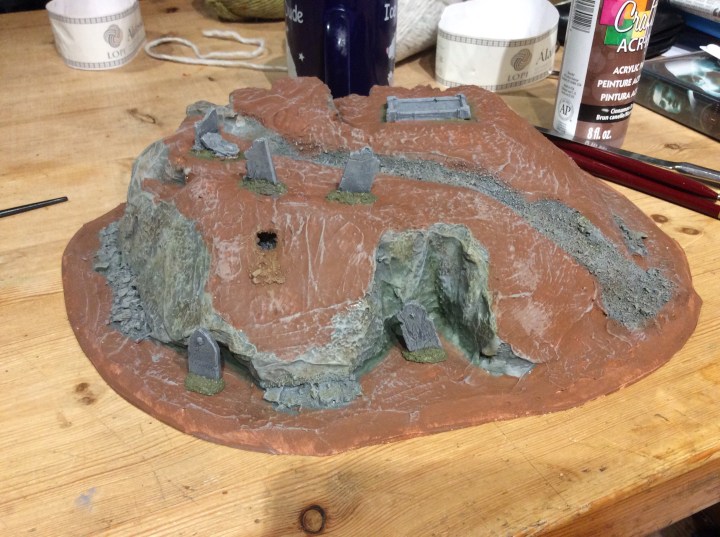
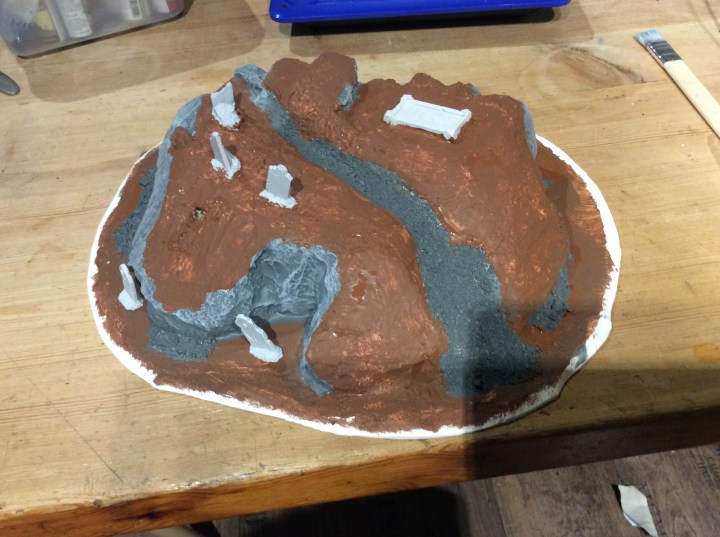
I am doing it in a few stages. The top first and then around the hill when the top dries. This green is a base level. There will be lots of textures and colours over the top of this.

I did totally balls up by covering over the spoil from the rabbit hole, but in hindsight, putting the spoil over the grass would be more realistic.

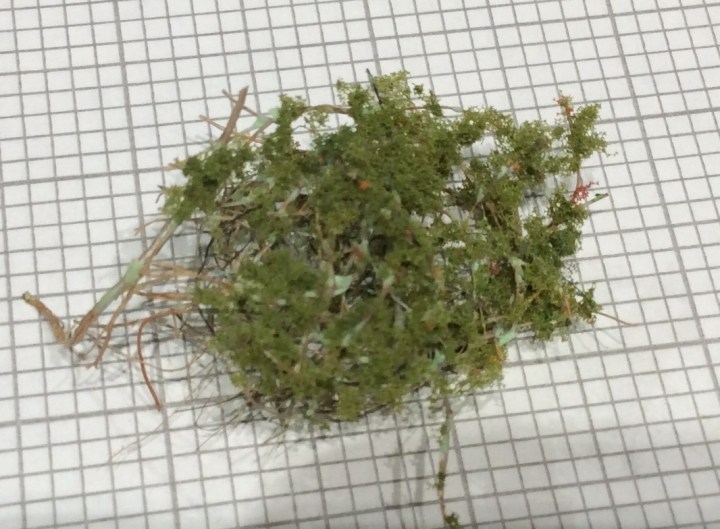
The damp bit has a lot of dark and bright green as well as some tussocks in there, not that you can really see in this photo. The bushes are not stuck down, I was trying to get an idea of what would look good. There is also a climbing plant in the damp alcove.

This is made from rubberised horse hair (or coir matting in this case) PVA was glued in random spots and then the thing was dipped in foam flock. This is very fragile at the moment and needs a dam good coating in watered down PVA to strengthen it up. It’s not a very big bush, as those are 2 mm squares. It is roughly 4cm by 2cm.

As a total aside, I caused a bit of consternation and hilarity at the yard after bringing the horse in. I informed a lady that I was having difficulties getting it up!

Luckily she realised I meant that I couldn’t get the wet horse rug over the top of the stall wall. Well if I find a packet of viagra in my tack box then I reckon she didn’t know what I was talking about.

Tomorrow I will finish of the grass layer on the base, then make a start on the next layers.

Graveyard… Looking a bit Better

I got a bit more done on the graveyard tonight…

It is starting to get there, I cleaned the brush off on the brown hence the weird grey pattern. The brown will be covered in flock so I am not too concerned about it. The deep recess in the front will be wet. The idea is to get reeds and tussocks in there.

The next problem is what colour flock to use, I will have to have a mooch about to see what I have in the shed. I will need some static grass tufts as my intention is that it will be overgrown and uncared for.

I think I still have plenty of stuff to make bushes and scrub.

There will also be other bits of graveyard to be used as scatter terrain. I think I will go for irregular shapes as opposed to old CD’s.

I will get the flock on tomorrow.

I forgot to mention the first of the Fire festivals took place on Friday. There are some very good drone and video footage, mine was time lapsed with the tablet.

We didn’t go down to watch the boat burn on the water, but this is a photo from a couple of years ago.

It’s not the biggest, but to be honest it is my favourite. It’s handy we can sit at my mates house and watch the procession go past.

Graveyard looking Naff

Well it is now at the yucky Naff stage, I had to it the brown base coat to help cover the white, I will lighten it up a bit but most of it will be covered with flock.

This layer has PVA added to help it bond with the bottom layer.

Hopefully some tidying up will help it look better. I will dry brush the fallen rocks and lower part of the cliff face when this lot has dried. When I paint it tomorrow I will not use the half inch brush I used today 😱

Forgotten Forces Friday

Another Week, another box…almost a song from Evita….

Well as my ‘What a Tanker’ rules arrived I thought I would seek out some tanks, I decided not to bother with the 6mm stuff and hunted for the 15’s

An ambush about to be sprung… I reckon the fleeing women should give a clue 😉. One day I may finish the houses…..

These were done for skirmish gaming hence the individual basing on the infantry.

Then onto the unpainted!

I am still in a dither about what size to go. Never mind the period.

Roughly a 15mm Tank costs £6 plus, 10mm tanks cost roughly half that. I could start with these and see how I get on, it would give me 3 tanks a side, but no options for changing tanks as the campaign progresses. The cheapest and quickest option is to go down this route…

I could have as many as a I want then, but it doesn’t feel or look the same.

Big thinks are now being Thunk…

A Gritted Graveyard and a BBA

Couldn’t get the groundwork painted as I added some grit to the hill…

It was a very quick job to get the grit down but a very long time to let it dry. It should be okay to get a base coat on tomorrow.

As this was drying I had a mooch around the house and came across the BBA aka big bloody Alien…

The marine is there for scale… I reckon he is shouting ‘sit!’ Now I know a fair bit about the Aliens franchise of films at the very least. The only time I have seen this one appear is in the computer game (oh and the board game). Retail cost for him is normally £30. I got him for a tenner with free postage. Too good an opportunity to miss I thought.

Tomorrow is the first of Shetland’s Fire Festivals, the galley is burned on the water in Scalloway. It looks like the weather will be good. I will endeavour to get some kind of photos of the event.

Graveyard… With Added Graves

Well a graveyard without graves is basically a yard, and a graveyard hill is a simple hill.

These are stuck down with ‘No more nails’. Normally I would just put these down with PVA, but they are in a prime spot to get knocked clean off. There are a couple more gravestones to add in the two indentations in the foreground.

I can’t get anything more done until this glue dries. Once it is done I will get the stones and grit on then get the ground base colour painted.

The big hole is deliberate, this will be shrunk a bit and some grit added at the base of the opening. The hole and slope will be filled with bones and a skull as if a rabbit or something has burrowed into where the coffin was.

I didn’t get the chance to do much else due to a small boy contracting Scarlet fever, not to mention the normal day to day Shenanigans of daily family life.

The other exciting news is that U-Boot is starting to be shipped out this month…. very excited!!! French and English are finished, other languages are in production too.

I only hope my table is big enough 😱😱😱

Graveyard A Teeny Bit of Progress

As it says… a teeny bit of progress.

I managed to get a lighter grey onto the cliff faces…. bizarrely after putting on the light grey layer I noticed some white spots where the dark grey hadn’t covered. One would imagine that the dark grey layer would have made it more noticeable.

I didn’t get much chance to get much more done as I was messing about, trying to get the printer to print something, I managed a wheel and a half. The PLA just wouldn’t adhere to the base.

The other reason is this… I spent ages reading it from cover to cover and then working out how things worked. I got the little tokens that go with the game, six each so enough for more than one tank aside.

Mark A. Morin I am laying the blame squarely at your door 😉 I wasn’t interested in tank battles until your blog got me interested.

The question I am working on is what year and what theatre, followed by what Scale. I can run 15mm Normandy onwards as I still have some Flames of War armour knocking about. From what I remember I have three M4’S a couple of Stug’s and a Mk1V.

I do quite fancy the desert war, but that will incur extra costs. I could become really awesome at 3D printing as I have found a whole host of 1/100 scale tanks not to mention 1/56 scale too. A cheaper, quicker option is to go 10mm, I have terrain and it will fit my small house better. I might see about getting a couple of smaller tanks to see how they look.

I do have a whole host of 1944 Germans and Americans but in 6mm, but I do think they are a bit on the small side. I will give the 10mm a go and take it from there. I am kicking myself that I never bought all of those really cheap Flames of War tanks I saw on Ebay when the rules became less popular.

Graveyard… Making Progress

The big blob of foam was trimmed down to something roughly hill shaped. This was stuck down onto the EPVC. I prefer basing on this as it won’t warp when the PVA is used.

I got a base coat of filler onto it, unfortunately it ran a bit thin as the tube was ancient and it wouldn’t mix properly. This was a bit of a bugger, so once it dried I used a thick coat of PVA to help toughen things up a bit.

When the PVA dried I got the cliff faces painted with standard Dulux dark grey with a bit of PVA mixed in.

This will be dry brushed to lighten it up then shaded with various washes.

I then tried out various gravestones in various locations. The idea for this piece is that I wanted an old overgrown graveyard. The hill is there as a line of sight blocker and raised ground (as befits a hill).

I messed around with the broken and leaning gravestones as well as a grave slab.

Off the two above I prefer the bottom one as I like the symmetry. No doubt I will forget where they go (hence the photo above). I intend to use sculptamould or more filler to bed the gravestones in. I intend the grass to be overgrown with bushes and weeds all around. The central dip on the top is to be some form of gravel path.

There will be other graveyard themed scatter pieces to go with this. I have just bought some 3D files that will be useful for the build.

I thought I would give a quick insight into my planning method…

I am totally rubbish at planning. I can’t get it down onto paper, it is all in my head but I am pleased to say that what I have on the table is kind of what I was thinking about.

The weather here is a tad blowy. Pushing 60 mph plus in the gusts. Thankfully the lights have stayed on

Graveyard…Making a Start

Well I have indeed made a start….

To be honest, it is a bit further on than this, but this is where it started….

I also made another cart:

As I can only print various bits, then I had to improvise with the top.

3 D printed wheels and chassis and a coffee stirrer top. The one in the background is the initial cart.

3D printing is cancelled until I can get some Isopropyl Alcohol to clean the bed with. Nothing is sticking any more!

Playing With Myself in the Kitchen

Well No-one else wanted to join in, my wife found her knitting more exciting and the kids were building things on Minecraft. So I had to go solo!

I hauled out my ancient copy of B17 Queen if the Skies. It probably hasn’t seen the light of day for twenty years. I had managed to get to the 13th mission, so I carried on. Mission 14 was a nice little trip to Amiens. The dice were with me so I managed to get there and back with a full crew and a hole in my Starboard wing where a flak shell went through it.

Fighter cover wasn’t too bad, a total of nine enemy aircraft attacked me, but thankfully they all missed, they weren’t so luck as my port cheek took out an FW190 and the Ball turret despatched a ME110.

Bomb run managed a 30 % accuracy so not brilliant, but 11 more missions and I can officially return home 😉

Fighter cover was Extreme on the way back…

We shall have to see where we get to tomorrow.