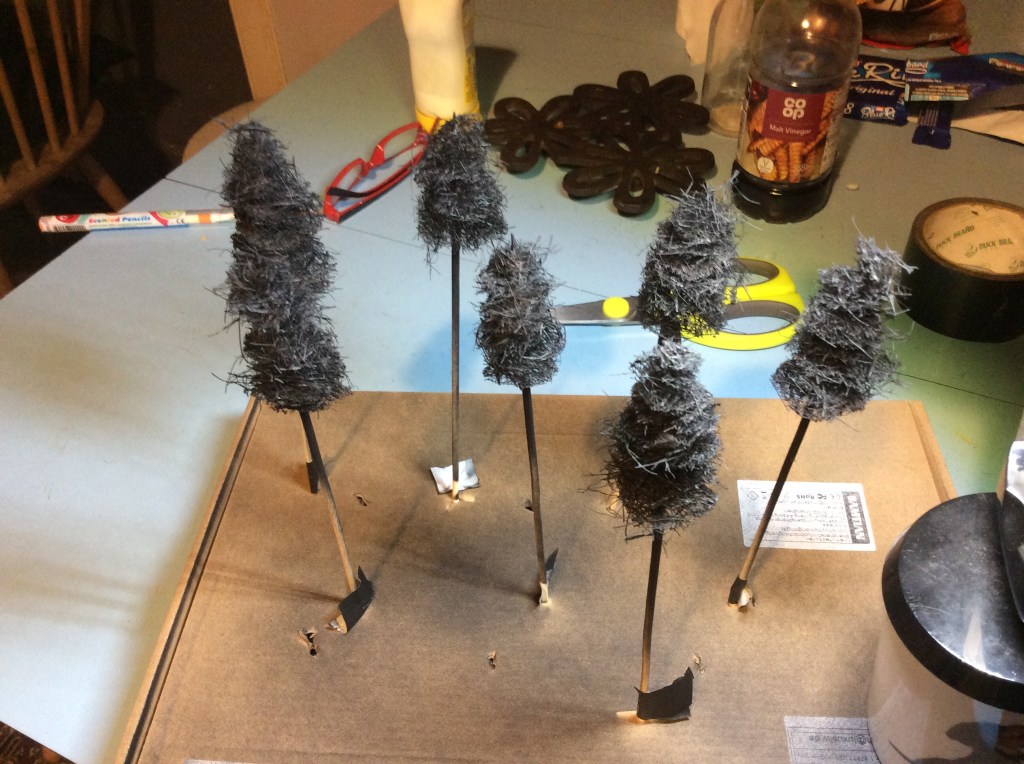
Sadly not a rather funky song by the Stones, more like me out in the wind and rain in the pony shed with a torch and a spray can of black paint.
But I did get them sprayed black. I will paint the trunks brown tomorrow evening and then get the things sprayed with glue and then flocked, depending on what I have got flock wise.
To be honest I am really enjoying making this thing, so much so that other things have been pushed to the back of the queue.
This is kind of a pity as I think it would look more balanced. If anyone could give me any invoice then I would Appreciate it. I did think about drilling through the base and pinning into the wooden dowel of the skewers and supergluing everything in situ.
I recon I can get the skewers into the top of the hill but the depth of base on the flat ground will not allow the placement I had in the test shot…
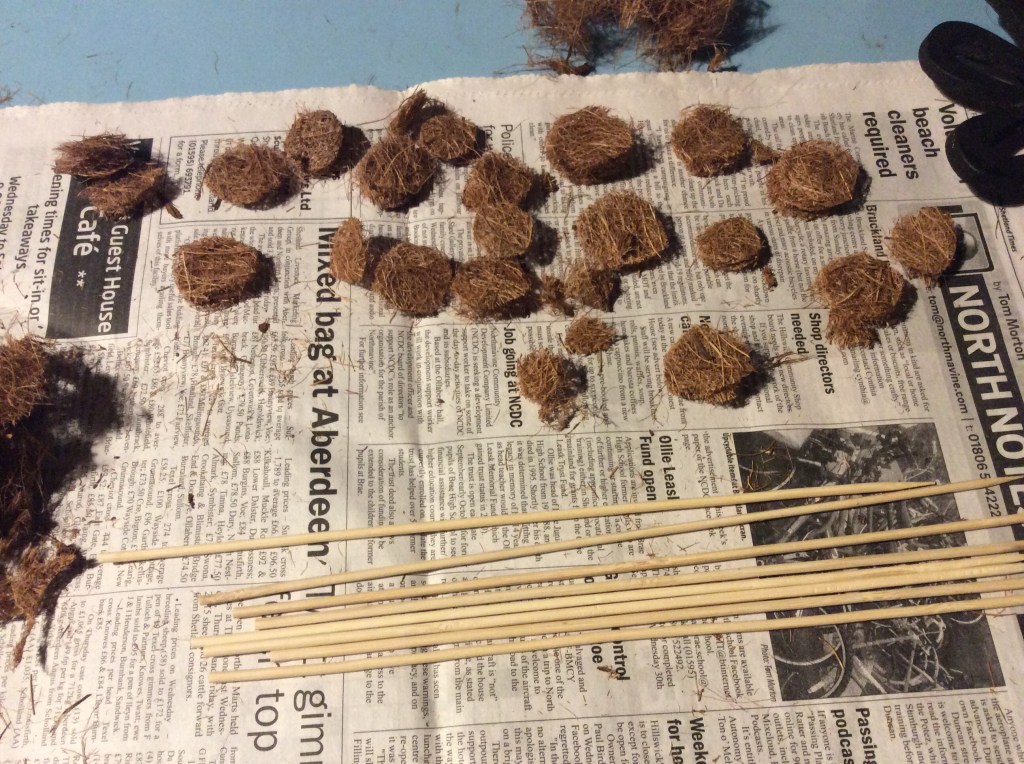
Tonight was another one of tree building, I got a pile more circles made out of the matting…
I managed to get four more trees done with what I had. Now to be honest I only used a quarter of one of the mats so I can make a whole host more…
Four more basic trees
Now the next question is to undercoat them in what colour? I have black and green here, I can probably pick up some brown on Saturday. The other option I have considered was dipping them in some brown drawing ink.
I have spray glue and or heavy duty hairspray to put the flock down. Next problem is I need some flock to add to them, now I have sawdust stuff, but I think foam would look better. I have posted on Geek Gaming to ask what they would recommend.
I will carry on with the diorama tomorrow and will make a start on the animals.
A big shout out to everyone who has sent out positive vibes, useful comments and support for this project.
I wanted to start off by saying thank you to everyone who offered support and useful advice on this diorama piece. I have taken on board what people have said and as such I have started to make my own pine trees (using stuff I bought about 5 years ago for that very thing).
So, as I said, I decided to make some pine trees, or at least start making some pine trees using some coconut matting planters that I bought for a quid each in Poundland. These vary n thickness and also in glueness some bits are like solid frisbees and other bits falling apart, but it is indeed true.. ‘You get what you pay for’.
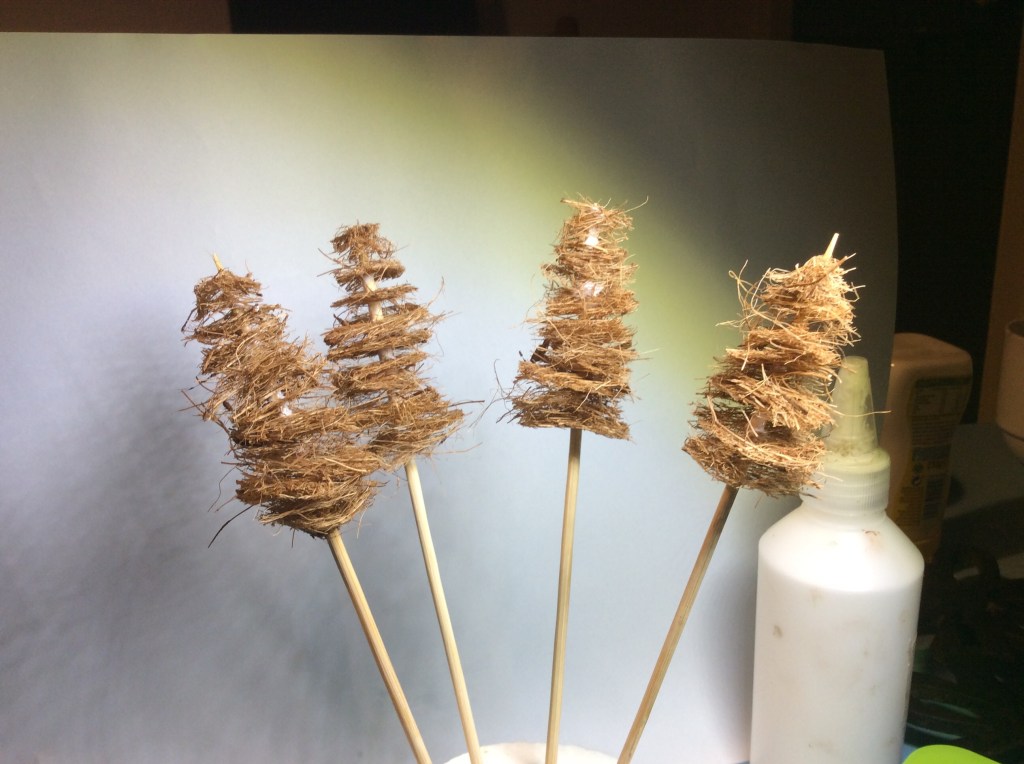
So here we have three ‘trees’, it was definitely worth doing as it gave me a bit of a chance to be a bit artistic and also they will probably look better than the cake decorations. Now I do actually possess the Woodland Scenic conifer and deciduous tree armatures, but to be honest these were probably more fun to do…
The one on the right actually looks weird in this photo, it looks like the rest in real life.
Once the glue is dry then I will give the extraneous bits a trim and then hopefully get some paint onto them, followed by some form of flock.
I also managed to produce enough crappy bits to make some form of bushes, to me they look a bit like gorse or bramble, either way with some spray glue and a paint/flock combo then they will probably look ok.
I gave the terrain another blast of watered down PVA tonight to ensure everything is sealed. Tomorrow I make more trees…
Tonight was another slow evening waiting for things to dry, I tried a bit of painting, but to be honest my mind and body weren’t up to it.
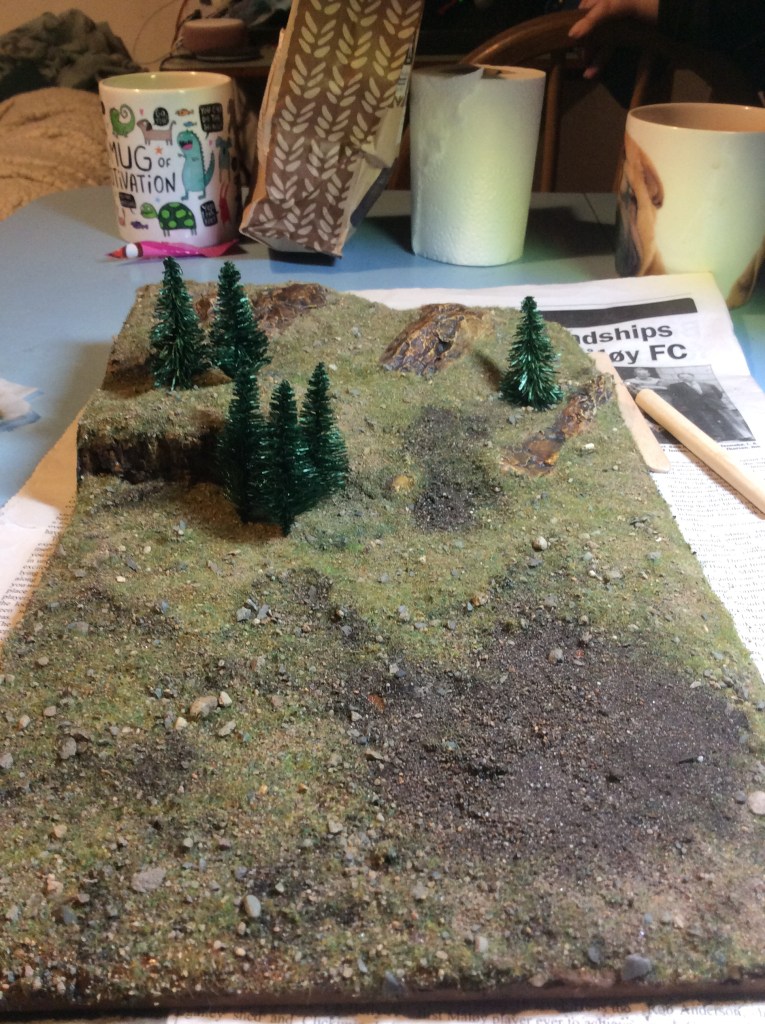
So anyway, I got as many static grass tufts out as I could find and shoved them randomly onto the board to try and make it look a bit more moorlandy, or should that be more moorlandesque?
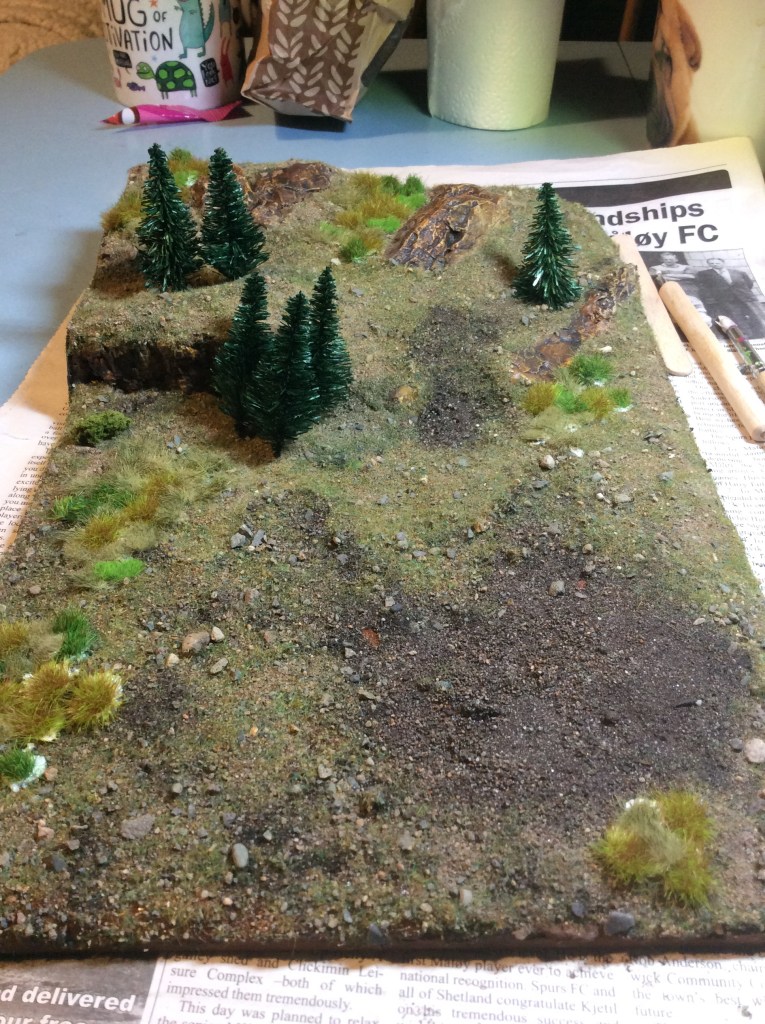
As you can see the glue hasn’t dried yet, the other thing that is noticeable is that I have shoved some trees on. I got these years ago for about 10p each, I think i got fifteen for a quid something like that. Anyway these are cake decorating trees for the average Christmas cake, but as I found them when I was looking for tufts, I thought I would shove them on and to be honest I don’t think they look too bad.
I would appreciate some comments from others as they aren’t exactly the most accurate trees around (all the same size for a start). I do think that they give the board a bit more verticality, so therefore a bit more interest.
This is what it looked like before I shoved the tufts on….
I have soaked everything in diluted PVA to seal the bits down. Tomorrow I hope to get the mud areas painted and then hopefully get some animals done to actually go on the thing… perhaps I should have got them sprayed at the weekend when the weather was dry!
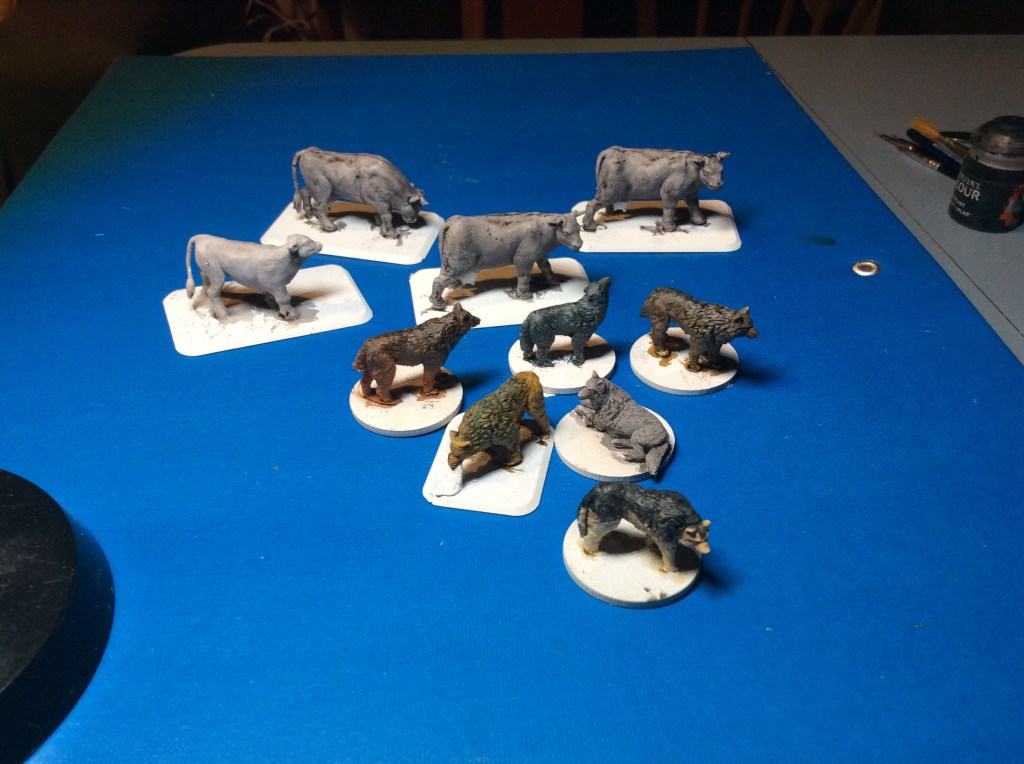
I might even go down the sand colour and dry brush route on them to save having to wait for the weekend.
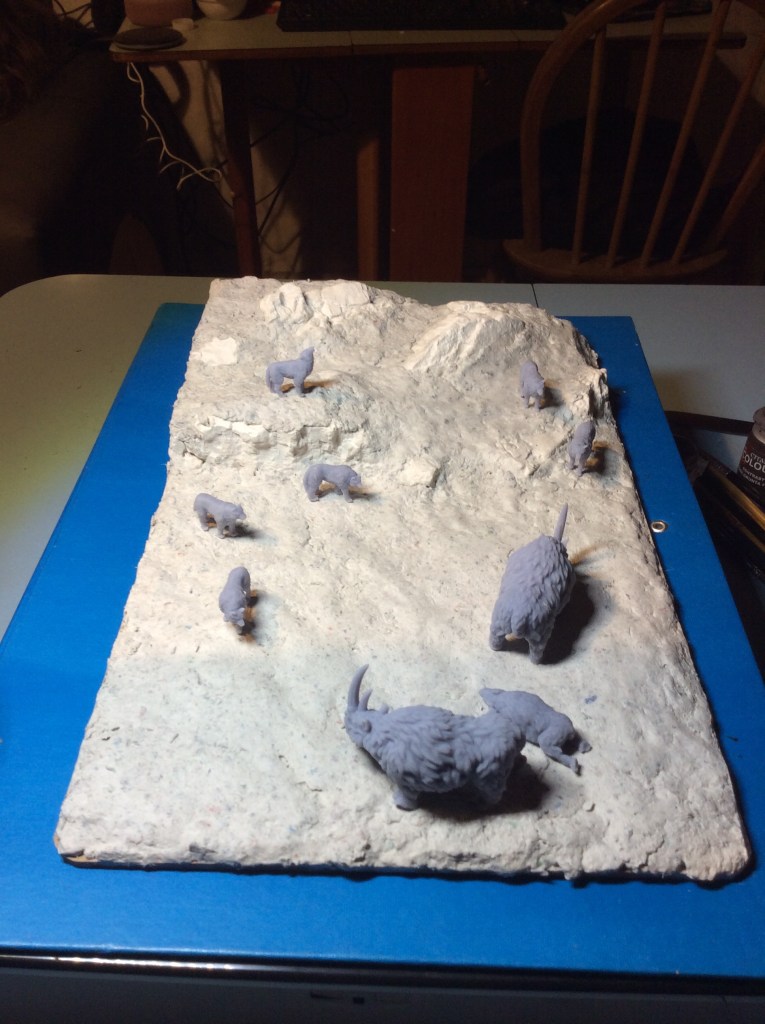
One thing I must remember to do is get some pins into the rhino. I am not sure whether or not I will manage it with the wolves… wish me luck!
Well, that was a bit of a worrying day regarding this thing. The stuff I covered the groundwork with yesterday was the fast acting basing glue and as such it didn’t dry. Thankfully flock was going over the top so it was saved. I added a lot more of the basin glue to make sure it was stuck down.
The dark bit in the foreground is where the rhino are going to be. I will paint this in to make it look more muddy as if they have been going at it for a while.
Initially I was going to have trees, but I kind of forgot, so this one will have bushes instead.
Hopefully I will get the animals sorted soon and start getting them added to the scene.
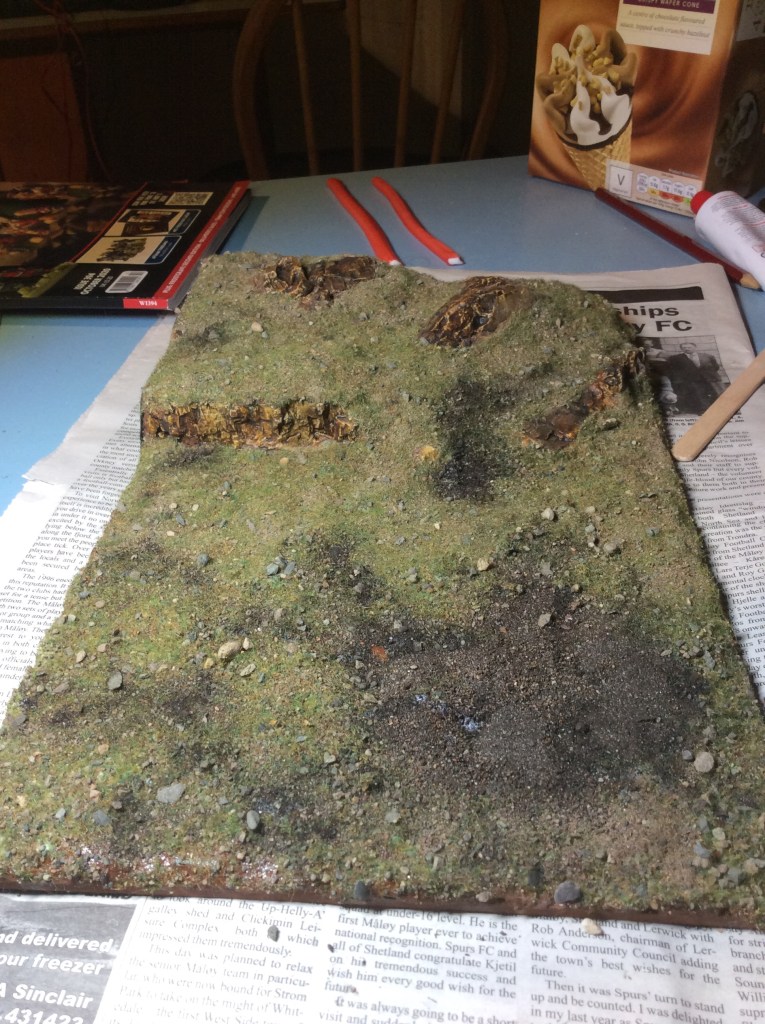
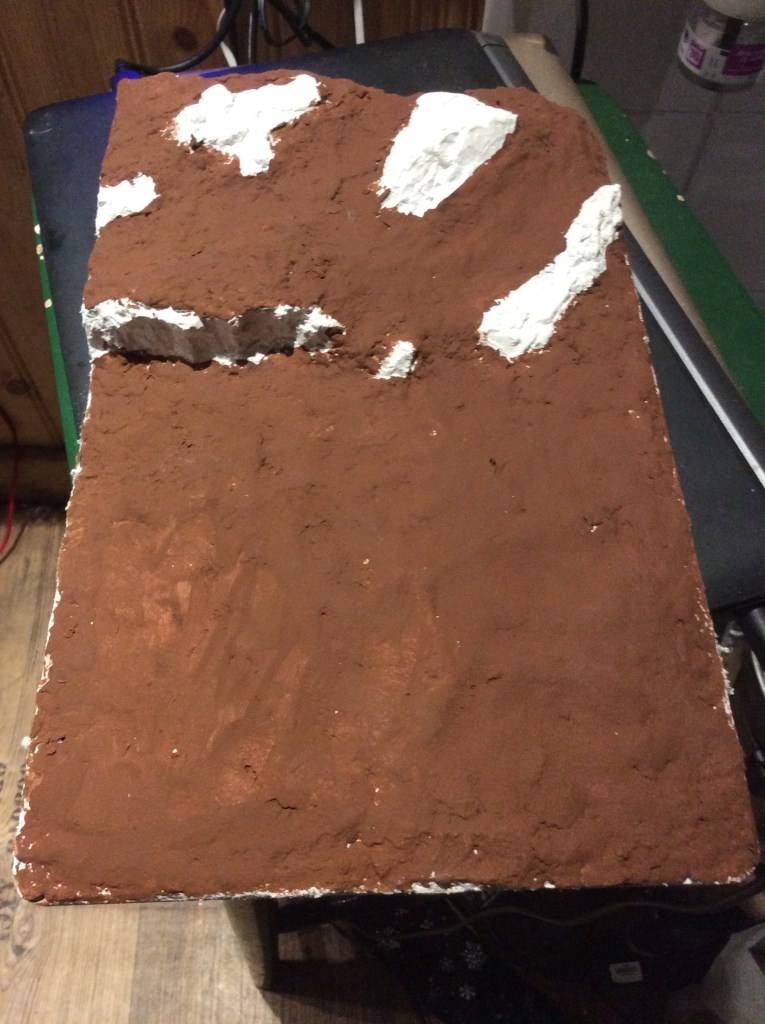
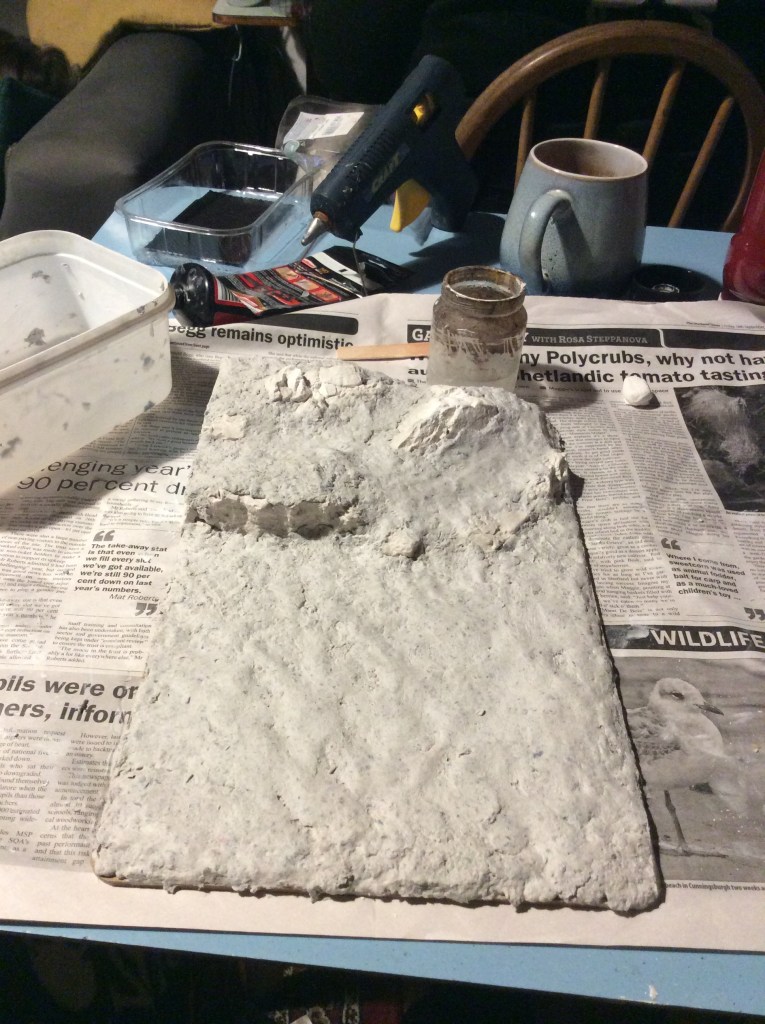
This evening I touched up the sides a bit and covered as much white as I could find. I then decided to get the rocks done.
It’s a bit shiny at the minute as I covered it in PVA to give it a bit of protection. Unfortunately My fingers were a bit tacky when I touched the rocks at the back and I managed to peel the paint off them. When everything has dried then I will get them recovered and then protected too.
The rocks actually look better in real life…honest.
So tomorrow, I will try and get some vegetation down, so wish me luck. Not sure how it is going to look yet, I definitely don’t want winter and snow, so it is what to choose out of the remaining three 😂
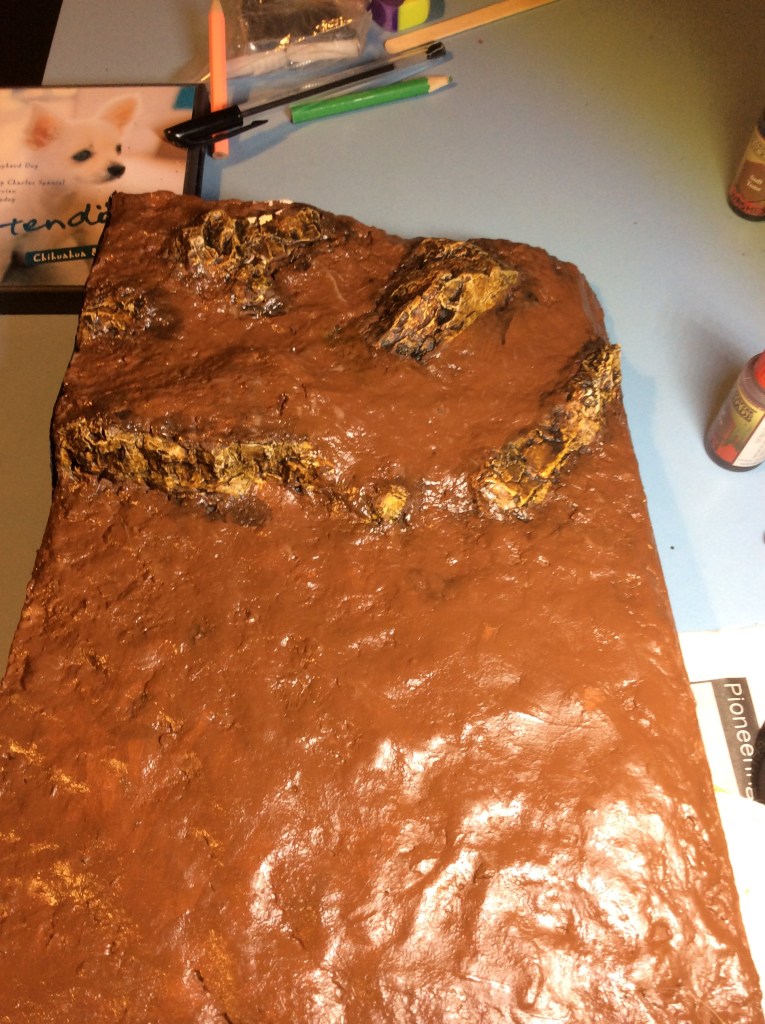
So after two days above the fire then I have eventually managed to make the majority of the ground brown…
I deliberately didn’t do the edges as I had no paper down and it would have got a bit messy to say the least. Hopefully I will get the edges and the rocks done tomorrow.
Sadly, and as expected I have a bit or warping…
You can just about see it in this photo. It is probably a mm or two out, so it probably won’t be that visible (unless of course it increases over time).
Well this is taking a while to dry, the ground cover stuff is still cold to the touch so is still not dry (the joys of not living in a centrally heated house). Anyway I shoved some beasties on to see what it looked like and to be honest I am rather pleased with how it is beginning to come together.
I reckon it will look better when I have some colours on both the ground and the animals 🥴.
I did splash some paint around this evening, I got some more on some wolves and started making the cattle less white…
This evening I got some more rocks stuck on. I scored the baseboard and then used the hot glue gun to get some uneven surfaces to allow the basing stuff to hang onto. I got the Compound mixed up and splatted on. Once it was going off I tried smoothing it down with water. I met a bit of a problem in that as I have had it a good old while then the plaster went off a bit quicker than I expected. Anyway this is what it looks like after the messy bit…
The next problem I am expecting is warping of the MDF. I will cross that bridge when I come to it. Another conundrum I have come up with is how to cover the raw foam on the side and back. I may cover it in black card to begin with as it is easy to cut and will stick nicely with PVA. It won’t be very strong but this thing will spend its life living in a box so there won’t be much handling involved.
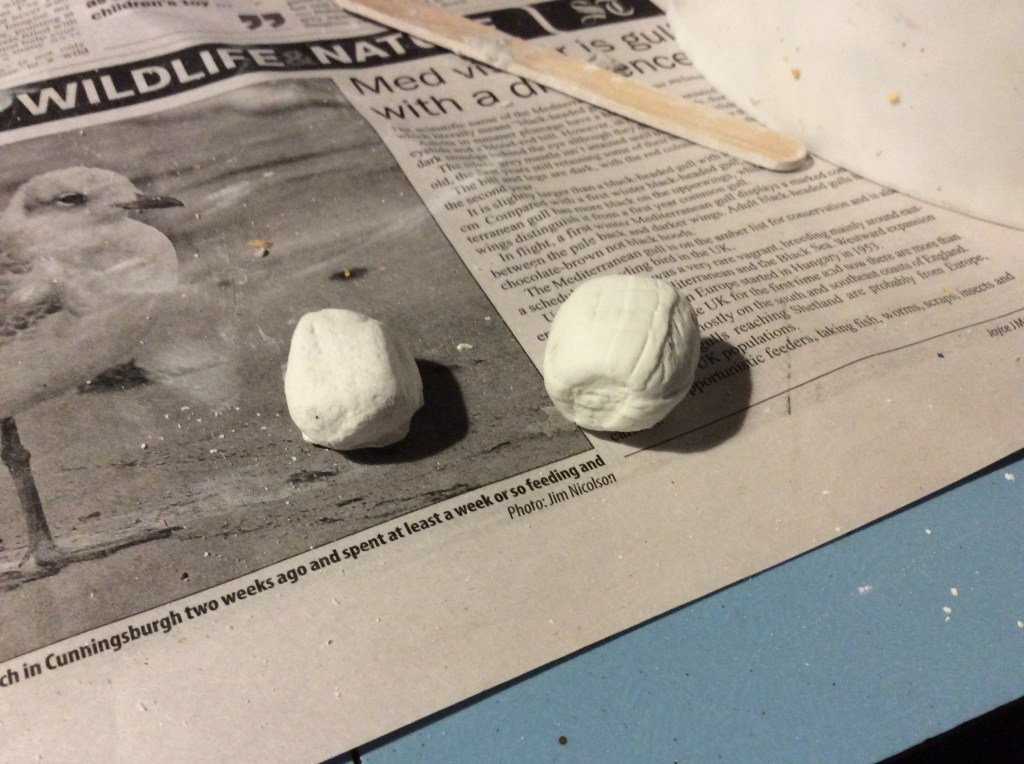
Talking of problems, I decided to scoff a couple of sweeties and shoved one onto my table while the other was in my gob. Bet you can’t guess what happened here with the plaster rock?
Tomorrow I hope to get some paint down onto the ground and then start work on the rocks… after that get some grass and things down… so here is a question for the diorama builders who have inspired me to have a go… do you put the miniatures on last or do you build them into the vegetation?
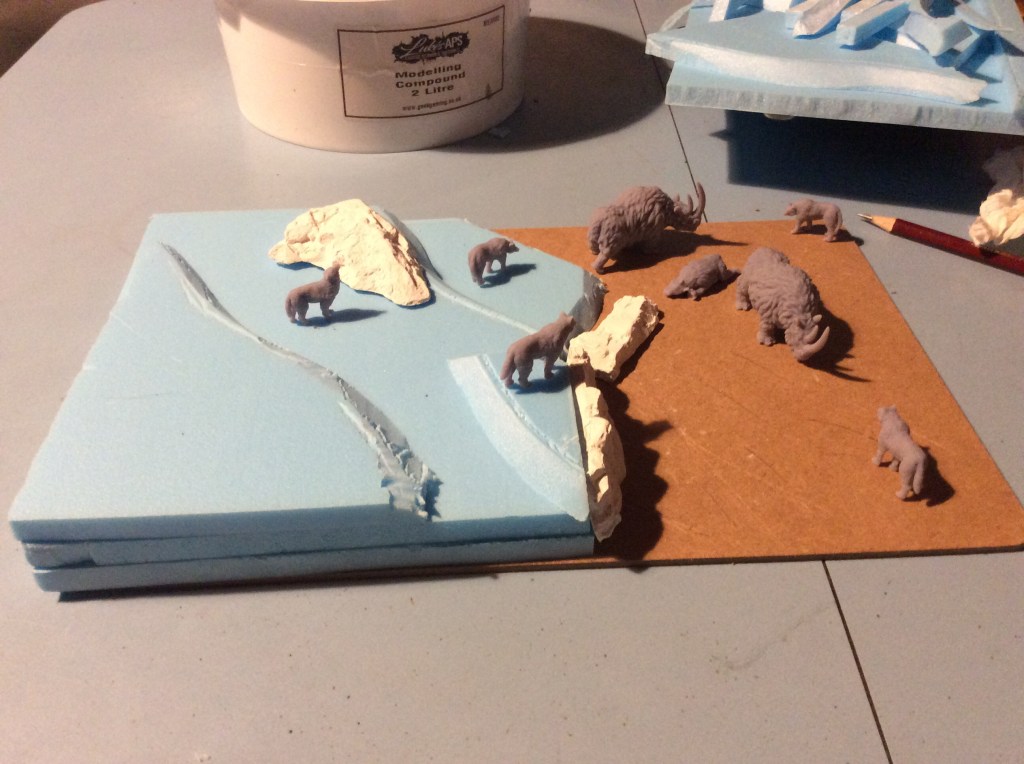
Tonight I mooched around looking for some bits and pieces to make the diorama in the end I settled on some 10mm blue foam and some Noch rock moulds.
I ran a couple of dry fits to see which would work best…
On the above one there was more high ground but I felt it cut down on the space for the rhino so I pushed the hill back a bit and came up with this one…
Now to be honest I preferred this one so I took the bull by the horns and cut it, sensible me would have made the cuts using my hot wire cutter, but silly me decided to do it with a knife!
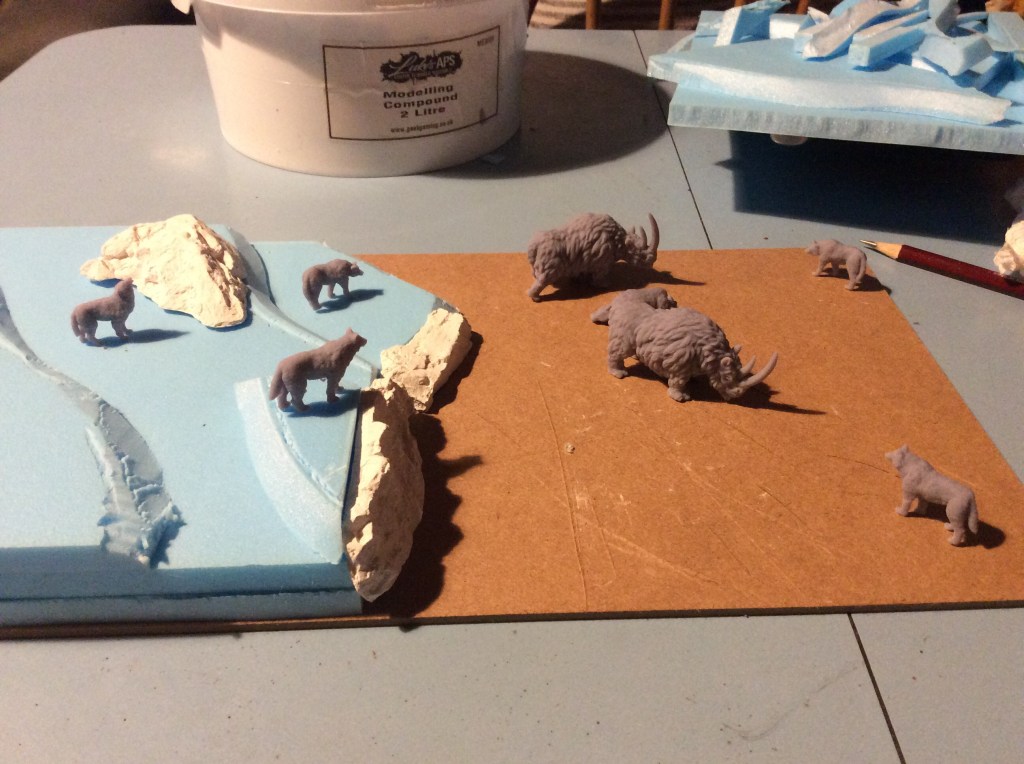
Anyway this is what it looks like from the other side…
I will build up the flat area a bit with the modelling compound and then build the hill up and blend in the rocks with it too. I will put an indentation into the lower part and make a small pond.
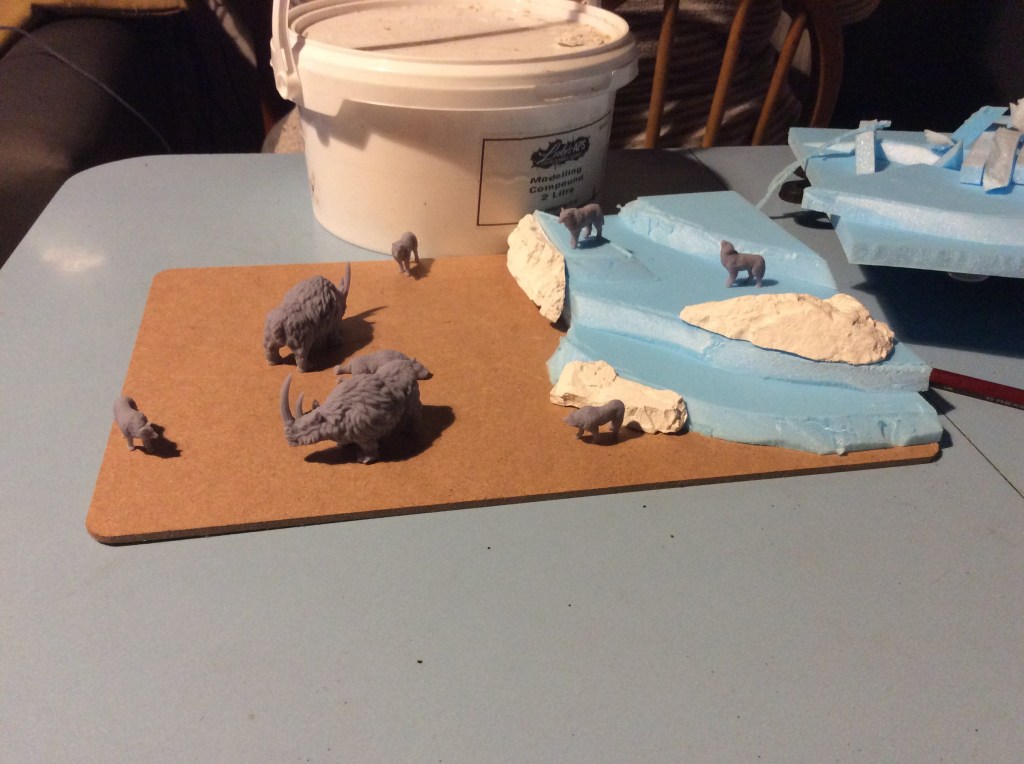
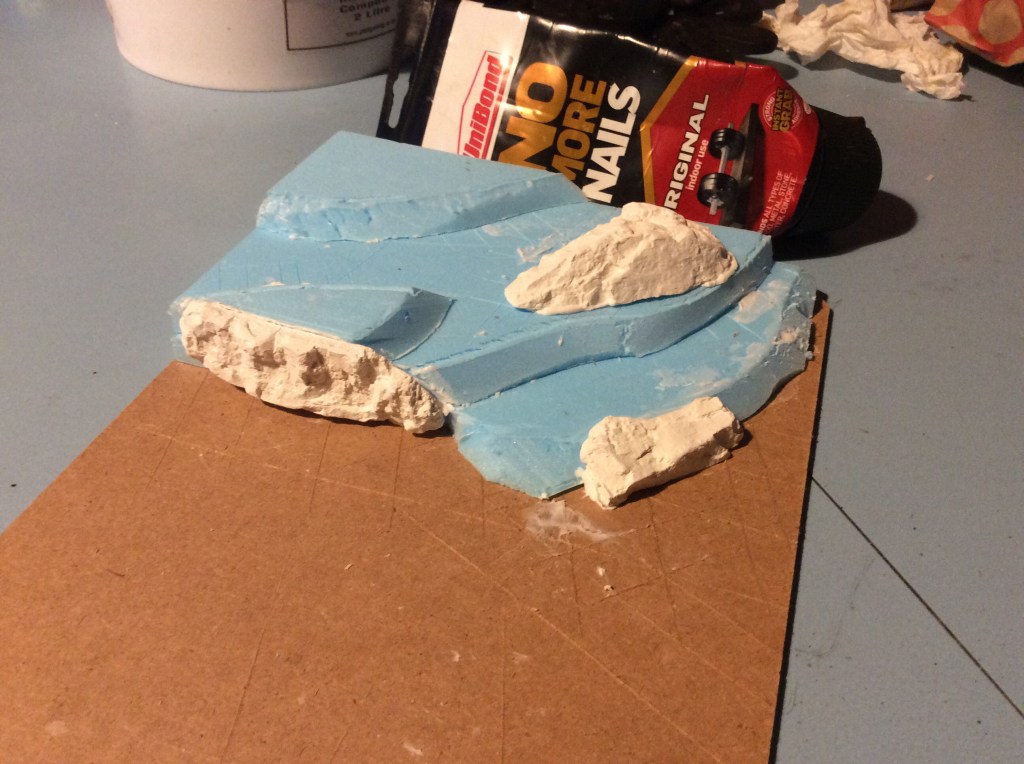
Next stage was to glue everything down and make it secure, which I did with no more nails, probably not the cheapest thing to grab but it was handy and needed using up…
I will see if I have any more rock bits to go along the bottom edge and if so get those glued down and then get the modelling compound on it.
I got called out of work early today as my son had a temperature and as we only had one car I had to leave. Luckily I had cover in as I was on my management day. Anyway I grabbed my thermometer and shot home to get him. Tested his temperature and it read at 35.4 now either it dropped in the hour it took me to get there or he didn’t have a temperature. Now to be fair his best mates Gran has developed Covid so I reckon they weren’t taking any chances and to be honest I would probably do the same if I was in their shoes. They had already had to close down one year group already.
He isn’t going in tomorrow temperature or not, we cannot take the risk of him being sent back home again when I am at work.