The Best Laid Plans…Do You Want To Know More?

Some famous Scottish blokey wrote thus…

The best laid schemes o’ mice an’ men
Gang aft a-gley,

So if you remember yesterday’s post, where I waxed lyrical about how I was going to (and I quote)…

“My plan therefore is to try and keep to one thing at a time. As I am not doing a One Ring for a while my Patreon models will keep as will my Neolithic hunter models (that haven’t been printed yet). So here goes. I will endeavour to get all of my samurai 6mm terrain painted and sorted ready for some games. I have a 6mm army so then I can use them in that.

After that get The Khmer army painted and based so that the Samurai have someone historical to fight. After this get the 15mm Samurai miniatures and terrain finished, then move back to get the 6mm Baccus army painted. This way I am not getting bogged down on one project, but I need stuff done. A few people have been doing a tray at a time. I really think that I am going to need to do that to keep me focused. Wish me luck!”

So how am I doing so far? Well have a guess!

Knackers here totally forgot that he was supplying the Arachnids for the Starship Troopers game tomorrow. So instead of painting fences or teeny tiny Samurai, I have been building giant bugs, what makes it worse is that I am building the things that will cause my character’s demise. How crap is that!

So far I have five warriors here, plus two more in the shed, these are the first two hopper bugs out of the six I have. I also have a Tanker and a Plasma bug and half a dose Firefries. We are going to die! For tomorrow these are going to have to be bare plastic, I will try and get them painted over the weekend. I still have another ten warriors to make in this box, I honestly doubt I will need the two boxes still in plastic.

Funnily enough I nearly sold these off a few months ago as I never thought that I would ever get around to using them.. silly me!

Today however I was shared some images of some Lego Bugs, , Troopers and a troop dropship… might just have a peek at them…no painting required! 😉

Walls, Huts and Printing

I pushed on a bit tonight and git some flock onto the base of the walls. I think it really brings out the colour of the wood… ye gods I sound like ‘Changing Rooms’ or some other interior design programme.

Of course I totally cocked up with the vegetation in the gateway. It should have three muddy bits and not two… probably shouldn’t have anything up the middle at all….I just noticed now! Poop! and generic expletives of that sort… oh well never mind I can scrape off the flock and repaint.

Thankfully I had success with the buildings off the printer.

They certainly have some supports going on there 🥴. I honestly don’t cabaret, they work and that is what matters. The pair of them (including supports) weighs just under nine grams. They look okay when you pull the supports off…

So Well Done to 3DAlienWorlds for making such lovely models.

If you remember, I had the spaghetti monster of doom the other day…

I started off printing them again and noticed a problem coming up so I stopped the print. Tonight I managed to rescue some of the roofs from the mess above and match them up with the building walls. I reckon that I can rebuild four of them. A bit of sanding and some superglue and voila, a set of useful buildings.

On a totally different note, I was perusing my piles of unpainted plastic and lead and thought I really must come up with a way of getting stuff done, as to be honest I seem to have the attention span of a stunned kitten. My plan therefore is to try and keep to one thing at a time. As I am not doing a One Ring for a while my Patreon models will keep as will my Neolithic hunter models (that haven’t been printed yet). So here goes. I will endeavour to get all of my samurai 6mm terrain painted and sorted ready for some games. I have a 6mm army so then I can use them in that. After that get The Khmer army painted and based so that the Samurai have someone historical to fight. After this get the 15mm Samurai miniatures and terrain finished, then move back to get the 6mm Baccus army painted. This way I am not getting bogged down on one project, but I need stuff done. A few people have been doing a tray at a time. I really think that I am going to need to do that to keep me focused. Wish me luck!

Painting the Walls

Tonight I managed to get a bit done on the walls and thatch of the village. Adding the brown to the base of the walls really makes the aged wood colour a bit more visible.

FE42D0E3-F191-4111-84D3-046EBB9A9362
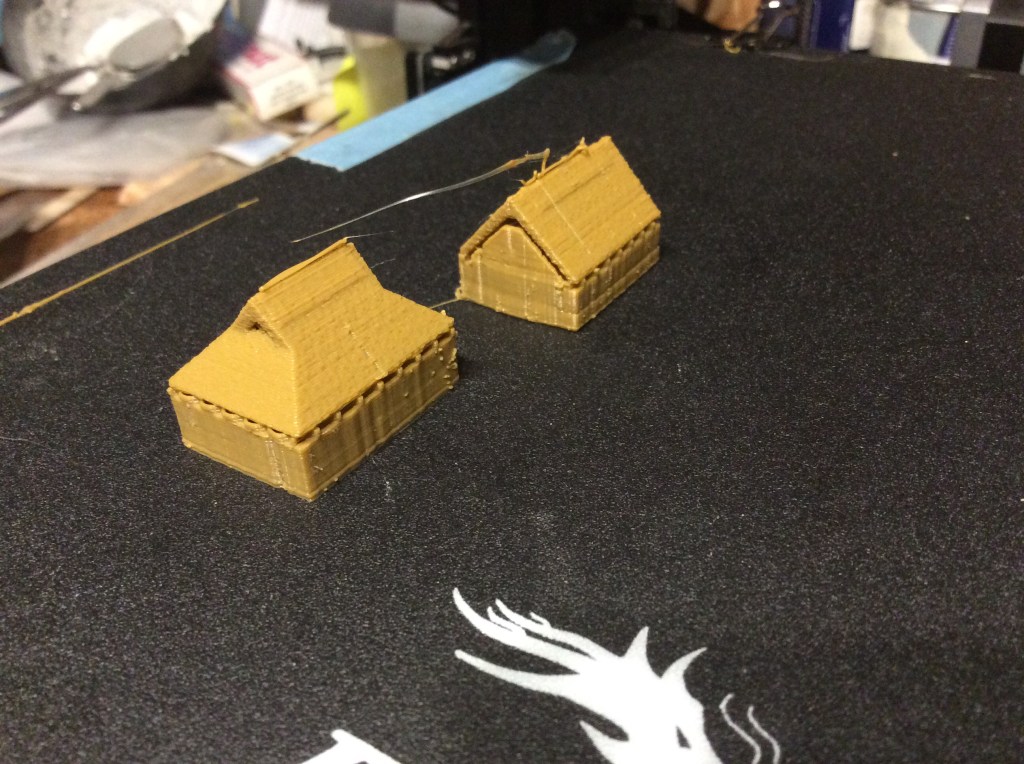
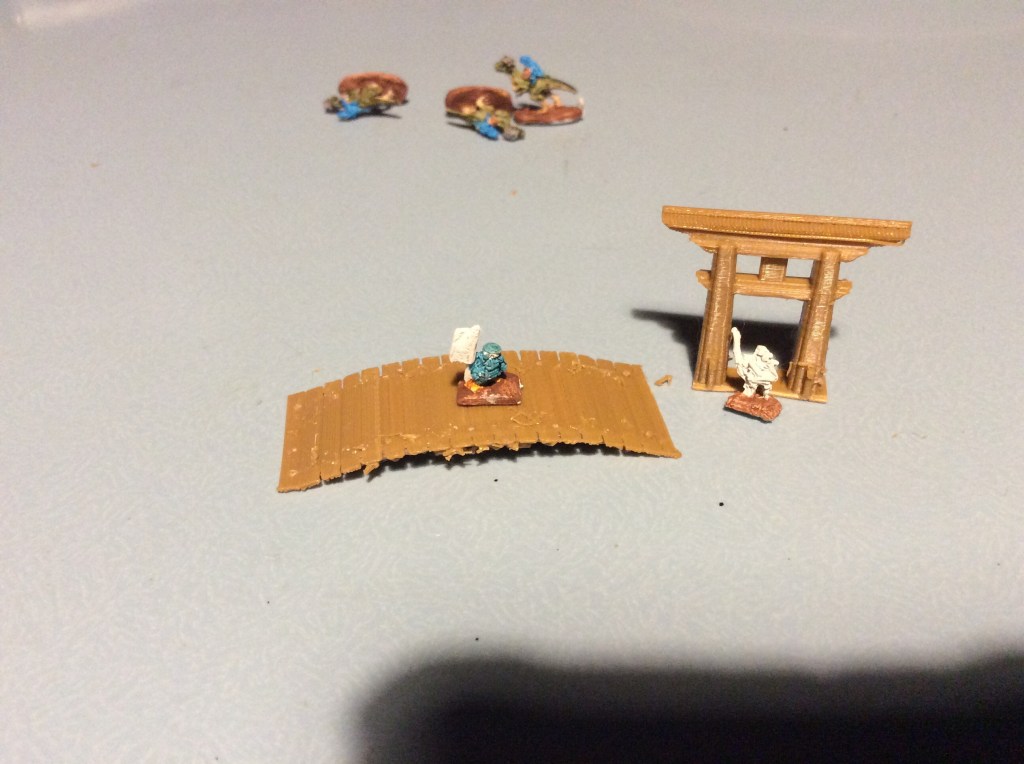
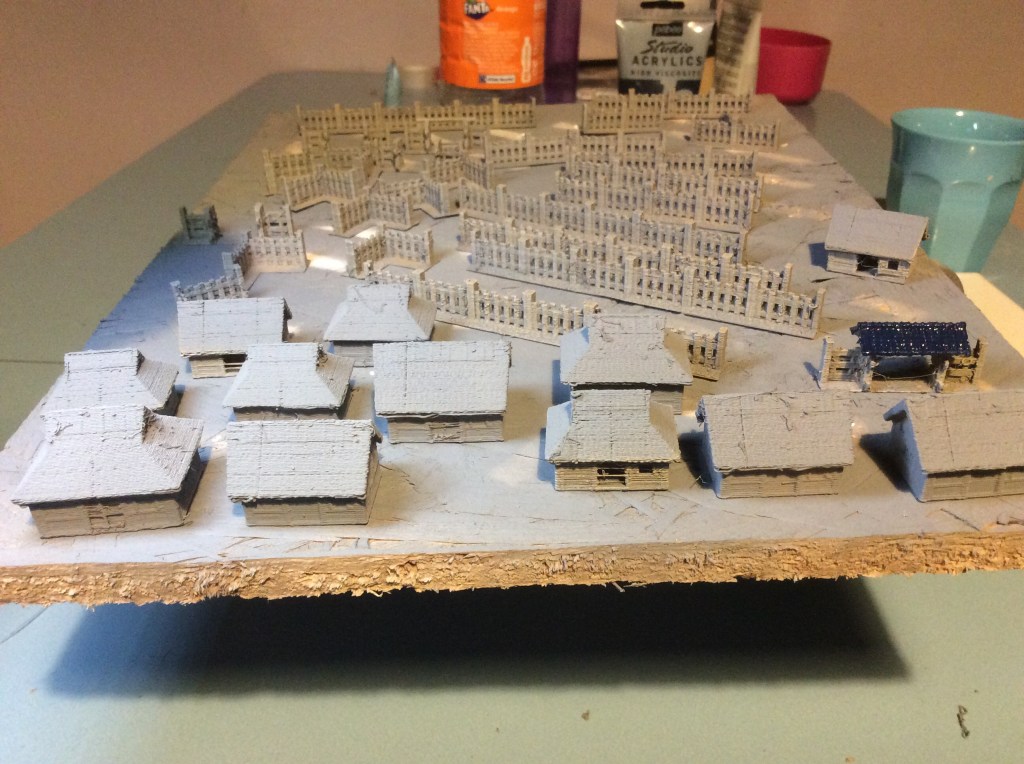
As you can see, the thatch was done just before the photo was taken. Still a whole lot of work to do on these, but I am definitely getting there.

I did swear earlier this evening, lots, in fact. I came home to this…

BF473E5C-889E-46BE-AC51-C5F01210B794
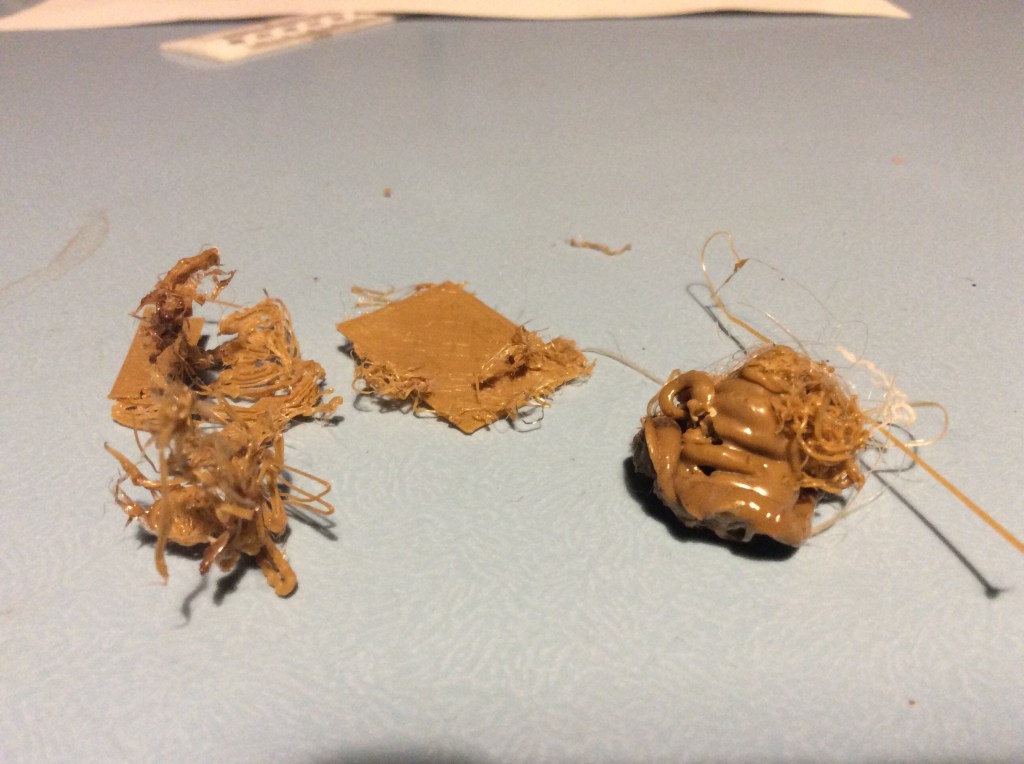
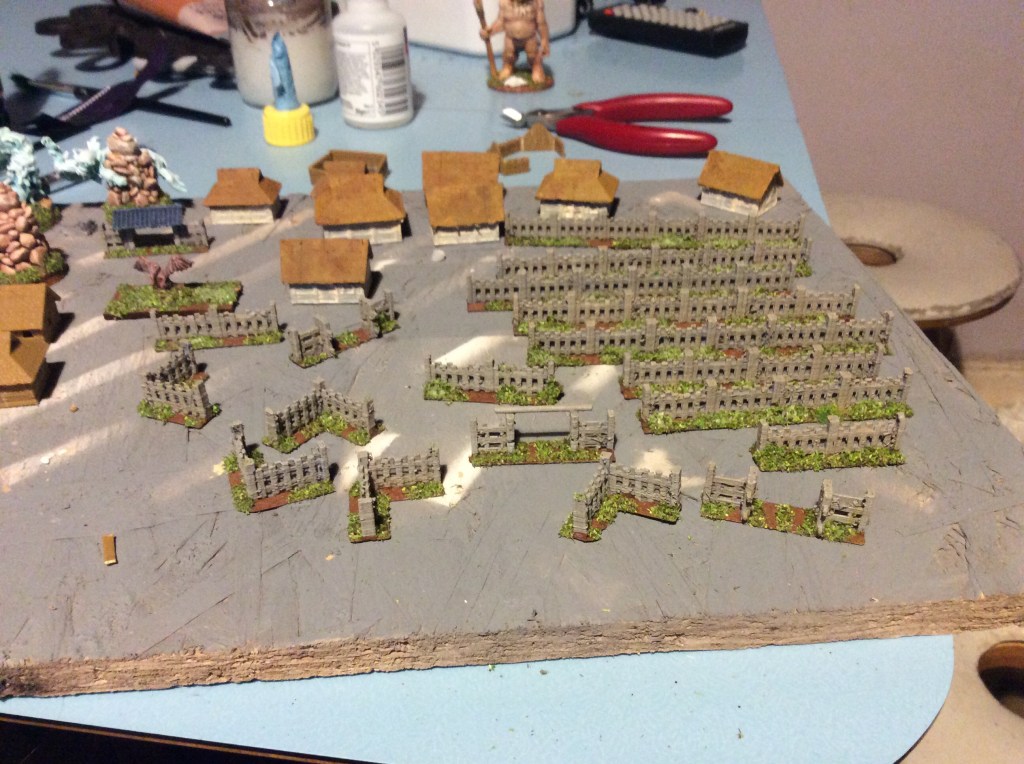
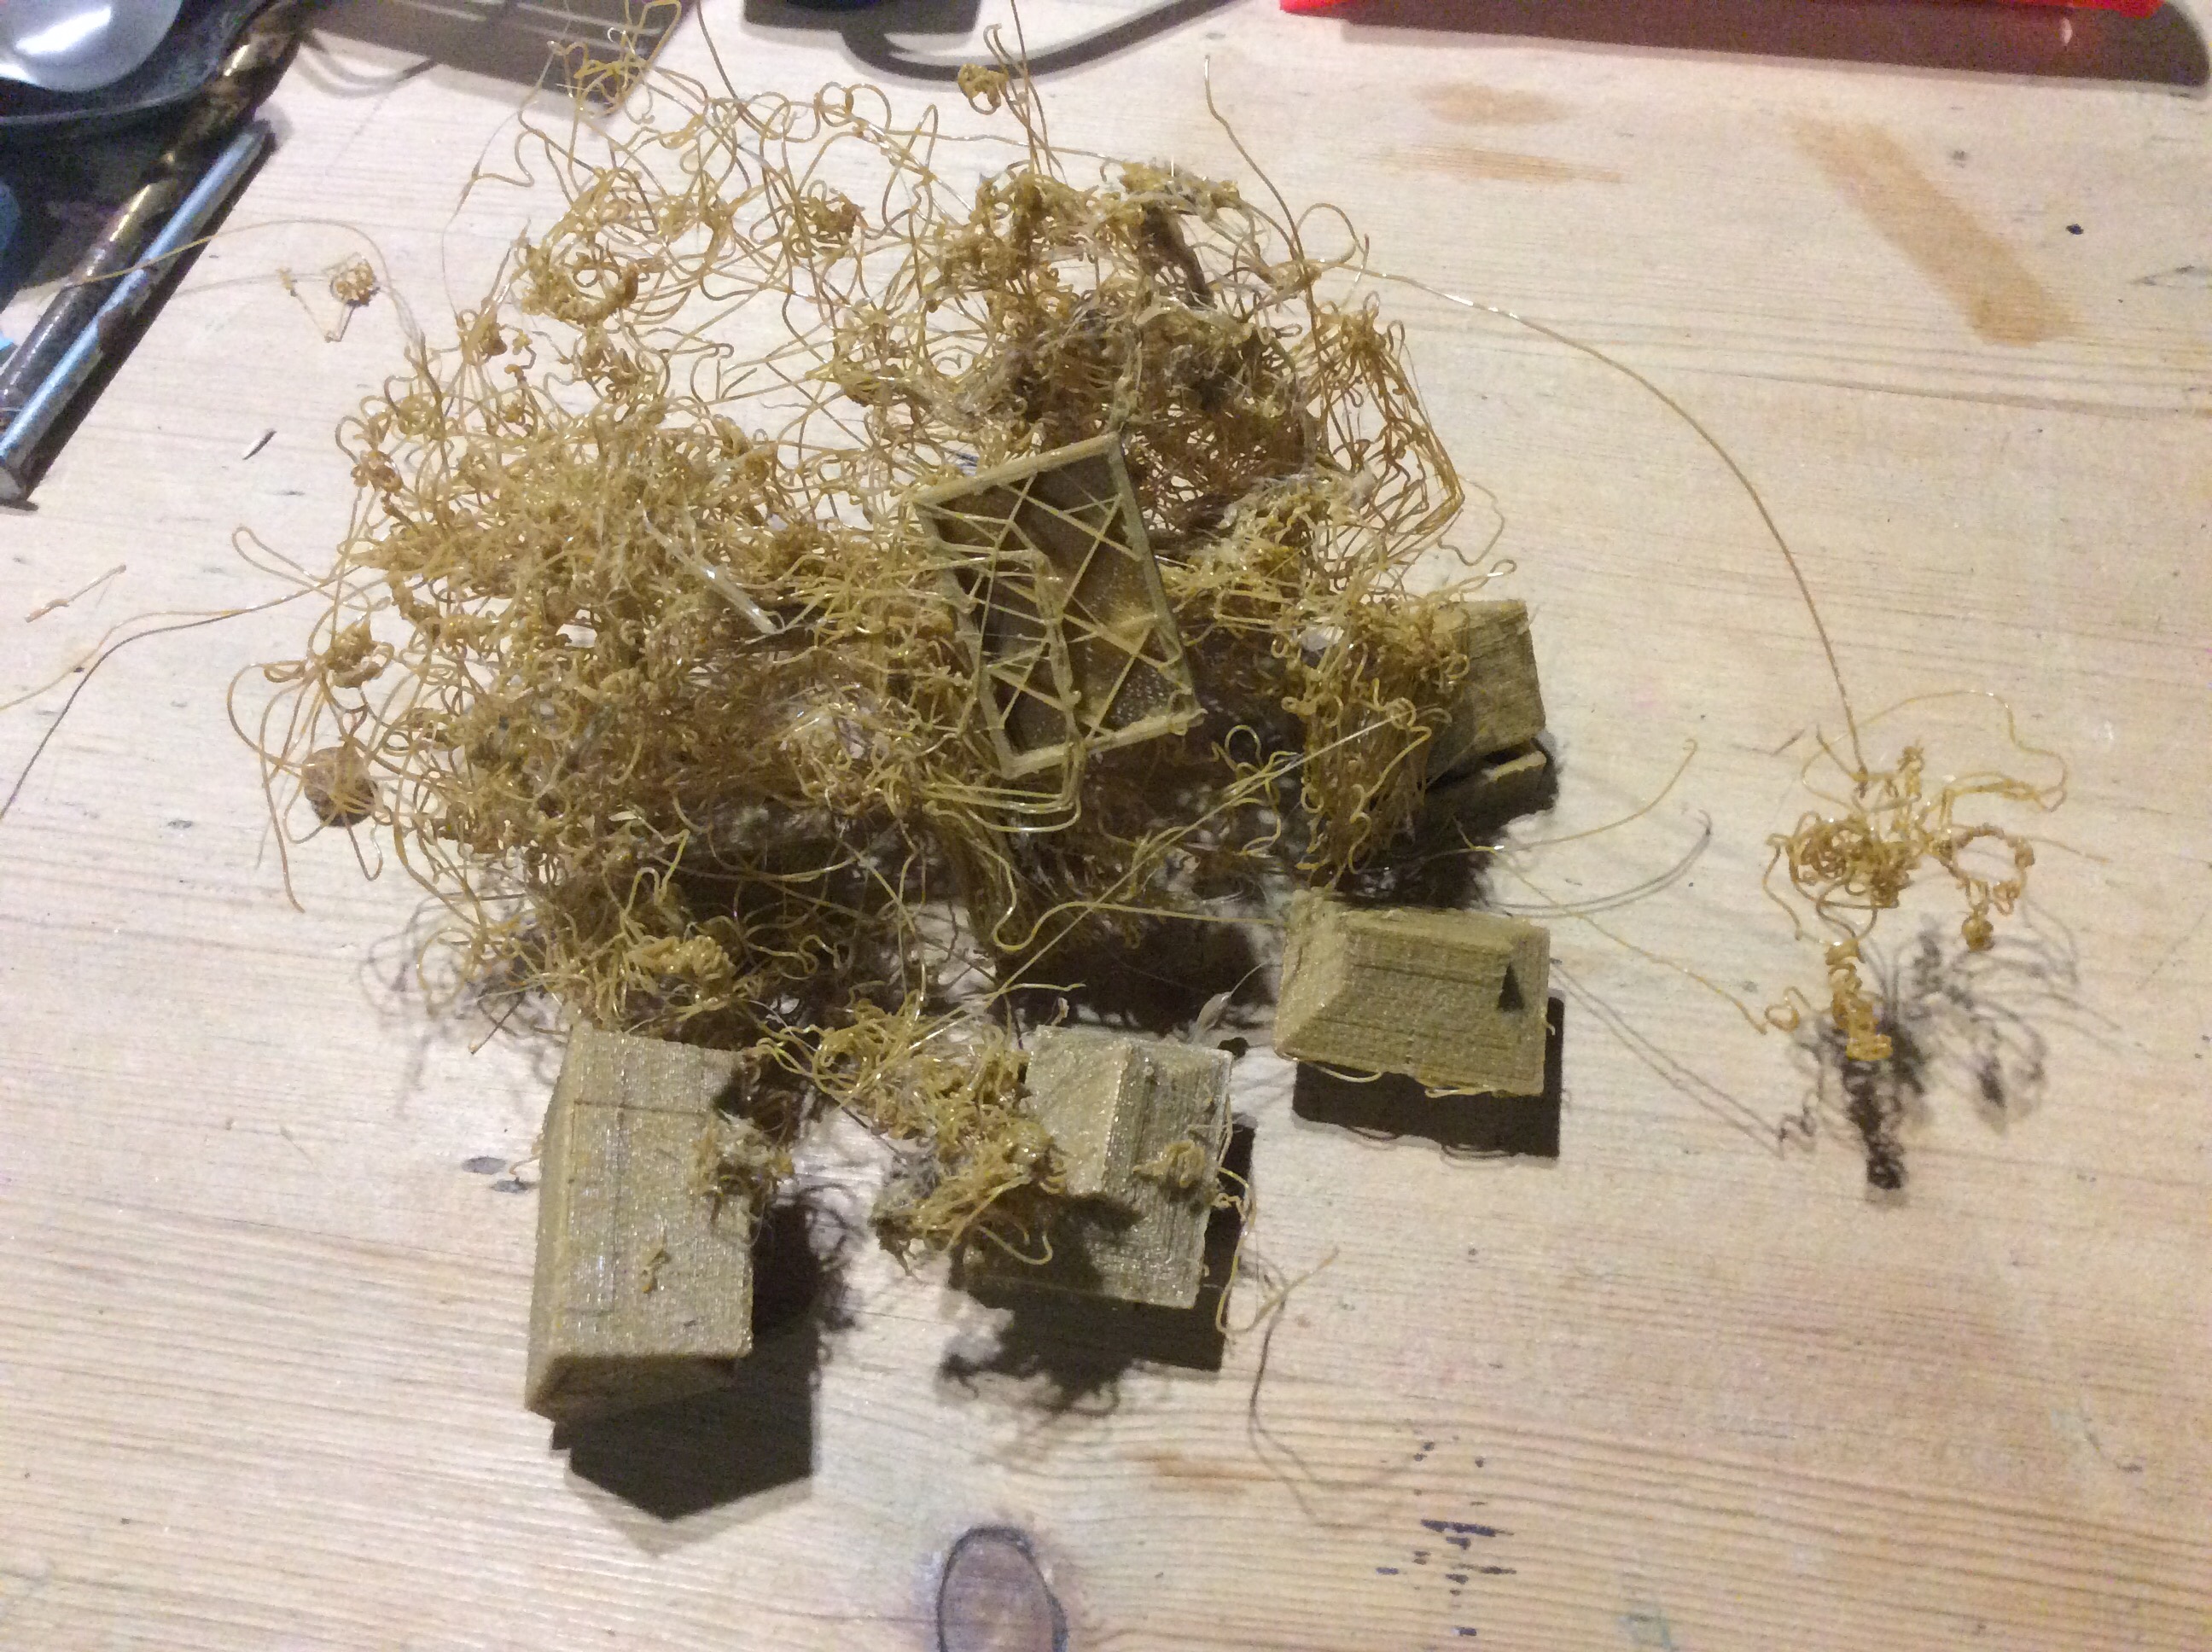
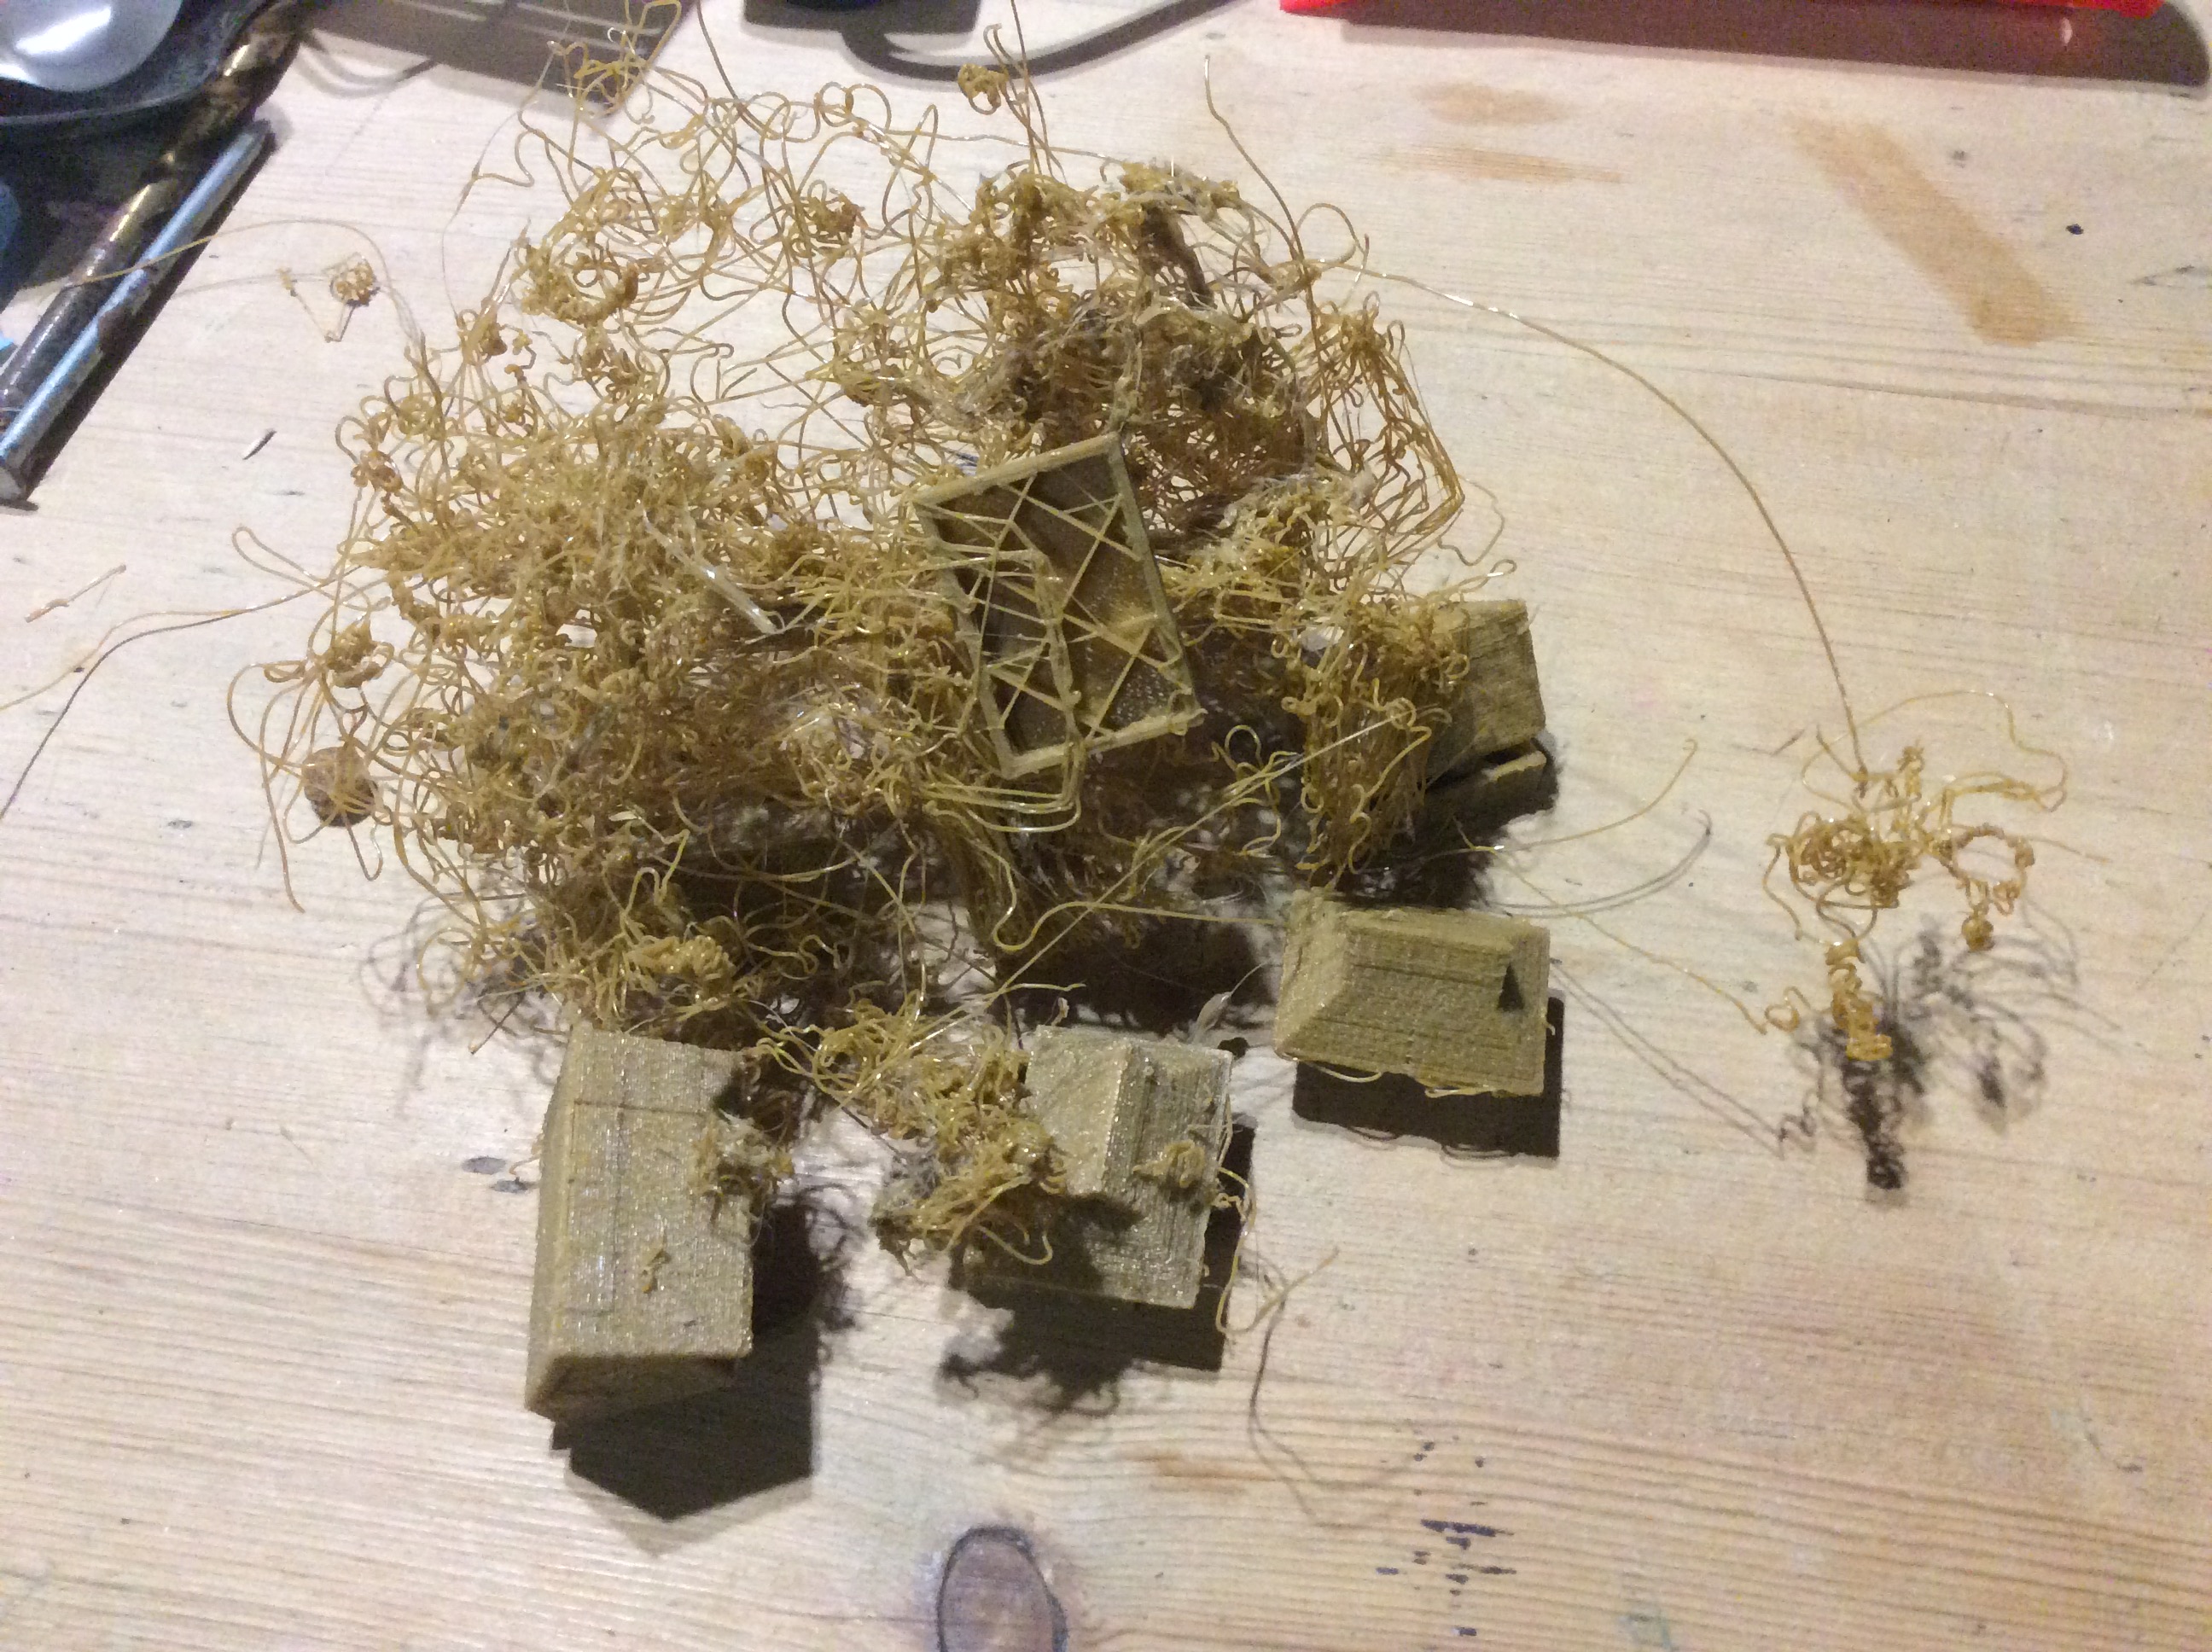
These buildings in the spaghetti are exactly the same as the ones above. There has been a massive layer shift on them as well as some not printing above a certain height. The only thing that I can think of is that one popped off and it caused a domino effect with the rest.

i therefore decided to print them in pairs (only to find part way through the print that I have one solid and one hollow on the plate). This time I have added supports in case it was the lack of support that caused the problem above.

It looks like shuttering around the building 🤣 It really does show how far out the roof sticks out…

FBDBD3D9-BBE8-4707-BC1D-512F6602D310

Torri and Bridge an Update

So after another bit of time, I rescued the two bits off the print bed…

Small wonder I couldn’t work out what was what. The tree supports went everywhere. Unfortunately removing said supports caused various bits to fall off the models. In the end the bridge ended up without it’s handrails as did the Torri gate…

I don’t think that they are too bad a size. I will try again tomorrow after I have taken the village off the build plate. (Yes I am printing more 6mm houses 😂).

The Castle Survived

So, thankfully after just under 27 hours the castle made it through.

There was a lump of spaghetti sitting on the build plate and to be honest I haven’t got a clue where it came from. I needed a visit to the loo at 03.00 and it was sitting there then, so it happened between then and 01.00. It looks like the Ender struggled with the tiles on each level as there are a couple of strands of filament hanging down at each level. The same thing happened to the other one (not to mention the spaghetti monster on that one too (in exactly the same place). With this in mind then I reckon something weird is going on with the STL.

Although I tried my best efforts to keep the thing in situ, it did actually move about a millimetre out…

It can just be seen above right on the stick and white tack. I reckon a bit of filler or Greenstuff and it will be invisible. Not bad really considering that whole top corner had come adrift and it was guesswork where it went. The other bit with a wobble is the top end gate which has moved in about a mil or two.

After this came off the build plate I decided to do a Torri and bridge. Evidently the printer decided that I wanted the surrealist version!

I had to replace the build plate top so that there was some adhesion, but I am now getting to the stage where I am thinking about getting a flexible steel sheet or a glass one as these replaceable ones are really beginning to annoy me.

I am printing a new bridge and Torri and they seem to be holding onto the build plate, but I really should have relevelled the bed, I am afraid I forgot. They look a right mess at the minute as I added tree supports and I don’t know what is support or model at the minute.

Got an hour before they come off, so fingers crossed.

Disaster Averted, I hope!

I was printing a second castle for someone online and it went in to check on it at the 8 hour mark and arrived just as one piece parted company from the build plate.

Lots of swearing ensued, but I think I managed to get it sorted with round ice lolly sticks, print stick and white tack.

Unfortunately the place I put isn’t exactly in the right place, but I reckon that I can redo the corner and print just that bit.

Basically what happened is that the corner under the print head is a separate entity until the curved gate top joins it to the other two sides. You can see in the photo below.

In hindsight, I should have added a base to the doorway then it would have joined everything together. Still got about 18 hours to go so fingers crossed that it will all still be working well tomorrow morning. 🤞

This is getting a bit stressful as I am printing it for someone else.

We went gaming again tonight, making characters for Starship Troopers. I have got a break from being a GM for a while. I am looking forward to playing instead of having to think of the game.

Whilst emptying a gaming bag I came across this little chap, looking worse for wear, to be honest. This is my forerunner of Contrast Paints. I painted him in washes and inks round about 2007/08.

Painting the Village

I leapt out of bed this morning and galloped into the shed to find some nicely (well okay they could be better) farm buildings suitable for my 6mm Japanese Games. The block in the middle had certainly worked and they now pretty much had doors.

I decided to get the fences painted this evening and managed to get a fair old way through on them. There may actually be more paint on me than on them though.

You will have to believe me but the fences are a grey/brown colour that looks pretty nice for aged wood. The solid farm house are still pretty much in their undercoat, but the hollow ones have had a bit of a paint, not that you can really tell.

As expected, as soon as I walked into the nursery today, my little chef legged it to the cooker to make my cake, as he had forgotten to give me it yesterday…

Finally, this made me laugh far too much…

Hopefully I will get some more done on the fences tomorrow. I also pick up the new(ish) car tomorrow. Both of my cheap run abouts have died, which is a right pain as they are not worth it to get repaired. But tomorrow I pick up a RAV4… I can honestly say that this is the first car I have ever driven and actually thought Wow, I like driving this.

Old Photos

So this evening I eventually got around to looking at a couple of photo disks that I found from 2003. Here are a pile from our training sessions in Maidenhead. we travelled down from Newcastle to there once a month. I would leave school at 16.30 pick up my wife (of Fiancee back then) and head on down the road. we used to get there at around 21.00… this was when Janet fed her horses so we would pile out of the car and help. This paid off long term as Janet would actually let Esther and I choose our mounts for either the training or for events

The last photo is of me in Poland, lounging without my sabre. Funnily enough the sabres were original Klingenthal. I always thought that they were replica, evidently not (or so I was told)… that is my original Universal pattern saddle from around the 1930’s too.

Talking of originals, when we were in Warsaw, one of our guys from the second squadron asked us to meet him at the museum at 11.30. We thought he wanted a coffee. instead he had raided the stores  and brought a pile of original uniforms  for us to look at…

I just had to add my very first Selfie into this.

I am going to have  a mooch through some more to see what else I can find to bore you all with.

Right Bed time, I am back working in nursery tomorrow and my important job is to eat the dry Pasta cake one of them made me and then put the bird feeders on the window! Ahhh the joys of being a principal of a small school.

6mm Village Houses

Yesterday I had a bash at printing some 6mm , they were okay, but needed a bit of work on them. This evening I did that work. I basically took them apart electronically and inserted a cuboid inside so that.. a) they weren’t hollow and b) the doors had something to rest against.

This actually took a lot longer than I expected but I got there in the end.

I decided to print half a dozen or so (I forgot to count). These are going to take 8 hours to do. You can really tell the difference between the the hollow ones and the solid ones. Hollow were 1.29 for two and these aren’t much more…

Okay not the most exciting photo, but it does nicely show the 10% infil…😂

Honey I Shrunk the Village

Eventually, after a lot of procrastinating, I managed to build my rural houses in 3D builder and shrink them down to an appropriate size for 6mm.

They were super tricky to build on the computer, but I managed. A huge well done to 3DAlienWorlds as the files were so good that it allowed me to do it. I did have to set about the fences with a mini blow torch to get rid of a lot of the stringing, but Success!

Ready for an undercoat.

These were printed at 0.2 layer height so basically draft quality, I am doing another pair right now, but being me I forgot to change the layer height.

Now the extremely weird thing is that I added doors and window shutters… as you can see, they disappeared! The only thing I can think of is that I forgot to merge them into the walls, therefore when I moved the buildings about the build plate the doors remained off the plate. This would explain why they were showing the size as being 4500%. Somewhere there is a door lurking 😂.

I haven’t managed painting tonight as I spent ages faffing on with building the houses electronically. I reckoned that trying to stick all the bits together with superglue at this size was just asking for trouble.

My plan is to do a few more of these as well as some with wooden roofs. I will also try the rice store and the well.

I really am having to fight the urge to purchase the castle walls, towers and gate house from 3DAlienWorlds. They are pretty awesome and would be used for skirmish gaming in 15mm. I know I am going to get them, but as I have spent a fair bit on toys recently, then I had better be a good boy and hold off for a while.

As we finished the adventure in the One Ring yesterday, we are going to do some Starship Troopers next. I think I will be building some bugs pretty soon. On Saturday we are going to be making characters and then onto playing next week.