Reins and 3D Printing

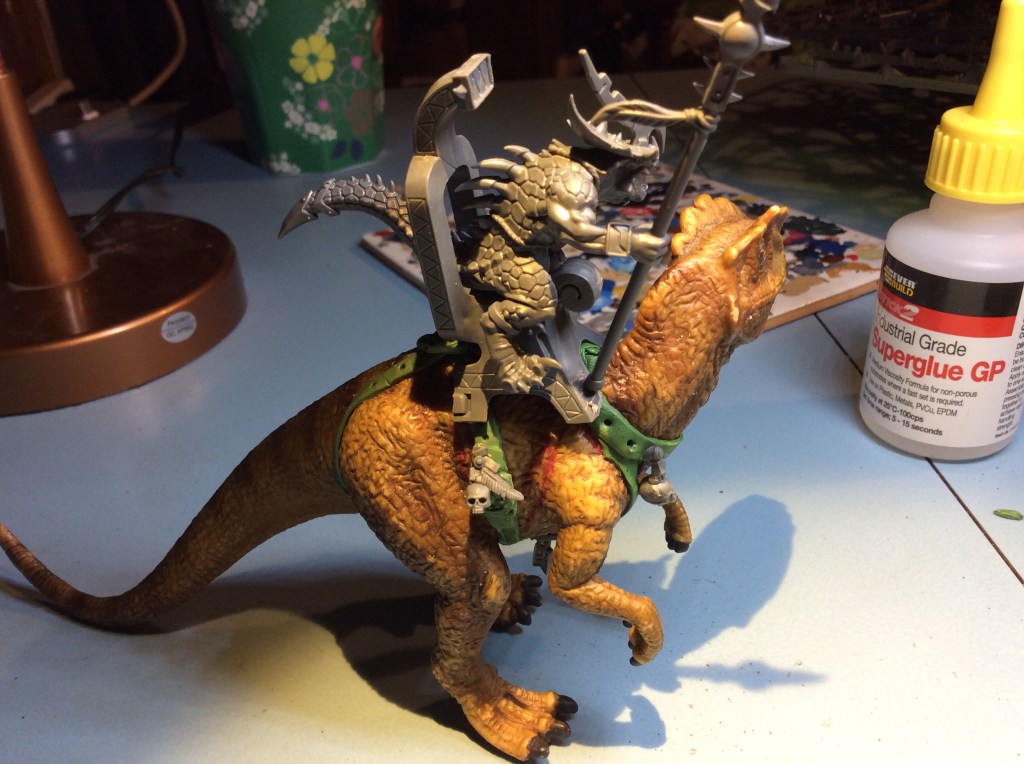
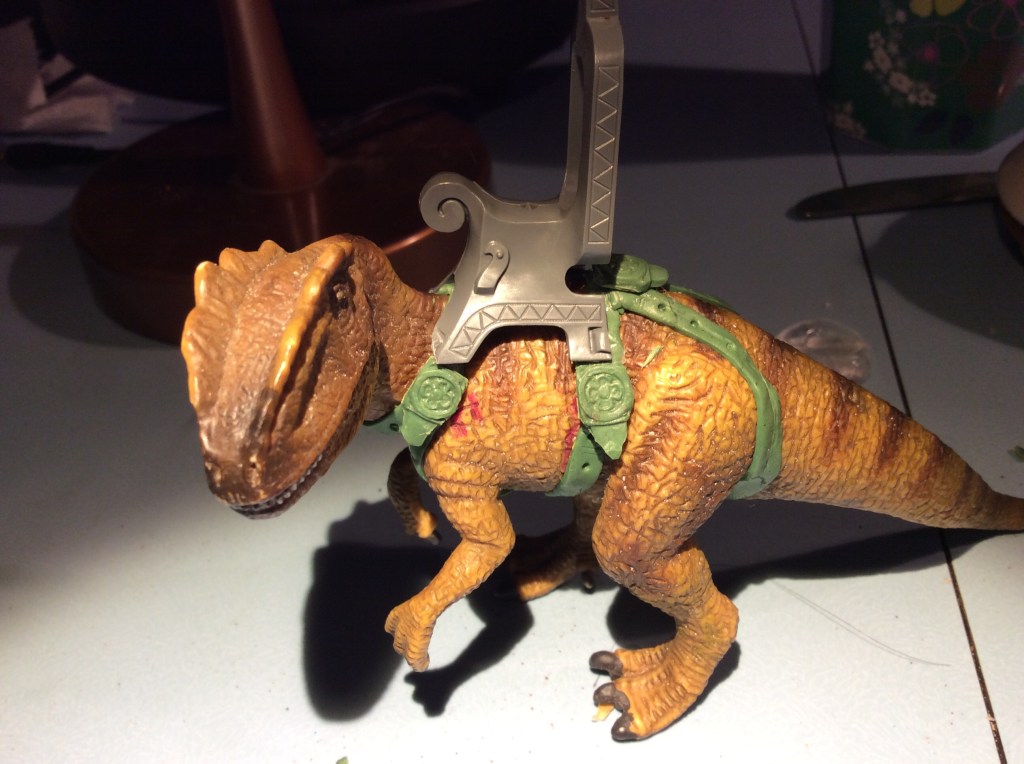
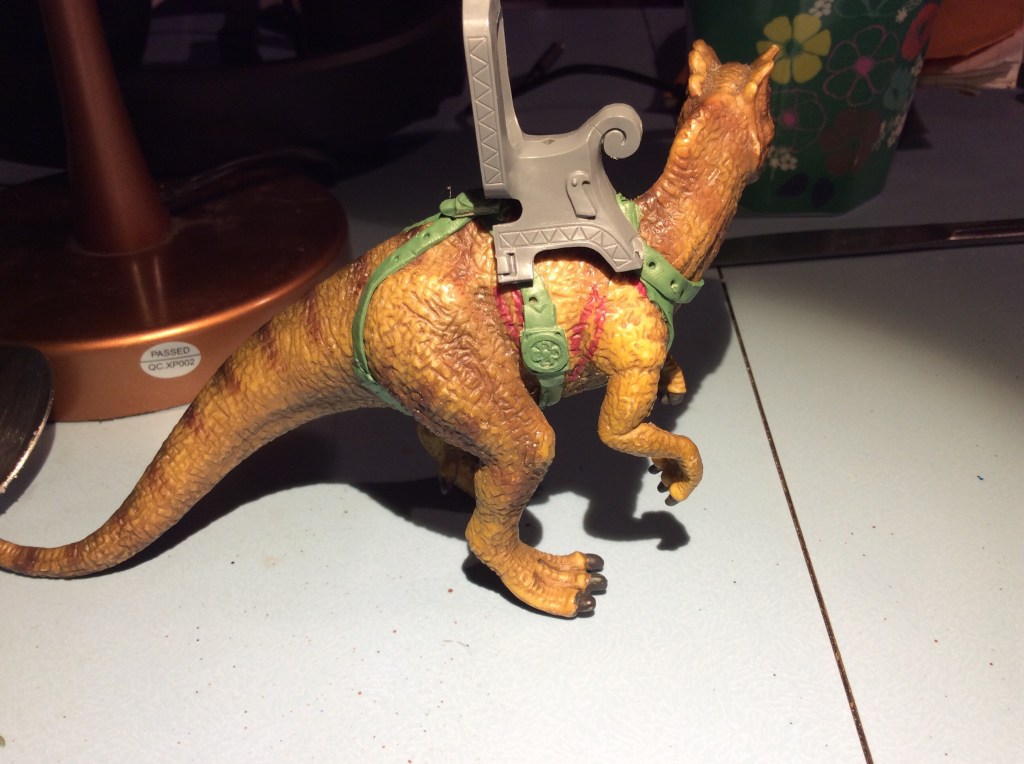
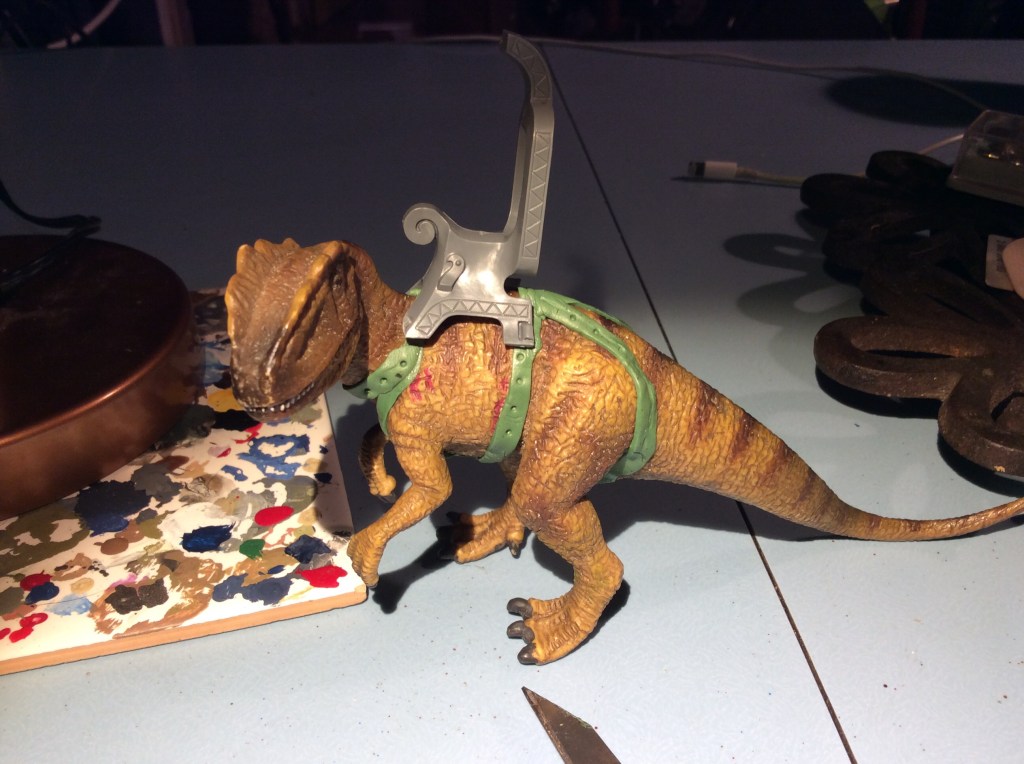
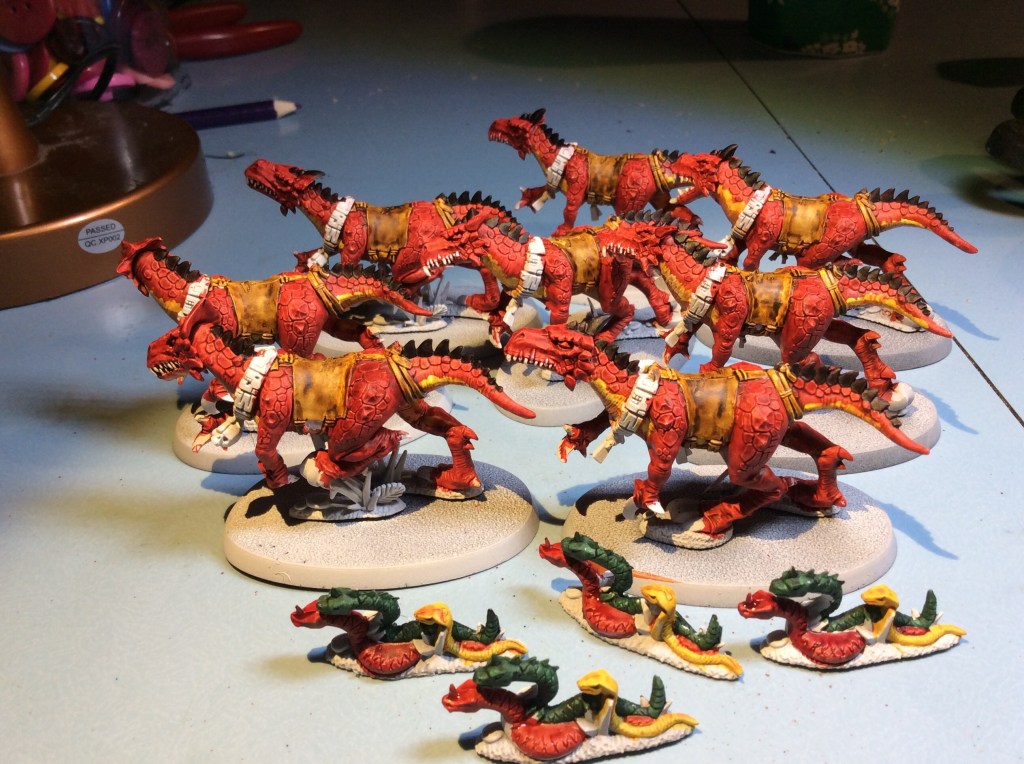
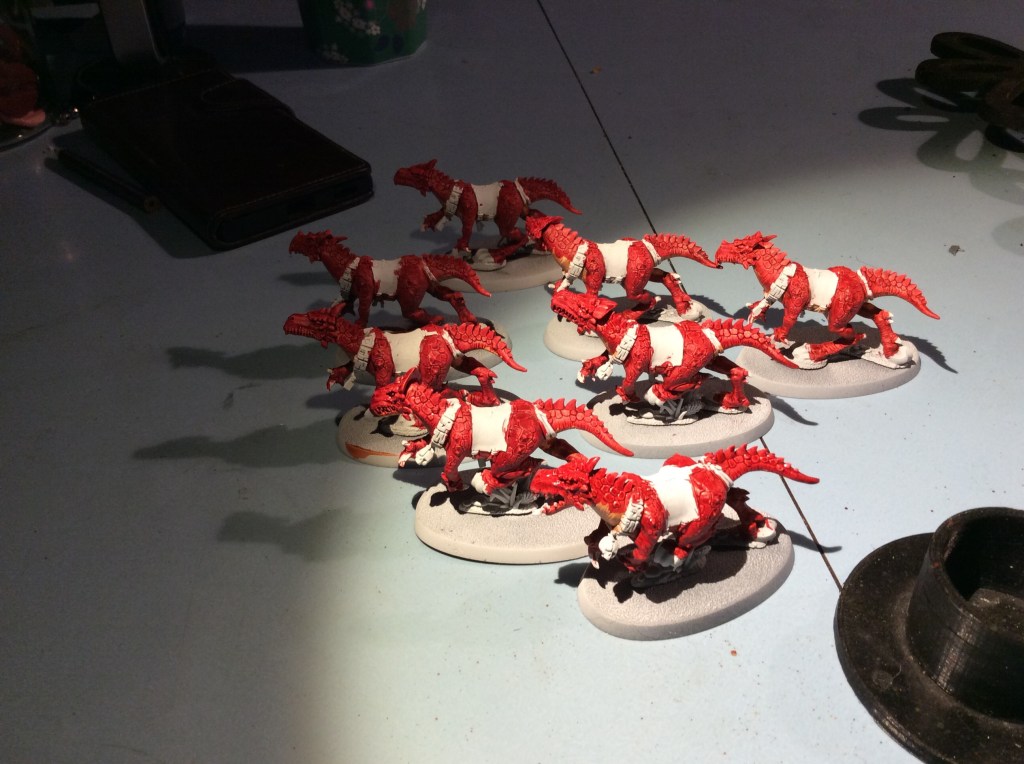
I did a quick addition of reins to the dinosaur.

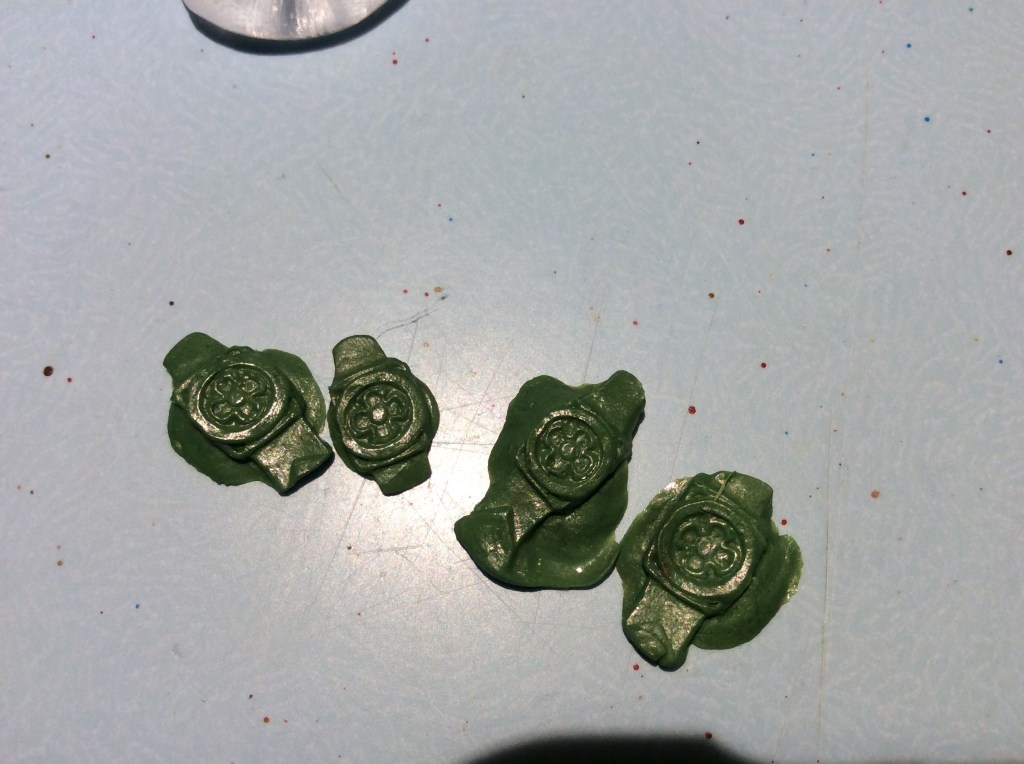
What I need to next is to add some Greenstuff onto the saddle to look like the two bits are joined together. My original idea was to keep the saddle and dinosaur separate and spray them in two pieces to aid painting. The problem with this is that the reins will not join. If, however, I glue the saddle down then I can build up the Greenstuff and blend in the reins.

I also fired up the printer and did a test print or two…

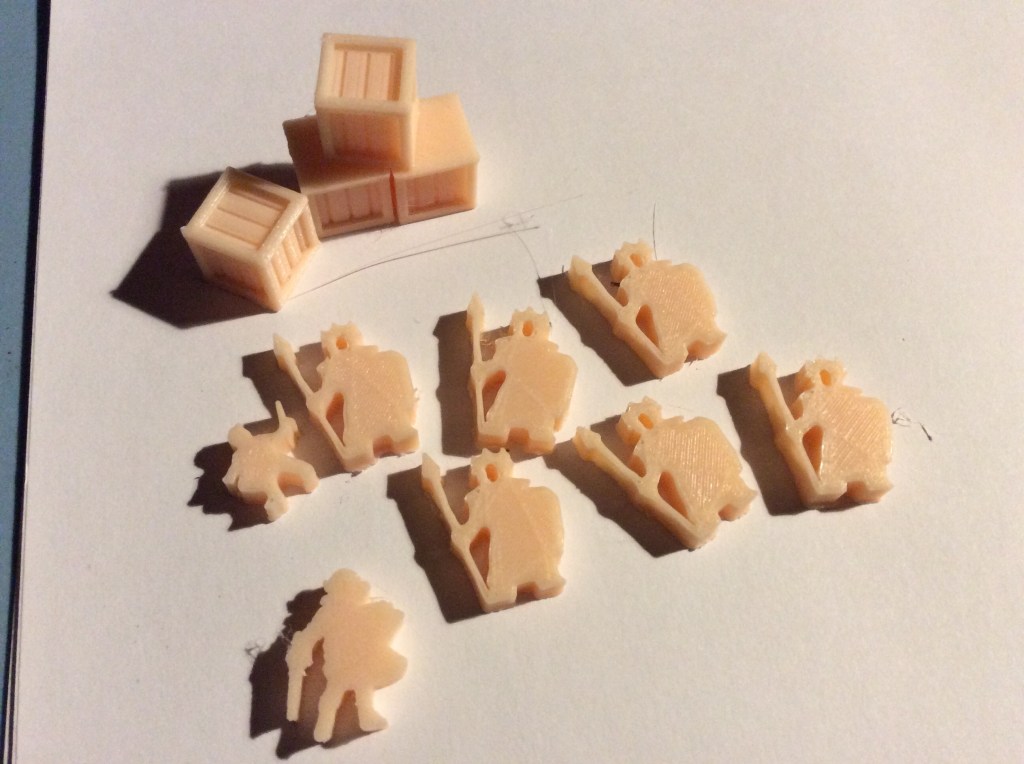
This was to ensure things were working before I started on this guy…

Complete with tree support

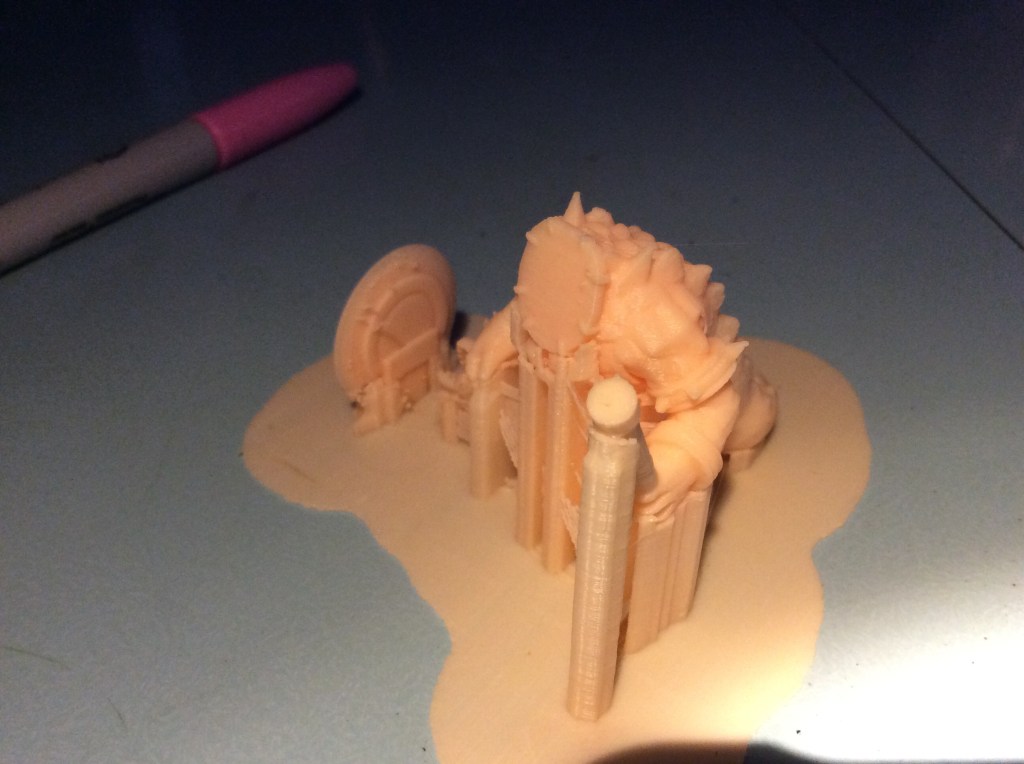
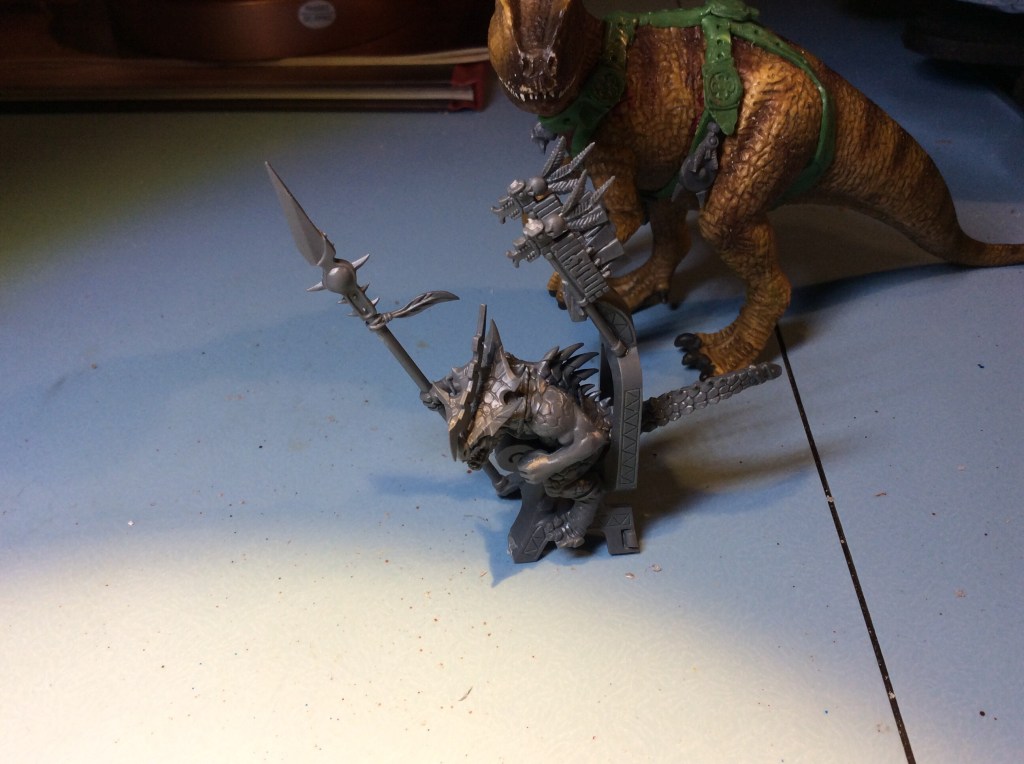
There was an awful lot of support on this miniature. I decided to give tree support a go. He looks like this when he is freed…

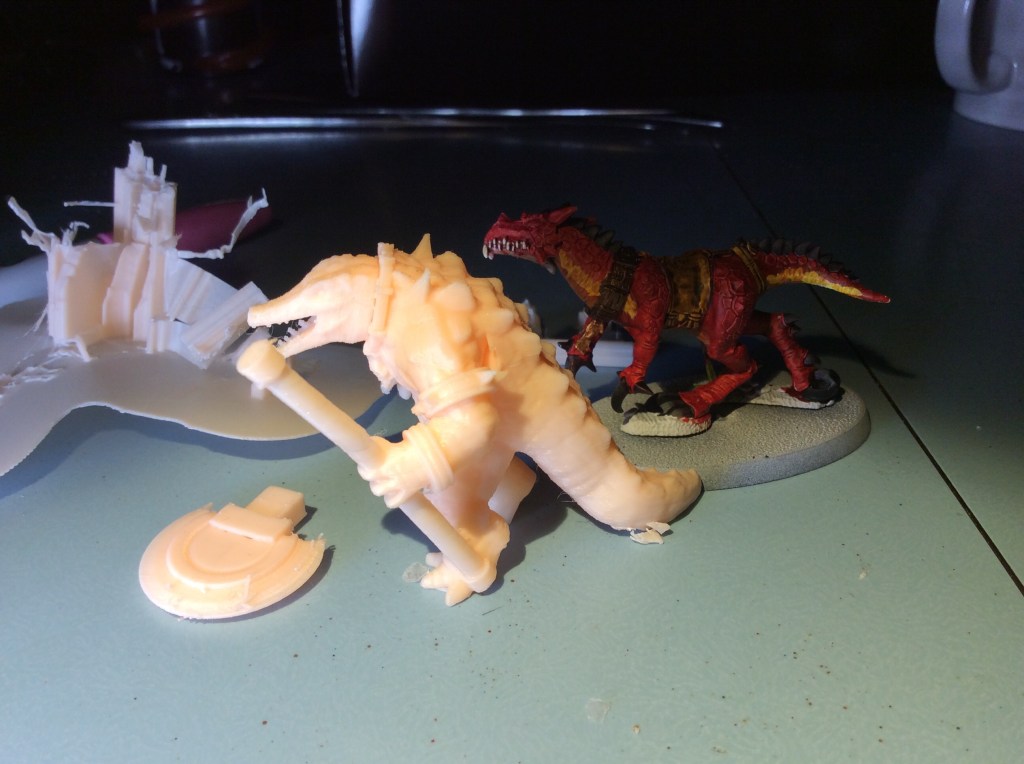
This chappy took 2 hours and 50 minutes to print. You can really see the amount of support in the background, along with a cold one to show scale. This is the first of my Kroxigor that I can print. Unfortunately when I was taking the supports off I managed to semi snap the weapon haft. I might get the Greenstuff out tomorrow and strengthen the break by adding some cord (or something similar). The thing on the floor sits on top to make a rather large and scary hitting thing.

I will see how this paints up before I print any more off – but knowing how I tick I will no doubt forget this and print all six off before it dawns on me that I did indeed have a plan!

Let me know your thoughts on whether or not to glue the saddle on before spraying everything white.

Saurus Cavalry

Tonight I spent a bit of time getting the remaining five Saurus riders glued together.

I would have got some of the other ones done if it hadn’t been for these being terrible to go together… well it wasn’t that they were tricky, it was that they pinged across the table and onto the floor. They dry fitted together perfectly and when the glue was added they wouldn’t go together at all!

Next problem was balancing the riders on the mounts. I would just get them all on then one would fall off and knock the rest off too.

I managed a quick thirty second job by adding the two banners onto the hero seat.

We are off to Archery tomorrow morning and I have a cack load of work to do for school in the afternoon. Hopefully I will get some time to do something tomorrow evening.

I

Lizard and Rider

Got in really late tonight so motivation level was down, but after supper I stuck the dangly bits on the harness and as I got a second wind I decided to build the rider for the saddle made days ago. I was a bit worried that he might look too large, but in all honesty I think he looks okay

I had the choice of a Scar Veteran or an Oldblood. I decided to go for a The Veteran as I fancied it. As I have no rules or anything else useful apart from what is in the manual I went for what looked good…I decided to give him a spear as he is on a big bloody lizard and a little sword wouldn’t reach anyone on the ground (the Hussars found this out in the Sudan, when the dervish laid down during a charge).

So here is the Scar Veteran on his mount.
The other side, complete with more dangly bits!

The saddle in the instructions has a whole host of horns jutting out from behind, but I am going for a more streamlined look, plus he won’t look as big. In the set there are a couple of smaller back banners that I might add to the back of the saddle just to add a bit more colour.

Hopefully I will be able to get this pair sprayed this weekend, along with the cold one riders.

Looking at the pictures, I do wonder how he gets up there. It was bD enough fir me getting on a 17 hand horse! This thing is way bigger…🤔

An Update

Well as we were chatting In the house a little while ago, I decided to get some Greenstuff added to the dinosaur.

I also added the other half of the banner. In typical annoyingly GW style it is way over sized. If it is gold like most of them seem to be it would way more than the lizard carrying it. Mine shall be papier-mâché with a silk tail.

Lizards and Moulded Greenstuff

I have technically had, what is best described as one of those days so my urge to do anything was minimal.

I did however decide to add the moulded bits onto the strap work on the dinosaur.

Not exactly the most elegant of things bout it will do for now. I put two on the flank as seen in the photo. One on the back just to the back of the seat and the final one on the opposite side.

This last one will need a bit of work to make it look like the strap is connected and not just superglued on.

Tomorrow I will do something with the strap and then add all of the bits and dangly pieces to him.

Lizards and More Greenstuff

Tonight I decided to try adding some buckles or something similar to the straps on the Dino. Let’s just say my sculpting wasn’t that brilliant, so I decided to do a little simple moulding using this stuff…

So I dunked it in boiling water for a few minutes and then squished it onto the thing I wanted to mould. You can just about see it in the following photo!

So I got a little mould and shoved GS into it…. problem is…. I couldn’t get it back out again without buggering it up. So the solution was easy….

Throw it back in the boiling water again and then make four mini moulds. We shall see how they come out tomorrow. I have used Milliput in the moulding material before, but unfortunately it leaves a residue that soon ruins it. So this time I am sticking to the Greenstuff.

I have found a whole host of bits and pieces in the box of Lizardmen that will get added to the Dino before painting. I might actually use one of them as the mould to add to the straps.. we shall see tomorrow how they look.

I also managed to build a couple more riders, this time the drummer and the standard bearer (or Fantasy equivalent).

Instead of giving the drummer two drumsticks I gave him one and a sword as a drumstick in combat is likely going to be a hindrance.

The other one just has the flag pole at the moment. I will decide which variant I put on the top tomorrow. I do quite fancy the ‘draco’ style with the silk tail.

So tomorrow we shall carry on with the Dino prepping… I am considering horns and spines along his back… I will have to sleep on it.

TTFN

Lizards and Greenstuff

Tonight I decided to try and get some Greenstuff onto the Sleich dinosaur. It was an absolute swine as the Greenstuff stuck to everything apart from the dinosaur.

I don’t think the GW Sculptors need to worry just yet 😂

This is the first level of the Greenstuff. Once this lot has cured I will make some teeny buckles or knots to add to the straps that are there.

I will add skulls and dangly bits to the straps so that it is a bit more interesting.

The other thing I managed to do was to get one of the Saurus riders. I suddenly realised that his mount is meant to have a different head, but so what, he can have a normal cold one bonce and like it!

You can see the head it is meant to have on the picture below the miniature. I am not too impressed with the joints in these as the neck is a flat joint so it ends up looking like there is a joint. As you can see from the picture above it could have been jointed at the collar to hide it, or indeed have the ball joint and cup approach from the older miniatures.

Hopefully I will get the rest built tomorrow night.

On a total aside, this is My 203rd post in a row…the longest stretch by a mile, the last stretch was 90 something.

Cold Ones…Nearly Done

Tonight I managed to get some work done on these whilst the Sunday Family film was playing. So whilst The Minions played in the background I cracked on with getting some paint on these.

They are pretty much done apart from adding a dark colour into the eyes sockets to add a bit I’f shadow. The snakes are sort of done too. My original idea was to paint them all different colours, but in the end I went for all the same as each snake base will appear in a different place. This way they won’t look too weird being same pose/same colour.

The other thing I managed to get done was to actually get out of the house and go and join the archery club. I managed to lose them as in my excitement I forgot to ask where it was held. Luckily the options were limited, all had cars outside so it did make it a bit tricky. Thankfully someone dropped some kids off and they disappeared into the school.

It wasn’t a bad grouping for my first time shooting a bow in about ten years (mine was the bigger target). I then moved onto the smaller target on the right.

I could really tell when I started to get tired as my grouping went a bit awry. I will start going regularly, My two girls want to go too, so it looks like we will all go next week.

Back to work tomorrow, I am in, but the kids still have another day off. I intend to try and get the riders built. Once they are done then I will get them sprayed. I intend to get some straps added to the Sleich dinosaur using Greenstuff or cheap necklace chain (or a mixture of both)

Cold Ones… Getting There

Tonight I managed to get some bits done on the red lizards (and the snakes)

I am either going to do the claws and talons as black or Wildwood, which is a very dark brown. I got the saddles and straps done in Snakebite Leather. I will do the collars in the Tin Bitz and add gold accents.

Once these are done I will start on the riders.

I ordered a fair bit of stuff from Green Stuff World today. I went for the mixed leaf punch, the branch punch: http://www.greenstuffworld.com/en/inicio/384-miniature-branch-small-punch-yellow.html with some of the flexible metal sheeting. I also went for one of the Aztec rollers with the silicone rings to get some patterned bases for the Lizardmen. I also ordered a pack of light coloured forest ground covered and some swamp tufts. I have plenty of different coloured ones, but I thought it would be good to get some of the same colour.

Red Lizards II

Today has been the first day at work where I thought ‘why the heck did I come here’. I am sure there will be other ones to come, but today was the first. I have awesome kids, awesome staff, awesome parents, awesome colleagues at the principal level. Sadly it was others who should know better that got me on the verge of swearing down the phone.

But enough of my whining 😂. I managed to get all of these done in the red now. What I am considering is redoing some of the white between the orange and red and then blending in some yellow to make a bigger contrast. I think it is going to be the case that I put a dark row of spines and at least some of the top scales in the same colour. That way it isn’t just a big lump of red on the table.

Hopefully tomorrow night I will get cracked on. Technically I am home a bit earlier than normal, so it should allow me to have a bit more time to get more done.

Having just looked at the big Beasty then I think I might go down the same route with the claws on these. Go dark rather than bone colour. Once again I will give it a go and see what I think. The nice thing about Contrast paint is that it is automatically thinned, you can’t put too thick a layer on them.

Typically, with this army, I have found out two things… firstly I am only the third person in the club who plays Age of Sigmar (not that I have started yet) and secondly the battle tome for these is to be updated sometime soon -ish. So there is no way that I am going to fork out a widget of cash on a book only to find that 6 months down the line that what I have built will be pointless. Big problem is… I don’t know how best to equip/build them. Not that I am a Beardy player. But some idea would help.

On the upside, I am enjoying painting them!