Scalians… Temple of the Moon

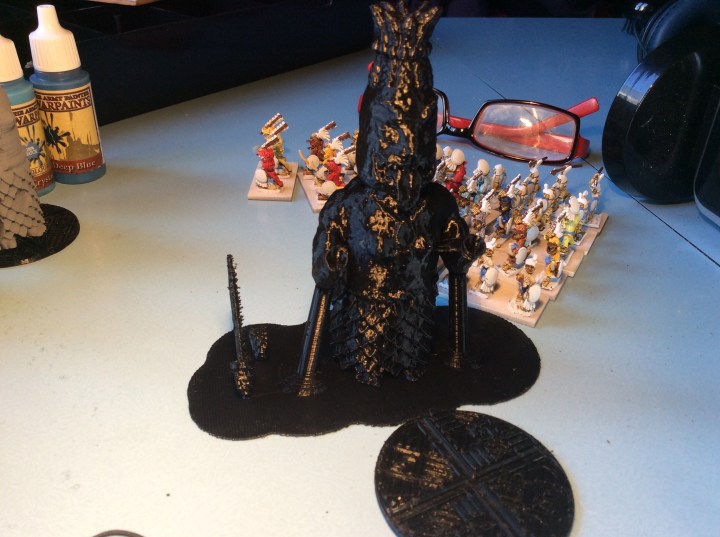
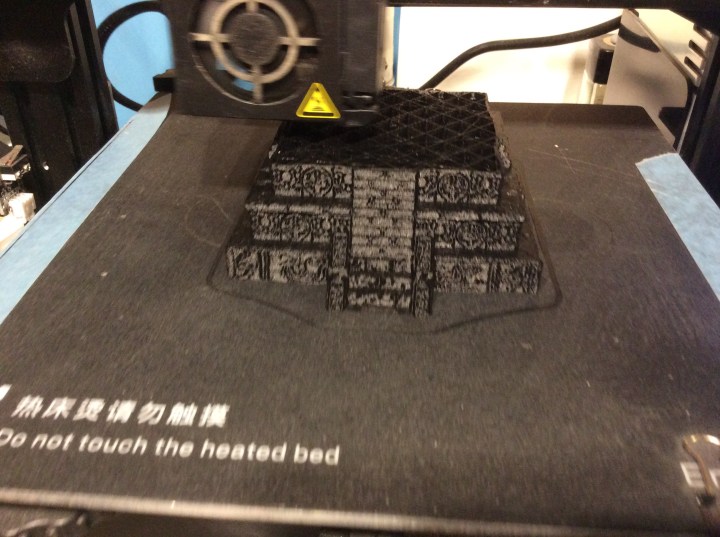
After 10 hours (I think… totally forgot to check before switching off the printer) I have got my temple finished and it is, in my mind, absolutely superb.

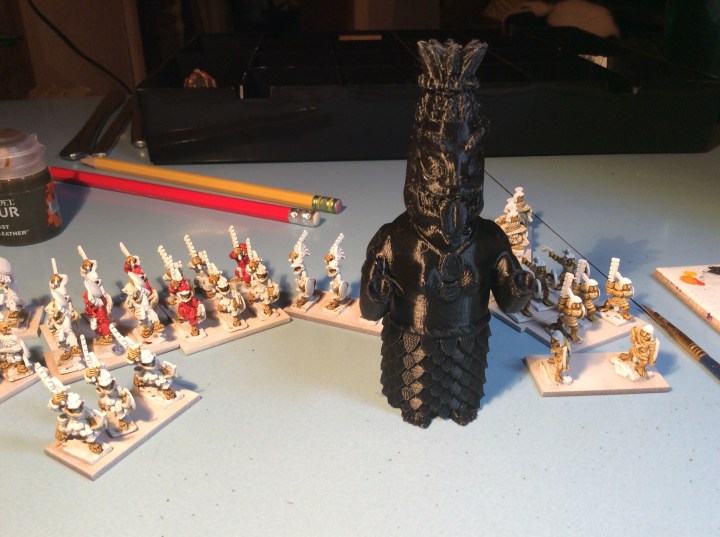
Once again the Black PLA is helping no-one see the detail.

The piece comes from here I-Lovecraft. The stuff on there is lovely, if you have a 3D printer check it out. There are Fantasy, Meso American, Roman and Asian buildings and accessories. My favourite out is Bridgeton – it’s a modular bridge with houses built onto it. Something I think I will save up for.

Anyway back to the Temple I printed.

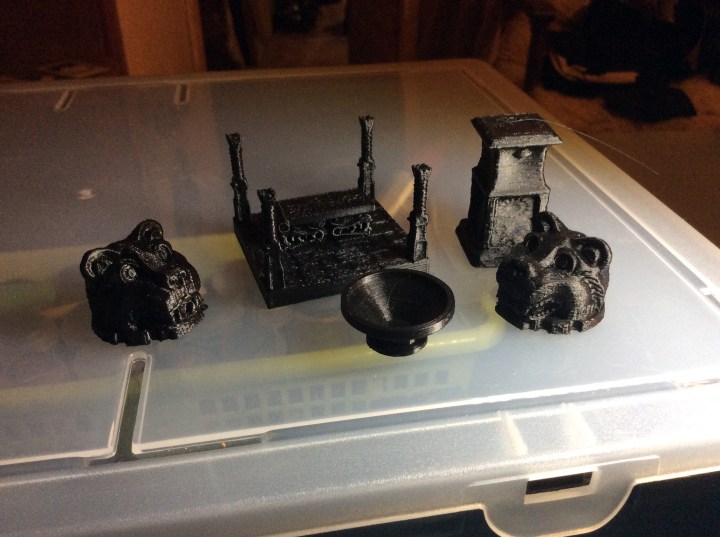
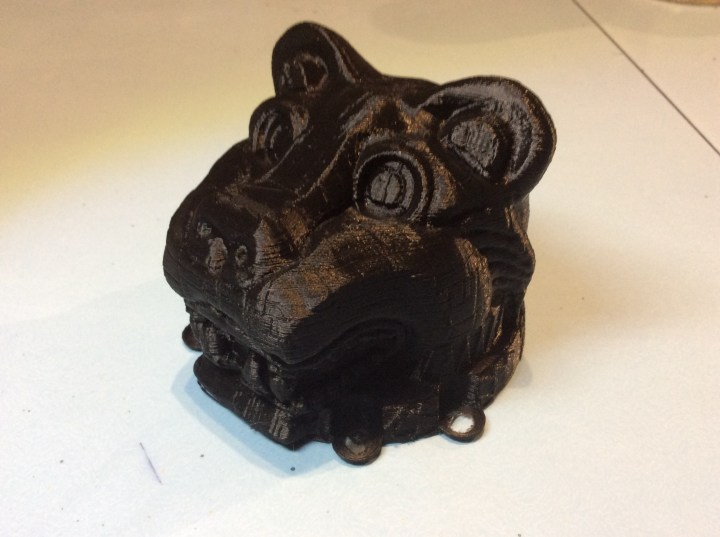
It comes in 5 main pieces (plus a brazier) there are four floor pieces.

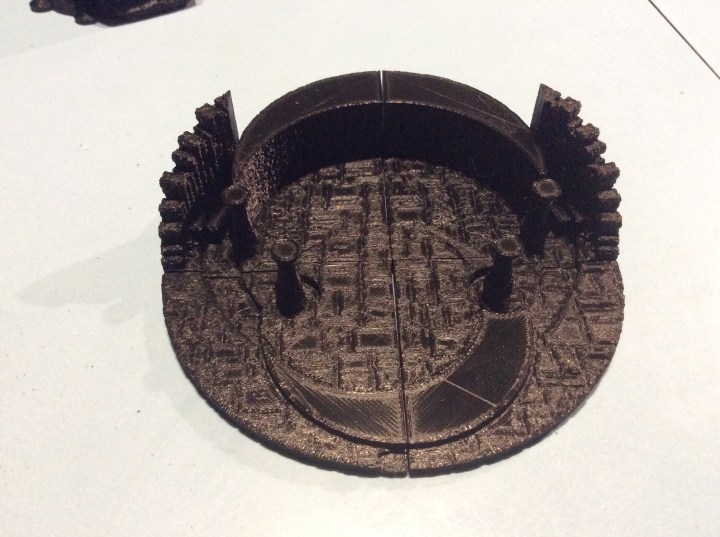
These in turn hold up the Jaguar head.

Based on the hole in this, my bed needs levelling again. I will have to have a think as to whether I want these pieces overgrown and disused or have them full colour. If so it looks like Disney’s El Dorado will be coming out again as I really like the colours of the city.

So what do I think of this piece, firstly I haven’t done it justice on my printer. First off I didn’t use the hi resolution version that was available in the download, secondly I set my printer to a middling quality, I could have set it higher, but with that comes a longer print time 10 hours seemed long enough and I am impatient. I meant to get up early this morning and totally failed to do so! I only set the printer going at 11.00 am so I wanted it before I went to bed. Yesterday I was up to near as damn 2.00 am waiting for the pyramid to print. I think they are pretty awesome. Both are €12.50 in the online shop, but I got mine in the humble bundle so came in at a fraction of the cost. The thousand dollar question is would I buy them full price. Probably yes, depending on finances at the time. The MDF ones shown above were a whole lot cheaper, but and it’s a big but… these are a a whole lot more detailed and I can scale them up or down, not to mention print out two dozen if I wanted to. The temple is pretty much a single centre piece (but the separate heads are really useful to add as Scatter). I would still go for it as I couldn’t get anything as nice in resin or plastic for the same price. There was a nice resin temple for fish tanks in my local pet shop. It was nice, overgrown etc but it was £25 so even mooching about for other things still works out more expensive.

Once I get better at the 3D modelling, these could be distressed and damaged prior to printing which means even more things that can be done for the price.

So all in all, definitely worth the money. Something near to 16 hours print time, but still way faster than anything I could get delivered from the mainland.

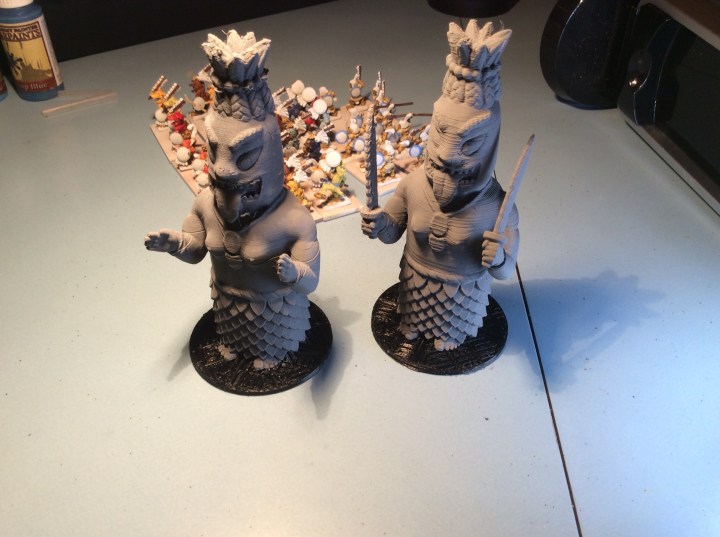
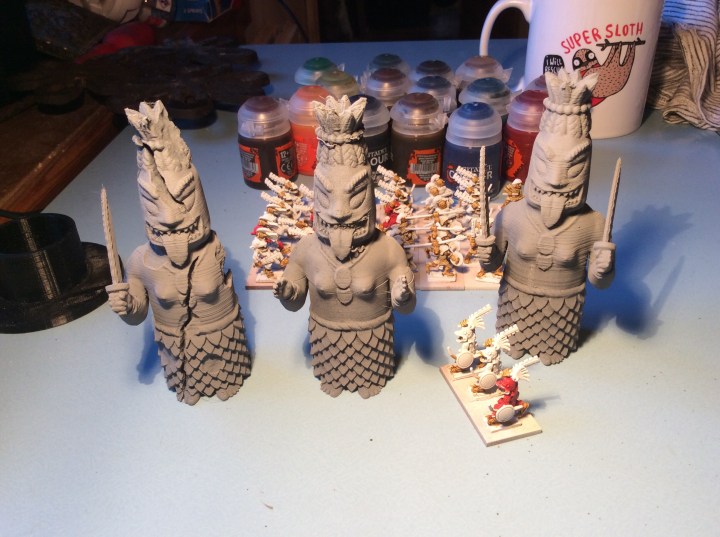
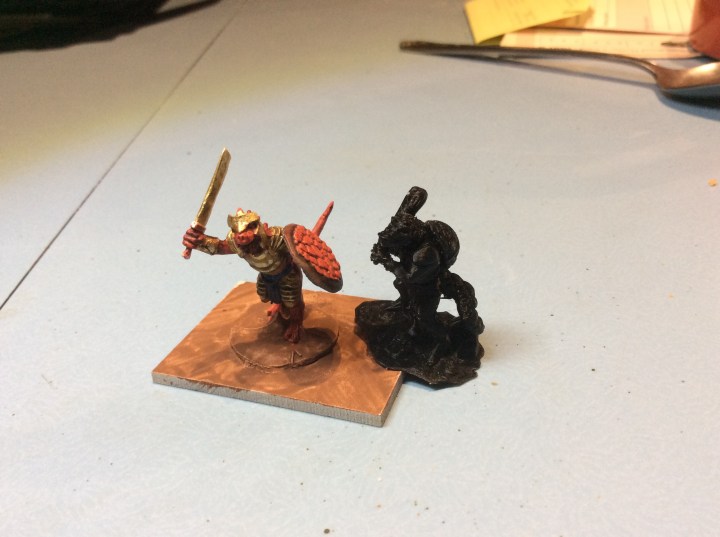
So here they both are with a base of Scalians for Scale.

I dropped both of these to 60%. I might do another pyramid but print it full size. I reckon that would be a bit impressive on the table.

My next conundrum is how to base them, if at all. Temples like these would be part of a larger complex. A table of pyramids and temples would be cool, but it would be an absolute nightmare to try and store safely.

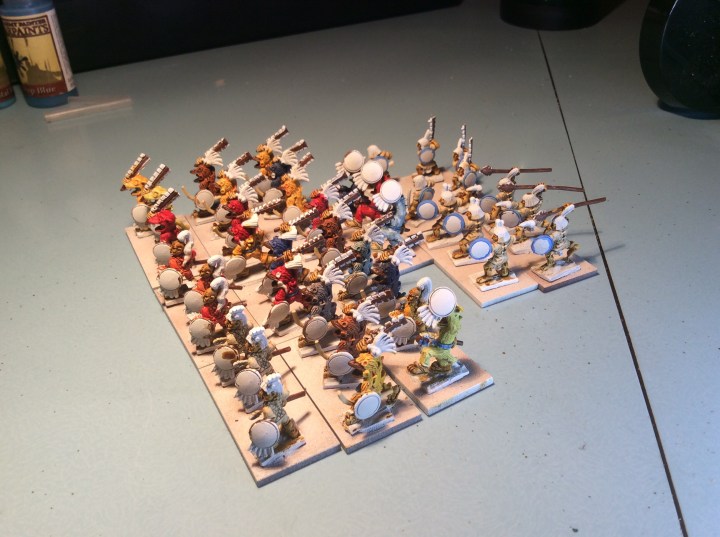
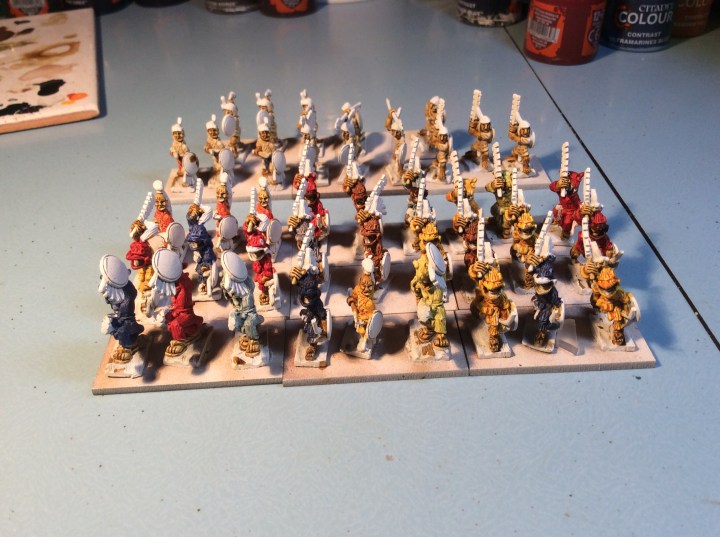
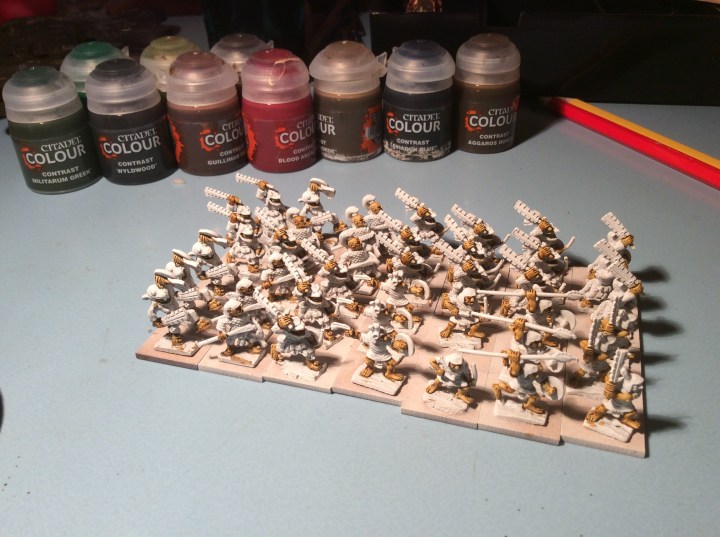
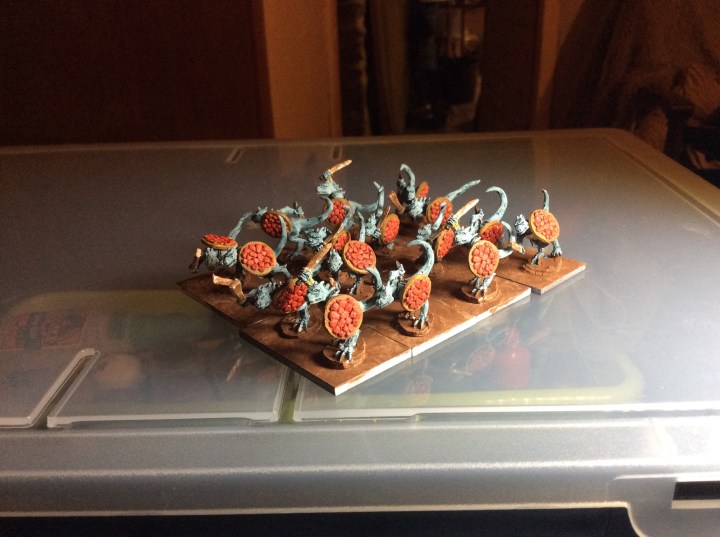
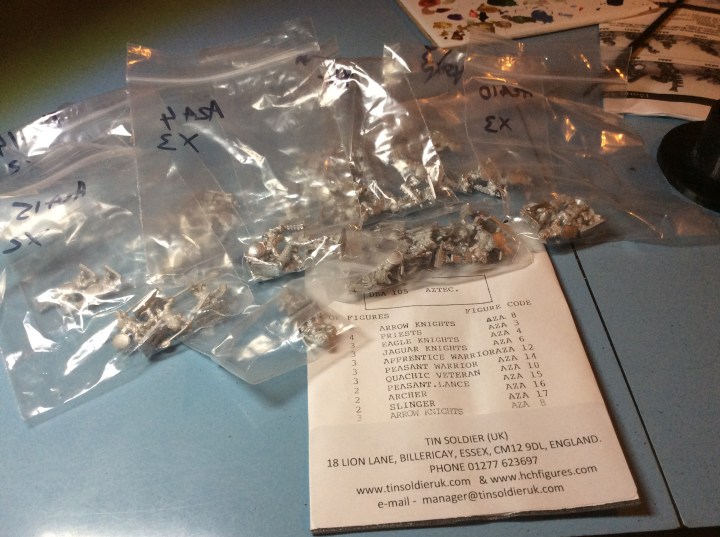
I could go for something like my HOTT stronghold here Temple Completed I did this on a smaller courtyard… like I say something to ponder. Tomorrow I intend to finish of painting the Scalians, print off some more bits and bobs – including some 25% sized jaguar heads to make some form of pathway to the temple and then make a start on my Tin Soldier Aztecs.

Scalians… Something a Little Different

What with one thing and another today then I never got anything painted. Technically I went into work today to clear out my desk before starting the new job and ended up chatting to colleagues who I haven’t seen for about 10 weeks so… I will need to go in and sort out my desk another time. I then went out this evening with some of my colleagues for our regular catch up meal, just back in to get this written up.

Modelling wise my day wasn’t wasted. I got thinking of the Scalian Forces and how they would need themed terrain. So off I went to look on Thingiverse. It was then that I remembered my humble bundle I bought way back in March. Something was making me think that there were Jungly things in the pack. I fired up the computer and had a look.

Apologies for the naff photo, but it was moving quite quick and the iPad couldn’t keep up. I found two pyramids, a jaguar temple of the moon and various scatter pieces too.

The other thing I found were some 3D printable Lizardmen. I took a guess at reducing the size to 70% and I ended up with this size.

You can’t really see him properly as he is black PLA but he does fit in nicely with the general figure. He will be joined by a few more to make a unit of larger lizard warriors akin to Kroxigor in Warhammer.

I also printed off some carved disks. Because I printed them flat the detail isn’t as good as it could be had I done them vertically. Problem with a circle is that it needs a whole lot of support to go vertical.

So no painting done but still something to show at the end of the day. The lizard is from Fat Dragon Games and for the life of me I cannot remember the maker of the terrain stuff. Lizard took 45 minutes to print, whilst the pyramid is just over 6 hours.

The jaguar temple is going to be nearer 10 hours. I will set it away tomorrow morning and see what appears at the end of the day.

Scalians…Almost There

I managed a fair bit today, only really the shields and cross guards on the swords to do.

I even painted the bases and I really, really detest basing things. Tomorrow I will paint the edges too before I get any kind of flock down.

I was a little concerned that the grey would stick out like a sore thumb beside the green ones, but to be honest I don’t think they are too bad. One thing I need to do is do a bit of highlighting on the fur on the big beastie saddle.

Next up…. Scalians

Well I made it home at 08.00 this morning. Managed about three hours sleep last night. The seats in the bar aren’t exactly the most comfortable, but at least I could lie down… certainly beats the floor.

So this afternoon I managed a smidge of painting.

I redid the green on the bows and still missed a bit as seen by the photo. This has brow been rectified! I also gave their bellies a lighter green and then painted the flights on the arrows white then used a red on them. The red will be the common colour for all units.

The swords at the back were given a coat of grey contrast paint. Obviously they came out of a different spawning pool to the bows, these have got shields to attach to the arm. When I am ready to attach 5he shields I will scrape away the paint where the shield will go, this will ensure a metal to metal bond. The shields and or loin cloths will be where the red goes on these.

Tomorrow I will get some more done on these.

Scalians… Further Work

I managed some of the infantry and general today

These still need a bit of work – first being to find all the bits I missed with the green paint. No matter how many times I look, I still spot things on the photo that were not painted. I think it might be that as the pain is wet it glistens, causing me to think the white bits are wet paint. I have just had another really close look and I am spotting more and more.

After a repaint of the green (it would seem), I need to paint the arrows in the quivers and then do some claws. A bit of highlighting wouldn’t go amiss on the bows. Then I can start on the swordsmen.

The other thing I did was darken down the fur on the big beastie. The chain and shield rims are now not blending in. I really need to tidy up the gold at the 11 o’clock on the shield though… I keep forgetting!

Am bit of highlighting on the general’s shield rim would help too. This is really where Contrast paint doesn’t work. Flat areas basically are a waste of time going for the ‘shove some paint on and voila – done’ approach.

Tomorrow I will try and get this lot finished and then at least make a start on the sword armed ones.

Scalians – Work on the Big Beastie

So I managed to get some work done on the big beastie or Juggernex as it is called on the website 😁.

I am happy with the mottling on the skin, but less so with the rest. The contrast paint didn’t work so well on the shield. I will have to highlight them both. Not to mention the gold. The gold looks better in real life, the photo has almost blended it into the skin tone.

I will need to get it flocked up, but need to decide on what and how to do it with.

Once I get these ones painted then I think I will get the cavalry… half with bows and half with spears.

Luckily the UK distributor lives on Shetland.

I have a couple of evenings left before the hols, so hopefully I will get some more painted before I head off.

Scalians – Making a Start

I cracked on this evening and got the minis glued down onto the MDF bases. This took a bit longer than expected as these minis are large scale 15mm. So my normal 3 or 4 to a base looked wrong.

I got out the bases that I had and had a play about.

In the end I found some 25 x 40mm bases and went for two to a base. There are sixteen to a pack so two’s worked well.

In the end I ended up with eight x bows and eight x swords as well as a general and a large beastie thing.

As you can see from the photo above the large beastie had a bit of a makeover. This was because he was a bit lacklustre – to be frank he was actually boring and crappy. Which is really weird as the rest of them are lovely miniatures.

Where I put the saddle/pad were a set of straps from the legs that just fizzled out. It was almost as if a saddle was an optional extra. I checked on the website and I can’t find anything to go on it. He is a mix of lizard and mammal and there is very little texture to the skin, I really should blend in that tail section when the superglue has cured fully (who would like to bet I forget before spraying).

My attempt to titivate him is a bit off scale, but it was what I had lying around the shed at the time.

I have my source material ready for colour ideas!

The Lizardman Army was my favourite alongside the wood elves and definitely my favourite in Warmaster. Sadly they went the journey, but the Warmaster army did make me £250 which was used to buy a second hand SLR camera.

I will get these sprayed tomorrow morning and start on the painting tomorrow evening.

Desert House 5…Update

Well the shell is finished…

The roofs are on there temporarily. I will decide on which roofs to add later. The tower needs to have its top and roof added. So how did it get on…..

These bits were supposed to be attached. The window shutters were out too far I would guess and I forgot to extend the door into the doorway to secure that. But apart from that it seems fine.

Now I could give another one a bash, something a bit more complex again, they are cheap enough, bit as Dave pointed out I need to be able to paint everything = some of these bits are going to be tricky!

Problem with doing some more is that there are quite a few already!

I reckon I can squeeze another couple in before I have to stop printing and start painting. I also need to print half a dozen roofs as well as a whole pile of doors and window shutters.

Desert House 5

More of a complex than a house to be honest.

Having had a busy day, what with watching a very interesting dinosaur talk in Lerwick. We booked it a while ago. Typically my youngest came down with chickenpox and couldn’t go. Lucy and I went and had a good time. After a bit of shopping we came home and she asked me to help her build a castle and village on Minecraft, I don’t know why as she is getting much better than me 😱.

So instead of printing anything off I decided to do something a bit different. Instead of a courtyarded building I went for more of a complex.

This is on the printer right now, but this is the view in Cura…

It needs roofs printing as well as the tower top. To save time I embedded a door in the base of the tower. This one is a bit more complex in that it has walls inside walls to make the distances fit, I also did some scaling to make sure doors and windows fitted snuggly as well as increasing the height of the tower. As can be seen the shutters are protruding a bit more than the last one so they should be more visible.

Whereas the last few were printed at a 0.2mm layer height I have decided to go for 0.1mm for this one. This should give me a better print, but also increases the time of printing.

The 0.2 mm version would take 4 hours plus this one is doubling it to just shy of 10 hours. So by 07.00 tomorrow it should be finished.

This is what it looked like earlier…

Not very much to see really.

Tomorrow I will show the fruits of my labour… aka scratch building 21st century style.. Thanks John👍

Update at 23.30….

After 3 hours and 3 minutes we are this far…maybe 10mm high at best 😱

Desert Houses 4

More 3D Printing I am afraid…

Today I had half an hour and had a mess around with 3D builder. I had a go at adding a compound to a small house. I was really pleased with the result.

This took just over 2 hours to complete. The other thing I did was to add the window shutters and doors in the software rather than printing them separately and glueing them on. I had mixed success with this as some were too far forward, but as my wife pointed out it does look like they were sealed up.

The one on the right above was the original house.

The second one looks a bit more complex But in all honesty all I did was join a couple of houses together with a couple of walls. Again I added in the window shutters to the software, I forgot the doors. The bigger one took 3 hours 58 minutes (to be fair it is nearly twice the size of the other one).

I really enjoyed doing this. It also means that the compound walls are secure and won’t need glueing with visible joint lines.

I still need to print roofs for them both, but tomorrow I am going to have a go at something a bit bigger 😉.