Hello and apologies in advance for the ringing of the damn bell, but unclean, unclean certainly springs to mind. Whatever I have got, has pretty much knocked me flat for another day. Spent a couple of hours this morning sorting out other people’s cock ups at work, not my team in school, elsewhere and it knocked me for six. I went to bed at 13.30 for a lie down and woke up at 18.45.
Anyway after oven roast sausages and mash I felt well enough to throw some paint on these fine fellows…
Still a fair bit to go but definitely over the hump now.
I also managed to get a bit of paint on these…
Hopefully I will feel a bit better tomorrow, I won’t be at work which is a right pain, but nobody wants me sneezing and snotting over them.
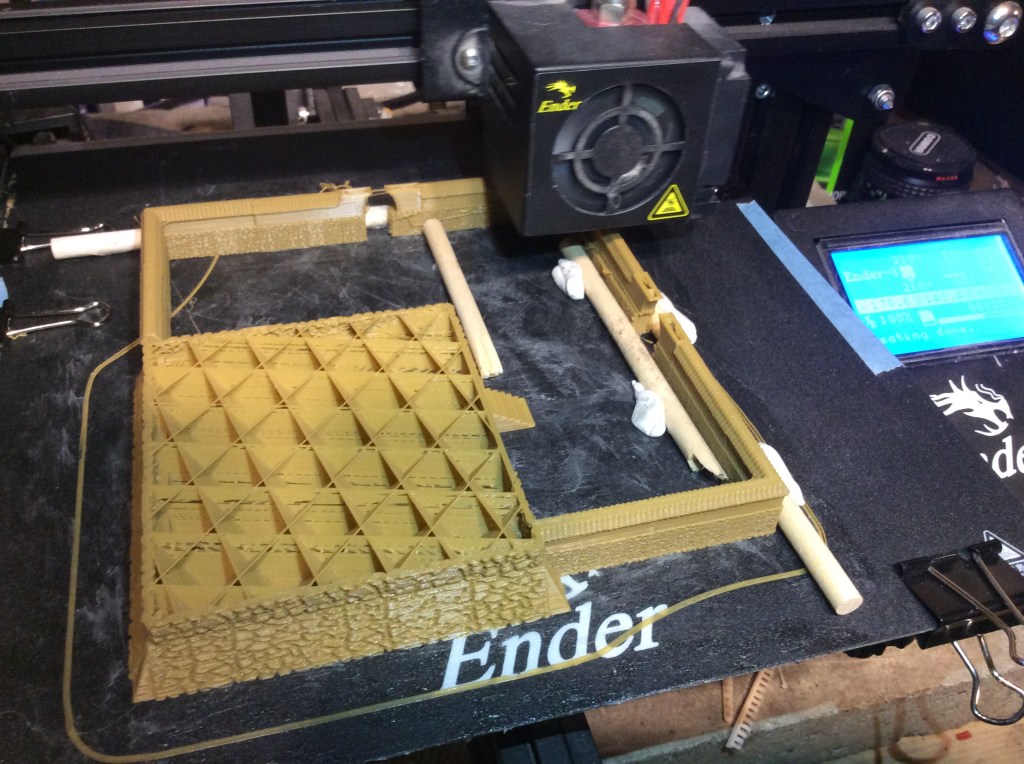
The advantage of working from home meant that I could press print more than once on the Ender 3.
Spot where the lake is going to go!
I am going to print a fair few more of these as well as some roads. Still not sure what I am going to do with them😉. Doing small runs is a good way to get things going in the right direction. My first ones were one of each tile so I got some that I probably won’t use. Choosing specific tiles makes it easier to get a map that I want.
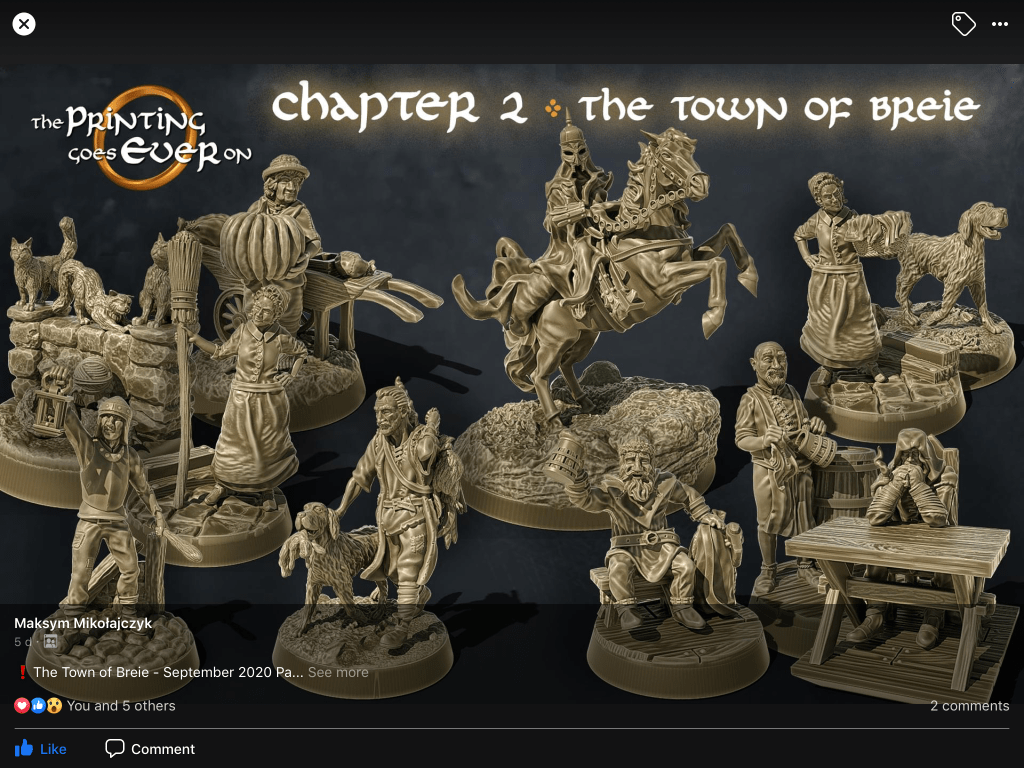
I also set about printing some resin miniatures, you will have to wait until tomorrow to see them as the print time was 14 plus hours, so they are going to finish sometime around 02.30.
I am printing the Hunter, his two dogs and the town guard…
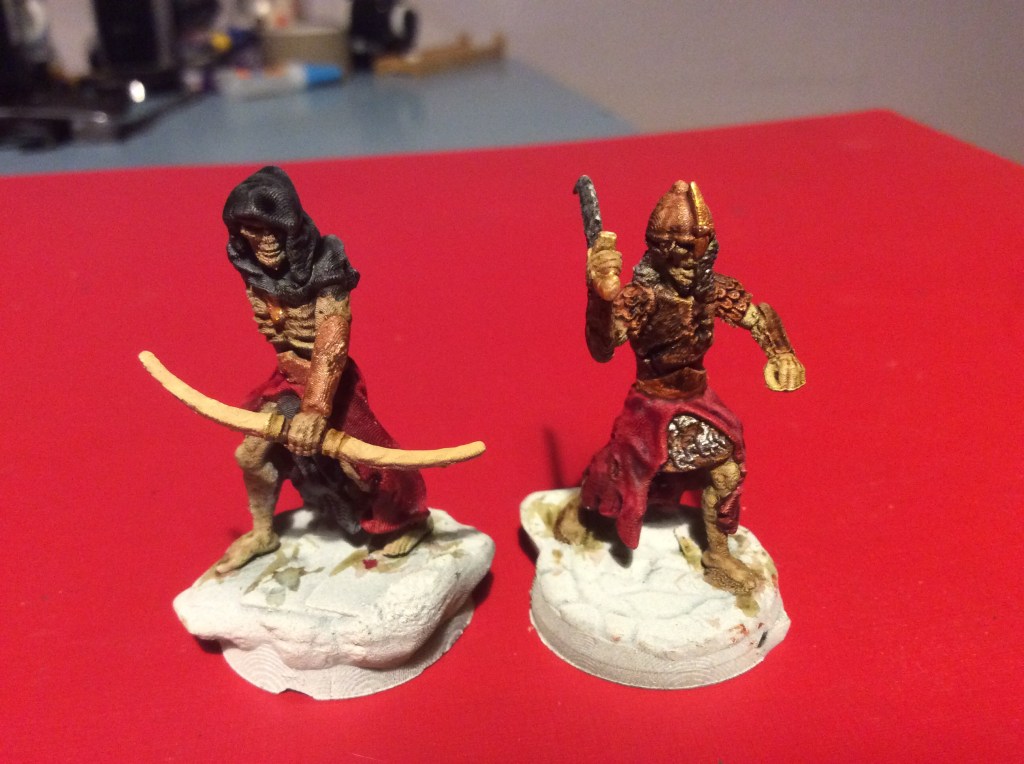
Once these have finished I have got a couple of wights to print.
Just a quick post at lunchtime to say that my test came back Negative. Which got me thinking. Negative is seen as bad, but in this case it is good that I have a negative result. If I had had a positive result then it would be bad….
So here is a photo out of my work window…
Not a bad view really.
I am a bit miffed that they were super speedy with the results as it meant that I had to go into work rather than lounging about for the day.
Tonight we went gaming and we got possed! We were playing Journeys in Middle Earth. We had narrowly succeeded last week so we’re quite confident this week (how silly we were). We had three characters o; the go. Bilbo, Aragorn and Bereavour. To begin with we were outnumbered two to one, but Aragorn set about the enemy with some initial successes, but each turn more enemy arrived, until Berevour managed to block the entrance. By the end of it both Bilbo and Aragorn had taken a last stand, both survived, but the big baddy boss legged it into the night. We really needed Gimli in their fight as he is a tank, sadly Bilbo isn’t up to much in a one on one with an ork Marauder!
The new files for my LOTR patreon are ready soon….
Some of them are going to be printed before the others, with the Hunter and dog being first on the list.
My daughter was checking through the money pot and came across this rare item…
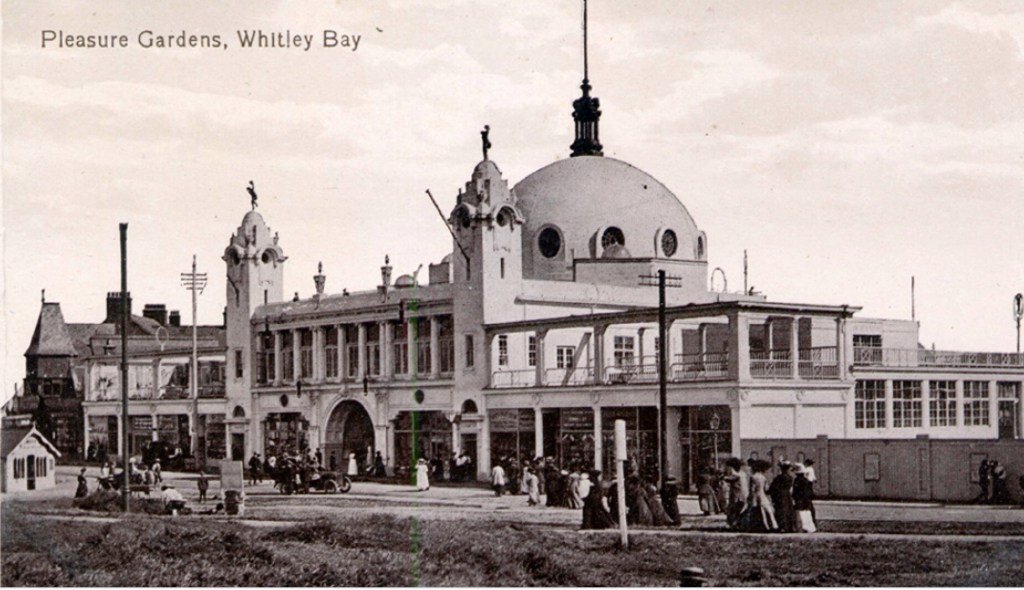
I say rare as I cannot even remember the last time I was there, at least 20 years ago, if not more. John will be able to let me know if the place actually still exists. I know the Spanish City at Whitley Bay disappeared a few years ago, so this might have gone the same journey. Random Trivia quiz, The Spanish City appears in which song by Dire Straits? Sting from the band ‘The Police’ used to hang out there too.
In case you are wondering the place itself was a part of a seaside town arcade that was opened in round about 1910, it was the small brother of Blackpool Pleasure beach. It is called the Spanish city as the original concept was actually made of wood and canvas and then painted up to look like a Spanish city as a group of toreadors came to put on a show in round about 1906. They came every year. The actual frontage itself is about 60m long with a depth of about 70m.
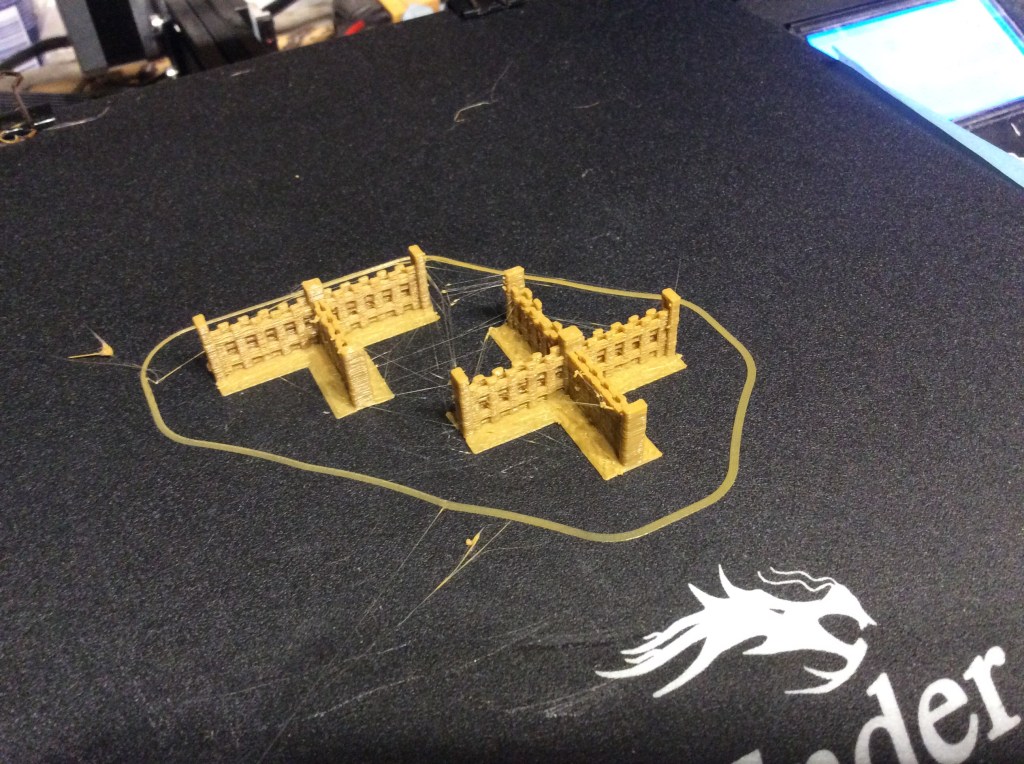
I went exploring today, more of that later, but after I staggered back in full of fresh air and fish and chips, I decided to try making my fences into a T junction and a crossover. So I set about playing in 3D builder and within 5 minutes I had a T (including ages getting the individual files to merge). I then set about using the T and added another arm to make the cross.
A bit of stringing but otherwise ok.
I measured the original printed walls and they sat at 13mm at the top of the tallest piece of fence. I therefore shrank these down to 13mm with the dimensions locked to ensure everything reduced by the same percentage amount.
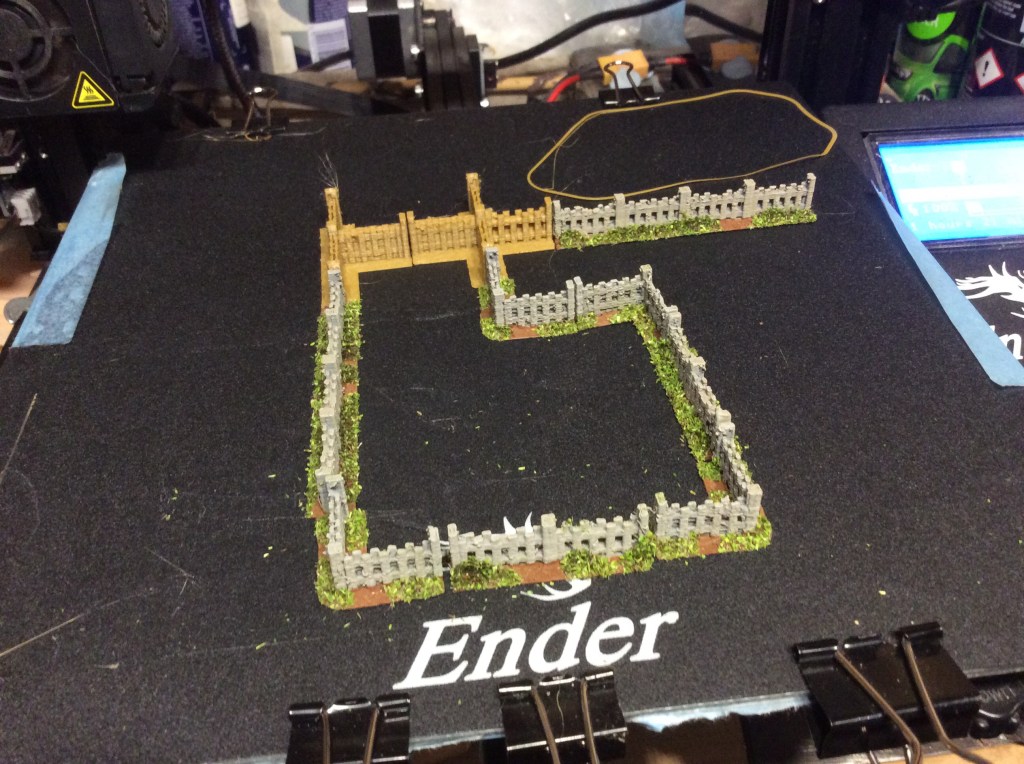
I would say I have successfully matched the two bits into the rest. I am pleased with how they turned out.
I am printing another pair and will see what I can come up with. I intend trying the same with the stone walls. These may prove trickier than the wooden ones as they have tiled roofs.
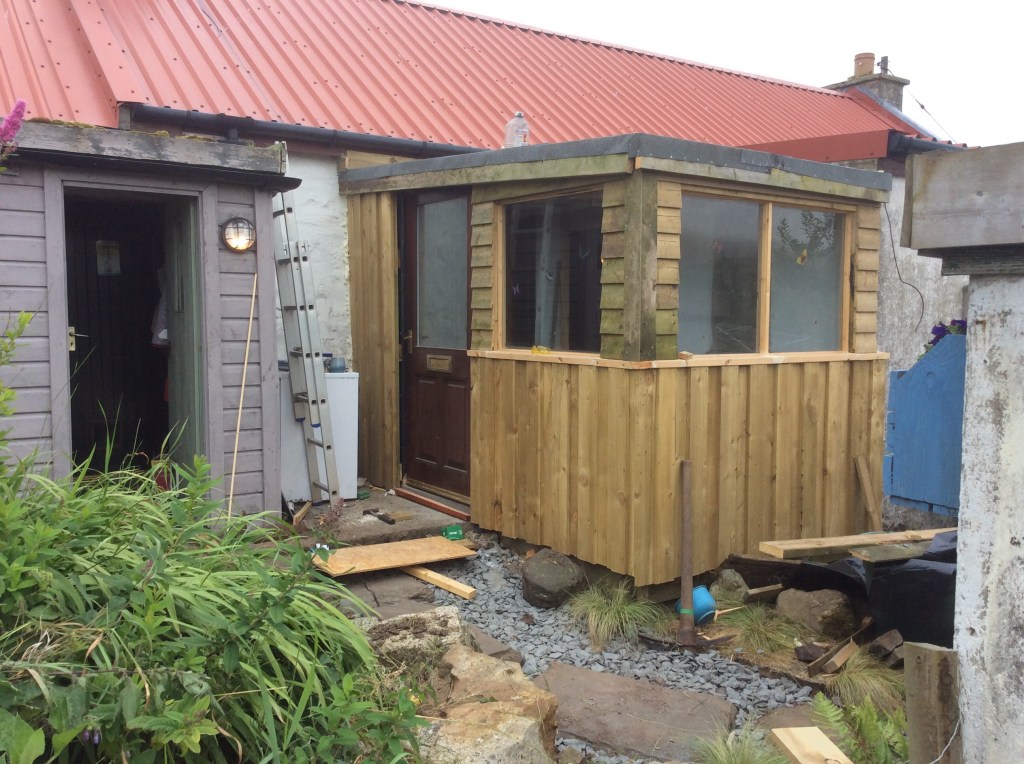
I was knackered this evening and after finding that somehow water had got in between my wooden roof and the plastic liner of the conservatory then, after swearing lots, I couldn’t really be arsed to do anything.
I think it must have got in a good while ago but I hadn’t noticed until this evening, as there is no way that it could have got in there now. There is also a bit of a damp patch where the door needs sealing properly (it just needs the external casing on), there is another bit where a nail went though the liner (I swore then too 🤬). So technically it is wind and watertight. My wife has been using it quite a bit to do her video meetings in, so she likes it, we take the ferrets for their daily run around in there too.
Built by my own fair hand 😉 actually, both wooden buildings are…
I started mooching around 3D Alien Worlds website to see what Samurai stuff I haven’t actually got 😂 not much to be honest… the castle stuff and the watch tower is pretty much it. I reckon that I am going to get the castle walls, corner tower and gatehouse for my 15mm skirmish Games.
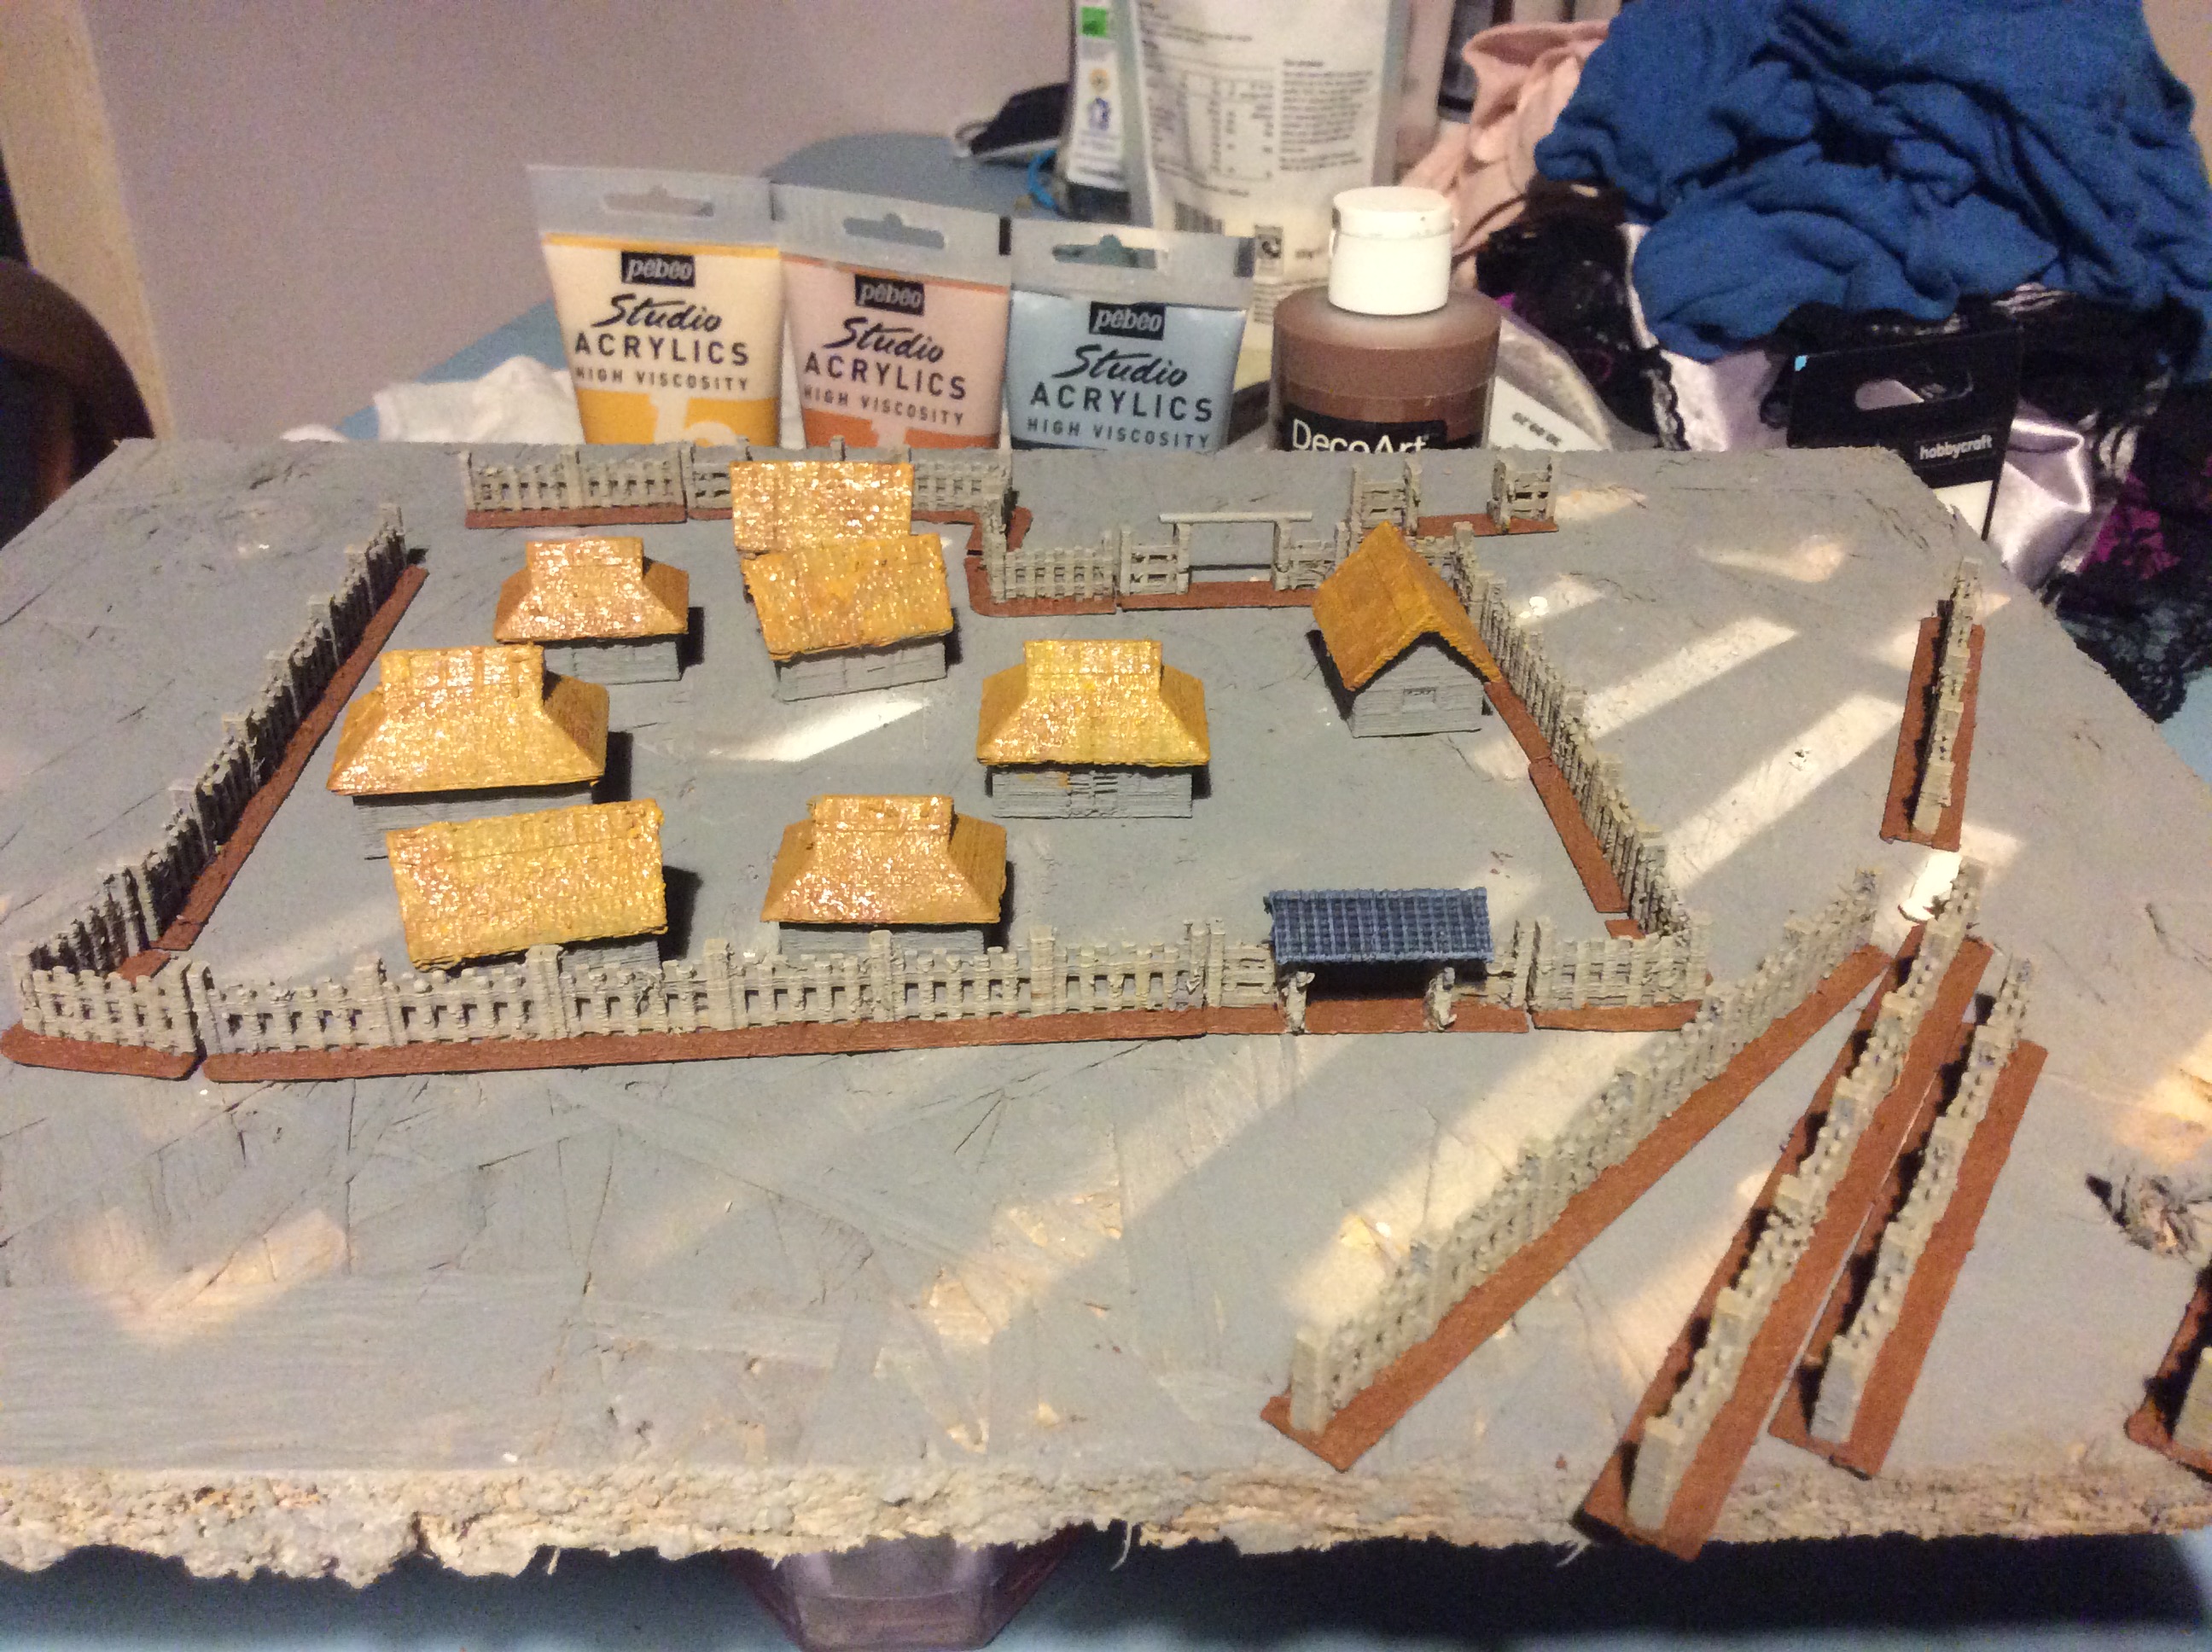
Tonight I managed to get a bit done on the walls and thatch of the village. Adding the brown to the base of the walls really makes the aged wood colour a bit more visible.
As you can see, the thatch was done just before the photo was taken. Still a whole lot of work to do on these, but I am definitely getting there.
I did swear earlier this evening, lots, in fact. I came home to this…
These buildings in the spaghetti are exactly the same as the ones above. There has been a massive layer shift on them as well as some not printing above a certain height. The only thing that I can think of is that one popped off and it caused a domino effect with the rest.
i therefore decided to print them in pairs (only to find part way through the print that I have one solid and one hollow on the plate). This time I have added supports in case it was the lack of support that caused the problem above.
It looks like shuttering around the building 🤣 It really does show how far out the roof sticks out…
I was printing a second castle for someone online and it went in to check on it at the 8 hour mark and arrived just as one piece parted company from the build plate.
Lots of swearing ensued, but I think I managed to get it sorted with round ice lolly sticks, print stick and white tack.
Unfortunately the place I put isn’t exactly in the right place, but I reckon that I can redo the corner and print just that bit.
Basically what happened is that the corner under the print head is a separate entity until the curved gate top joins it to the other two sides. You can see in the photo below.
In hindsight, I should have added a base to the doorway then it would have joined everything together. Still got about 18 hours to go so fingers crossed that it will all still be working well tomorrow morning. 🤞
This is getting a bit stressful as I am printing it for someone else.
We went gaming again tonight, making characters for Starship Troopers. I have got a break from being a GM for a while. I am looking forward to playing instead of having to think of the game.
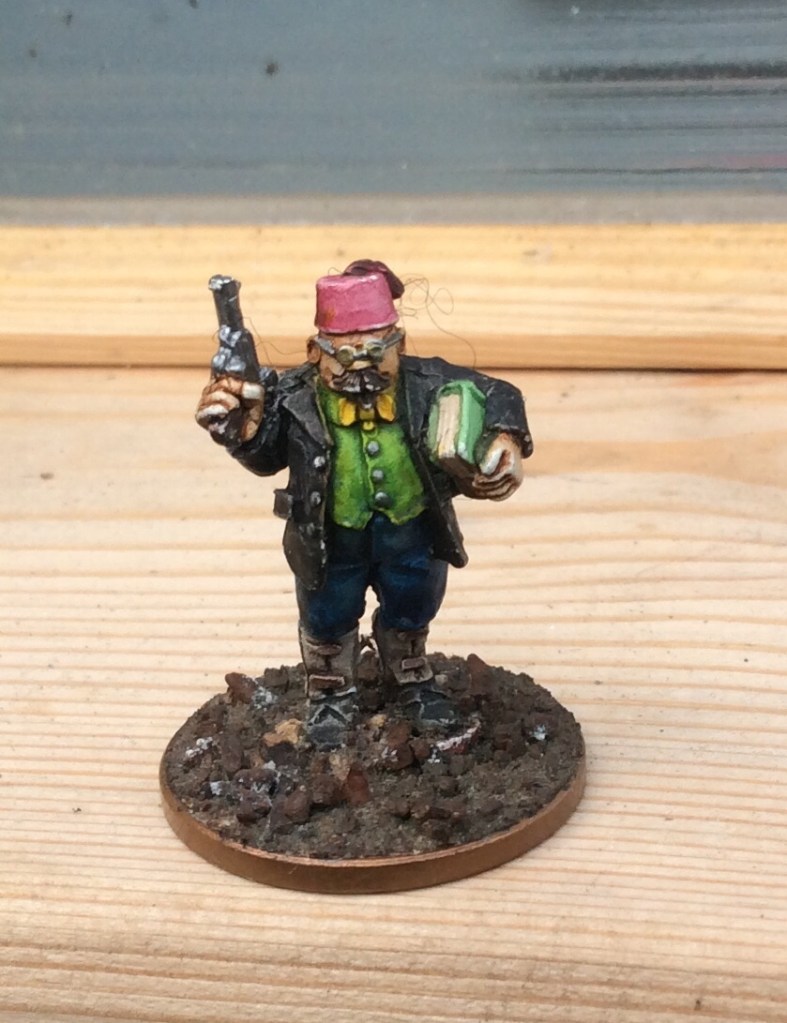
Whilst emptying a gaming bag I came across this little chap, looking worse for wear, to be honest. This is my forerunner of Contrast Paints. I painted him in washes and inks round about 2007/08.
So this evening I eventually got around to looking at a couple of photo disks that I found from 2003. Here are a pile from our training sessions in Maidenhead. we travelled down from Newcastle to there once a month. I would leave school at 16.30 pick up my wife (of Fiancee back then) and head on down the road. we used to get there at around 21.00… this was when Janet fed her horses so we would pile out of the car and help. This paid off long term as Janet would actually let Esther and I choose our mounts for either the training or for events
The last photo is of me in Poland, lounging without my sabre. Funnily enough the sabres were original Klingenthal. I always thought that they were replica, evidently not (or so I was told)… that is my original Universal pattern saddle from around the 1930’s too.
Talking of originals, when we were in Warsaw, one of our guys from the second squadron asked us to meet him at the museum at 11.30. We thought he wanted a coffee. instead he had raided the stores and brought a pile of original uniforms for us to look at…
I just had to add my very first Selfie into this.
I am going to have a mooch through some more to see what else I can find to bore you all with.
Right Bed time, I am back working in nursery tomorrow and my important job is to eat the dry Pasta cake one of them made me and then put the bird feeders on the window! Ahhh the joys of being a principal of a small school.
Yesterday I had a bash at printing some 6mm , they were okay, but needed a bit of work on them. This evening I did that work. I basically took them apart electronically and inserted a cuboid inside so that.. a) they weren’t hollow and b) the doors had something to rest against.
This actually took a lot longer than I expected but I got there in the end.
I decided to print half a dozen or so (I forgot to count). These are going to take 8 hours to do. You can really tell the difference between the the hollow ones and the solid ones. Hollow were 1.29 for two and these aren’t much more…
Okay not the most exciting photo, but it does nicely show the 10% infil…😂


 As you can see, the thatch was done just before the photo was taken. Still a whole lot of work to do on these, but I am definitely getting there.
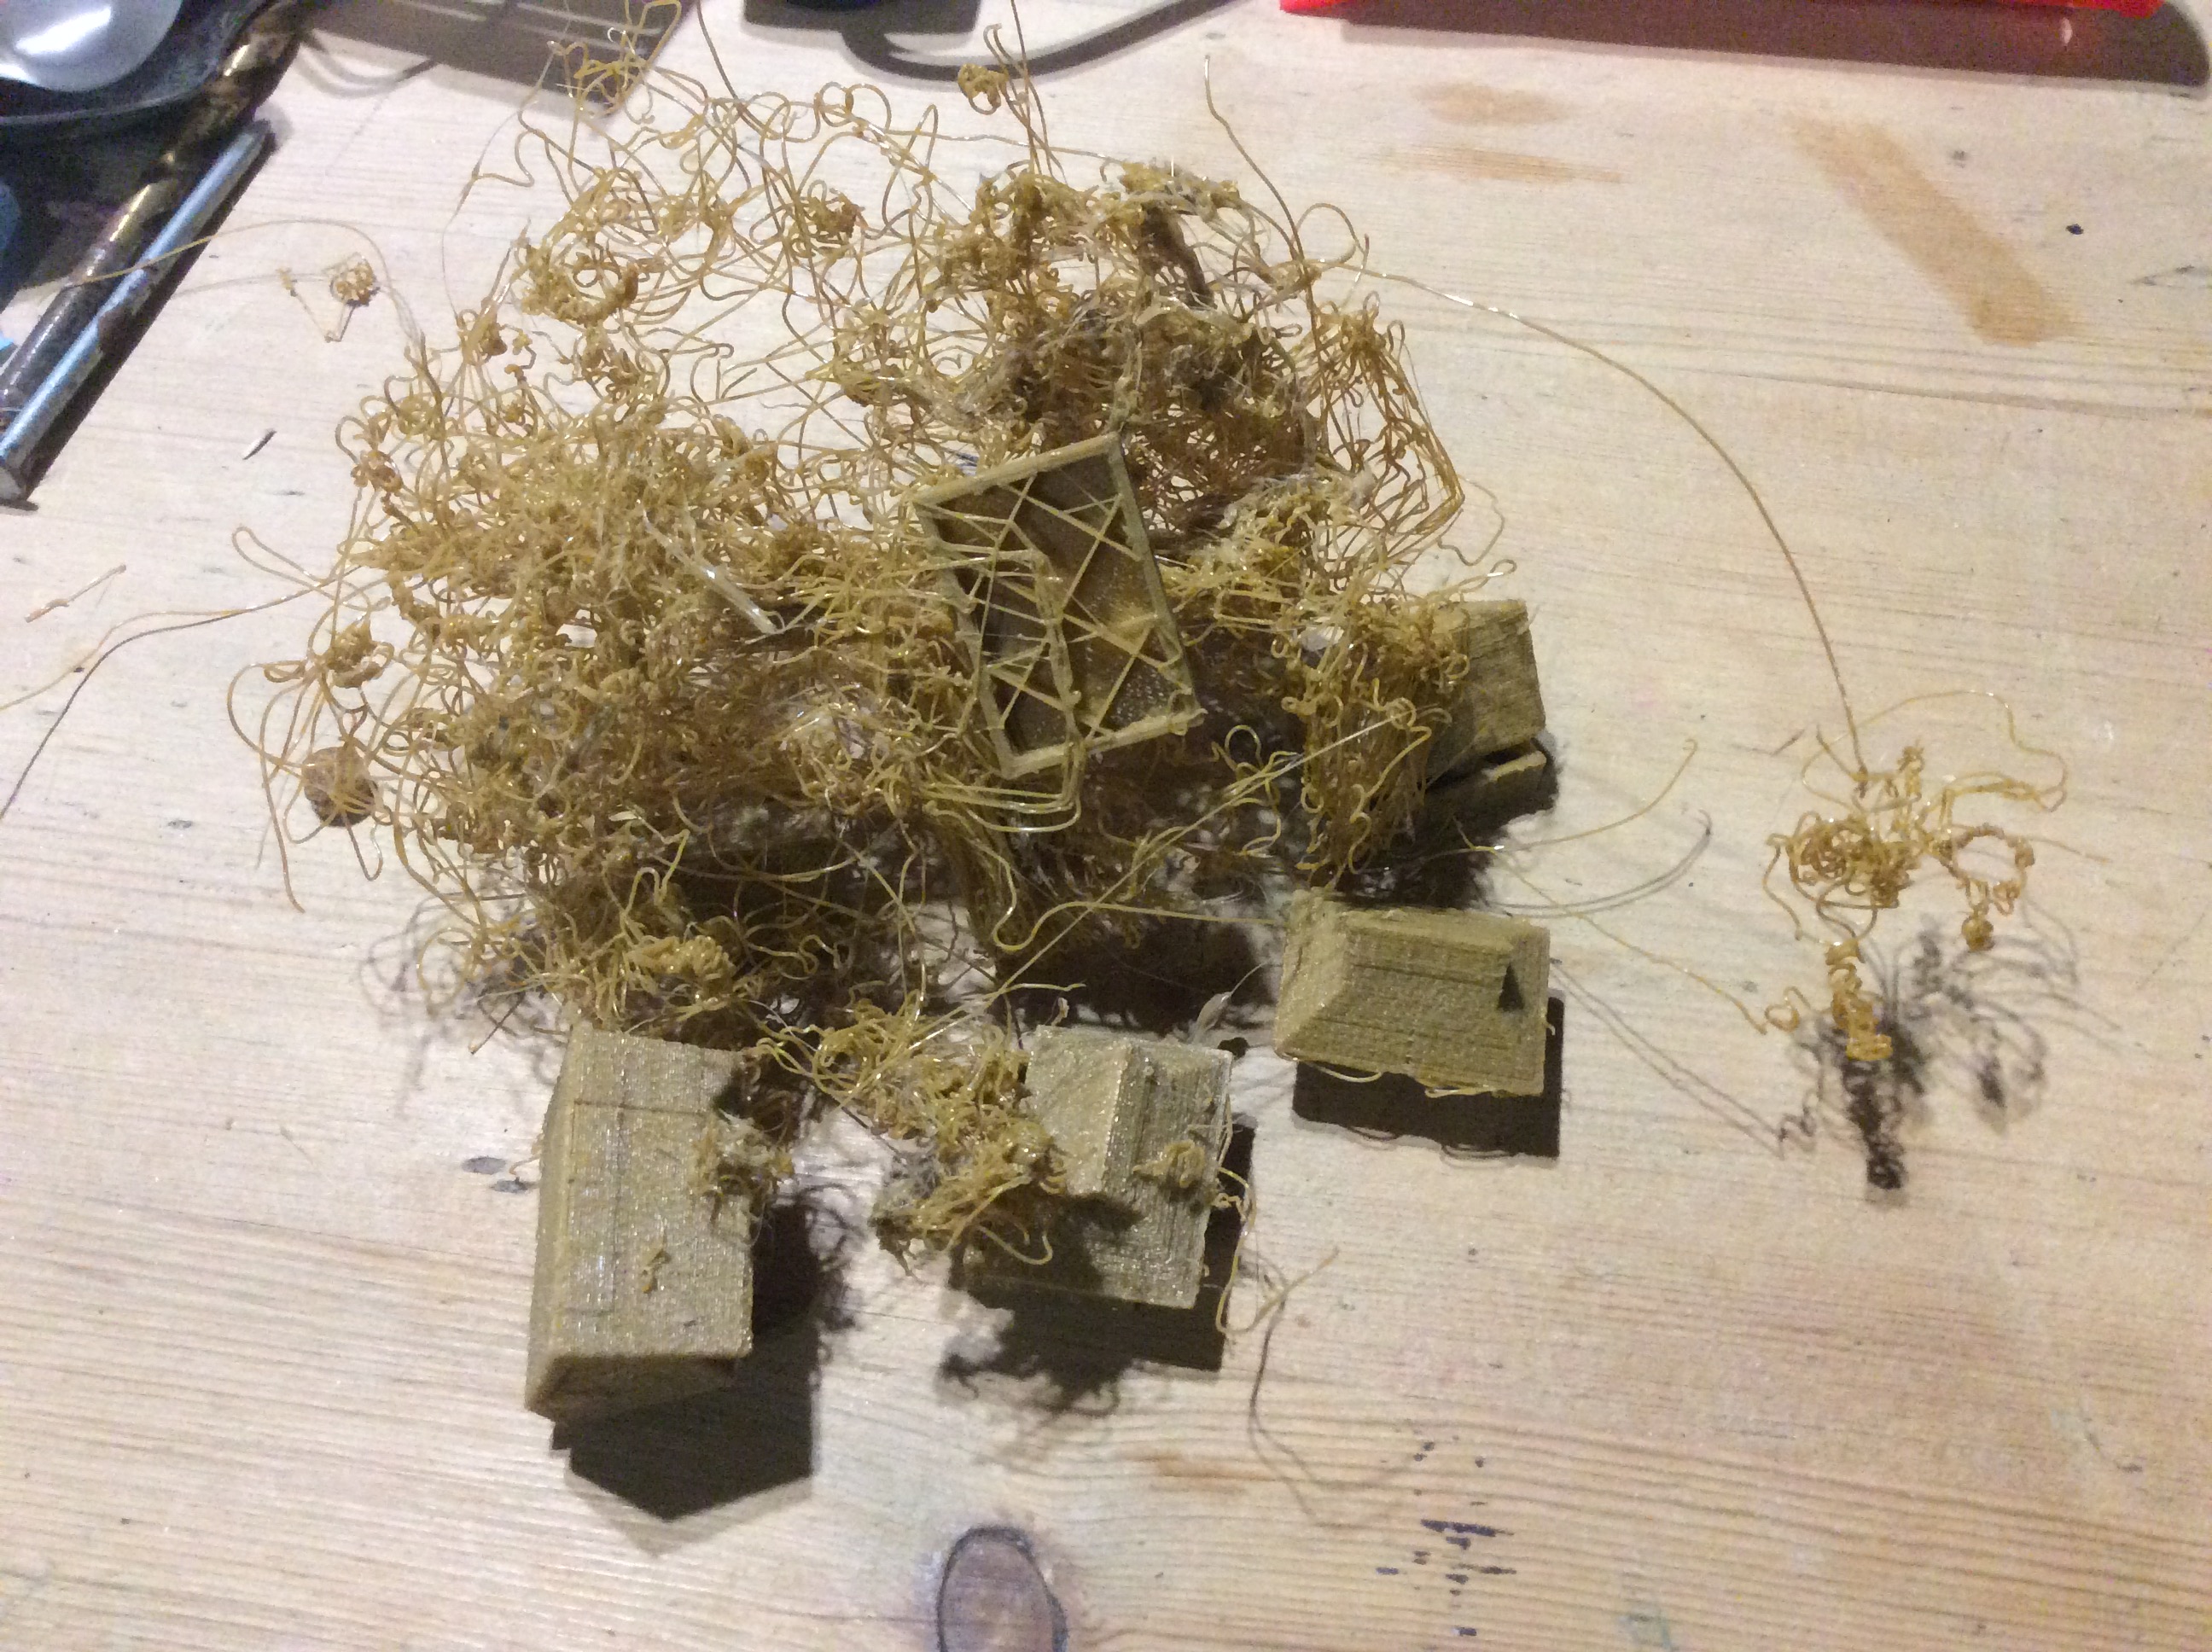 These buildings in the spaghetti are exactly the same as the ones above. There has been a massive layer shift on them as well as some not printing above a certain height. The only thing that I can think of is that one popped off and it caused a domino effect with the rest.