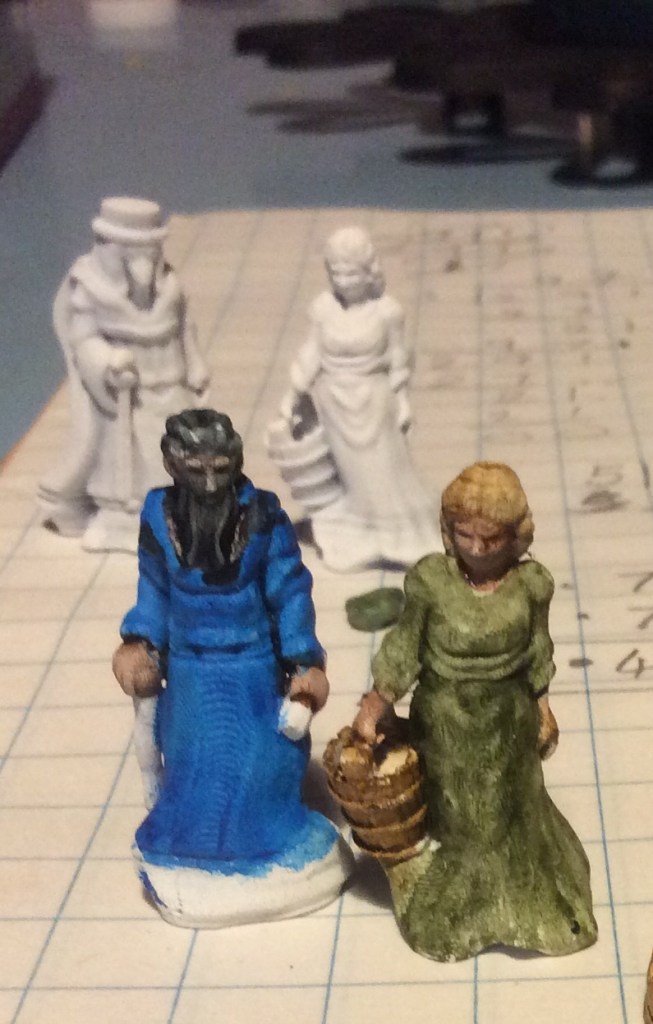
Tonight my son decreed that he was going to start painting again, to which I said not a problem…I hadn’t realised he meant right then. So I had a mad mooch for something that was undercoated and he chose the court wizard. My middle one decided on one of the milk maids and I cracked on with the ones I started ages ago.
You could really tell that I hadn’t used the Contrast paints for a good while as the tops had well and truly got sealed shut. Nevertheless we cracked on.
Being the cunning devil that he is, he informed me that he liked developing a back story for his models and his wizard had been dabbling in the dark arts and had developed a blackened face because of this. Nothing at all to do with painting flesh on when the black hadn’t dried.
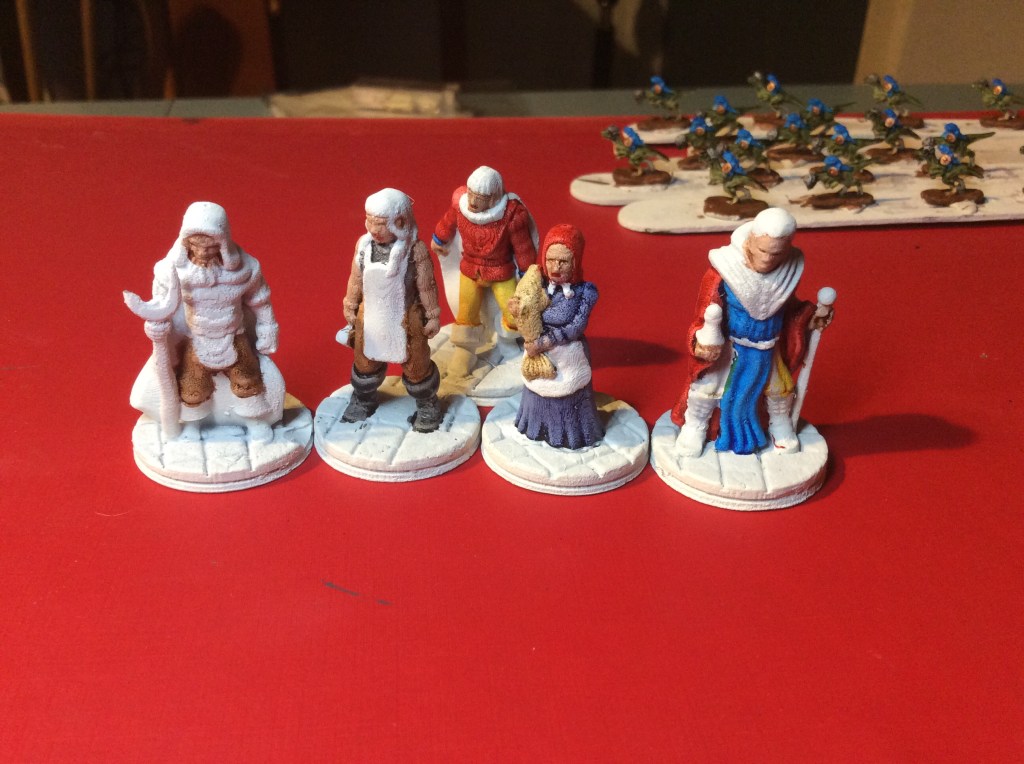
I managed to get some more finished and got the lady painted too…
Sod all detail on them, but they will do. I will try and get some more sprayed tomorrow and then get them painted. I actually enjoyed doing these, i think it was a sense of accomplishment, I have dotted around so much of late that nothing has got finished, I also rather like the bright colours on the posh ones.
I had a major panic at work today. I actually thought I had lost my new child. Thirty seconds of searching and then I asked her sister if she had gone home early. Yes, she replied, because it’s Thursday (one of her finish early days). I had got it into my head that it was Wednesday… this didn’t wear off as I was gaming on Thursday… I bet you can see where this is going! At least I got some figures done instead 😂
The other day I decided to treat my players to their own miniatures of their characters. I got these of Hero Forge. I actually had great fun playing with the software, but in the end I came up with the four characters. Two hobbits, a Mirkwood Elf and a ranger.
I bought the STL’s as I can print in both resin and filament (still cost over $7.00 each. But it was a present so I was willing to spurge in my mate’s and my eldest.
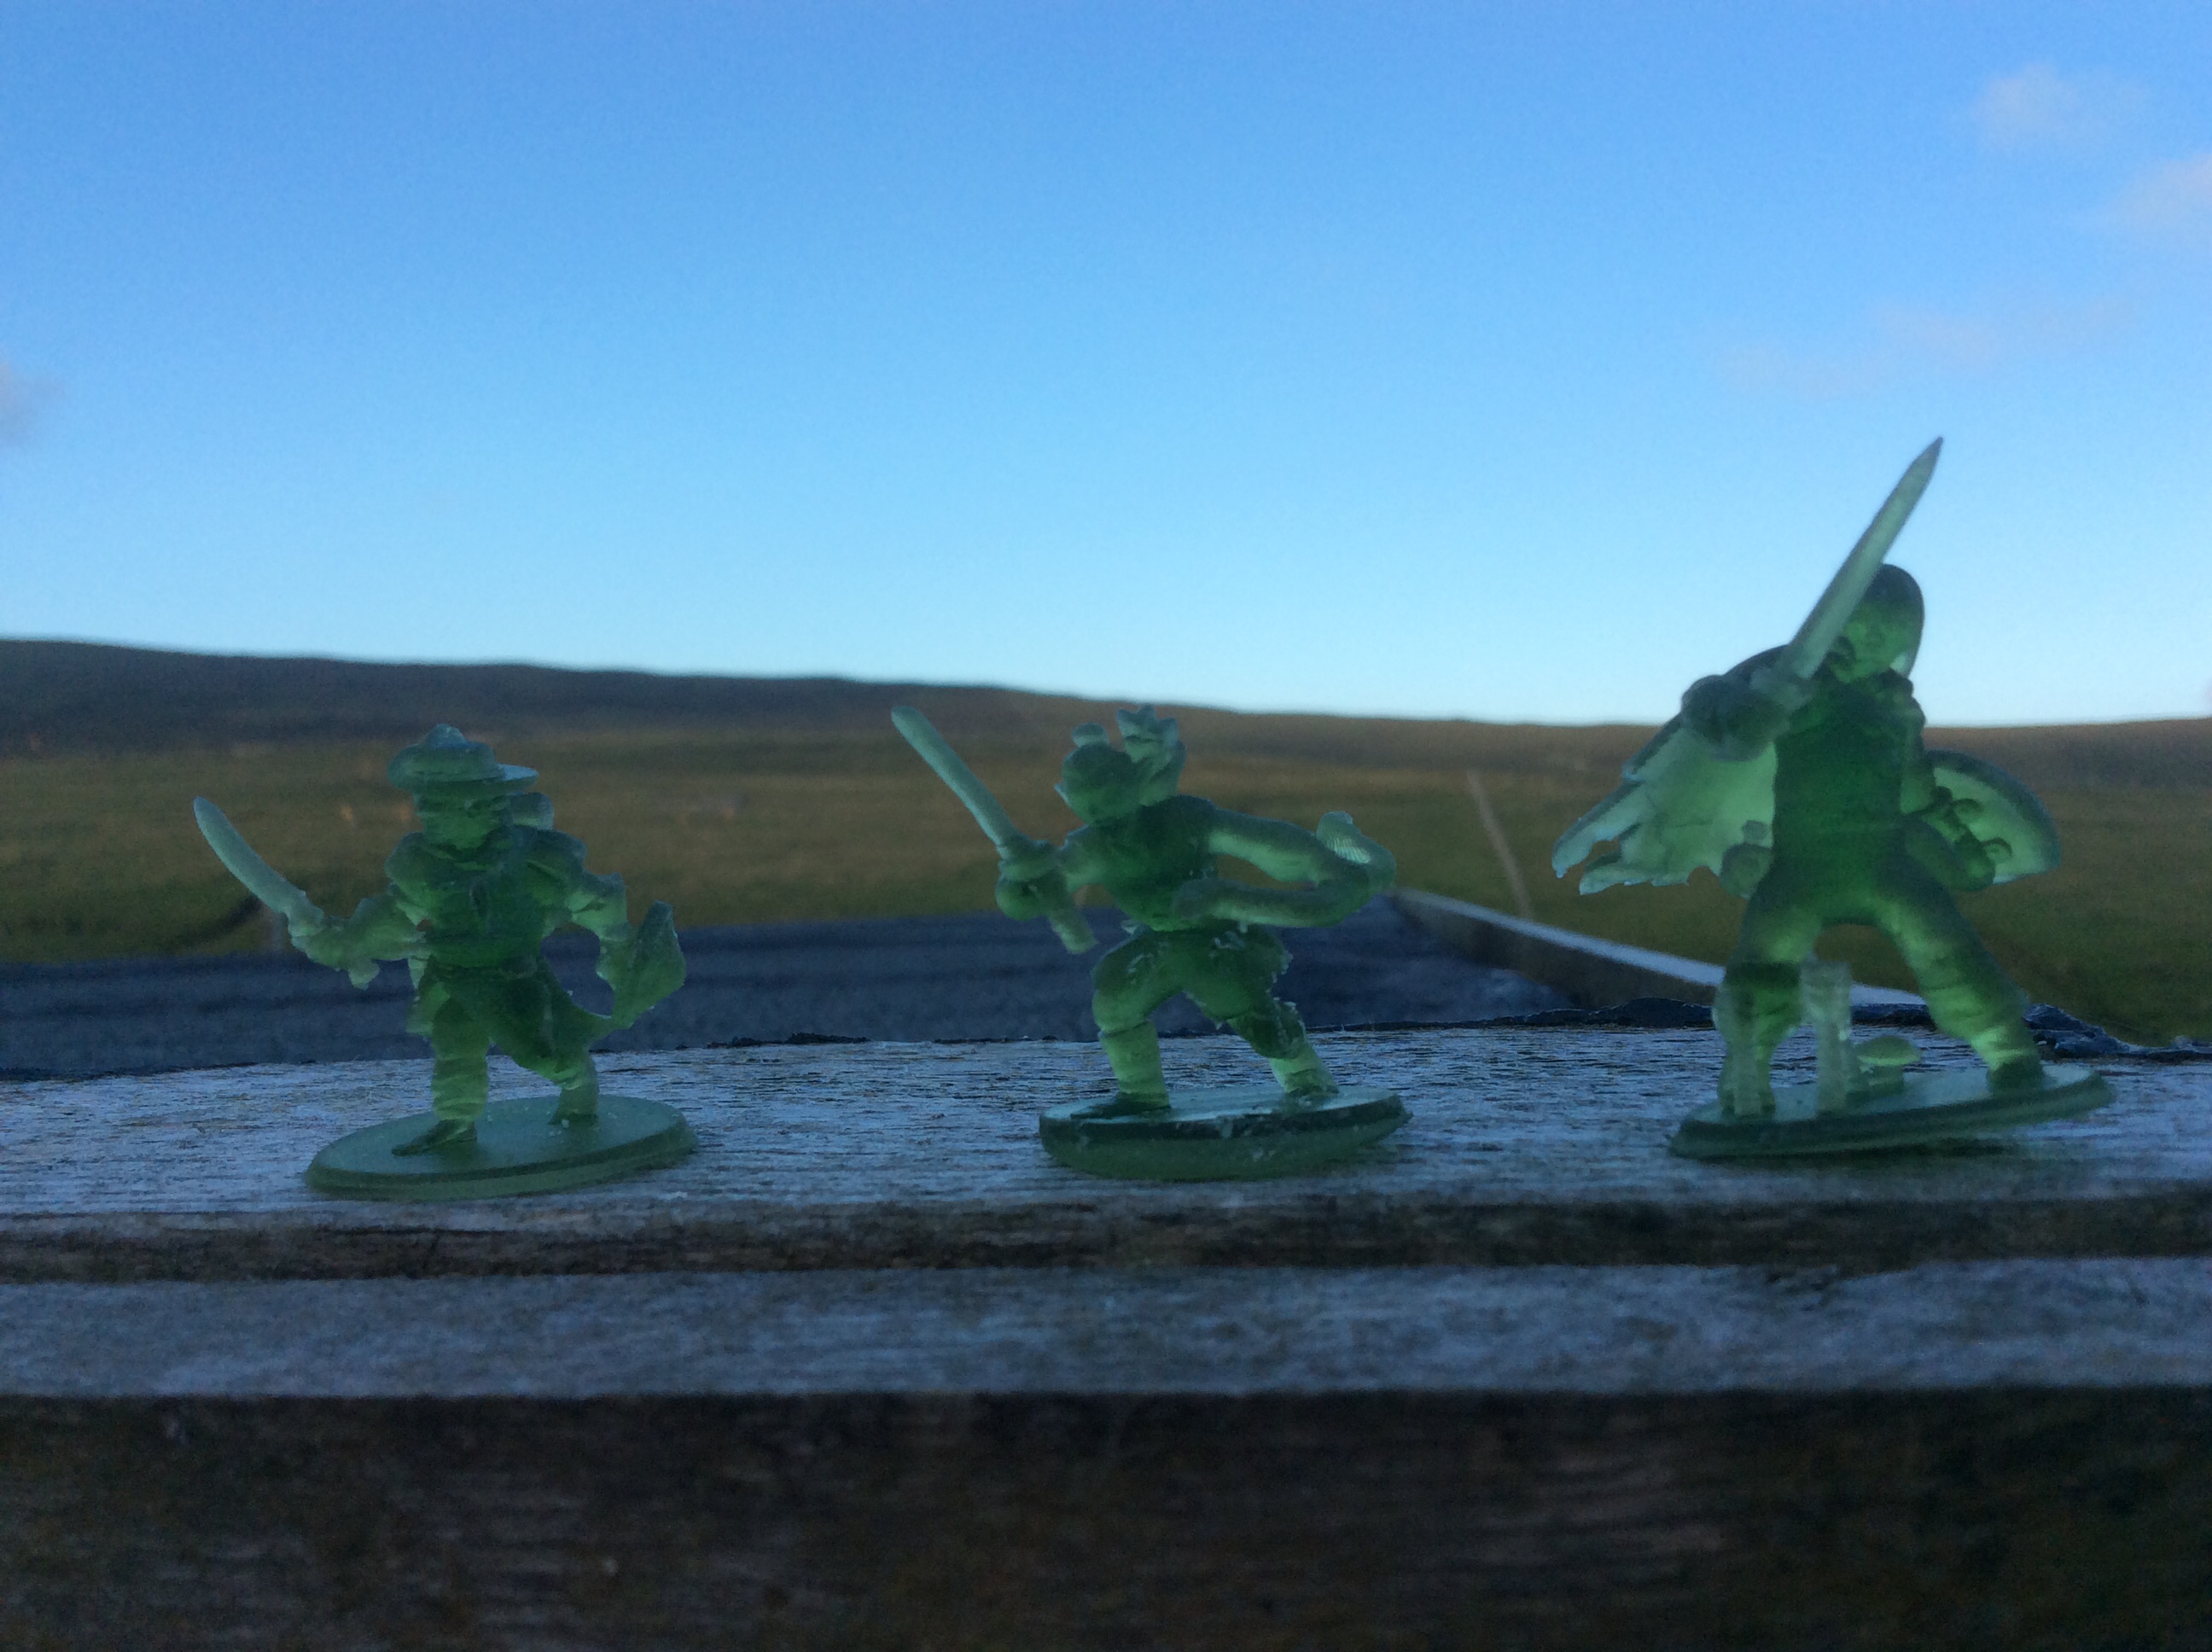
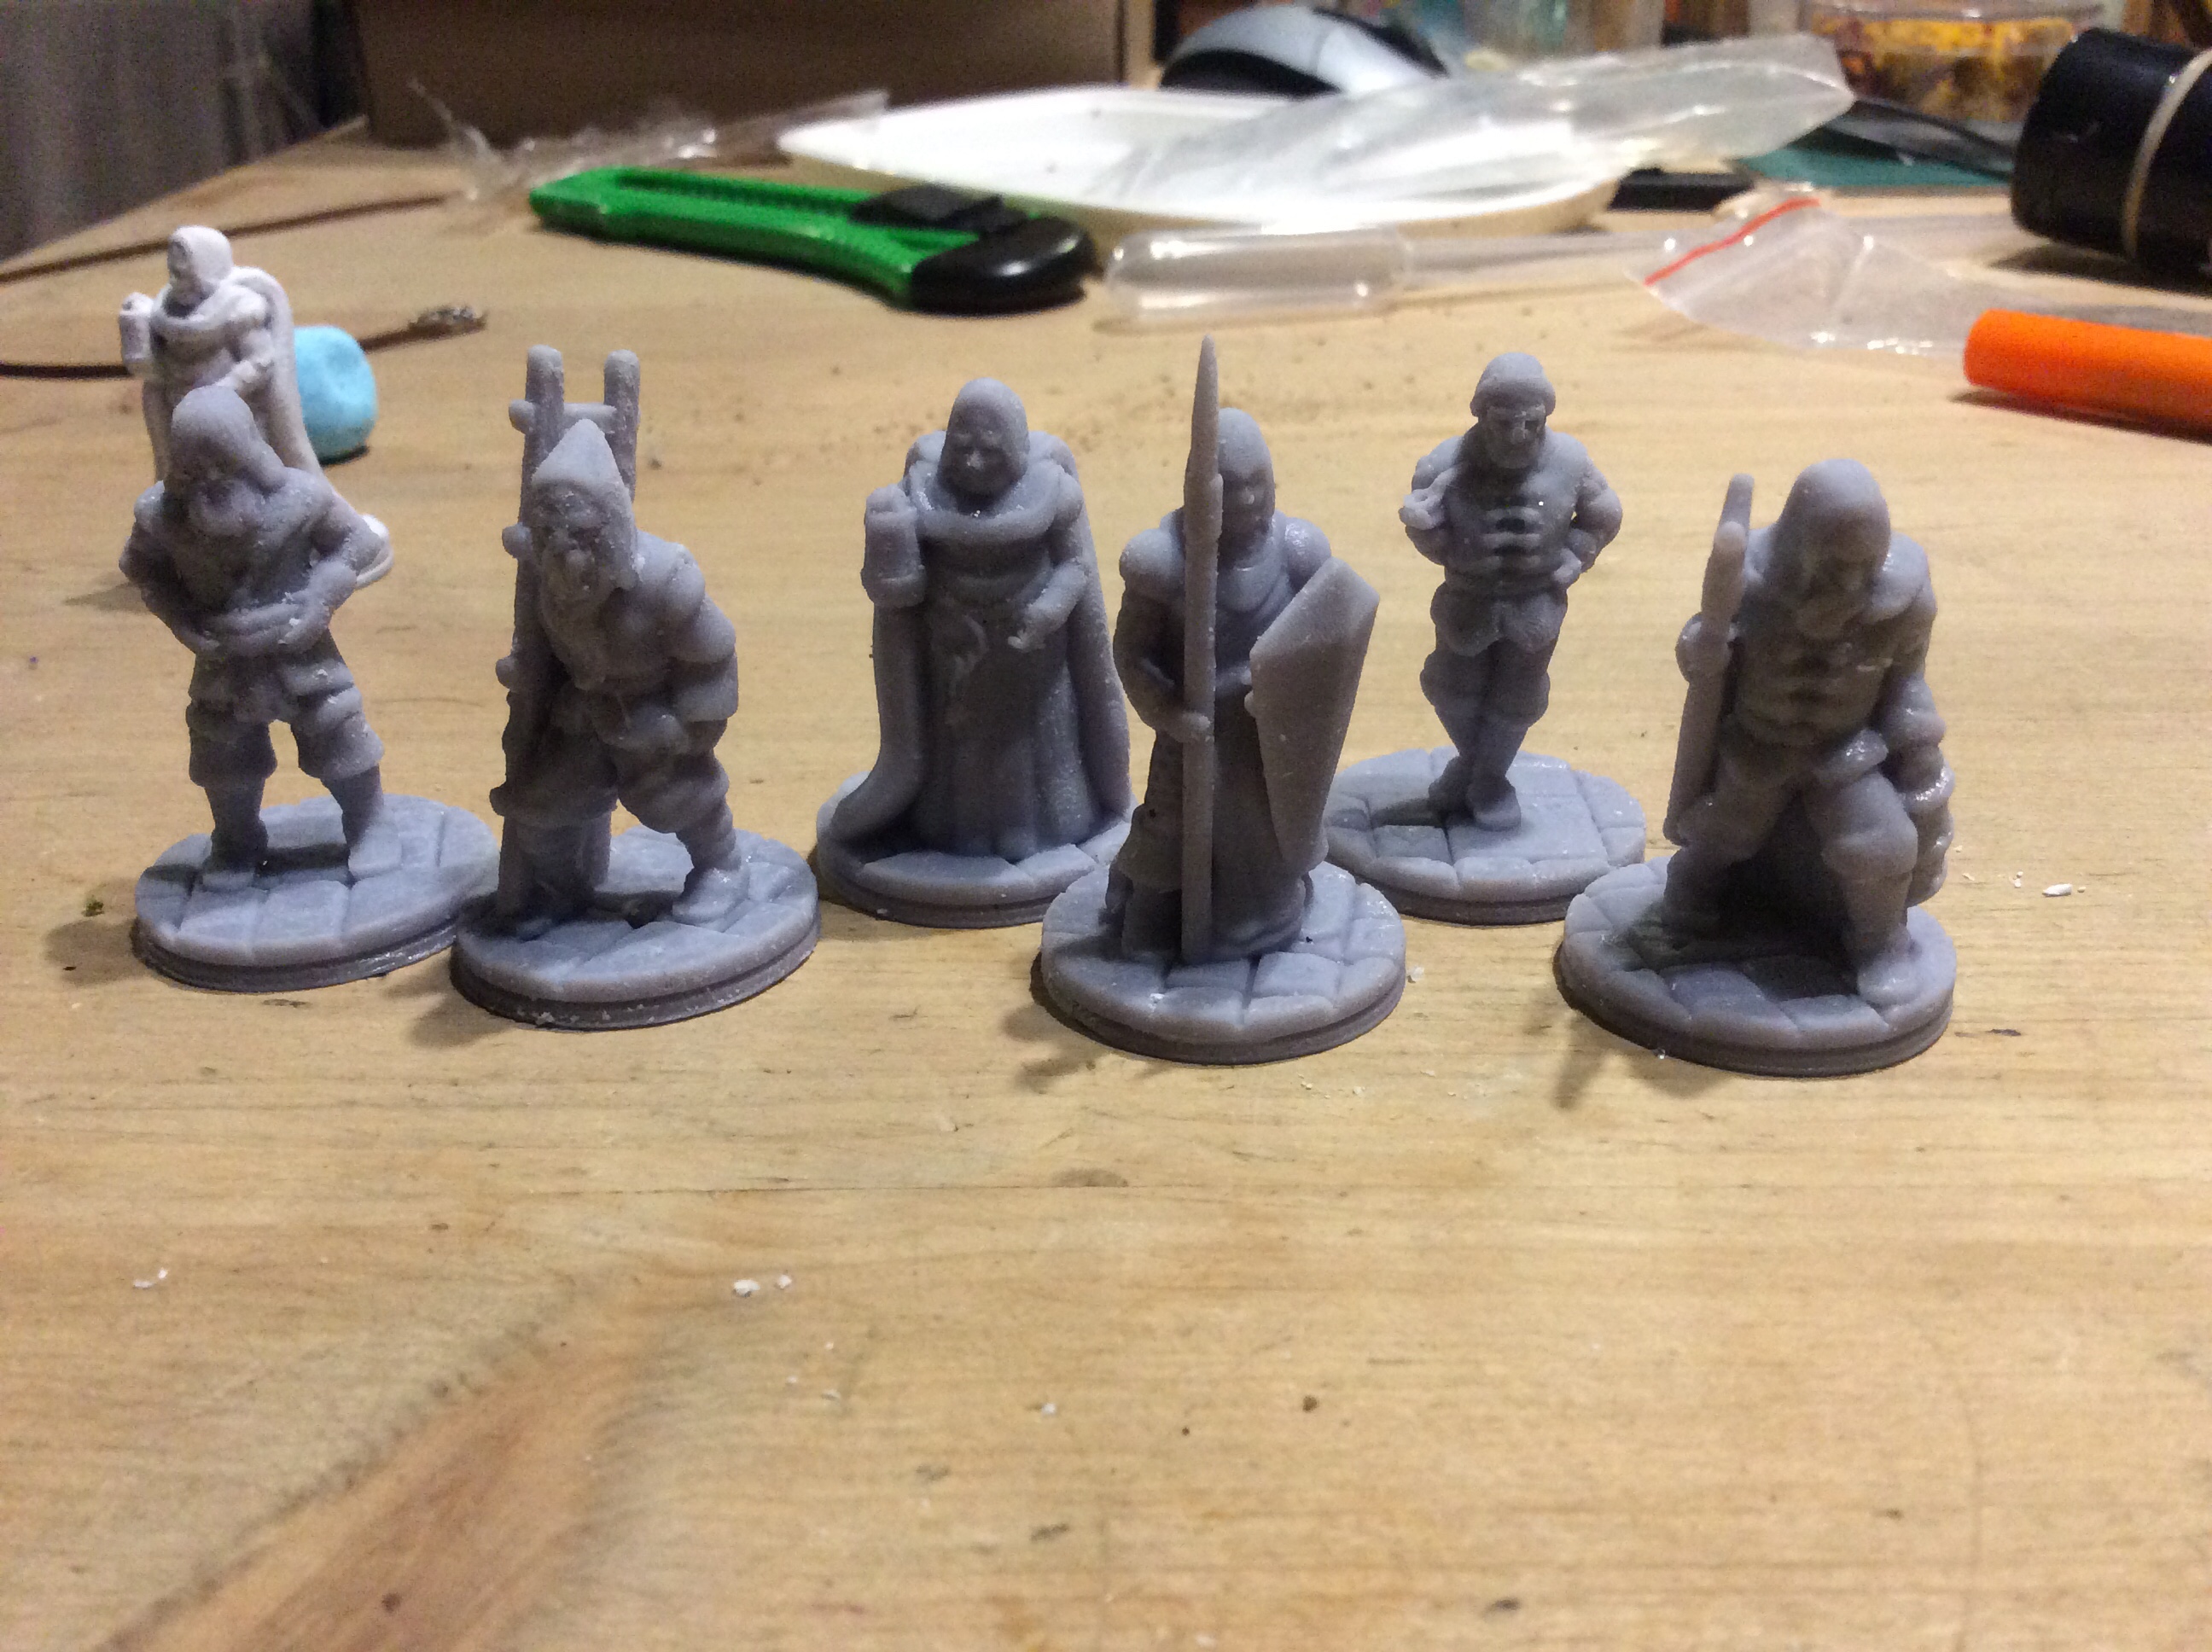
So I posted a picture of them yesterday in their raw state…
Sadly one of the hobbits failed to print properly, but the rest came out okay (ish). I reprinted them all today as the ranger had lost half of his shield and the elf lost their scabbard. Unfortunately on today’s print the ranger lost a different bit of their shield as did the hobbit, the elf still lost the scabbard, but luckily the other hobbit printed (even if she does seem to have very thin arms.
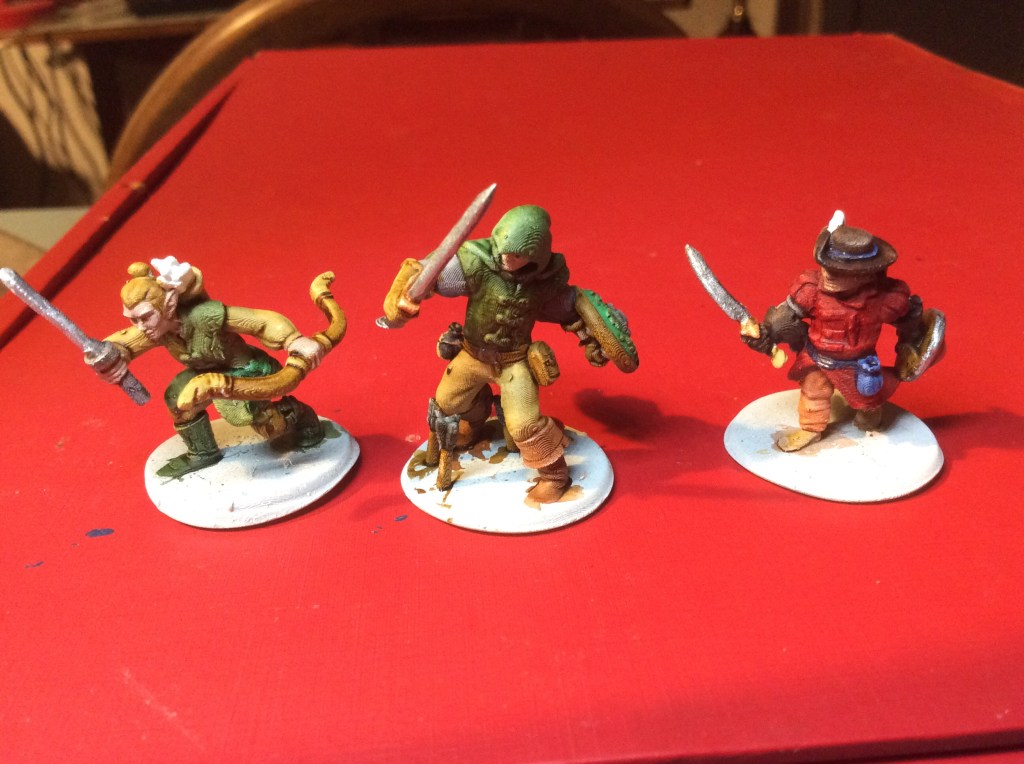
I decided to give the original ones a lick of paint tonight and here we are…
So left to right we have Tauriel, an elf of the woodland realm. Arador a ranger of the north and finally Hoban Underhill a hobbit of the Shire.
The poses were funky and as I said I enjoyed playing with all the different poses and equipment. I spent a couple of hours at least on the four of them. This is where it gets a bit interesting. There are some poses and equipment that do not work at all together. I decided to make a Samurai and Ninja. I felt the urge to make a diorama… I blame Dave and Pete for that! The Ninja was in a three point landing and the samurai was rushing forward with a spear. Whatever weapon I tried to put on the belt of the Samurai actually went through the armour. It would go on the right side of the body fine, but not the left. I then decided to do some experimenting with different figures and found similar things. The elf above has her hair in a bun, simply because if it was long it would go through her back quiver.
The other thing I found was that the resin actually has ridges on it as if it were done on a filament printer. They are faint, but they are there. At the distance you would normally see them on the table they are invisible, but they are definitely there. Now this is different resin, but the civilians I did a while back do not have these ridges. It makes me think that it could be the actual miniature itself. I have seen pictures of the Hero Forge stuff that people have bought as a miniature having them too.
Will I be rushing out to get any more, probably not. This was a one off experiment. I might fork out $16.00 for the two Japanese minis I built, but before I do I might see if I can find something from the various mini manufacturers out there.. to be honest it would probably be cheaper.
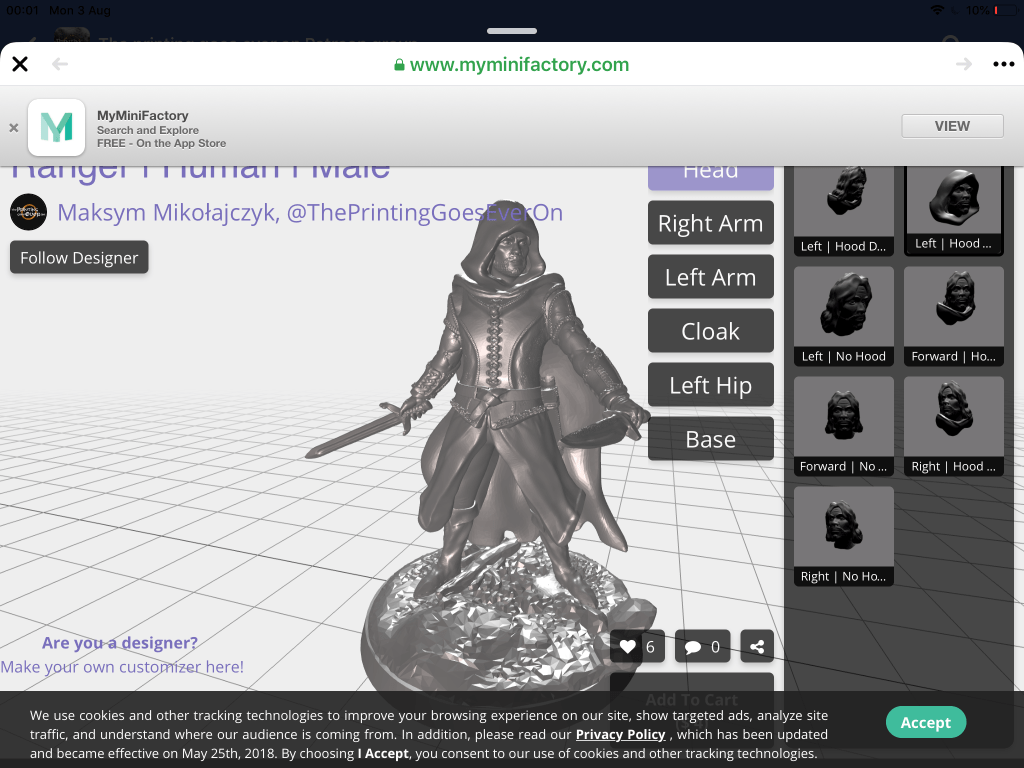
Talking of cheaper, the Up and coming Patreon that I said I was likely to follow, is more like definite now, but interestingly enough he shared a Link to a MyMiniFactory page, where I could make a ranger… okay I cannot have him doing back flips or other things like I could on Hero Forge, but it is really a nice miniature and I could have some weapon options etc. Plus they come with a full sized base, not a really thin one like the ones I just did.Price $4.00 just over half the price of the one above…
These are pretty much finished now apart from the fact that I forgot to paint the back banner!
I also had a play about with some of them on a 30×40 base and a 20×40 base. I still can’t decide which to go for. There are twenty in total so I could get 5 bases With 4 to a base and 6 full bases with 3 To a base.
Pretty much everything I have done is on the 20×40 bases so I don’t know whether adding something bigger into the mix will look a bit weird or not.
These next miniatures are not lizards and definitely not 6mm.
I decided to get some paint on these. These were the underexposed lot so the features are pretty much non existent, but as I am a stingy sod I am painting them anyway. Hopefully I will get them finished sooner rather than later. I have been a really good boy and my resin printer is having a rest while I think about what I am actually going to do on it.
I took my print off today and have enough bits to make my small town. I will need to print some more houses as six do not a town make!
I bumped the gate up to about 200% and left the walls at 140 and they seem much better (I had originally shrunk them down to 15% in 3D builder but they looked too small so I increased the small size by the above amounts).I can make the compound for the temple separate from the town as I have extra walls knocking about.
I also shrunk the wooden fences down to fit the 6mm scale too these were a bit trickier to print, luckily I did a test run of all the different bits, before the mammoth 13 hour print (3D printing certainly isn’t a fast affair).
Unfortunately the gate posts couldn’t take the strain at the top and both came off. I improvised with a bit of plastic rod…
These wooden fences were the ones I built in 3D builder to allow me to print them pre constructed for my 15mm village… I never thought I would be printing them for 6mm too.
So where do I go from here. First up some rice paddies. I am actually just going to print the 4’s that I did for the 15mm village (without the rice) I will give it a go with static crass as the crops and avoid the resin pour stage. I really do need a better system of making the static grass, that does not involve forking out £55 for a WWS one. I will have a play around with my cheap (tea strainer) one and see what I can come up with.
I also intend to see if I can build some of the 3DAlienWorlds farmhouses in 3D Builder and then shrink them down too. The ones I have really only work as town houses and not ones you would find in a rural setting. To be honest I could just buy the ones on 2D6 world’s, they aren’t that expensive but to buy enough for a couple of hampers then I am looking at over £30. Interestingly enough they have just brought out the stone walls in resin. But 3DAlienWorlds ones are spot on for me and I can also print as many as I like for pennies, plus it gives me a bit of a challenge 😂.
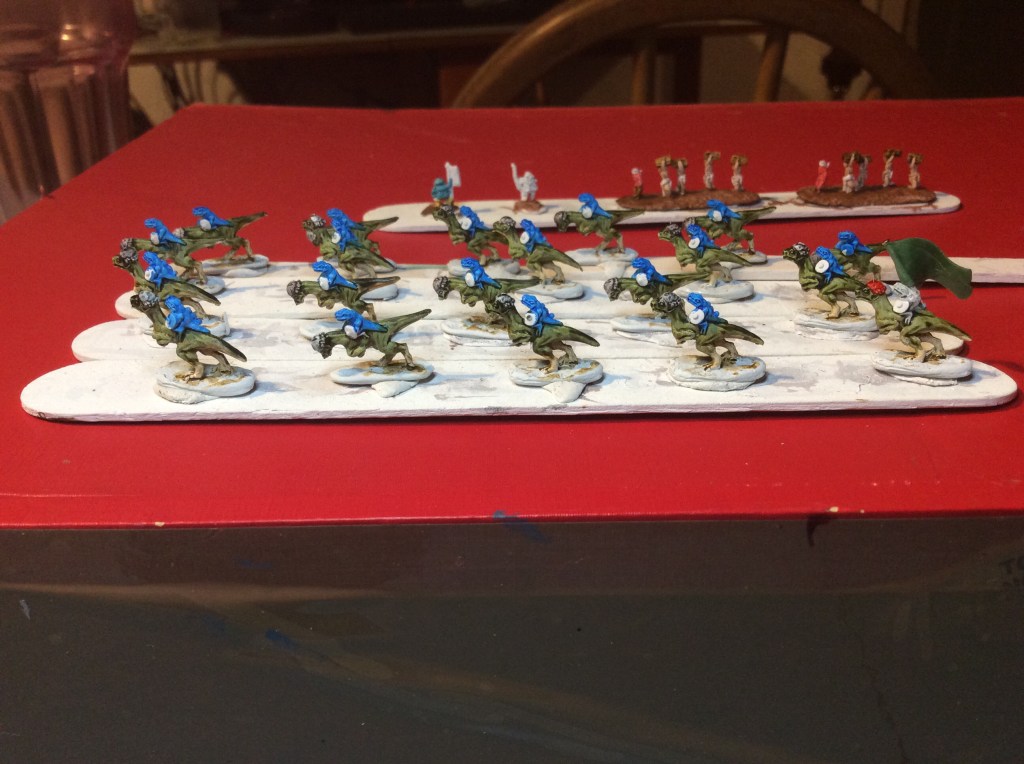
Tonight was a bit more productive than yesterday as I actually managed to paint things…
Here they are so far. They still have weapons and shields to do and then sort out any missed bits. These were really nice to paint so thumbs up to the sculptor as they were pretty speedy to do. Yeah I could have spent more time sorting out stripes and things but decided against it. I decided to make a leader by adding a back banner as befits an Aztecesque Beasty. Once the Greenstuff has cured I will cut it down and make it colourful. The leader is the only one that is a different colour. My original idea was to go black, then purple, but instead I went for grey, trying to make an albino type that would mark him out as special. His mount is the only one with s coloured crown too (well yes grey is a colour, but I meant bright colour).
Hopefully I will get these finished tomorrow. I am not sure how many I will add to a base and what size base to do. All of the other cavalry are on 20×40. I can definitely fit them onto one, but part of me things 30×40 as I can then spread them out a bit. I will have a play around tomorrow and see what I come up with…
Today I did some more miniatures on the Resin Printer. The one thing I have learned is that I am going to have to up my game in the post printing stage. Although I was trying to avoid the ISO, I think I am going to need it to get rid of a lot more of the liquid resin off the miniatures.
I will do some more testing tomorrow with the meths and see if that will work and if not then I will need to get some more ISO in.
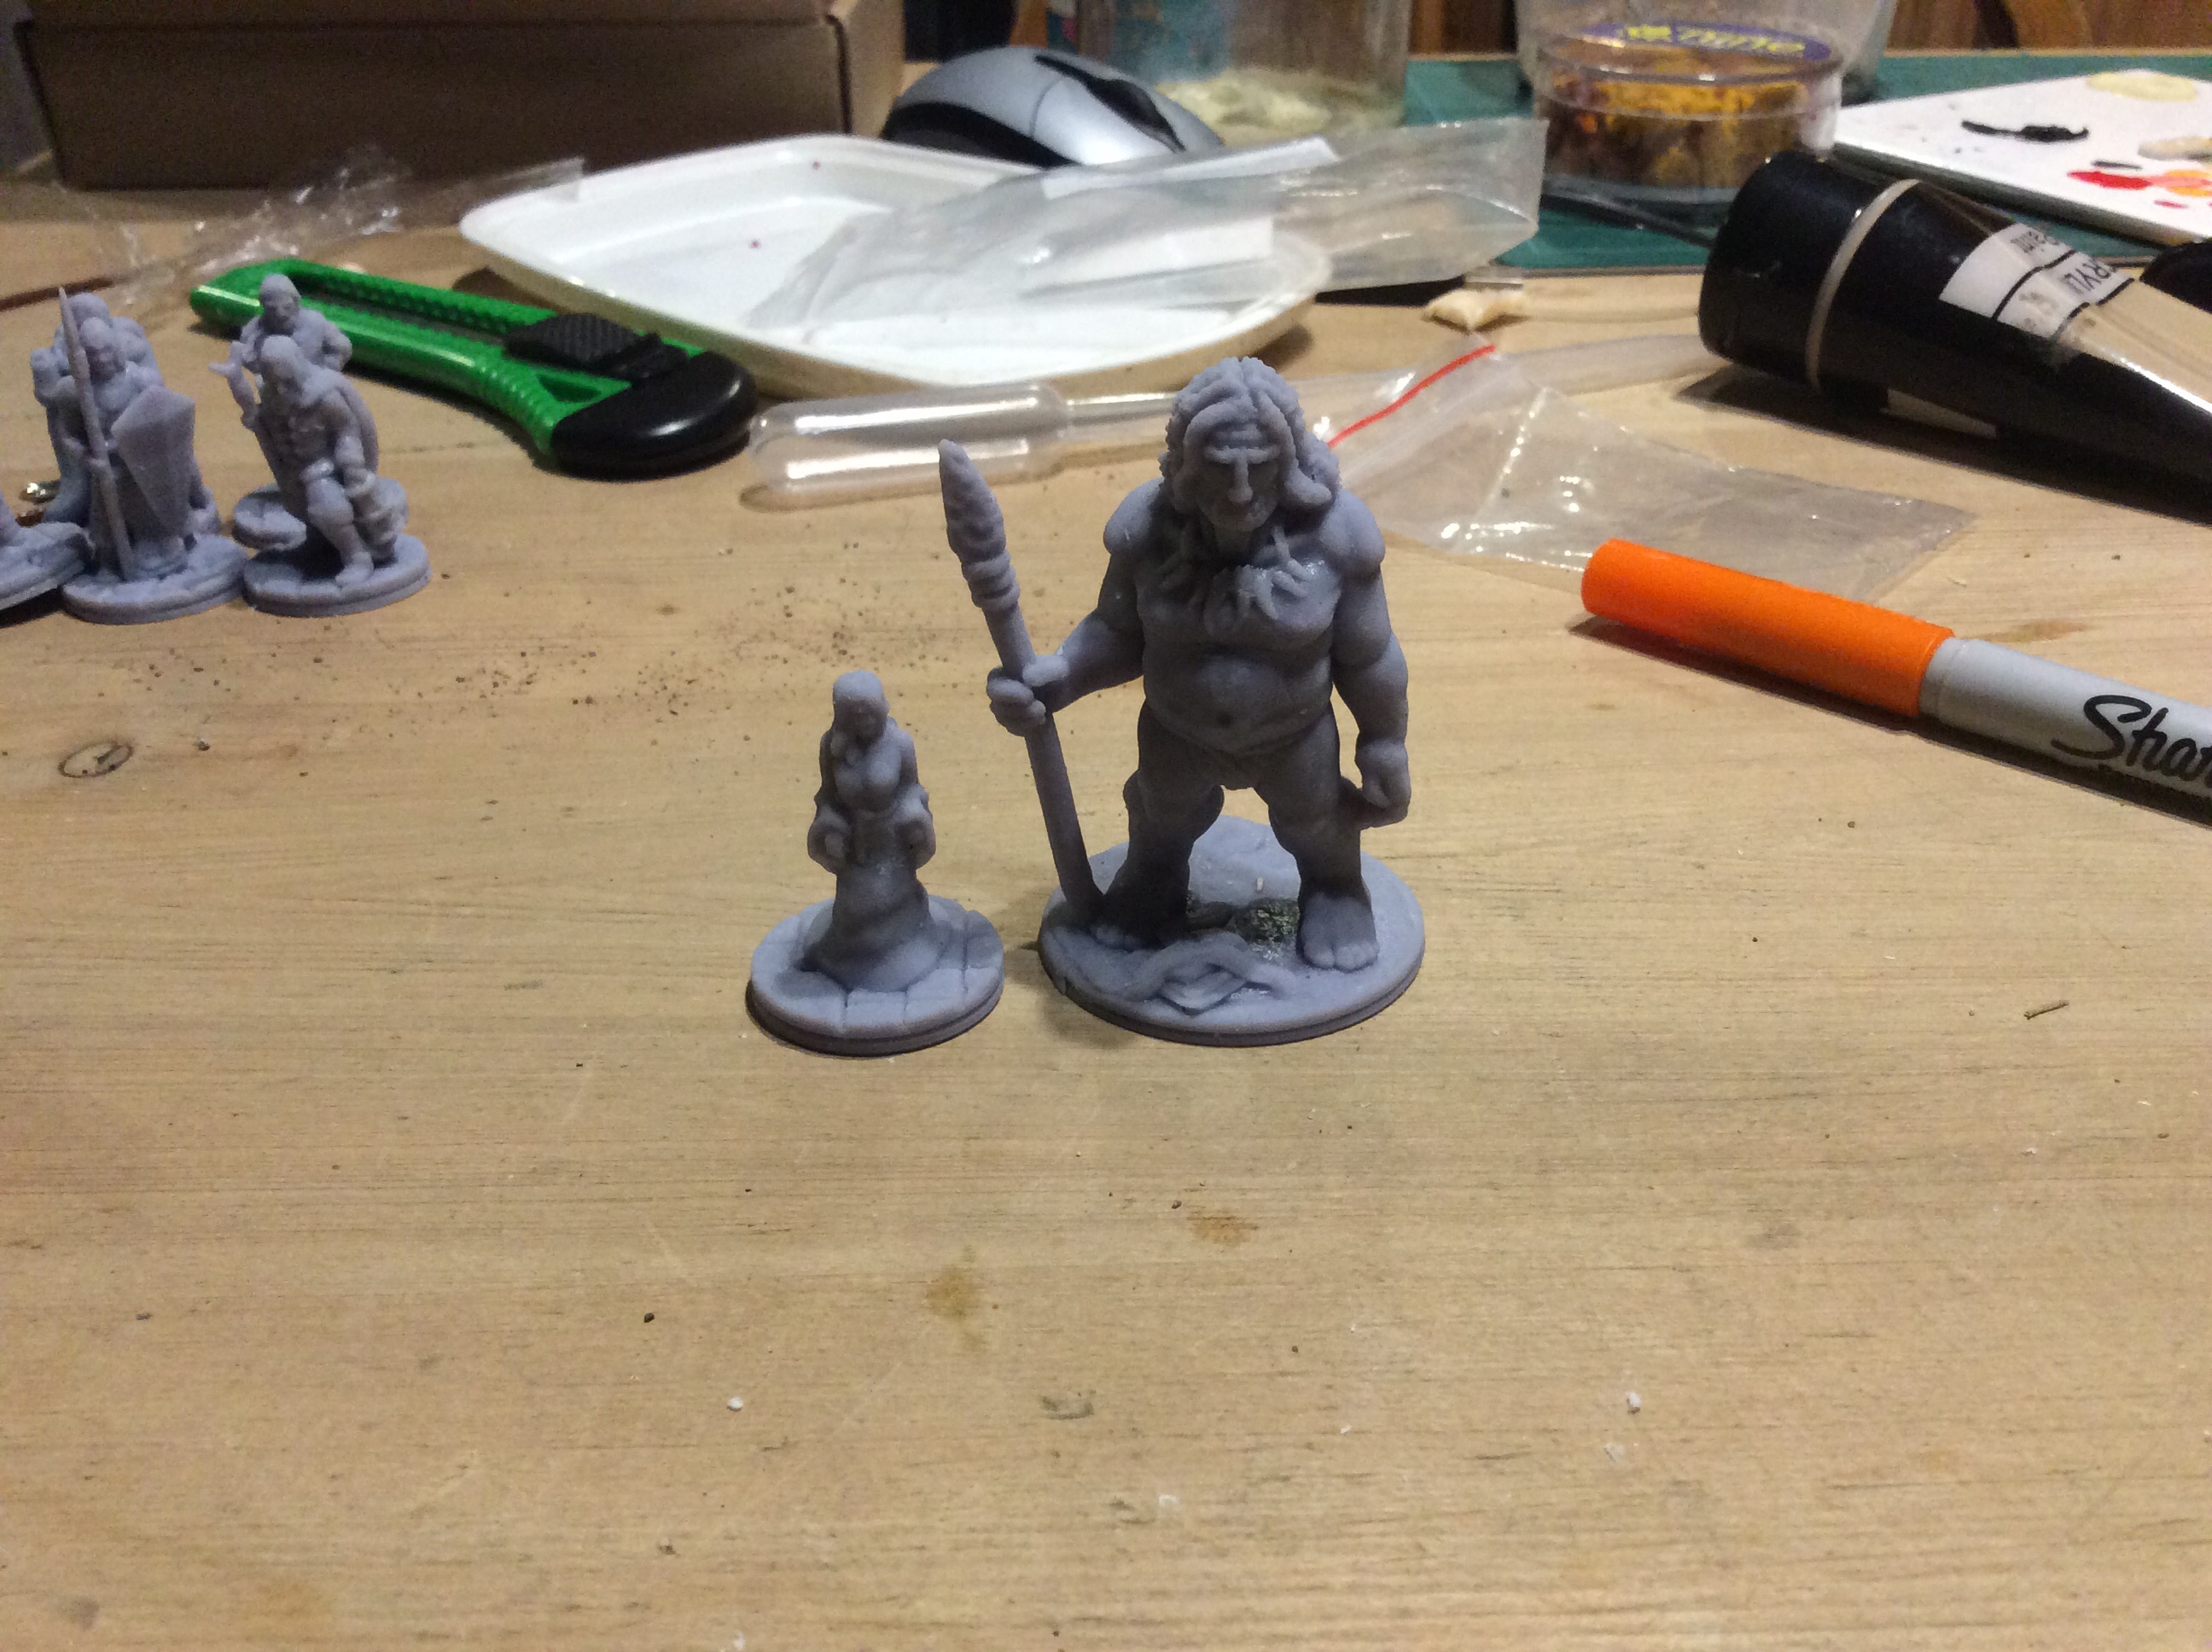
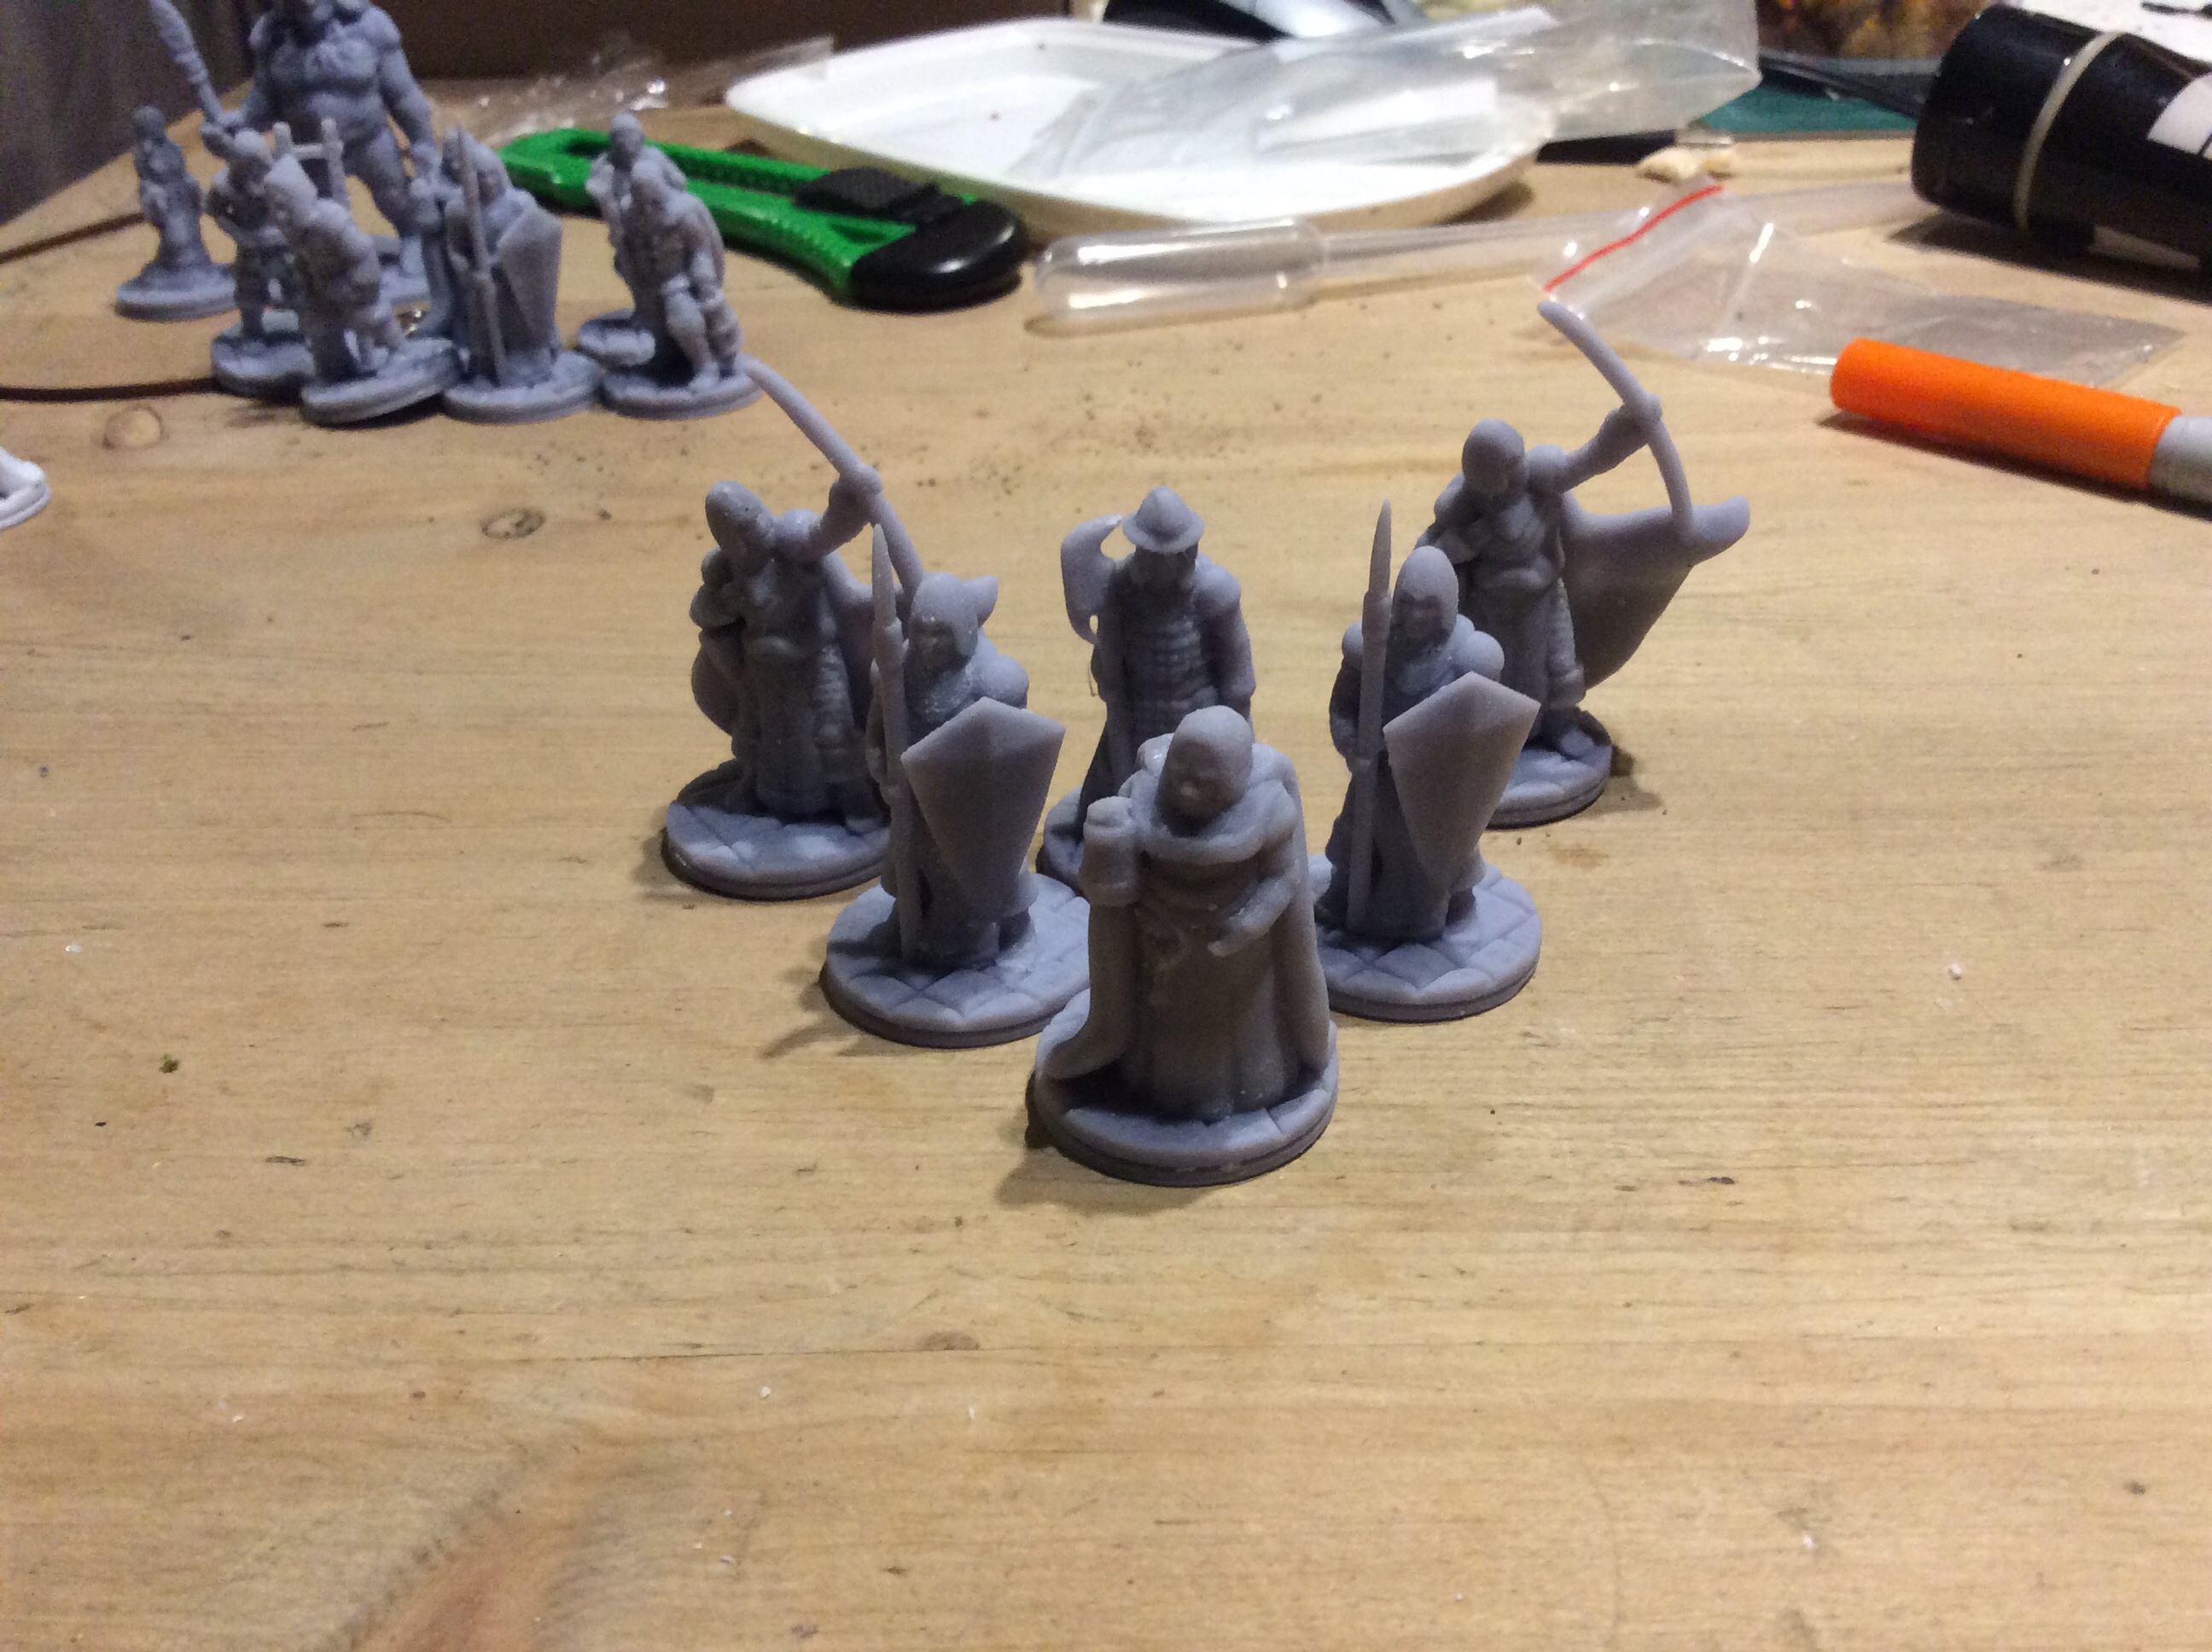
In the first picture we have a merchant, lamp lighter, jailer, spearman, sailor and rat catcher. In the second we have a villager and a troll thingy (brain dead and can’t think of the name) and then we have a mix of spearmint and archers with a lone guard and another jailer. The last lot were done at 10 seconds a layer.
Tomorrow I think I will do an individual figure at different time per layer. It will probably be something small (and faster) and really try to get things clean.
Wish me luck!
My eldest wanted to do some sea creatures today but unfortunately, I had a support failure. It was the first time I had tried supports, so that will be the next thing to master after cleaning things.
The one thing that just struck me as I was about to sign off is that I am still printing at the standard resolution for the printer. I haven’t actually tried higher resolution. Something to ponder the future.
Another day of testing the printer… As I said I would I bumped up the cure time to 9 seconds. and it does look a bit better. The problem is that I printed different miniatures to last time.
So from left to right we have:
Male villager
Town Guard
Female villager
Lounging bloke
Female villager
Lady of ill repute.
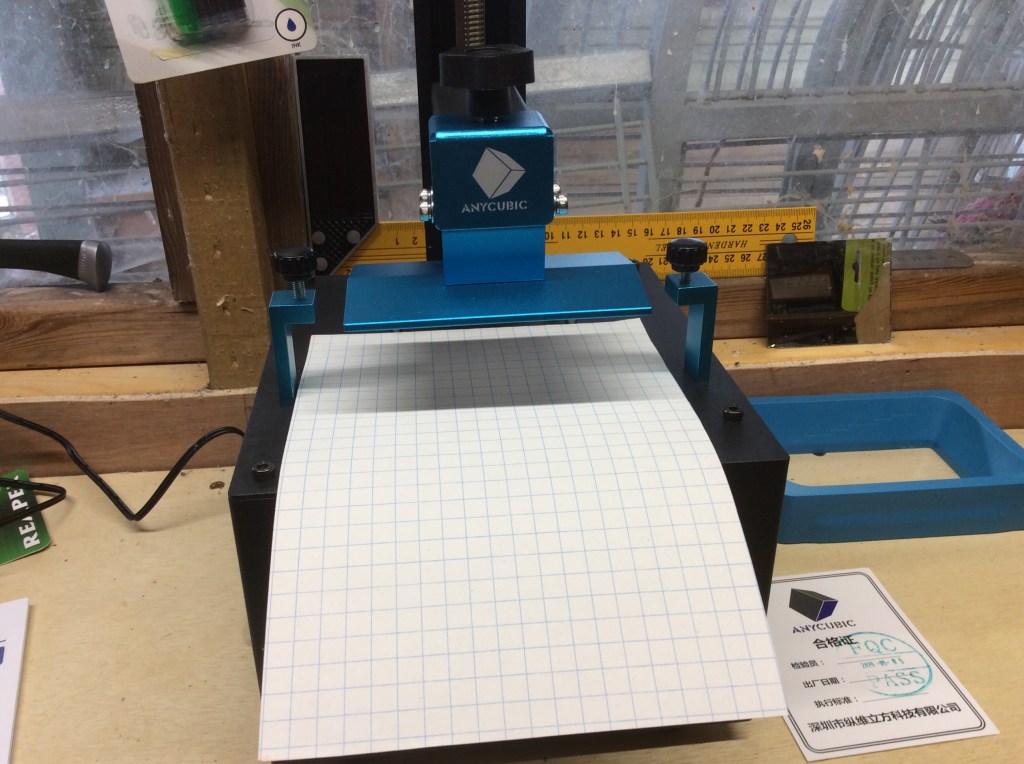
I found the reason for my layer shift today… a simple case of user error. If you look at the photo below… you will just about see a nut above the Anycubic logo. The twice I have forgotten to tighten it fully then I got a shift.
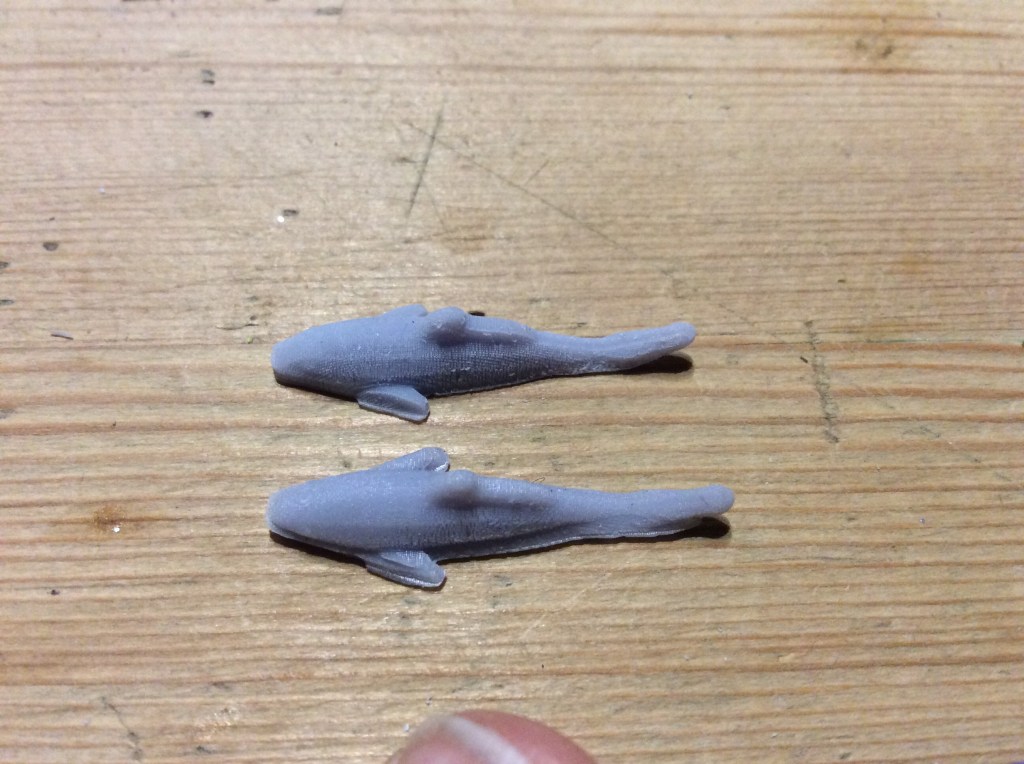
You can really see it with the two koi below…
So note to self, I will need to ensure that the nut is tightened. It doesn’t matter really with these supportless miniatures, but when I move onto supports then a layer shift can cause a right pain I would imagine.
One other thing of note with these is that these bases are an absolute sod to get off the plate. For the next lot I am going to put a little gap under the edge of the base to allow a blade to fit in easily.
My next rock group name … Resin People and the Undead.
So today, after my successful first print I decided to have a go at some miniatures. These are some of the Ill Gotten Games Townsfolke.
As I said I would, I went and washed some in ISO and some in meths. I printed a single mini too which I washed in soapy water.
So what do they look like?
The details are quite soft on the faces, I think that this is under exposure as the print cures. I will need to dial things in a bit and re test.
But anyway, the ones on the left were washed in ISO and the ones on the right in meths. Not to be honest I can’t tell the difference at first glance. They were all put outside in the sun and left for a few hours then taken inside and put under the lamp.
As mentioned I also printed another milk maid and this time washed her in soapy water. Once washed I coated it in washing up lights and rubbed it in, then rinsed off and threw it under the lamp (it was dark by time she was ready).
This is where things got interesting….
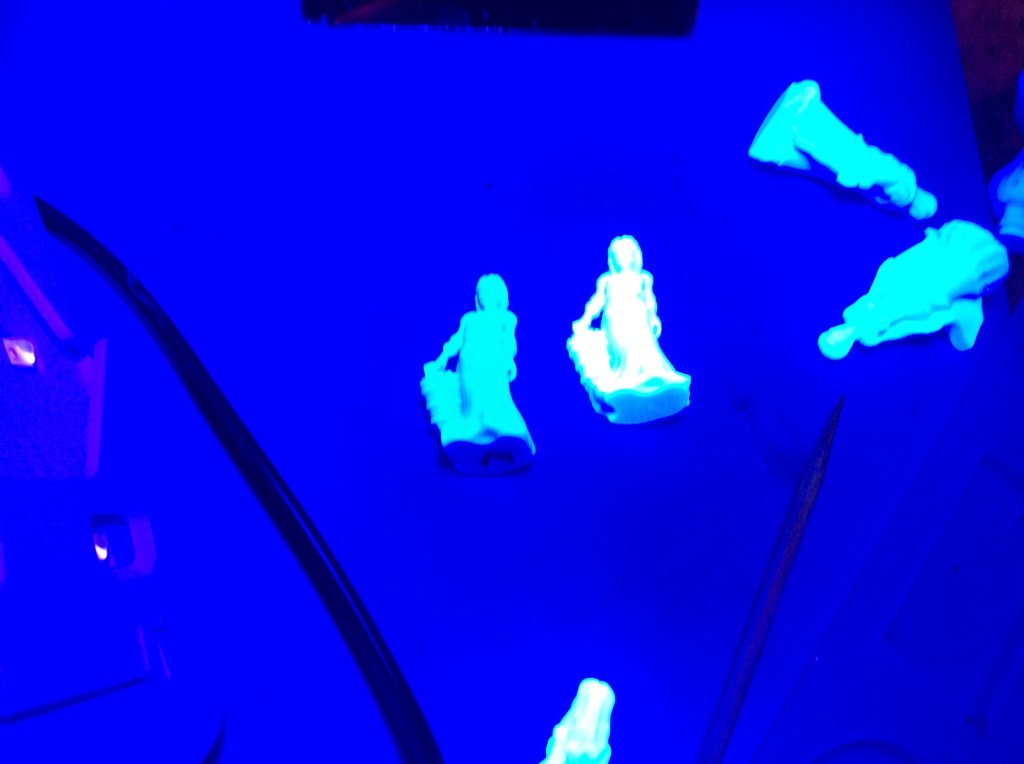
The one on the left is the one done in water and the other is the one done with ISO. Now they are definitely different colours under the light. One has just gone under the light the other has been outside and then spent a few hours under the lamp.it will be interesting to see if they both end up the same colour this time tomorrow. The others look dark as they were out of the direct light source.
Disco Milk maids
I also managed to get my Undead up to the basing level. Hopefully tomorrow I will get them done and onto the next thing.
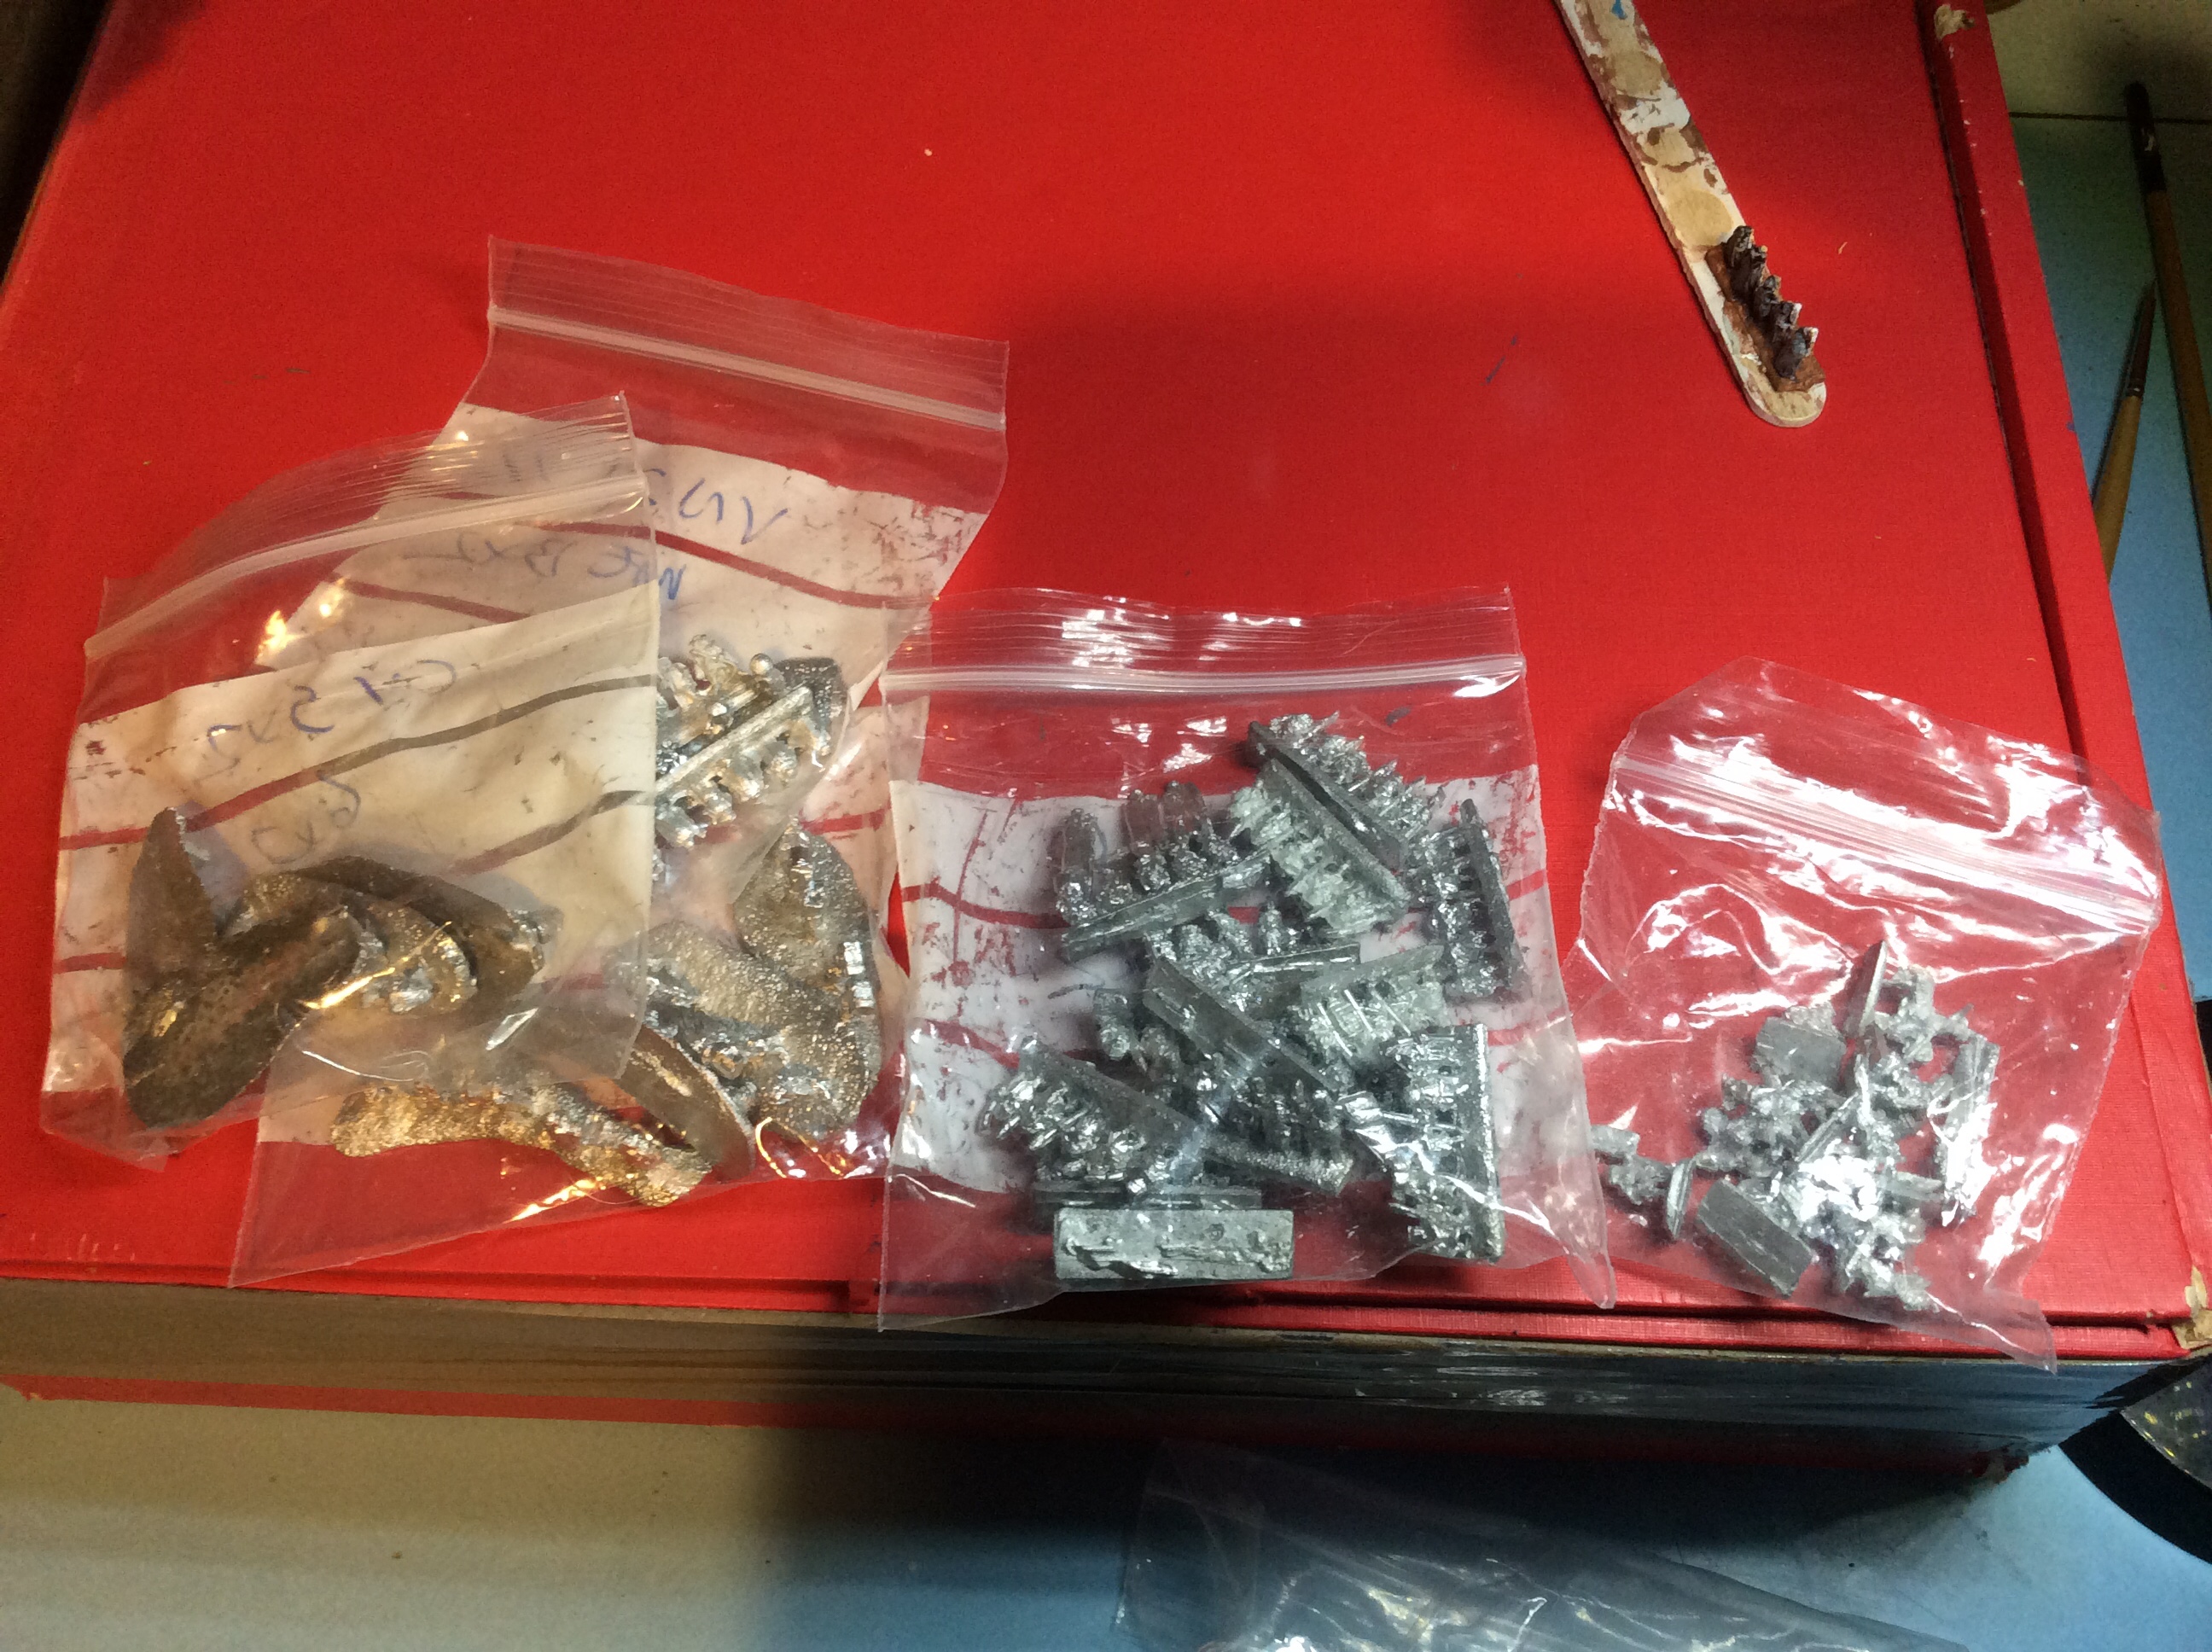
Today may Irregular order came…yippeee, and I never finished my undead…boooo! The box was massive, compared to what I am used to – who cares, it had metal goodies inside…
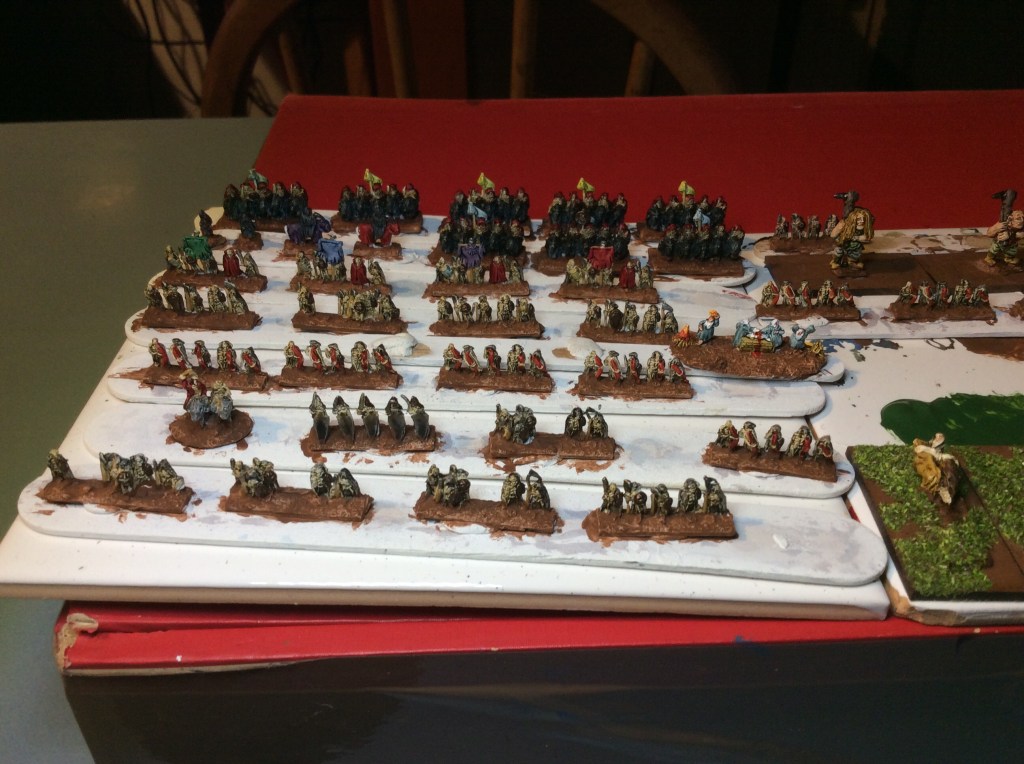
On the left a Khmer army complete with hefalumps and on the right various packs of civilians, some Ikko Ikki monks and Nobori holders and then a Samurai hero set. The last two are to make command units for my army.
Sadly I was too knackered to paint much tonight and it was the tedious painting of weapons that finished me off.
These still have a long way to go, but the horrible bit (or one of the horrible bits) is over. Next up shields and metalwork.
Today we made another step closer to being a true Shetlander 😂. Yes indeed, we have now built a hen run covered in a trawl net. Clobbering in a pile of fencing posts didn’t do my wrists much good.
We have been asked to bake for Sunday Teas, dug our own peat (cast as they call it up here), sat on a hall committee. We are certainly ticking things off our list. If I ever get invited onto a fire festival squad then I know I will have made it 😂😂😂.
The cockerel was lovely last year, but this year he has matured and is now going for the kids, hence the need to keep him in a fully enclosed run. We have him and three hens, so this is plenty big enough for them. It is about 6 metres by 4 metres. They will also be let out too, this is until he calms down.
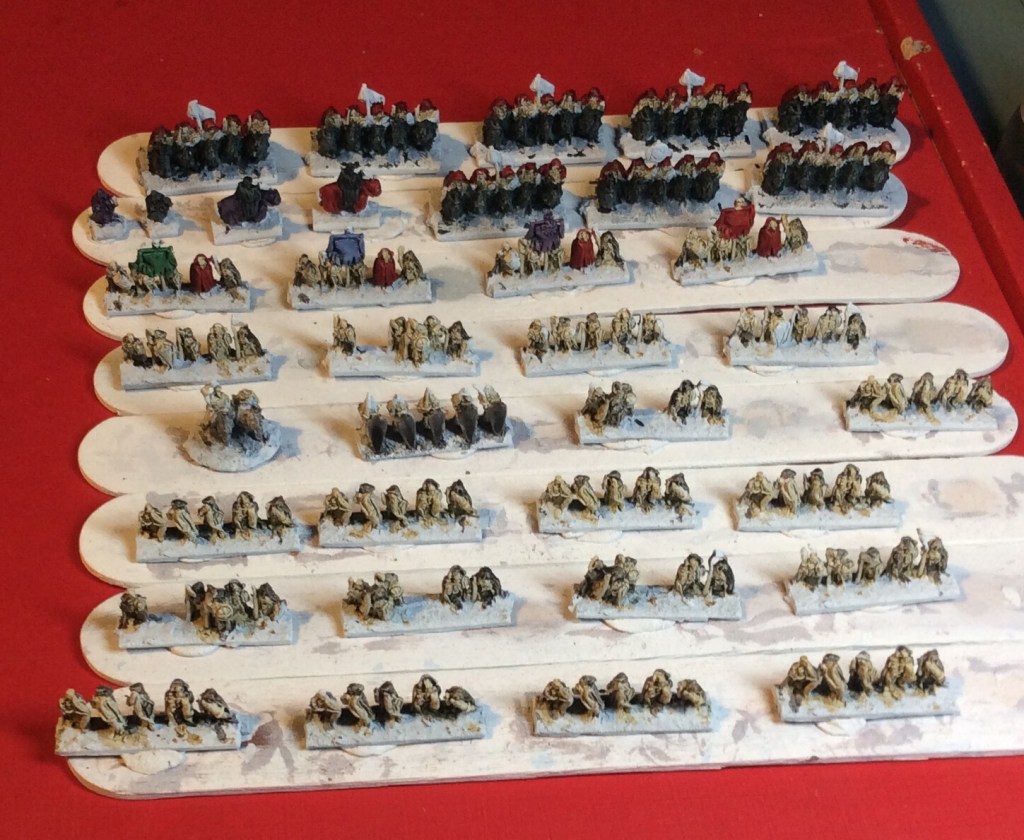
I got these sprayed yesterday and made a start today. They were pretty speedy to get to this level. Probably three hours tops, but I was watching Tomb Raider at the same time…
These aren’t the best sculpts and are probably the worst of the ones I have done so far. They will probably come out fine once they are finished as most things do.
There are eight bases of cavalry, four of bow, eight of hand weapons as well as a couple of hero bases. A Napoleonic Officer has decided to help out as the general and a base of elves have died to help out too (I was one strip short. That will be my elite unit with the red flag.
I also had a mooch today and found my 6mm road wars.
These are my raiders civilians and mutants. I also have a paramilitary force of (basically) Sisters of Battle.
This is my convoy… I need to get the girlies based and painted. Sadly the road wars gear can only be got from the states now. Which is a bit pants as I want some of the big rigs. They also do a nice line in Lizardmen cavalry (which mine are sadly missing).
Tomorrow I hope to get the Skellies finished. Then I may start on the sci fi stuff.
We played with the resin today too…
Once again we had fun…. talking of resin… hopefully I will get a space sorted for the printer soon 🤞