Printing Tanks

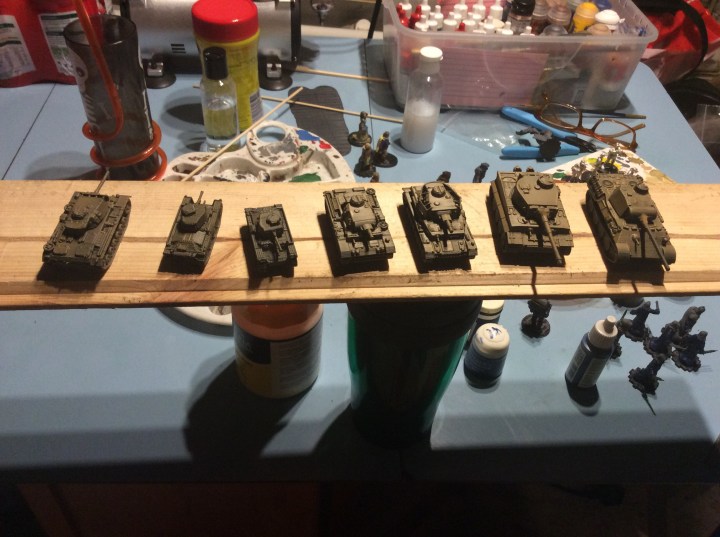
A Matilda to start with….

A picture of how it came off the plate.

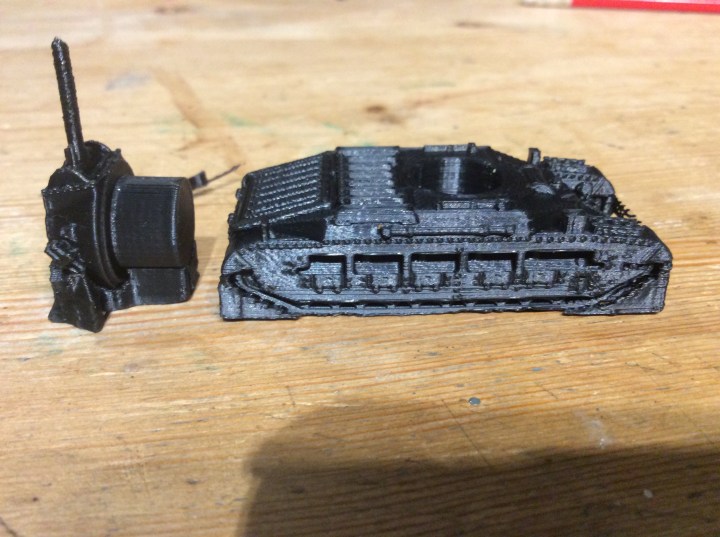
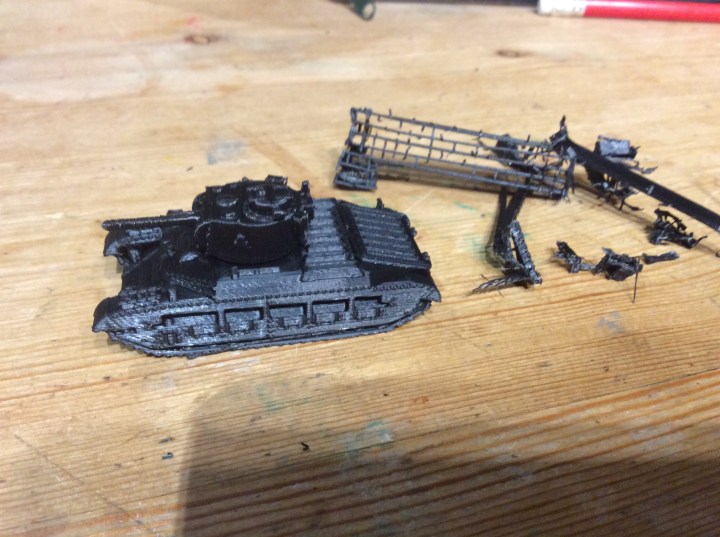
You can really see the support network to help it print properly. I have always printed it vertically before (like the turret). This is the first time on the tracks and to be honest, there is less chance of it getting knocked over, the down side is a lot more waste.

Here you can see the stuff that has been pulled away from both bits…weight wise not really very much, it just adds to the time required.

And finally… here she is all trimmed up and ready for a run into the paint shop.

I am printing off a CharB just now with a Somua to follow.

To be honest I don’t know what theatre of operations or date to go for. At the cost of these I can print of a fair few different ones and see what catches my fancy.

I did consider the desert war. The advantages are that I have some palm trees etc as well as some 6mm buildings. I also have a terrain mat and some desert style hills.

I reckon I can print some 15mm buildings and off I go!

Friday’s Forgotten Forces

Well another Friday has arrived and it was another freezing cold foray into the shed to depress myself at how much untouched stuff is in there.

Today we have Skelingtons, as my kids used to call them

Command units, cavalry and spears…

Next up missile troops and zombies (and half a chariot)…

And finally the swords…

I must have started on these a year and a half ago at least. I got them as another force to play HOTT with my daughter and they kind of got forgotten about. They are now in the big shed where I do my painting so hopefully they will get finished sometime soon… 🤞

These came from Alternative armies from their 15mm HOT fantasy list.

These have a nice skeletal bagpiper as part of the command group… question is how does he play it without any lungs… to be fair I am being a little trite… I am willing to accept reanimated corpses shuffling about, but not magical bagpipes. It is simply one of those things that niggle me 🤔

A Fair Old Bit Of Painting

Lots of painting but sadly not the elves….

First up some 15mm German armour, they still need another coat or two, perhaps sand straight over black wasn’t the best idea. I ran the airbrush to get these sorted. Still not sure whether to add camouflage or not.

Then some of the 28mm 3D Printed miniatures

We were all out in the shed and the elves were still in the kitchen and that is my excuse. Just look at the age of the GW paints I am using. The white stuff in the bottle is Matt medium and water.

My mate has asked me to paint up some sci fi miniatures (on the painting tile) for when we start our new top secret game.

And The Mystery 3D Print was…

Pete correctly guessed….

I just printed a 1/100 scale MkIV tank on my printer… I am still grinning like a Cheshire Cat…I started of with a bare plate then 3 hours 19 minutes later I have a tank.

Like Wow! It’s an effing tank! That was printed by me in my house on a printer…. The turret turns and everything. I was going to print one with the plates on the hull and I uploaded the wrong file….

As you can tell I am a little bit excited 🤪🤪🤪

Next up a Panther methinks, or maybe a Tiger or a Hetzer or a Jagdpanzer IV…..

Did I mention I was excited 😉

At this moment I am being a kind father and printing some eggs for my daughter who wants to paint some accurate bird eggs.

Forgotten Forces Friday

Another Week, another box…almost a song from Evita….

Well as my ‘What a Tanker’ rules arrived I thought I would seek out some tanks, I decided not to bother with the 6mm stuff and hunted for the 15’s

An ambush about to be sprung… I reckon the fleeing women should give a clue 😉. One day I may finish the houses…..

These were done for skirmish gaming hence the individual basing on the infantry.

Then onto the unpainted!

I am still in a dither about what size to go. Never mind the period.

Roughly a 15mm Tank costs £6 plus, 10mm tanks cost roughly half that. I could start with these and see how I get on, it would give me 3 tanks a side, but no options for changing tanks as the campaign progresses. The cheapest and quickest option is to go down this route…

I could have as many as a I want then, but it doesn’t feel or look the same.

Big thinks are now being Thunk…

Tournament Results!

Bloody Hell I won!

Not only did I win the competition, but my Stronghold also won. I managed to come Second in the themed army too. My daughter was somewhere in the middle. Not bad for her first ever game.

My prize for winning was a new 15mm army = Scalians from Battle Valour Miniatures My prize for the stronghold were some mdf roundhouses. These were by Martin of Dragonfrog games, him of the pyramid design.

There were some tough fights in the three games, first game I beat My daughter by 2pts. Second game I lost by 2 points and third game I destroyed an army with the loss of only two points.

Game 1.

Me as the attacker against the Early Germans

Game two

Me as the attacker against a Martian force

Game 3

Me as the defender against a host of Alien worm thingies (made by Martin on his 3D printer)

So a big thank you needs to go to Mike and Martin for organising a fun little tournament. Everyone were also given a nice 15mm giant for taking part. Nice cake appeared too. All in all an enjoyable morning.

My miniatures….

And finally, the giants…

Hordes of the Things Armies

It looks like the tournament is on tomorrow,

My daughter and I both have an army each.

She has my early German one.

Hero General (Druidic types with their spirit bear)

Warband x 5

Riders x 1

Beasts x 1 (werewolves)

Flyers x 1 (bat swarm)

Behemoth or in her case Bearhemoth x 1

Plus a sacred pool to act as her stronghold.

Mine is as described throughout the posts, I decided, however, on the smaller temples as they fit inside a box file.

My daughter is very trusting, she let me choose an army that will face mine. I did, in fairness, discuss the various types. She did make a few changes, added a flyer instead of one of the warband bases.

I had to quickly knock up a base for the behemoth. This is a Beorn figure from the battle of the five armies set. He is my giant cave bear for my 10mm Mammoth hunting games (hence the round base) I did a quick circle out of Greenstuff to make a basic sabot base and then did the usual sand and flock approach, but this time I painted the sand.

A bit rough and ready, but time wasn’t on my side.

We shall see how things go tomorrow. We each have three games with various victory points etc. Let us see how the Dice Gods look upon us on the morn.

Till Tomorrow!

Conquistadors Officially Finished

Sort of….

Still a bit of contrasting flock and bushes to add and then a quick varnish.

And from the side…

I decided to paint up the skulls, some are the remains of the Triffid’s last meal and the rest were placed on the temple.

Still don’t know if there will be room in the tournament due to the size of the room and me having to have the kids. But either way at least I got something else painted.

Tonight’s painting was brought to you by:

https://youtu.be/hEJnMQG9ev8

Motivating myself to paint some Dark Future Vehicles…

And finally I shall leave this with you all.

Temple Complex Completed

All done…

Well when I say all done, I did contemplate square plinths in the corner to put skulls on. Part of me wants to add plants on the outer wall to add a bit of brighter colour. But this would cause problems with bits getting knocked off.

I can fit two of the smaller pyramids into the same space provided that they sit diagonally front to back.

I decided to see how the pyramid worked with 10mm too. I am happy with the results.

I felt my Amazon’s were a good army for a funky pyramid, well that and they were the only ones I had to hand. 🙄

I gave the whole thing a smack with a ball of silver foil to give it a bit of texture. Not that you can really see it in these photos

For this build the paint was mixed 50/50 with PVA. This helps the craft paint adhere to the polystyrene. I also made up my own Sepia wash with water out of the condenser dryer, some sepia ink and a drop of detergent (I was too lazy to go back out to the shed for the proper stuff).

Guess who shook it vigorously to mix everything together? Three hours later there are still bubbles! Once this was dry a gave it a quick dry brush to lighten it back up again.

I decided against doing it the same colour as the Pyramid as it would look better with a bit of a colour change.

The Dry brush colour is the same as the temple.

Finally, I was going to add a terracotta tile pattern in the plaza, but decided against it as it would be a lot of work for very little gain.

Tomorrow I will probably flock up the troops and then who knows….

Azazel’s monthly challenge is something mechanical…. off the top if my head I have…

6mm Post Apocalyptic vehicles

15mm Flames of War tanks

20mm Dark Future Vehicles.

I may have a blast at some of them (but really should finish the Mongols) 🤔

Temple Complexes and Triffids

I started on a plaza for my temple tonight.

Sadly I only had one thickness of blue foam, so it is a bit thicker than I wanted. The foam is held together by pins until the PVA dries. I fully intended to do something a bit bigger and a bit more complex. But the stronghold in the game must sit within a six inch square (600 paces) and must be bigger than 2 inches (200 paces). Technically I could have simply shoved the temple down, but it did look a bit weird just on its own. However this looks a bit weird on its own too. I suppose, I realise that Temples didn’t just sit in the open in their own…I really must get a life!

Once the PVA is dry I will attack it with some kitchen foil to add some texture and then get it painted in the same colours

The other thing I managed to do was the Triffid’s appendages…

Its not quite how I wanted it to be, I may repaint the ends as they went a bit brighter than I wanted. I am pleased with the way it looks, just not the colour.

Oh and while I remember, after some lovely photos of sunny days out, today it is blowing an absolute hooligan an£ P*ssing it down.