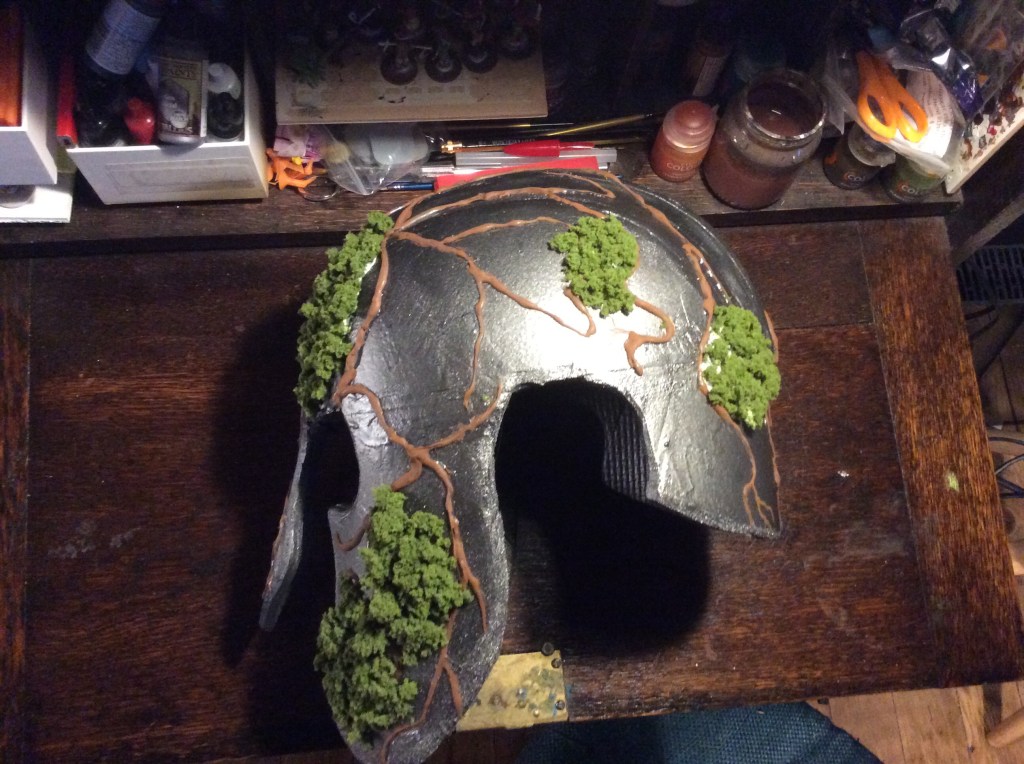
Much swearing occurred this evening, stupid stuff wouldn’t stick to the stupid glue on the stupid helmet, but apart from that I managed a little more on the first heavy layers…
As you can see I am onto the top now I will get onto the right hand side tomorrow.
I just found a pile more flocks and scatter material this evening so I reckon I can make it pretty.
I really haven’t got a clue as to whether the stuff will stay on…but with a few layers of watered down PVA then there is a chance that it will stay on at least until the photos are done 🥴
Yes I managed to do another small bit on the helmet, I am beginning to wonder if the quick drying glue stops being quick drying if it gets old?
I am considering asking on the Facebook page if the glue can go off. If so I will order some more as it is useful stuff
At the rate I am going then it should be ready for at least Christmas 2022…it is sooooo slow!
Hopefully tomorrow I can move onto the other side. The stuff I did last night eventually stuck. Once all the heavy stuff is done then I will set to work on the less dense flock. This is definitely becoming a long term work in progress.
Tonight I set about using my basing glue and some clump foliage to get a base level on the cheek piece…
This seemed like a good idea, but it is annoyingly fiddly and difficult for the stuff to stick to the helmet. So I will leave it drying over night (so much for quick drying) and see what happens with it tomorrow.
In my mind there are going to be thick clumps like this as well as thinner areas too. Once it is all set (hopefully) then I will add different colours to this to get it looking more natural.
So the helmet was looking naff with the metallic paint on it, so I was going to do the rough bits as rust and damage, but I suddenly came up with the idea as I is going to be an eleven helmet then why not make if more forestesque… imagine an elf picking up an ancient helmet that is covered in roots and moss… so voila…my starter for ten…
I am going to build things up with clump foliage as well as foam flocks… we shall see how I get on… basically I am going to make it like some terrain😉
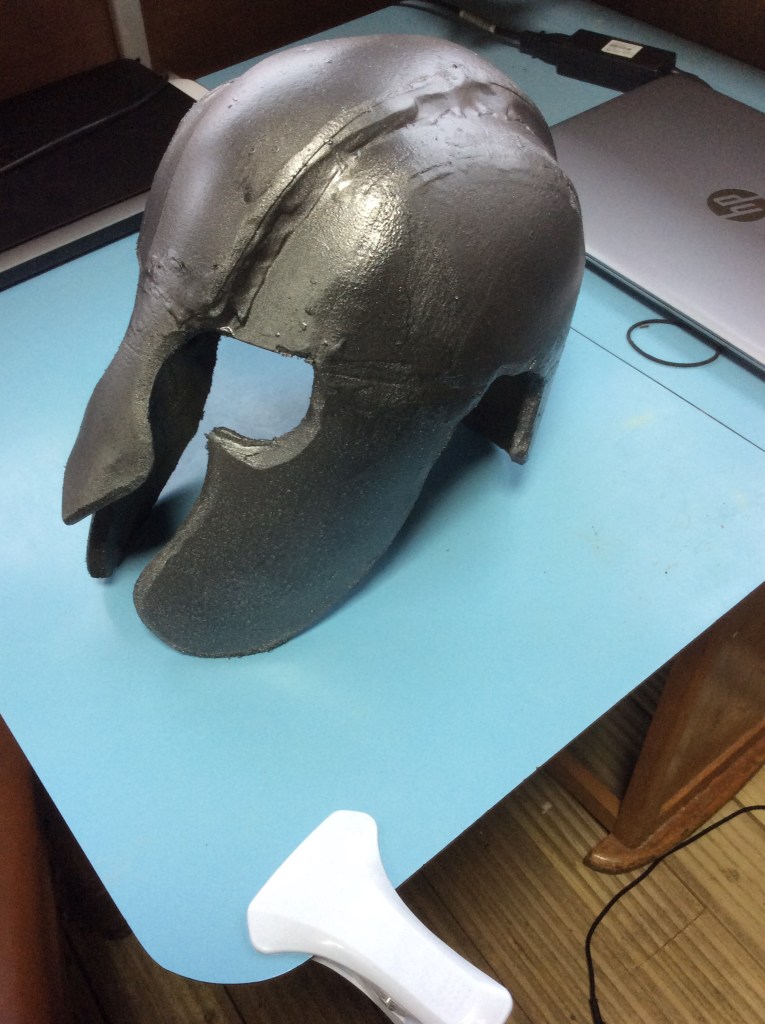
Today I managed to find some Rustoleum Gun metal spray paint. O thought I would give the old helmet a once over… probably should have tried it on some scraps first…
Now this thing is my test piece so perhaps this is the scraps but it is now a sort of metallic colour. I will give it another once over tomorrow.
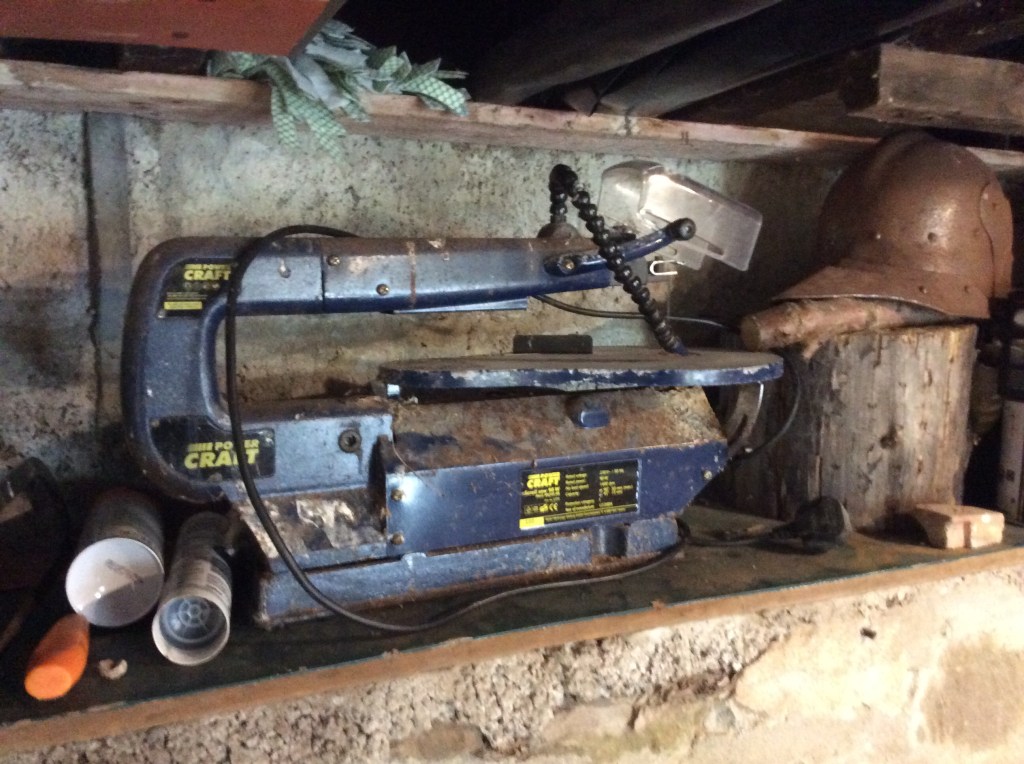
One of the interesting things I found was the nose guard bent, you can probably just see the line across it. This shows me that I need some kind of support in behind it… this is definitely a learning curve. I think over the next few days then I will try another one using my trusty, rusty scroll saw…
At least using this then the cuts should be vertical and not need filling as much. I am not certain but I think I bought this before we moved to Shetland in 2006… now to be fair I might have brought it back from an Aldi sometime after that, but I cannot remember doing so. There again, my good lady spoke about the gerbils we had when my eldest was small.. I have absolutely no knowledge of any gerbils in this house whatsoever
I will carry on fiddling with this aspect of a hobby as I do really enjoy it. on the next helmet I am going to try simple decorations too… plus someone very kindly shared a place where I can get faux horsehair crests (well I actually have a genuine horse hair crest, but it is for my Corinthian helmet 😉).
Now if we get back to the helmet above, I am going to have to work out how to ‘hide the messy bits. In hindsight some simple decorative features would have done the trick, but as we know hindsight is a great thing. I could actually just sand off the paint and add some embellishments…I will let you know what I come up with.
A cap of iron and leather would have been the easiest to achieve. I have some 2mm foam that would work for the metal part. The rest would be done like the bracer… big thinks, being thunk!
Wind is picking up again. I decided to try and get a bit more done on the foam helmet. I have pretty much had to make it up as I went along….
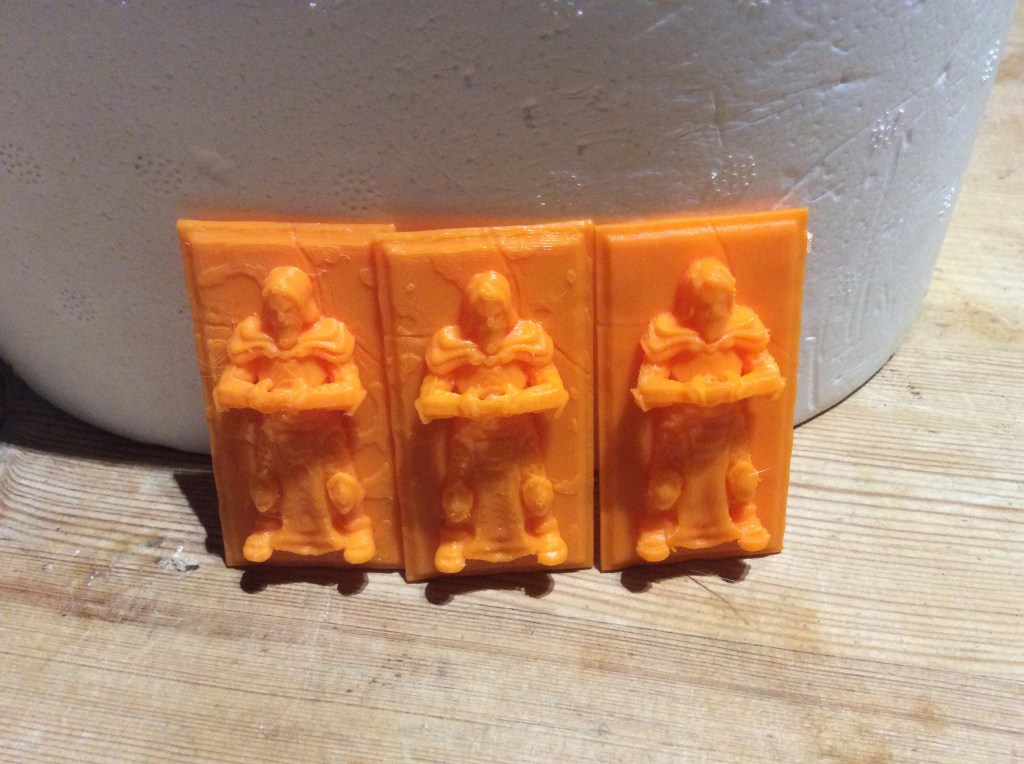
I printed another top for the coffin. This time I did it on its edge and it has helped with the top layers. The ironing didn’t really work. I could have increased the top layers as well as the infil. But this has worked so I am leaving it be…
Left to right…Original, ironed and vertical
I was going to print some more ruins today, but I had to cut the power to do some more work on the electrics in the conservatory… basically I wanted to cut down the length of the cable as I just shoved it in to begin with. I didn’t want to spoil an 18 hour print, by switching things off…again!
Tomorrow I will try and get some painting done, as well as print some more cool stuff (weather dependant).
When I got home from work today there was a nice parcel waiting for me. This was the 1 and 2mm EVA foam. This will be used to add designs to the pieces instead of the cardboard.
I decided to try and get some more done on the arm guards this evening… the one on the right is working just fine, the green and fold certainly need some work, but I am getting there.
Now this is going to sound really pretentious, and it isn’t meant to be, but I keep forgetting these aren’t 10mm leather. When I was taking the photo of the one outside the other day, I really couldn’t get why it was blowing away.
I really am enjoying doing these, one it is because my daughter really appreciates them and two they are really good fun.
It is hard to describe how I feel about them. I suppose, in a round about way, I am proud of them, more so than painting miniatures…it is something that I am doing from start to finish. These all started with a flat bit of foam and ended up being something wearable. I suppose it is like people doing dioramas. You take an idea and run with it from start to finish. There are lot of you out there that will know more than me.
Tonight my daughter and I worked on some different upper arm armour. We used the shoulder piece from yesterday and added some extra plates.
The extra plates were increased in size to match the original increase. We also decided to make these plates from rough leather. So using the old ball of tinfoil we roughened the top layer up a bit. In the case of EVA foam then we needed to heat it up a bit first and then when it was warm push the foil into it. Now as I write this I suddenly remembered my soldering Iron tin foil roller. This was a loose sleeve of foil over the heated end of the iron. This was then passed back and forth across the foam to make it textured.
This fits my daughter really well. A third plate would make it too long for her. I could manage a third or even fourth plate.
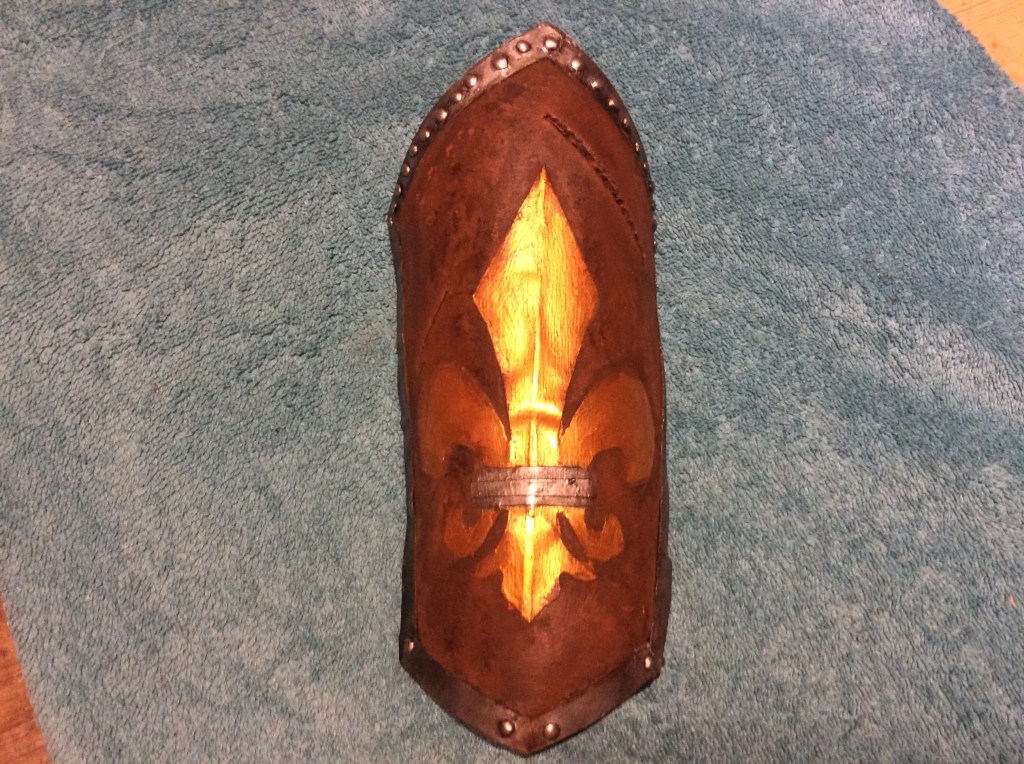
While I remember, this is what the vambrace looks like outside…
Tomorrow I will get the bits sprayed and then onto the painting tomorrow evening.
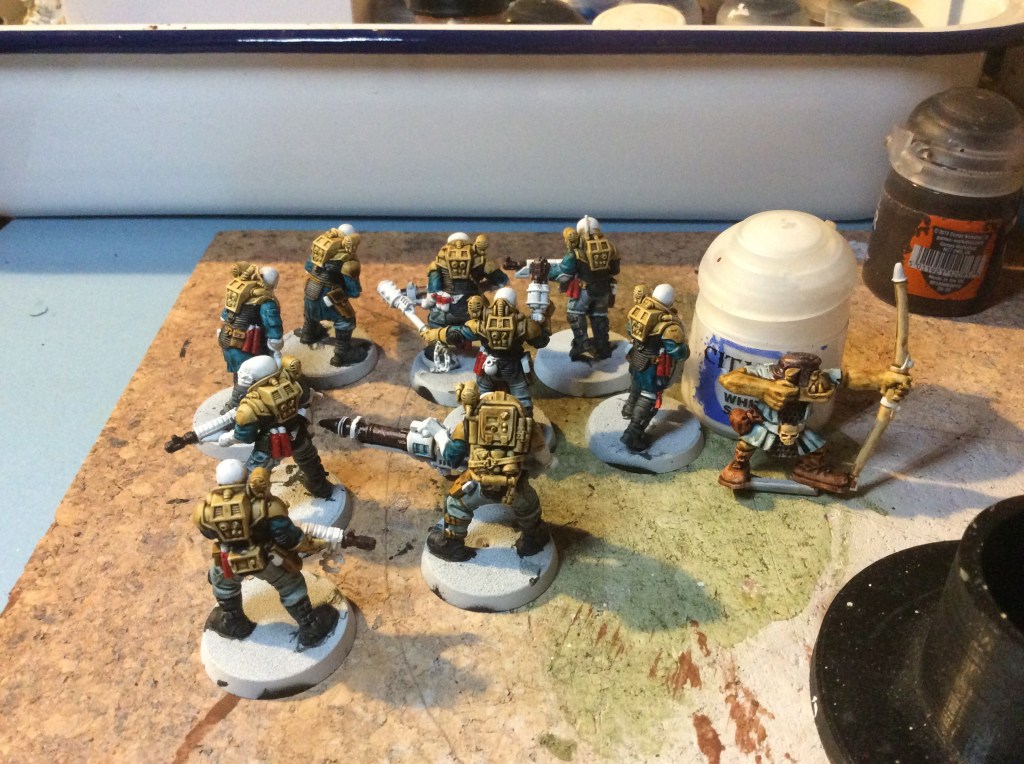
Regarding painting, I did manage a bit more colour on the Ork and on the cultists…
Tonight, I thought I would fiddle around with some colours for the armour. I wanted the leather to look a bit worn and scuffed. I didn’t exactly achieve scuffed, but I did end up with something sort of leather looking.
I will try and get a better photo tomorrow as the towel it is on is turquoise!
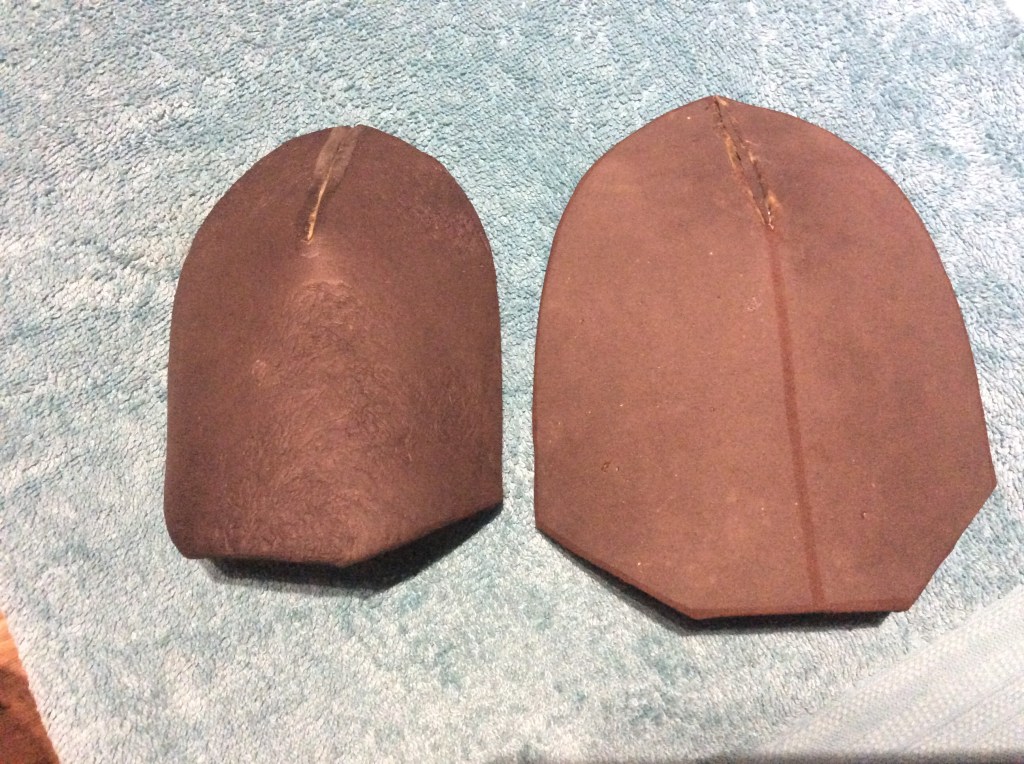
I also had a go at adding a curve as well as increasing the size from a pattern. I did better with the latter, than the former, but we all have to start somewhere.
I also had a bash at texturing the EVA foam. To be honest I did the same as I would with XPS, but in this case I heated the foam a bit and then attacked it with a ball of aluminium foil. Voila… rough leather…
I reckon a heat gun would assist me in my endeavours, the one I had, well technically it is a paint stripper with a temp dial, seems to have packed in.
I will get these looked at tomorrow and see what I can do, if anything to fix them.
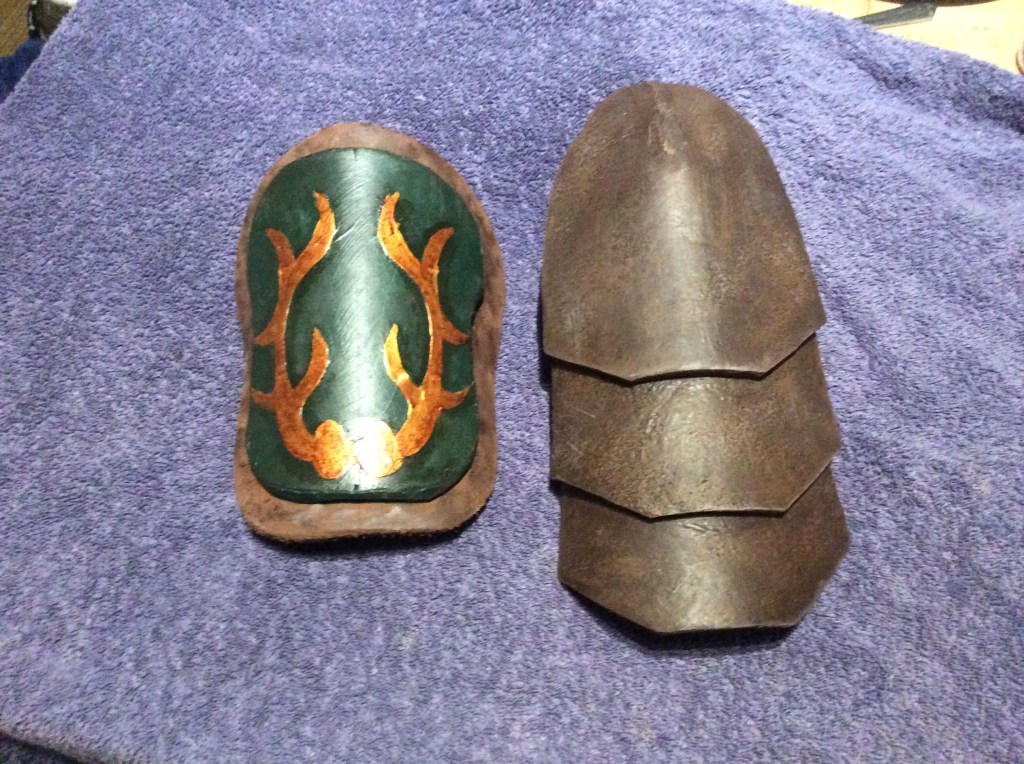
My daughter and I got another of layer of brown on the armour and a first layer of green on the bigger one too. She is suffering a migraine and I am rattling with the pills for my ribs and the fever effects of the jab. So needless to say not much has been achieved on the miniature front.
As you can see the green is still a bit on the wet side. Now obviously the card on the vambrace has lifted a bit, but I have ordered some 1 and 2mm EVA foam which will work better than the card. Tomorrow we will try and ‘distress’ the leather a bit. Somewhere I have a pot of gun metal paint, I will see if I can find it for the edges of the vambrace. My daughter wants the designs to be gold.
I got an email from Museum miniatures today saying they were bringing out some more ‘z’ range ancients… it reminded me that I have an army to paint. As a lot of them are nude with bronze armour then they should be easy, peasy to do.
There is also bucket loads of 3D printer stuff to get going with too. In fact there is so much that I don’t even know where to start.
My first Kickstarter dropped today, I also have more hex tiles as well as three month of Patreon goodies from the Lord Of the Rings.