I decided to get the Battle Valour minis stuck onto their bases this evening. I have the half dozen Oni who will become something for my monster hunters to hunt down. I may get some of the other beasties that Battle Valour have.
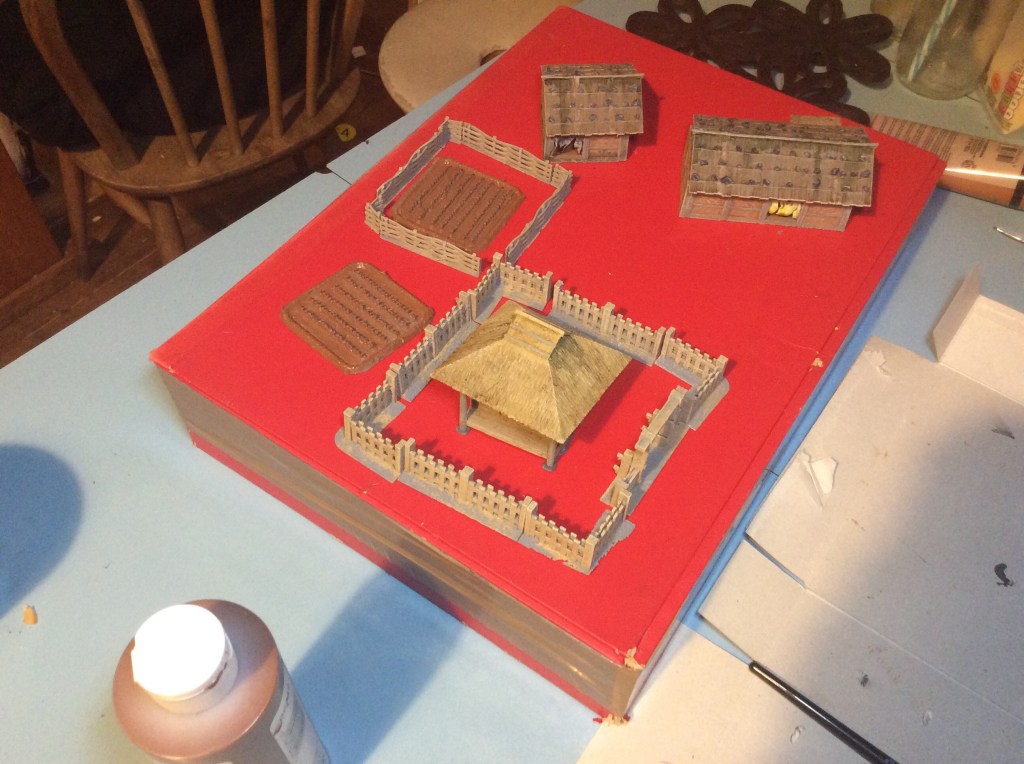
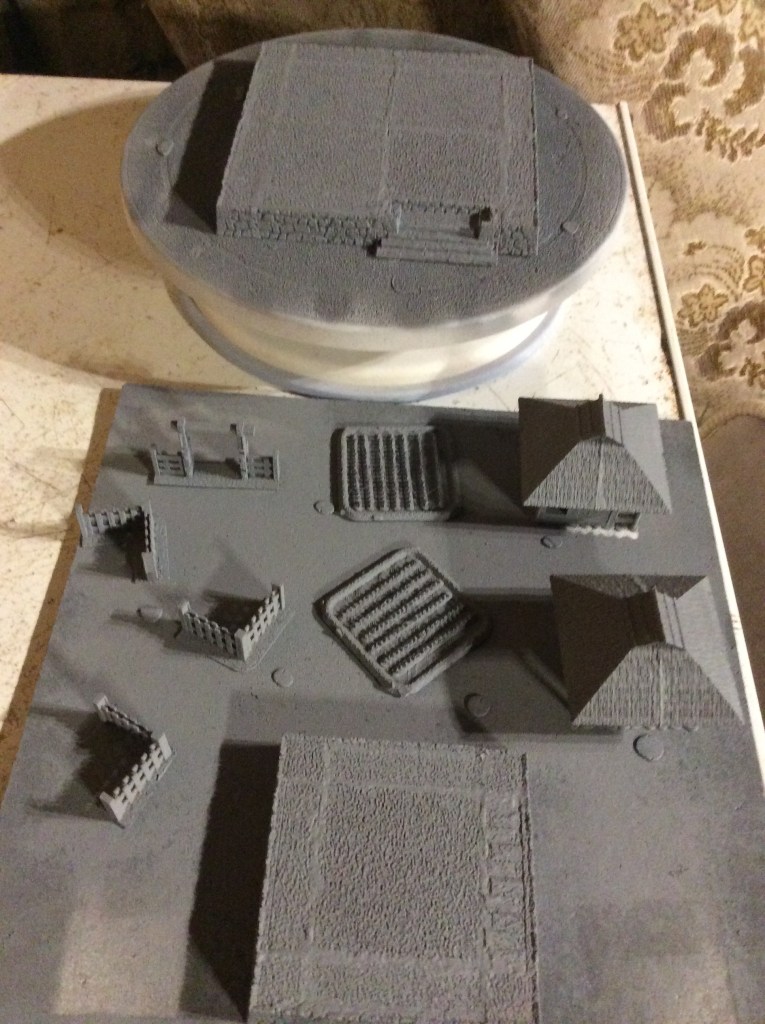
I was going to get some of the buildings done tonight, but it never happened. Hopefully I will get some more done tomorrow evening.
On the home front, my wife got a message to call her boss this morning, even though she has a meeting with him tomorrow. As you can imagine we were fearing the worst, but thankfully he asked her to come back to work starting onWednesday. She will still be working from home, but the problem we have now is how to get the kids work done from their school.
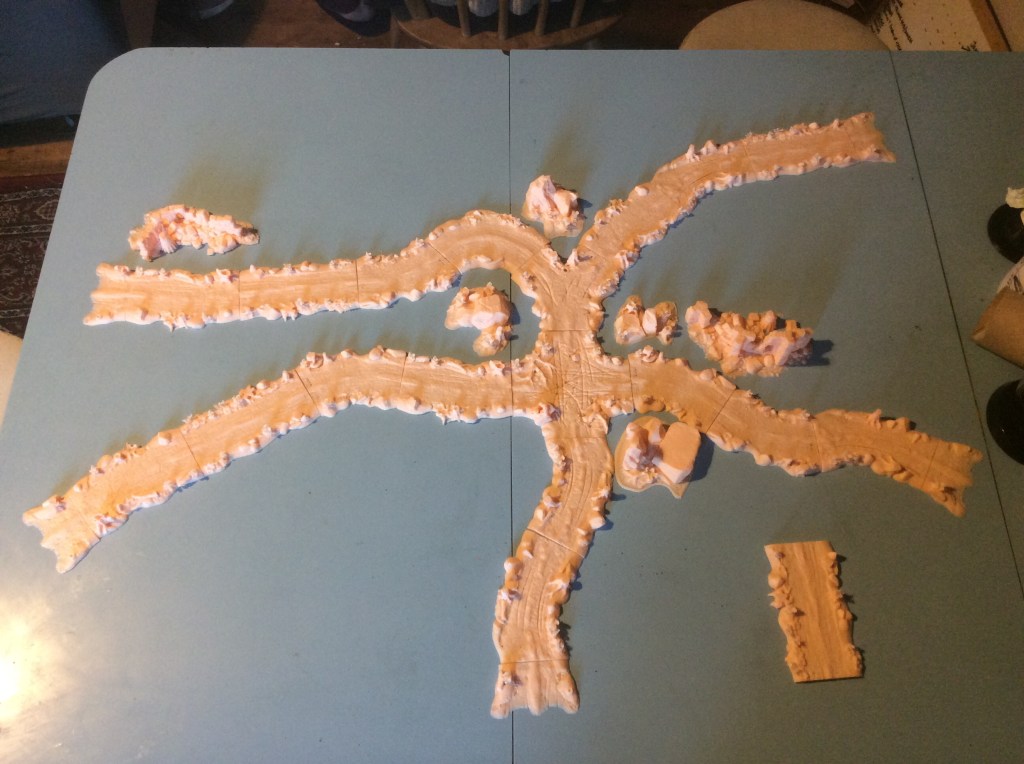
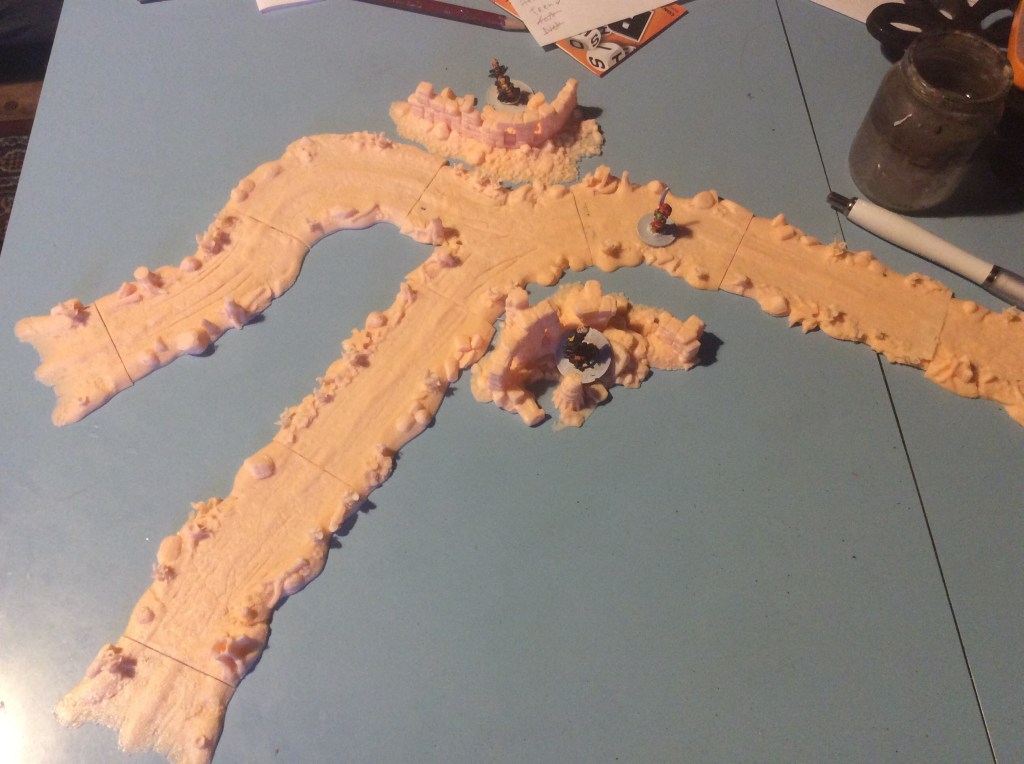
I just can’t wait to get on the road again… actually my times on the roads are coming to an end… a couple of 90 degree bends and perhaps another couple of straights then I will see what it covers.
The table it is sitting on up to the line is 70x75cm. I think there were four straights still sitting there out of shot. So the road is quite long now.
These are printed at 50%, the full sized ones are huge.
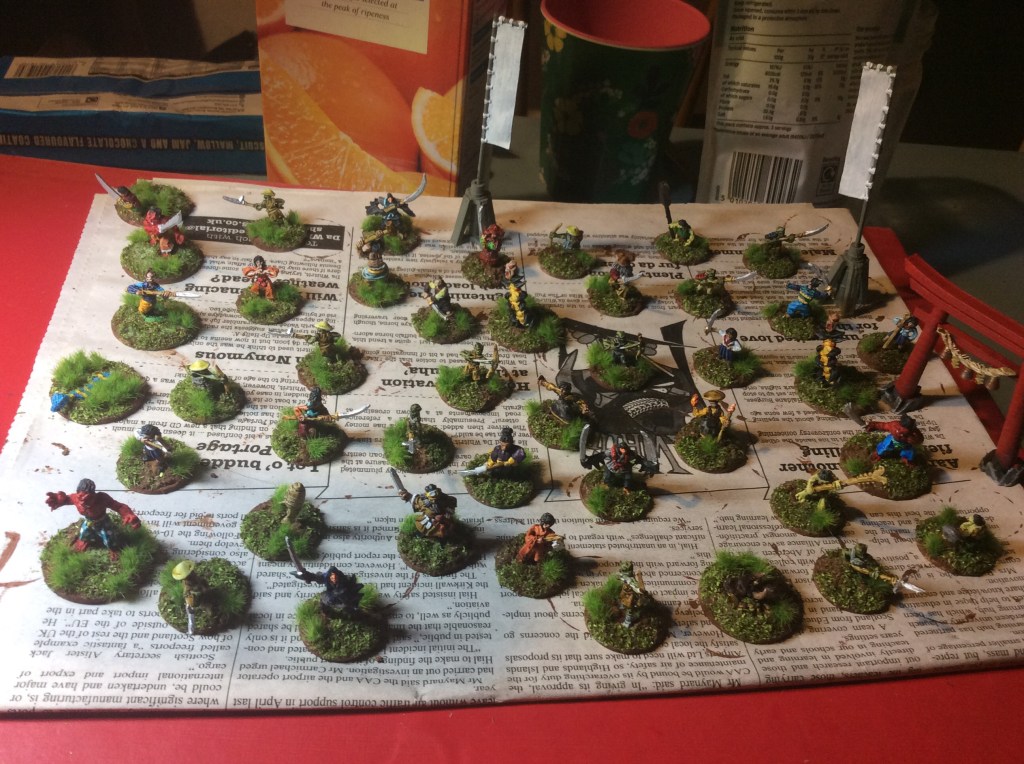
So that is it, the miniatures are all painted and based. I need to get the bases sealed with watered down PVA and then everything varnished. But thank the lord for that. These have been a bit of a chore, but at least they are finished.
These seem to have taken a lot longer than I thought they would. I suppose in all honesty I have been making and painting the terrain that came off the printer, so it isn’t really surprising.
A bit more of a close up shot.
Tomorrow I will get on with buildings and hopefully get them sorted soon.
This has got everything on it and the main road is 90cm (3feet) long. I am going to do at least another four straight and gentle curves plus a couple of ninety degree bends too. I have printed up some scatter bits too. These are rocks etc. A bit like the one to the left of the paddy field and next to the tree.
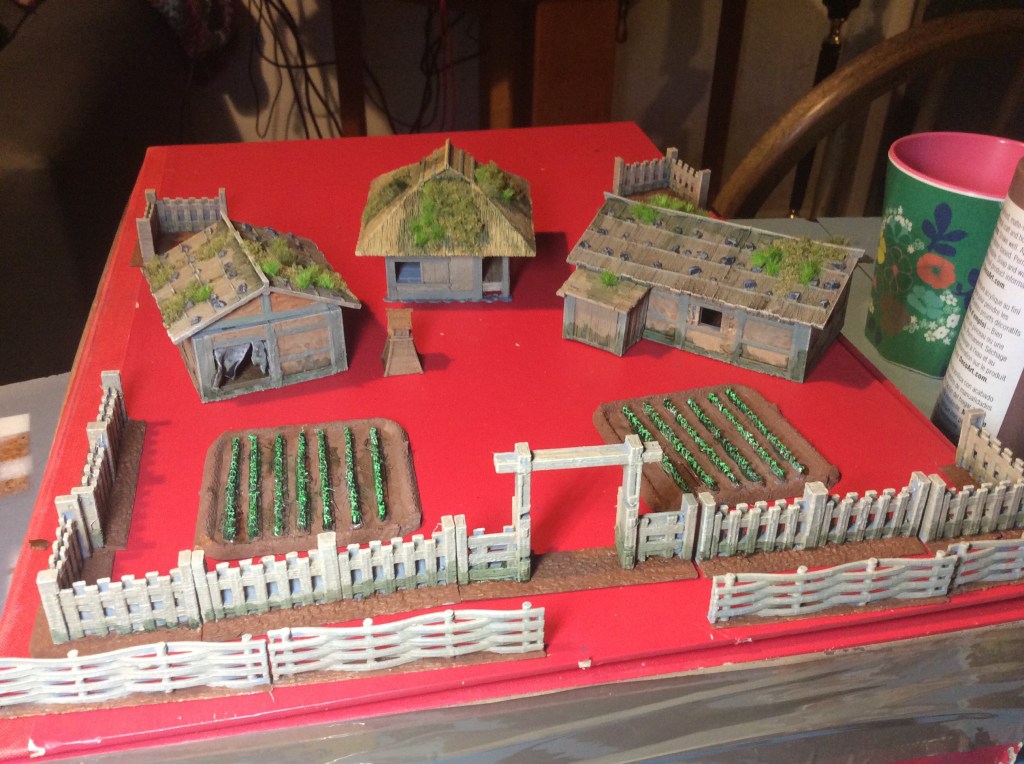
As can be seen from the photo above, I have also sprayed the shrine and pretty much a lot of other things too…
The shrine will have a clump foliage hedge around the edge… the inner section will be covered with sand and the edges under the hedge as soil as befits the need.
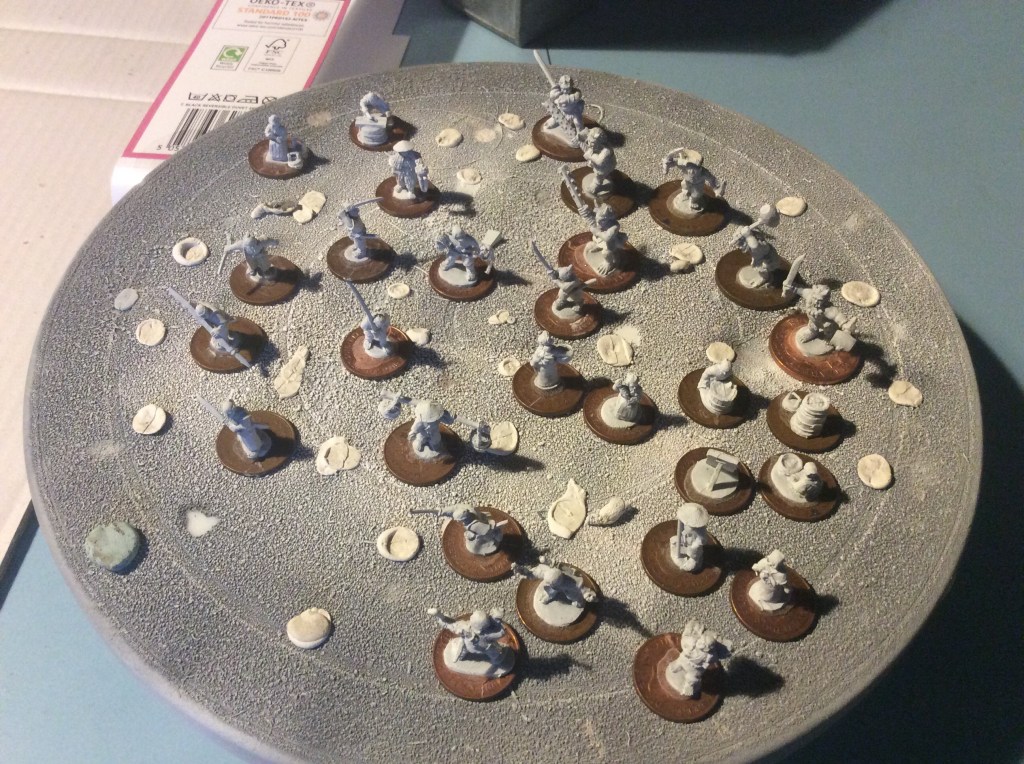
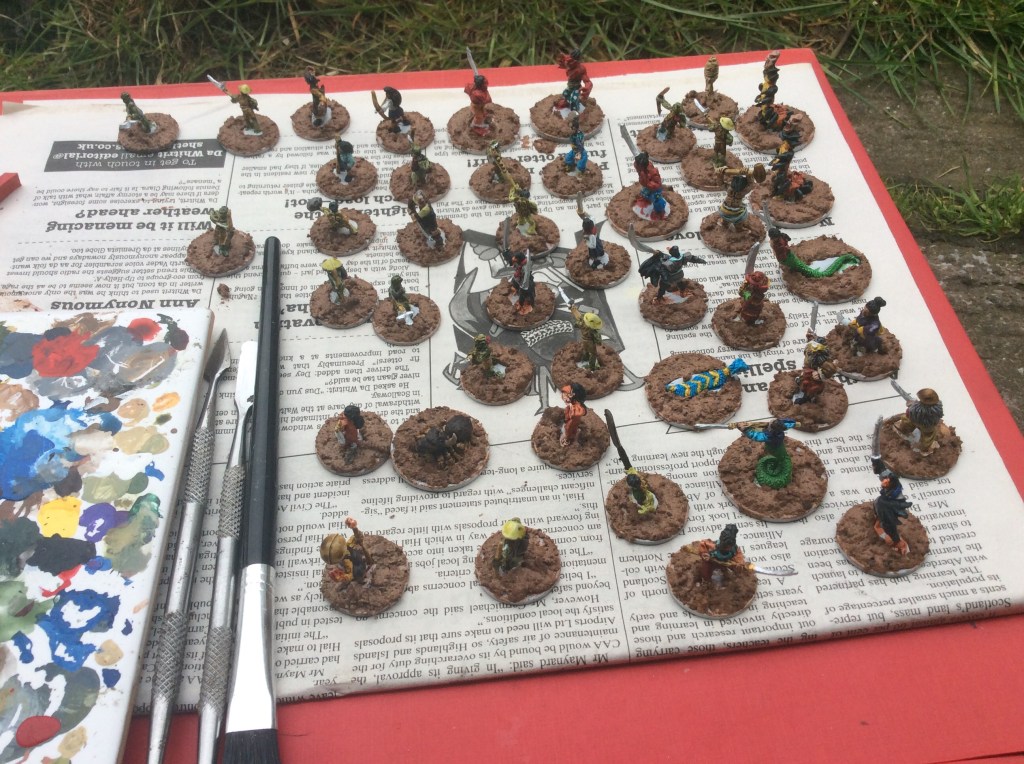
So this afternoon, whilst my daughter painted a wooden ship, I decided to get some gunk onto the bases of the various miniatures.
Once the gunk has dried I will paint in the white bits and get the edges painted too. Once dried it will be onto the flock etc. The gunk in this instance is home made wood flock, a bit of sand, filler, brown paint and PVA.
I could have just chucked the flock on, but with the superglue potentially being iffy I decided to get this done to help hold the mini down. I gave them all a poke to see if they were going to budge and thankfully they all seem secure now.
I still have bits and pieces to finish on these, but I thought I might as well do this as it would take a while. It probably took longer to base them than it did to paint the Goblins last night.
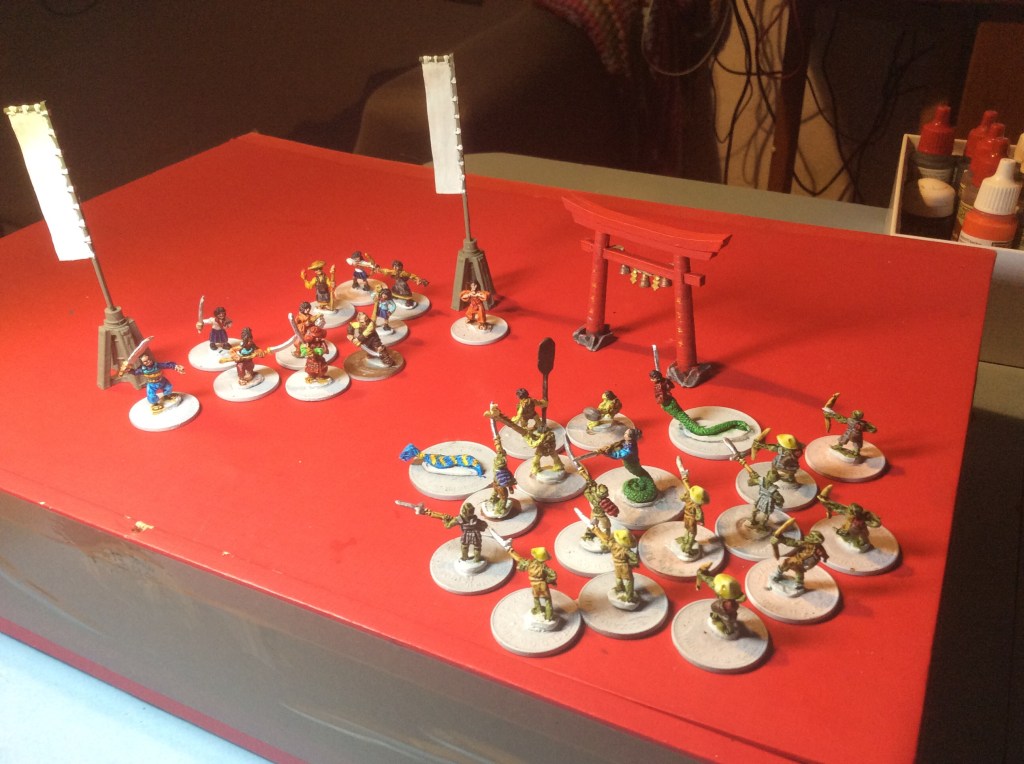
I have struggled with these and I think it was because I don’t really like them. Now this is not a case of having a dig at the sculptor, but there is something a bit ‘meh’ about them for me. It definitely isn’t the subject material as I am probably going to get some more Battle Valour monsters to go with the Oni. I have a pile of Alternative Armies 15mm fantasy miniatures which I love (not to mention hundreds of Flintloque 28’s). I kind of feel bad saying it, but if these weren’t for my mate I would have probably put them in a box and forgot about them. Maybe it is just a phase and once they are done and finished I will like them. I actually just had a thought there. The ones I liked really worked well with Contrast paint and the meh ones did, but had weird poses. The Japanese school girls in uniforms are, to be frank, totally out of place, unless they are for modern monster hunters.
At least they are nearly done and I can get on with this lot next…
So here we have half a dozen (small) ronin. A dozen villagers and village things, three ninja (or Shinobi as I should really call them) and half a dozen large oni with big weapons.
He ronin are smaller than the villagers which is a bit weird. I never noticed until I had them ready for spraying. I will have to see if the other types are smaller.
So both this evening and yesterday I worked steadily on the miniatures for the Monster Hunter game.
They are pretty much all done now apart from the arrows of the goblins. These will need painting white then repainting.
Here are the ones I worked on.
Some of these I started yesterday and others I had already made a start on.
They all need their bases painting and basing and annoyingly, some of them needed superglueing back onto their bases. I think my superglue might be going over.
I still have the buildings and fences to finish for the village, but things are definitely getting there.
So I printed some more bits and pieces off today. I really like these…
I am printing a crossroads off just now, but this will be enough Junctions I reckon. I will probably do ten more straights and ten more curves and see how it looks then. Each piece is between three and half to four inches long.
Little does the lone samurai realise that he is being watched closely from the ruins
The ruins are rather nice and are part of the scatter terrain for this set.