As suspected, I didn’t manage the whole dozen of these. I did get six done ready for an armour wash.

I am going to add rust and verdigris when I have got them all done.
As suspected, I didn’t manage the whole dozen of these. I did get six done ready for an armour wash.
I am going to add rust and verdigris when I have got them all done.
To be honest, I never managed twelve hours, I got about six hours off and on as my back started to give up the ghost. So how far did I get….
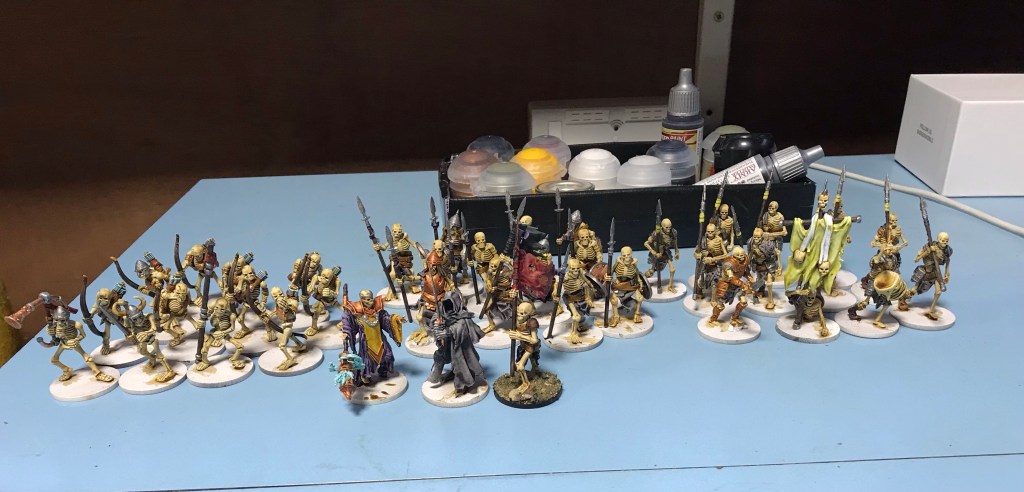
So I finished off the dozen in the middle and the mage and got the next twenty four finished, apart from the white bit on the right hand banner.
I am going to carry on with the painting tomorrow and see how I get on. I got the zombies onto their bases as well as giving mr half head a new set of hair…
Still a whole load to do… a dozen wraiths, half a dozen cavalry plus a mounted Liche, the zombies and the dozen Boyar infantry too.
I then have the big Beasty to do. I got my air brush out for this one as I really didn’t fancy doing something this big with a 00 brush 😉.
I think that is everything that I have for the undead army.
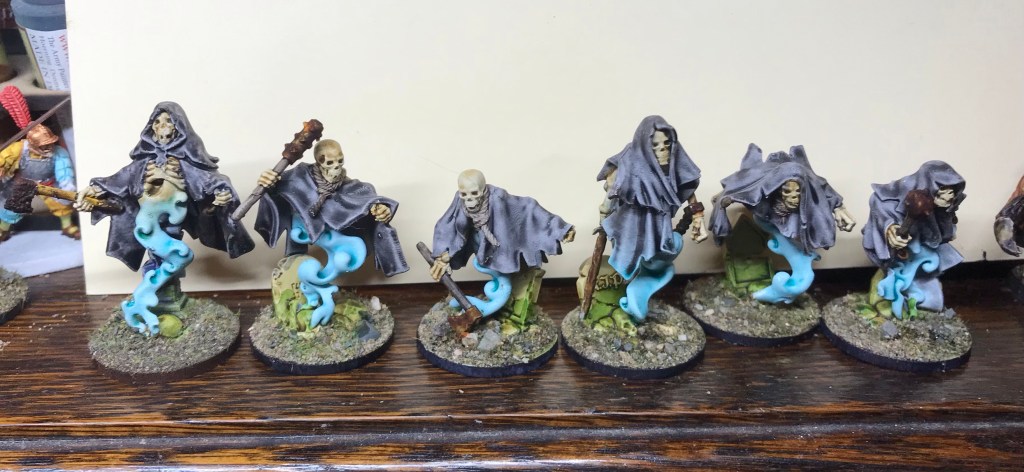
Today I decided to sort out the problem of the undead mounts. Now if you remember with thec16th century stuff ihzd problems with the pikes snapping so to solve the problem I either mixed ordinary and flexible resin or as of late I bough in some stuff that had the flex built in…. move forward a couple of months and I purchase some undead mounts that are in awesome poses, with, in some cases only one foot on the floor as you can imagine semi flexible resin would not work so well with gravity…. so after a bit of a head scratch I came up with this plan…
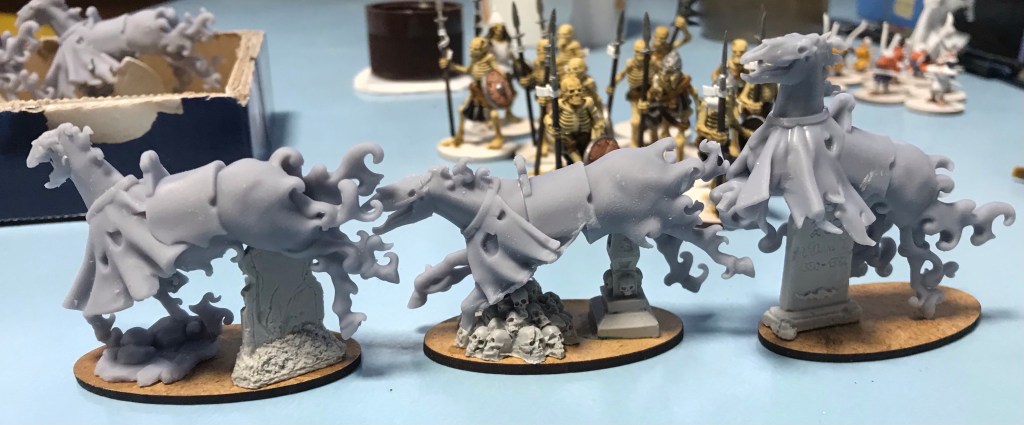
Each mount is supported by a gravestone or something similar. This should hopefully help with the problem of gravity induced bending!
Joe and I had a good session paintingnthis evening and I managed to get a fair old way on with the skeleton unit…
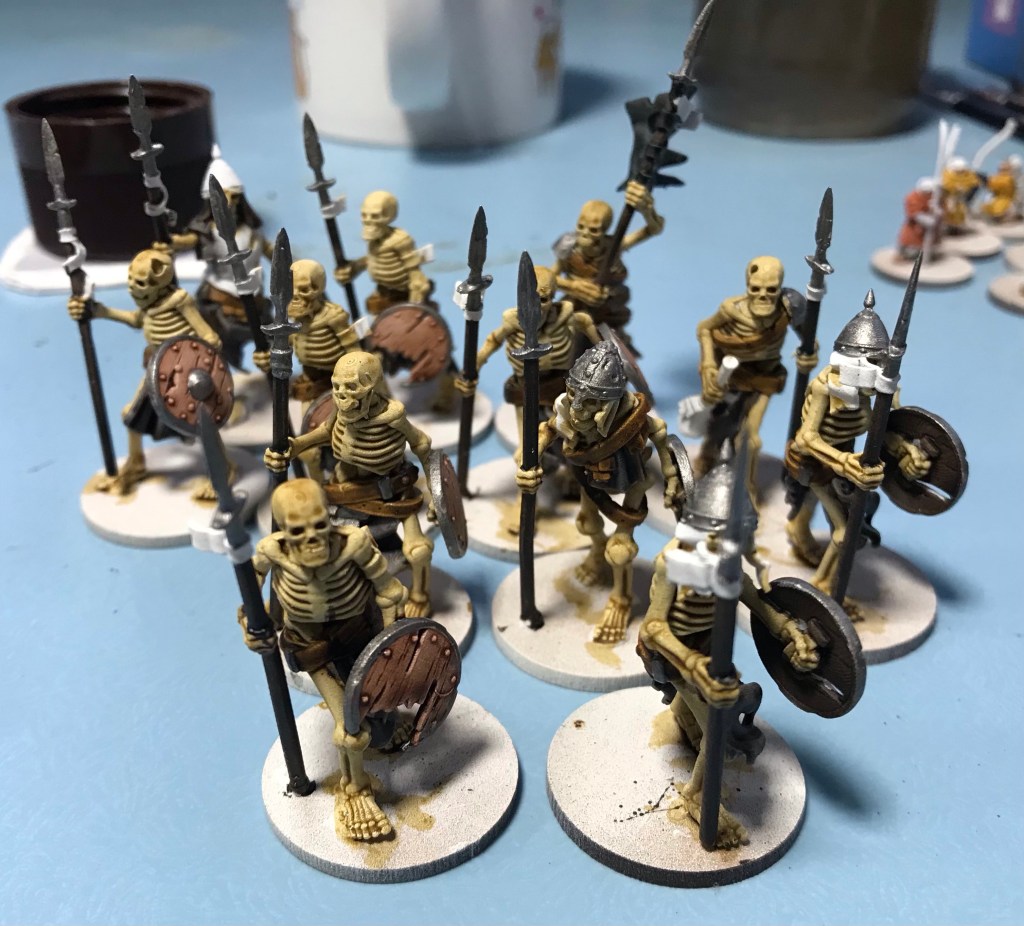
Still a fair old bit of work to go but there is definitely less white showing now.
Tomorrow I have decided to do a twelve hour challenge. 10.00 – 22.00. I am going to see how many miniatures I can paint in that time… hopefully quite a few… well what else are holidays for but to do something foolish.
Tonight we had a family game night and as such I didn’t get a lot of time for painting. I did however repaint the blue shroud to fit in with the grey ones…
I will get some skeletons printed tomorrow.
I had another blast with the rust this evening. I resprayed the piece and this time on the back side I put the superglue and baking powder on first and then spayed it afterwards … it was a heck of a lot quicker than yesterday’s version….

I also got a bit more done on the ghostly skeletons…

Tonight I wanted to give the rust effect a go on something a bit bigger than an axe. Luckily I dropped my small brush down the back of all my boxes on my painting station. And voilà I found anold style Necromunda plastic wall.
Quick spray white and a cover with a mettalic paint… in hindsight I could have just spayed it a metal colour with a rattle can…
I then threw some superglue and baking soda on it…well when I eventually got the glue out that is!
This was then covered with the metallic colour. When dry I splashed on the rust effect….
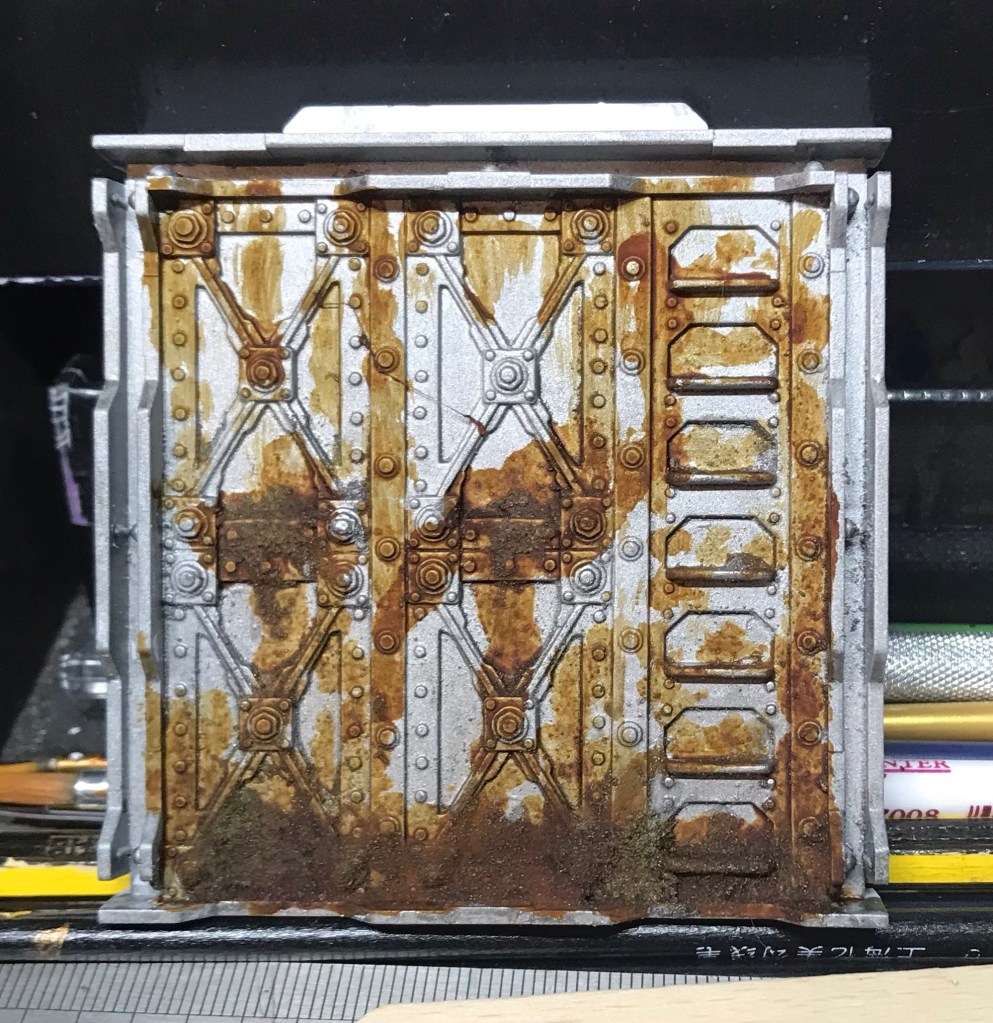
The effect is somewhat spoiled by my crap placement of it.
Since taking the photo I have noticed the bottom layer is actually becoming more orange…it looks like rust!
While waiting for things to dry I got my treeman finished…

The bits needing to dry were these chap’s…

As you can see I changed cloak colour… I may repaint the blue one.
Tomorrow I will do the other side of the wall.
Well after painting loads of undead Napoleonics and starting on a plan to take over the world with undead skeletons I decided that I needed a way to make rust look good….so i had heard of this range of materials…

So rather than just slop on the rust I decided tonuse some superglue and fine sand to make a texturedsurdace on the axe…in hindsight I should have just used baking powder, but hey ho…
So when it was dry I slapped some metal colour over the top and then threw some of the rust stuff on the axe head…. bloody he’ll in about two minutes it looked like rusty metal… I kid you not
I was actually bit gob smacked, sadly with the size of the mini it is really hard to see with a camera but I did try and get a photo…

You will have to trust me, it looks better in real life.
I then went for the moss effect for the grave stone…..

Again I was happy with the result.
Now to be honest this was me spending 30 seconds flinging a new product on a model, but it seems to do what it is meant to do. I will find something a bit bigger to paint another day.
This stuff isn’t cheap, at all. Makes Contrast paint look cheap. The best deal I got was the three bottles for £22 with free postage. It is a solvent based paint and dries really, really fast, so no smoking fags near them when they are open. As you can see from the bottles they are a good old size, so should last a while.
As for the verdigris, I want some of the skeletons on bronze armour…so thought this might help.
I am hoping to do some more testing of these sometime soon and will keep you updated to speed on what I find.
This evening I decided to try out the 2mm legions. The central one has its Velites as well as a line of Triarii…
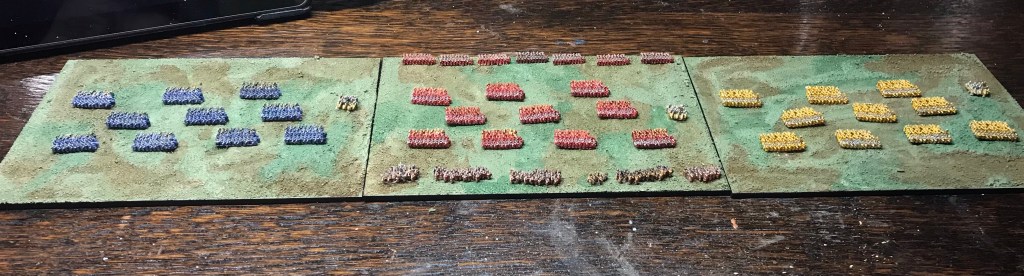
The bases are 80x120mm. Normally the bases are 60x120mm for the army sized ones. Skirmishes have same frontage but are 10mm deep.
Tonight I got the vampire finished. To be honest I am not too happy with him…
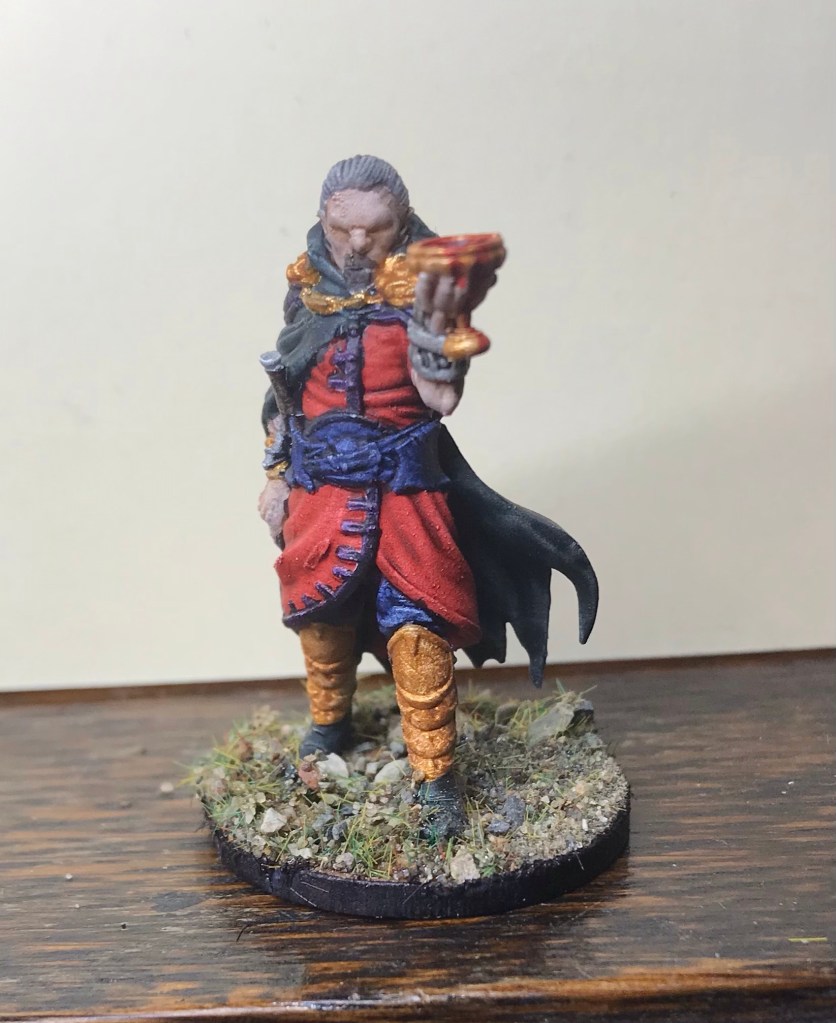
I think it is the colours I chose as I really like the pose. I am torn to be honest. Part of me thinks repaint and another part thinks sod it… he is painted. There is of course another option and that is to print another one, look at some reference photos and start again.
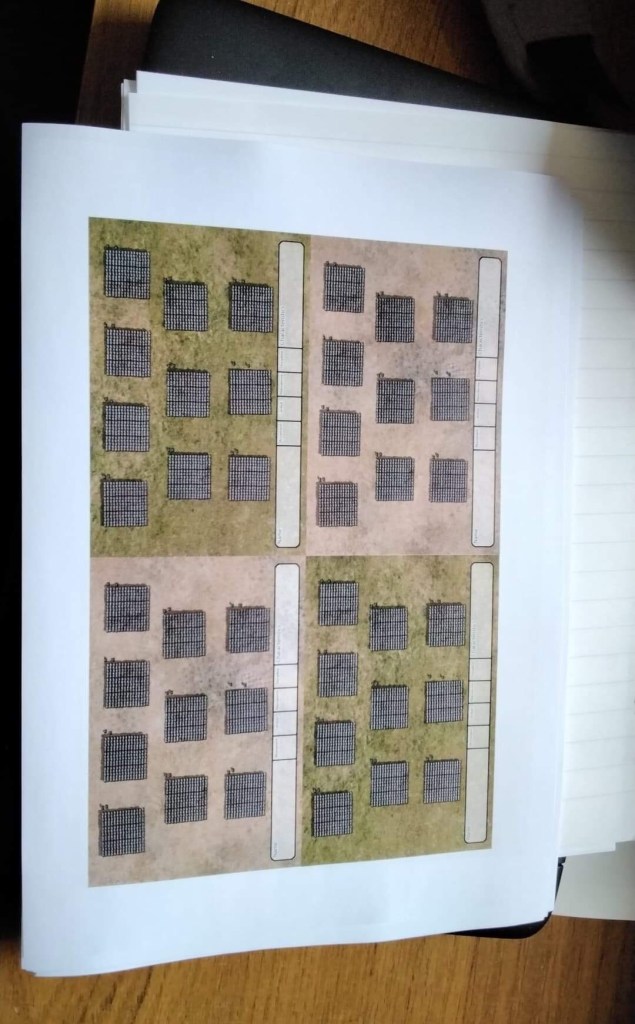
We never got our game on Monday as my lot weren’t feeling well so we are going to have a try of something on Friday as well as plot some games. I decided to purchase some paper armies to try out Strength and Honour. I will still use the 2mm minis but might base them differently. Each ‘base’ is a legion two are on temperate ground and two are on arid.
This evening I managed one miniature done. This was deliberate rather than an inability to get two done.
Here he is…
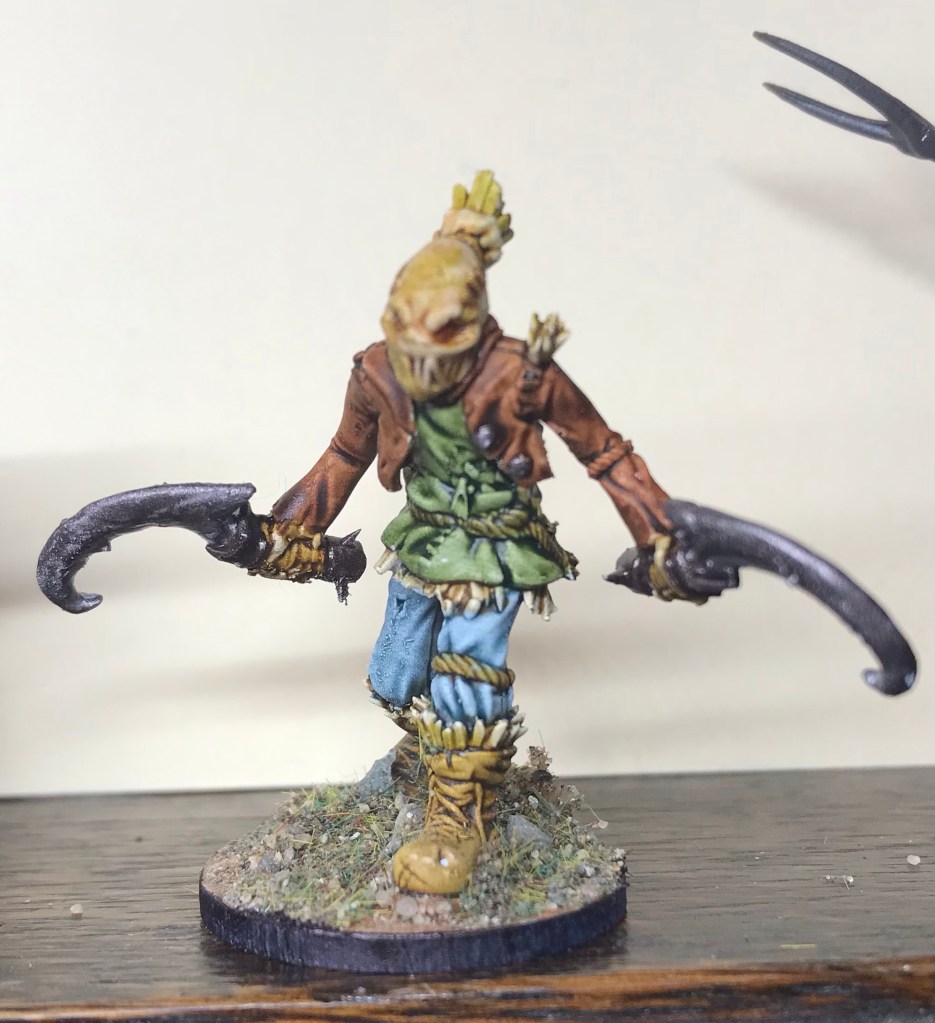
A bit of a scary chap I think you will agree. Now I normally say something like it takes me about half an hour or so. Tonight I decided to actually time myself….so this chap took me…
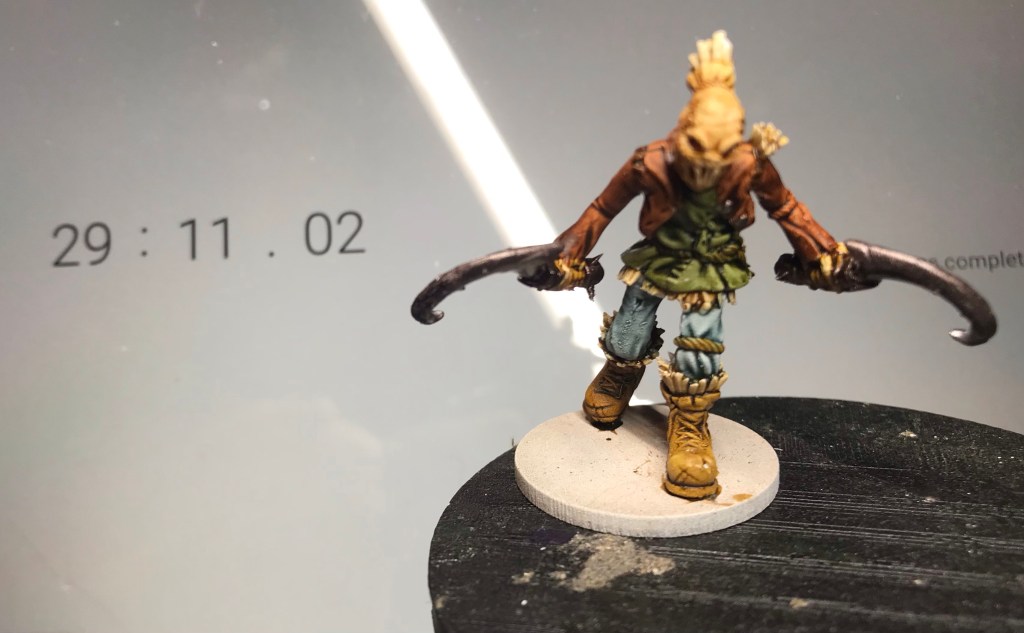
Yes from start to finish he took me 29 minutes to do. I wasn’t rushing, just painting in my normal way.
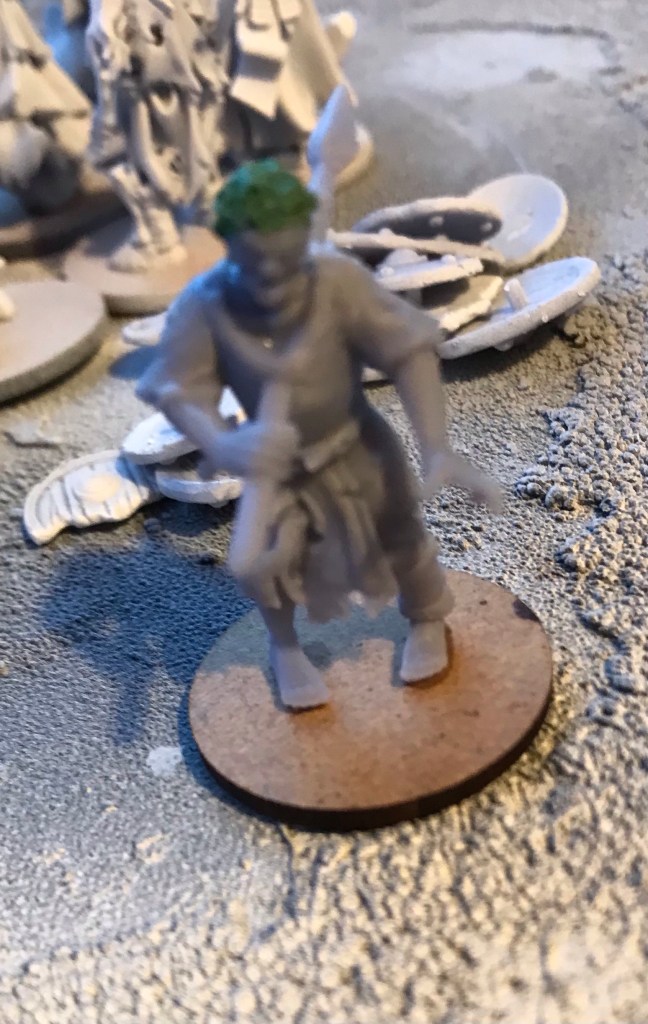
On this one I went in the followingorder… boots, green smock, trousers, brown jacket. This was to allow some drying time for each of the different parts. The mask was a mix of zombie green and orange with various splodges of orange over the top while still wet. I also added leather brown into the eye sockets then used my thumb to remove paint from the eyes. These were then dotted with red.
Once again superglue on the base and showed in the base ready. A quick zip around the edges with my super wide black sharpie and voilà one scary scarecrow. Start to finish thirty minutes.
In case anyone is wondering..this is Worzel Gummidge…
https://images.app.goo.gl/RCqZ8dmvovUxF8FEA
Worzel was played by John Pertwee, who also played Doctor Who… I know which I prefer and it isn’t a wierd scarecrow from Ten Acre field!
Oh while I remember, the four beasties are by Tytantroll miniatures.
One day I will work out how to tag people on my blog as they really are lovely miniatures…I really fancy having a go at some of the miniature busts..there are some really great ones, the only reason I haven’t got one yet is because I can’t decide on one.
Finally, I said I had only painted one mini this evening, part way through writing this I decided to make a start on the vampire.
