So after owning these tiles for about 3 months I eventually decided to make a start on them. I am going to do one of each (I think) I will then write the tile number in the back with Sharpies and the. I will have a reference to work to as well as having something to play with.
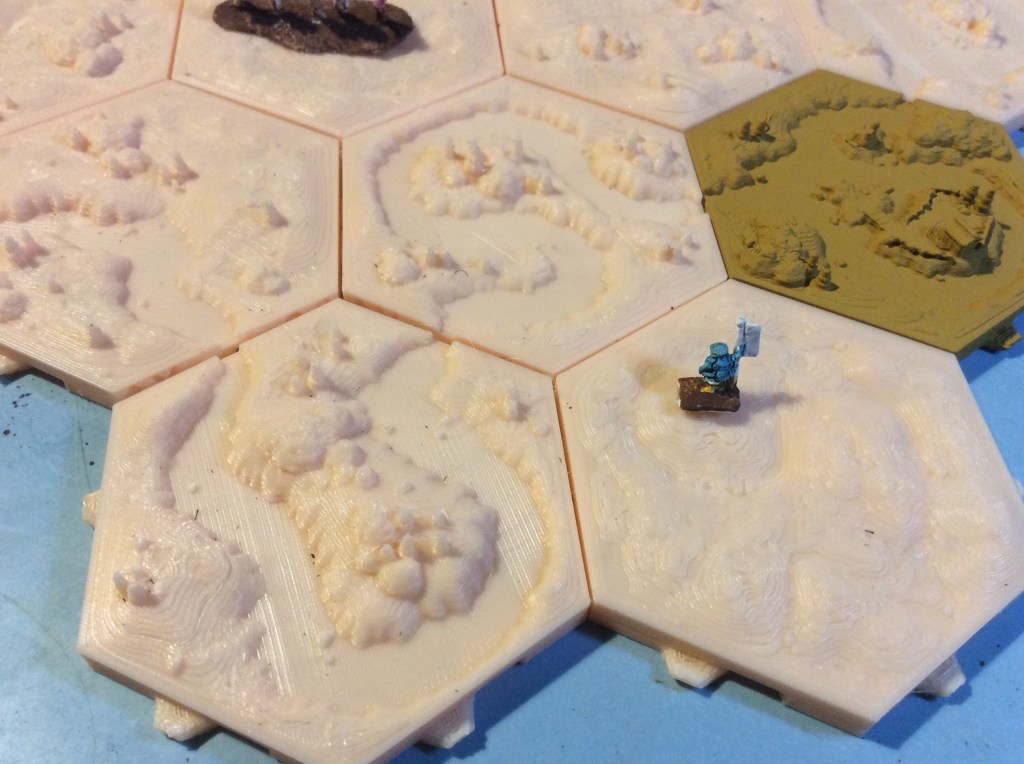
So here we have six river tiles and six plains tiles (plus the three original test ones). I stuck some stuff 6mm miniatures on to give you a sense of scale. I am quite pleased with them. These are not a quick print. Each of these sets of six took about 8 hours 40 minutes to print. The woods are going to be over 12 and the mountains 14.
Here we have a close up…
Still not sure what I am going to use these for, but based on the 6mm miniatures then I think I have found my counters for whatever campaigns I use. If a desert version ever comes out it will be used for my Sudan campaigns.
I think I will print all I need and then paint them so that they all look similar rather than having mix and match. The upside is that they will look the same, the down side is it will be a mammoth painting mountain…
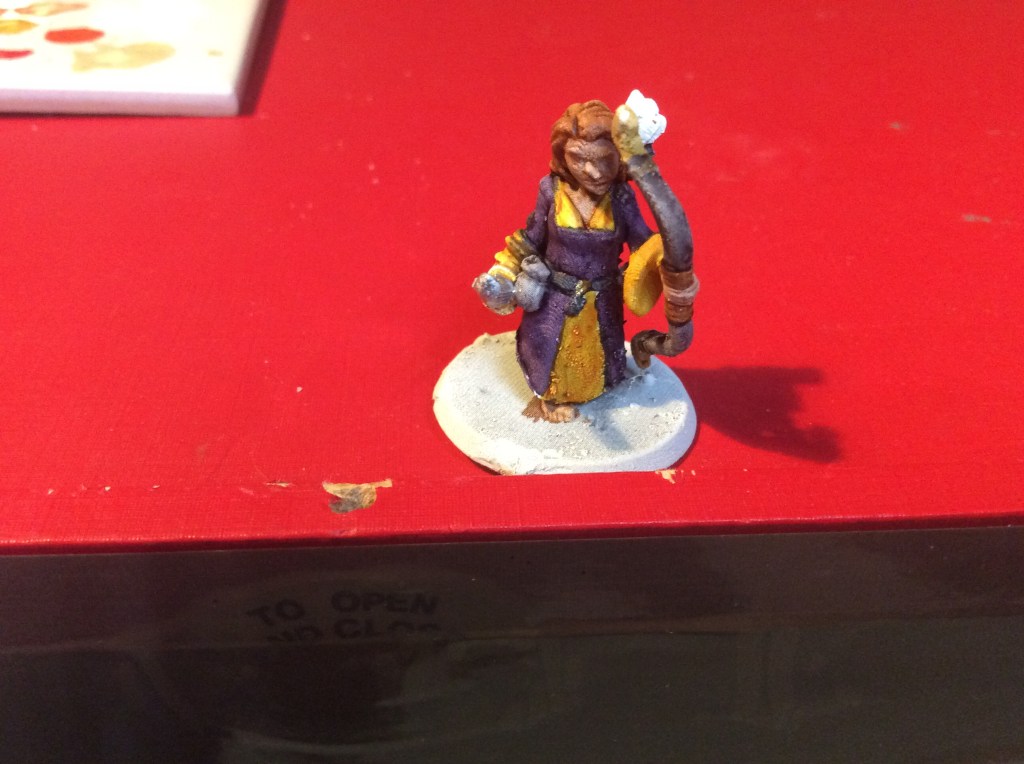
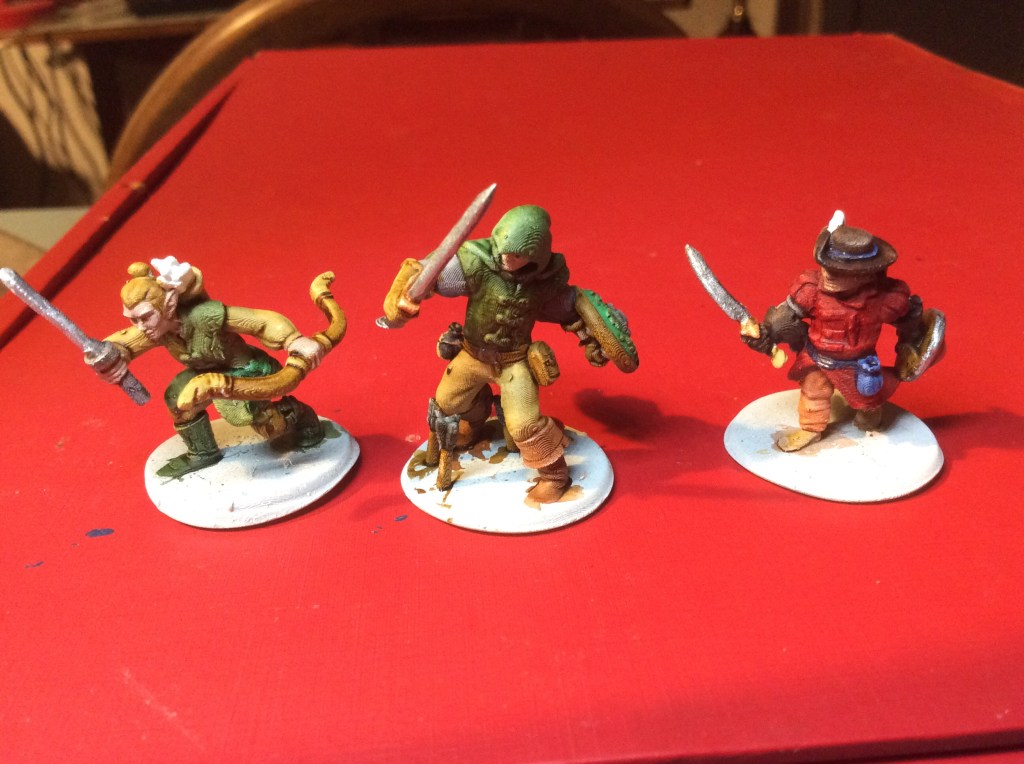
Allow me to introduce mistress Celandine. The final miniature for my players…
My friend, Maggie, likes purple hence the dress colour. Yellow and purple do go quite nicely together. I found this out ages ago when I painted up my vampire for Witchlands.
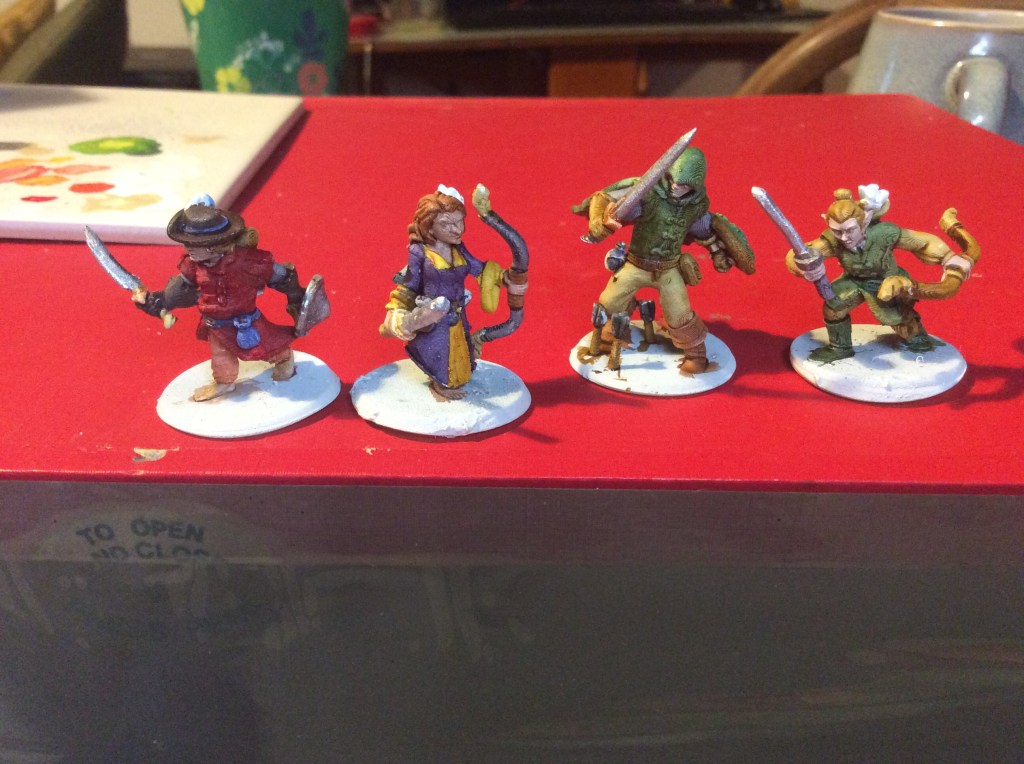
Here she is with the rest of the party…
Tomorrow I will print up some bases (or find some GW ones) and base these up.
The other day I decided to treat my players to their own miniatures of their characters. I got these of Hero Forge. I actually had great fun playing with the software, but in the end I came up with the four characters. Two hobbits, a Mirkwood Elf and a ranger.
I bought the STL’s as I can print in both resin and filament (still cost over $7.00 each. But it was a present so I was willing to spurge in my mate’s and my eldest.
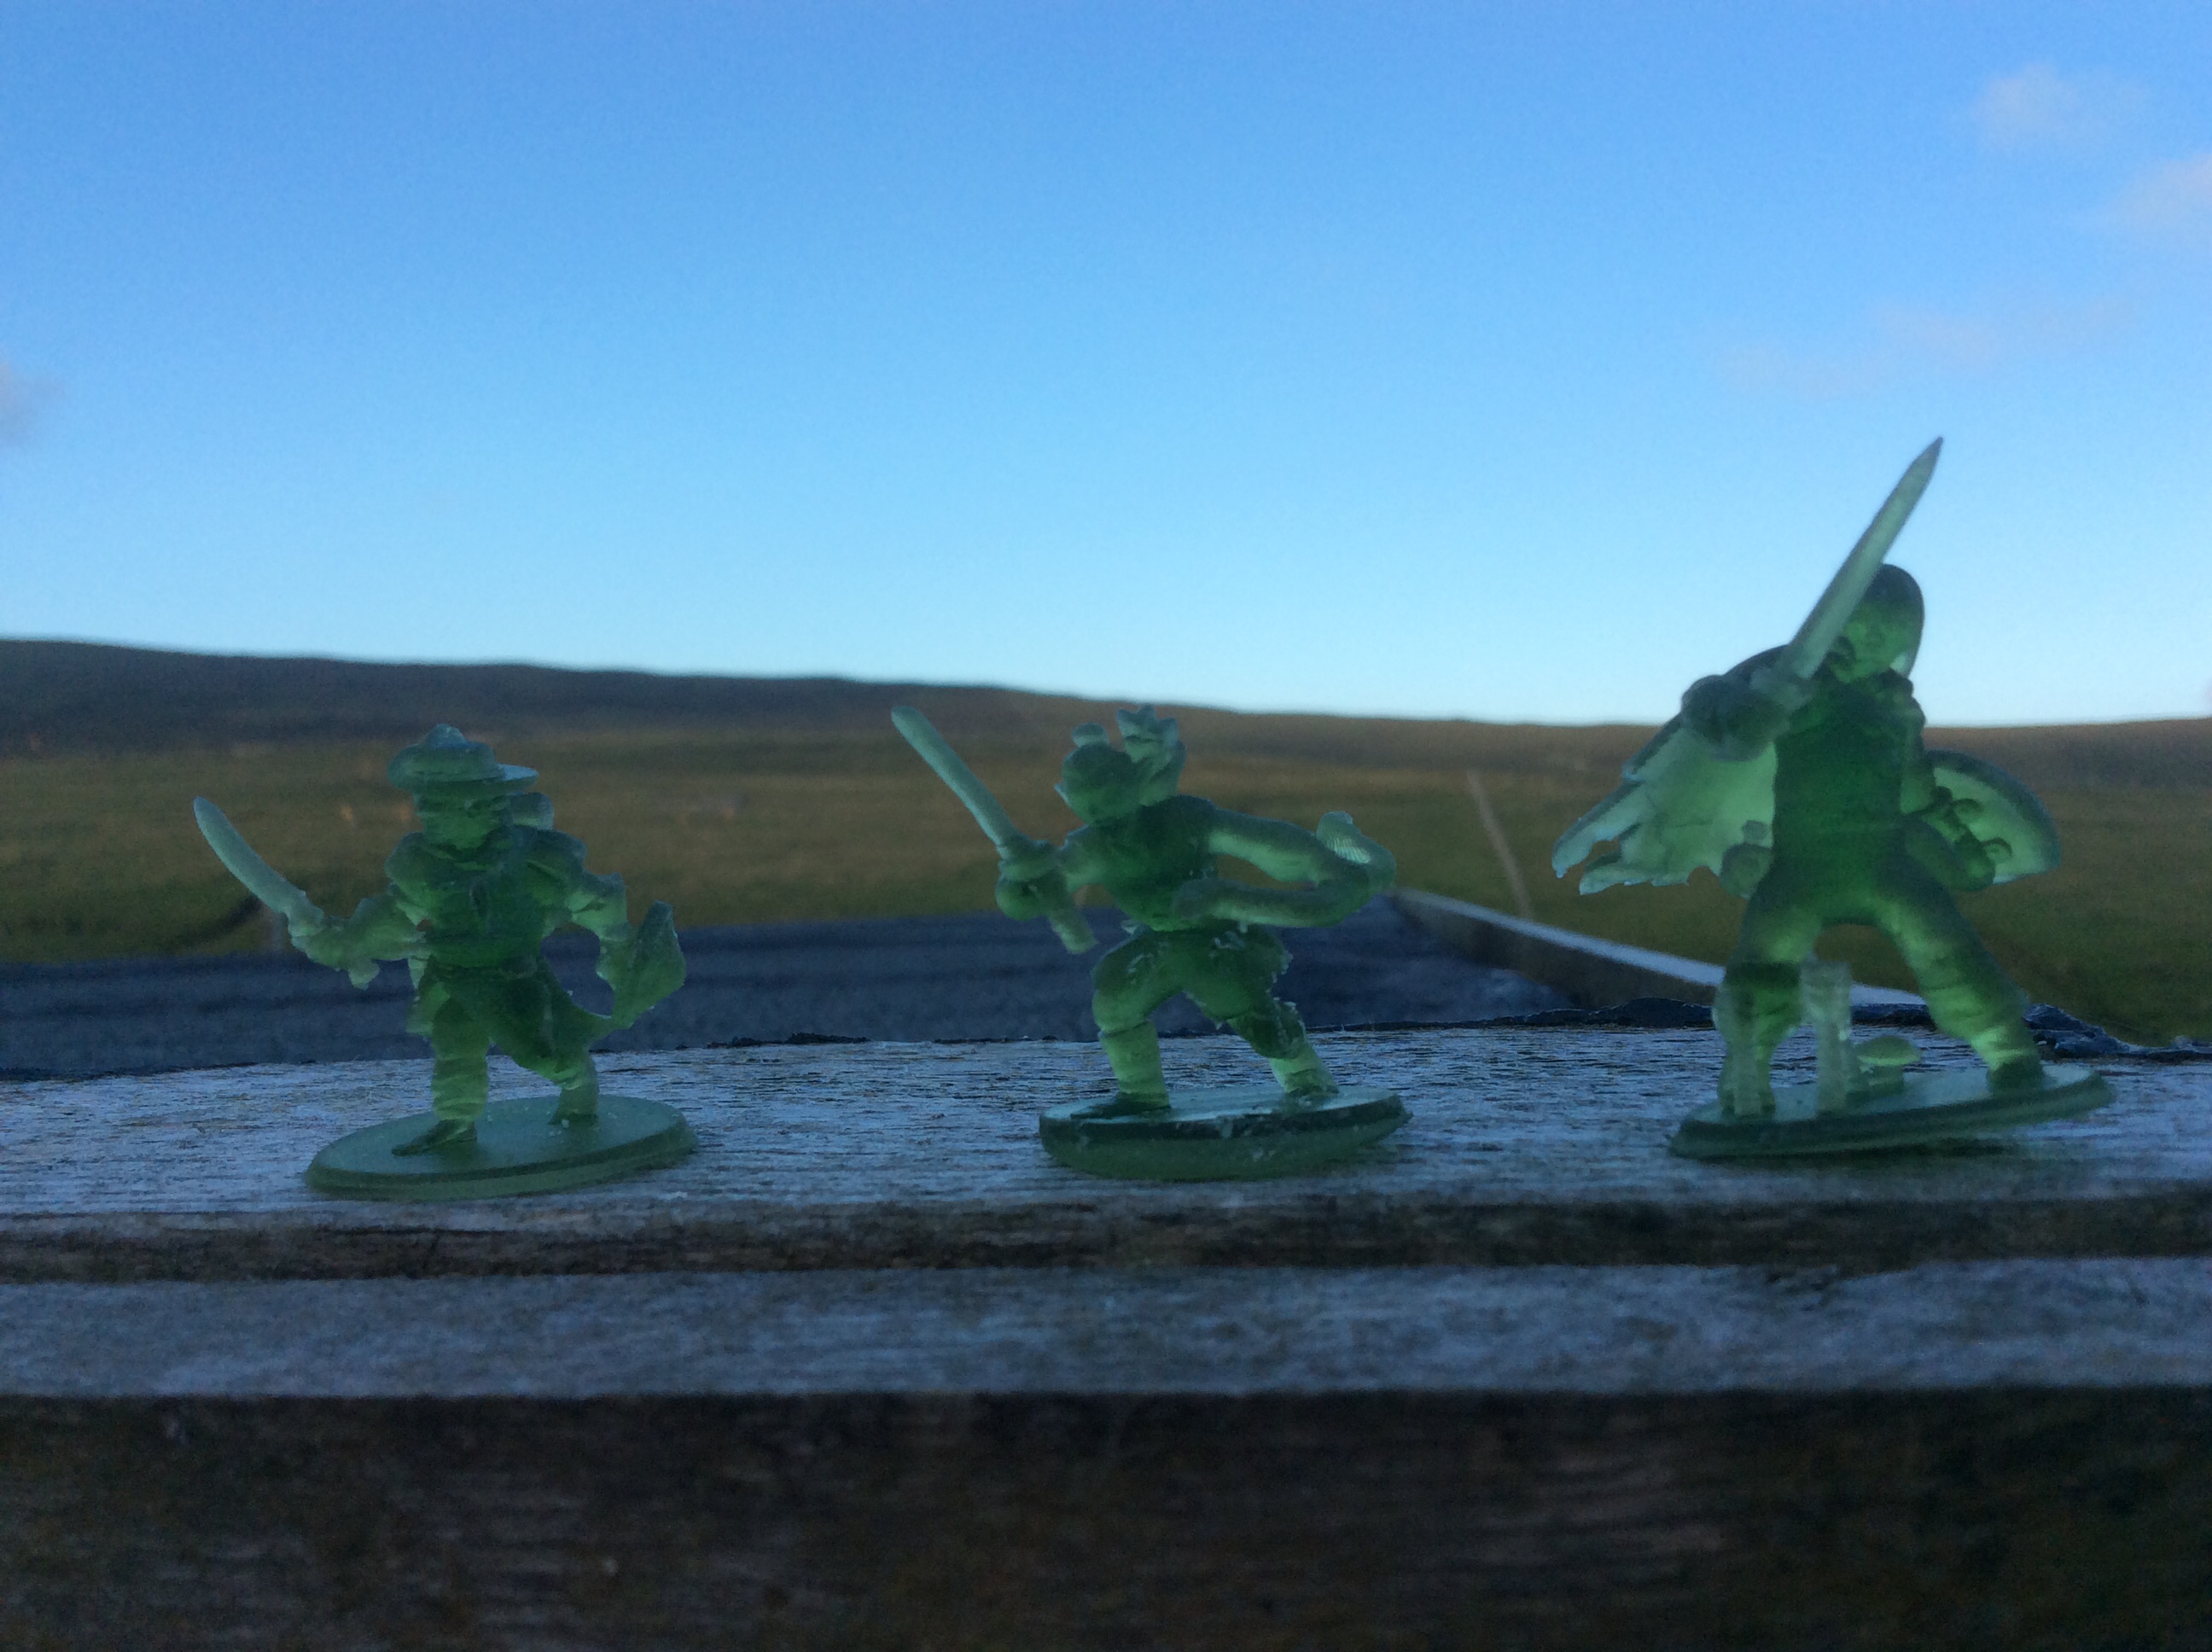
So I posted a picture of them yesterday in their raw state…
Sadly one of the hobbits failed to print properly, but the rest came out okay (ish). I reprinted them all today as the ranger had lost half of his shield and the elf lost their scabbard. Unfortunately on today’s print the ranger lost a different bit of their shield as did the hobbit, the elf still lost the scabbard, but luckily the other hobbit printed (even if she does seem to have very thin arms.
I decided to give the original ones a lick of paint tonight and here we are…
So left to right we have Tauriel, an elf of the woodland realm. Arador a ranger of the north and finally Hoban Underhill a hobbit of the Shire.
The poses were funky and as I said I enjoyed playing with all the different poses and equipment. I spent a couple of hours at least on the four of them. This is where it gets a bit interesting. There are some poses and equipment that do not work at all together. I decided to make a Samurai and Ninja. I felt the urge to make a diorama… I blame Dave and Pete for that! The Ninja was in a three point landing and the samurai was rushing forward with a spear. Whatever weapon I tried to put on the belt of the Samurai actually went through the armour. It would go on the right side of the body fine, but not the left. I then decided to do some experimenting with different figures and found similar things. The elf above has her hair in a bun, simply because if it was long it would go through her back quiver.
The other thing I found was that the resin actually has ridges on it as if it were done on a filament printer. They are faint, but they are there. At the distance you would normally see them on the table they are invisible, but they are definitely there. Now this is different resin, but the civilians I did a while back do not have these ridges. It makes me think that it could be the actual miniature itself. I have seen pictures of the Hero Forge stuff that people have bought as a miniature having them too.
Will I be rushing out to get any more, probably not. This was a one off experiment. I might fork out $16.00 for the two Japanese minis I built, but before I do I might see if I can find something from the various mini manufacturers out there.. to be honest it would probably be cheaper.
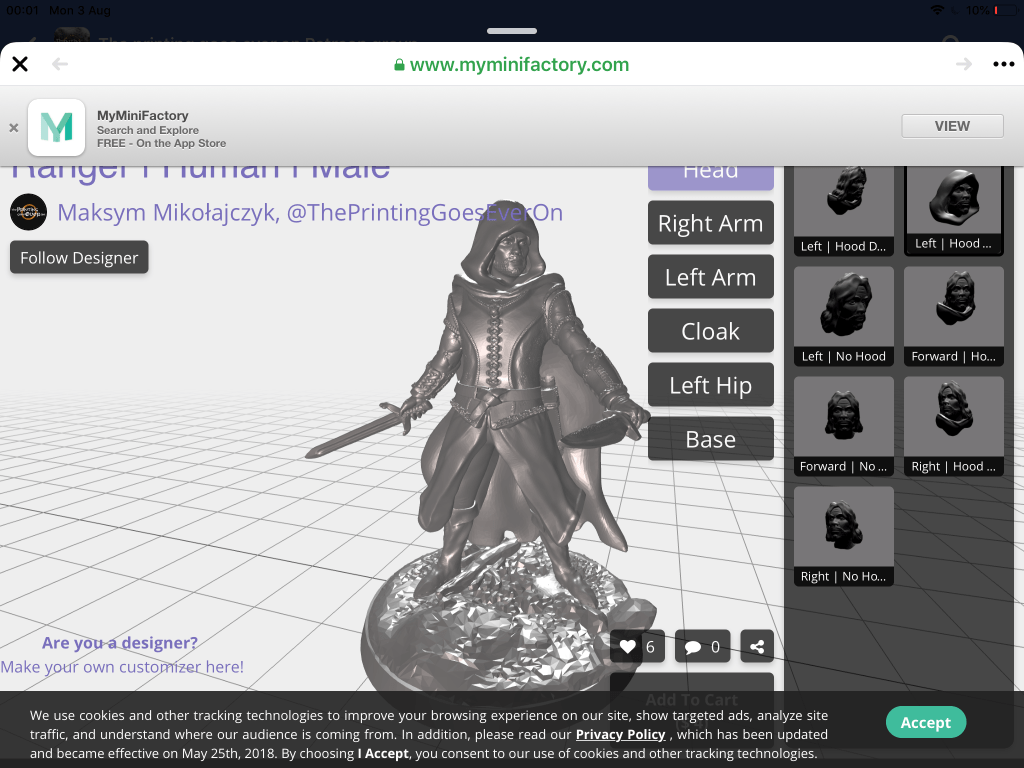
Talking of cheaper, the Up and coming Patreon that I said I was likely to follow, is more like definite now, but interestingly enough he shared a Link to a MyMiniFactory page, where I could make a ranger… okay I cannot have him doing back flips or other things like I could on Hero Forge, but it is really a nice miniature and I could have some weapon options etc. Plus they come with a full sized base, not a really thin one like the ones I just did.Price $4.00 just over half the price of the one above…
Well I think it is… I decided to print a Twylite samurai castle that came with the samurai buildings already printed. So I ran it through Cura and sliced it. Total print time 26 hours 51 minutes
It is a lovely model, with one major flaw… I made it too big. I bumped the size up to 140%. I know castles are big, but this seems very big. It’s not really a problem as it can go with my 10mm Forces if needs be.
Another flaw is that the stairs don’t actually go anywhere. They meet a blank wall. I am sure that I can make something and stick it on. Next question…what colour to paint it 🤔.
If truth be told I am lucky to have it at all. I popped in at the 18 hour mark and found this dangling from the side…
It is actually the base of the layer above the first roof line. I haven’t got a clue what happened, but the layer that was being printed was a bit of a mess. So I snipped off as much of the spaghetti as I could with the only thing handy, a pair of kiddy scissors! Structural integrity will be compromised to some extent, but at least I got a completed print.
Now part of me quite fancies printing this again at 100%. Print time should be faster, possibly 40% quicker.
I deliberately haven’t painted this evening as I have spent a lot of today hammering and sawing and my arms are buggered, on the upside I managed over 10,000 steps 😂.
More of the same tomorrow. Hopefully the bloody midges won’t be out, they were a nightmare today.
Today I set the Ender away and printed myself half a dozen new houses to go in the town.
I must remember to add the roof to the gates!
The buildings are from Twylite games and the walls are from my favourite maker of Japanese things 3DAlienWorlds. I dropped the size to about 18% or so and I don’t think they look too bad.
I would have undercoated them but it has been up to 40mph winds today so no spraying for me. Weather is better tomorrow so hopefully they will get done soon.
We will see how the resin and filament compare when they are painted. The resin weighs at least twice the weight of the filament.
So the walls finished overnight only one failure and to be honest I don’t actually know what it is 😂. I had to do some speedy repairs to save the bottom left gate. Luckily two layers of the blue tape pretty much matched the base that had pinged.
The other problem I had was stringing. Before I went to bed I bumped the temperature up about 10 degrees. I think it was too much. I used to do this over the colder months, so just automatically did it last night.
When I did the test print I had no stringing, so I reckon the change in temperature was the problem. Easy enough solved with a lighter…
I have been busy constructing the sitootery again today. It was meant to be heavy rain, but thankfully we had a couple of twenty minute drizzling and that was it. Strong winds are forecast tomorrow so I might not get any more done.
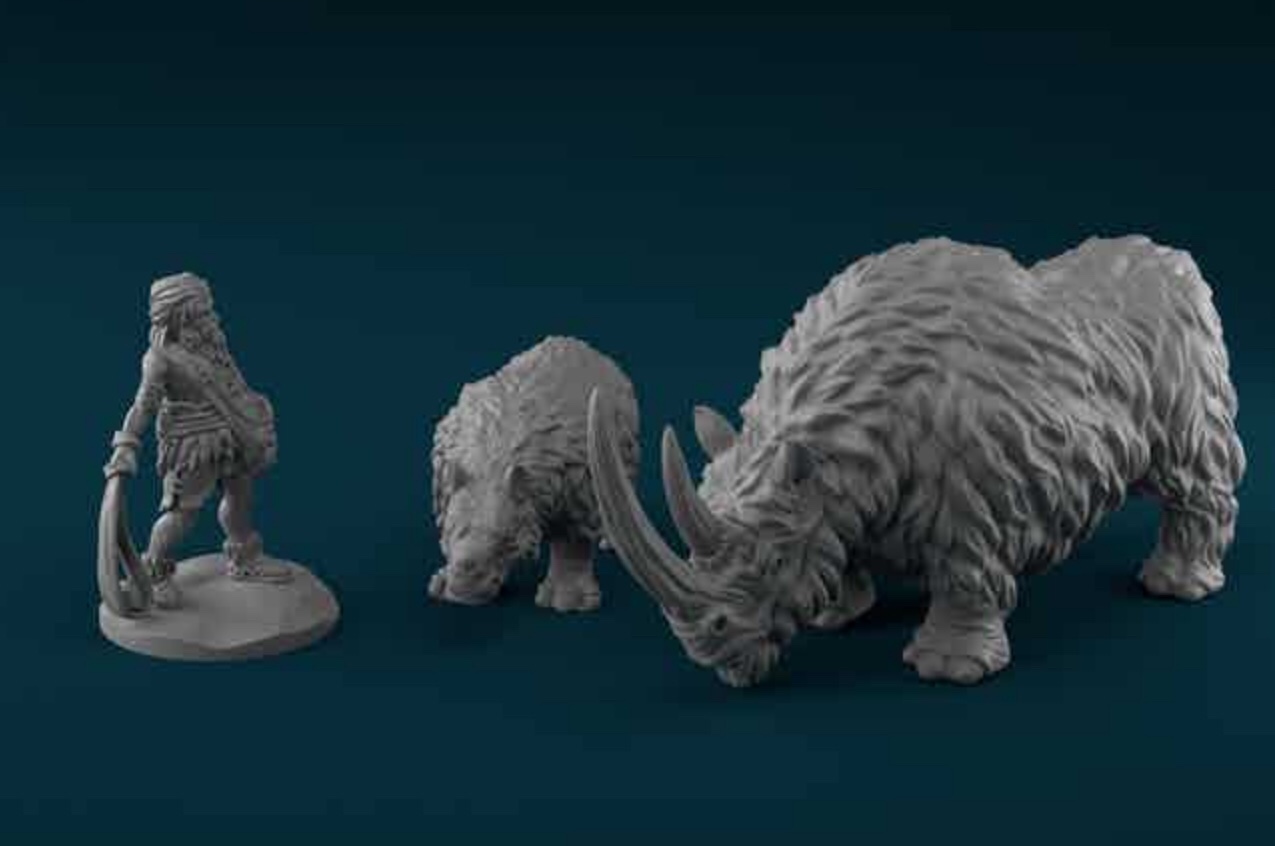
I have recently backed a few Kickstarters, not that it is any surprise, but they have all been for 3D Printing. The latest, and one that I am rather excited about is this one…
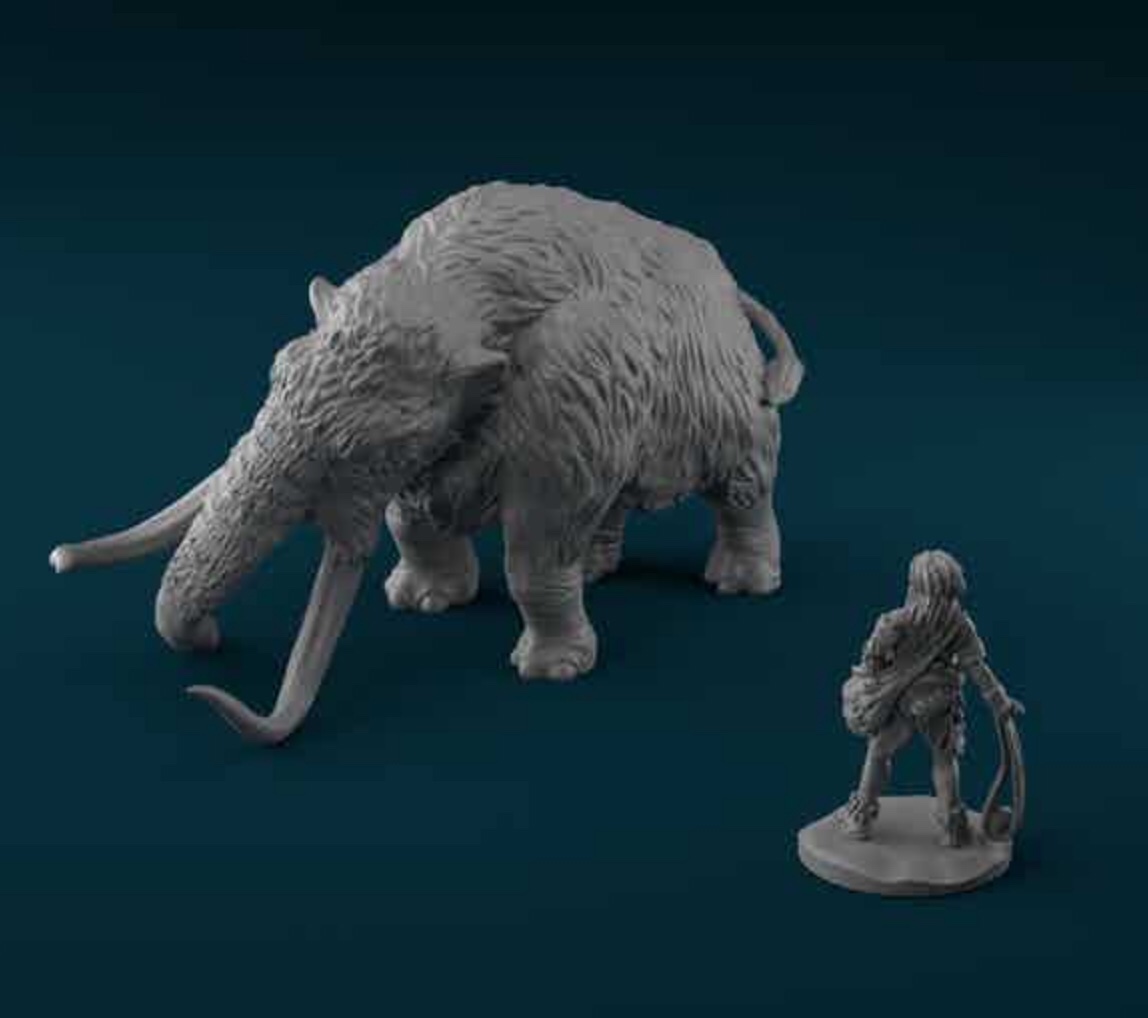
I really love the Palaeolithic period for gaming and this really does hit the spot. I actually have a role play game set way back then. I am very excited by the updates, mammoth and woolly rhino have just been sculpted and they look Awesome!
Now the title says Kickstarter v Patreon. As you can imagine I am in a fair few Facebook 3D Printing groups and quite often someone will post their latest Patreon set of sculpts be they terrain of miniatures and there is some absolutely amazing things out there, but they are wanting a monthly subscription of somewhere between $5 -$10 which in the grand scheme of things isn’t that much over the course of the year, but the one thing that I have found is that although I love some of the stuff shown, some of it I have no interest in it whatsoever. Therefore I am passing them by.
Now I do have one Patreon which is I’ll Gotten Games. This was a way of saying thank you for all of the free stuff that I downloaded of Thingiverse.
I am now at the stage where I am regularly looking at the Kickstarter app and choosing what I want. As an example, the rampart stuff above came in at $20 for all of the files (and stretch goals) even if I just printed all of the animals it would be worth it. This has 6 days to go, so if you have a printer, they are well worth looking out.
These are shots of one of the mammoth and the woolly rhino (both of which I am extremely excited about… maybe too much so!)
The other thing I like about the STL Kickstarter is that I don’t have to worry about postage costs.
Over the next few days I may share some of the other ones that I am backing, and a couple that I am really considering!
I took my print off today and have enough bits to make my small town. I will need to print some more houses as six do not a town make!
I bumped the gate up to about 200% and left the walls at 140 and they seem much better (I had originally shrunk them down to 15% in 3D builder but they looked too small so I increased the small size by the above amounts).I can make the compound for the temple separate from the town as I have extra walls knocking about.
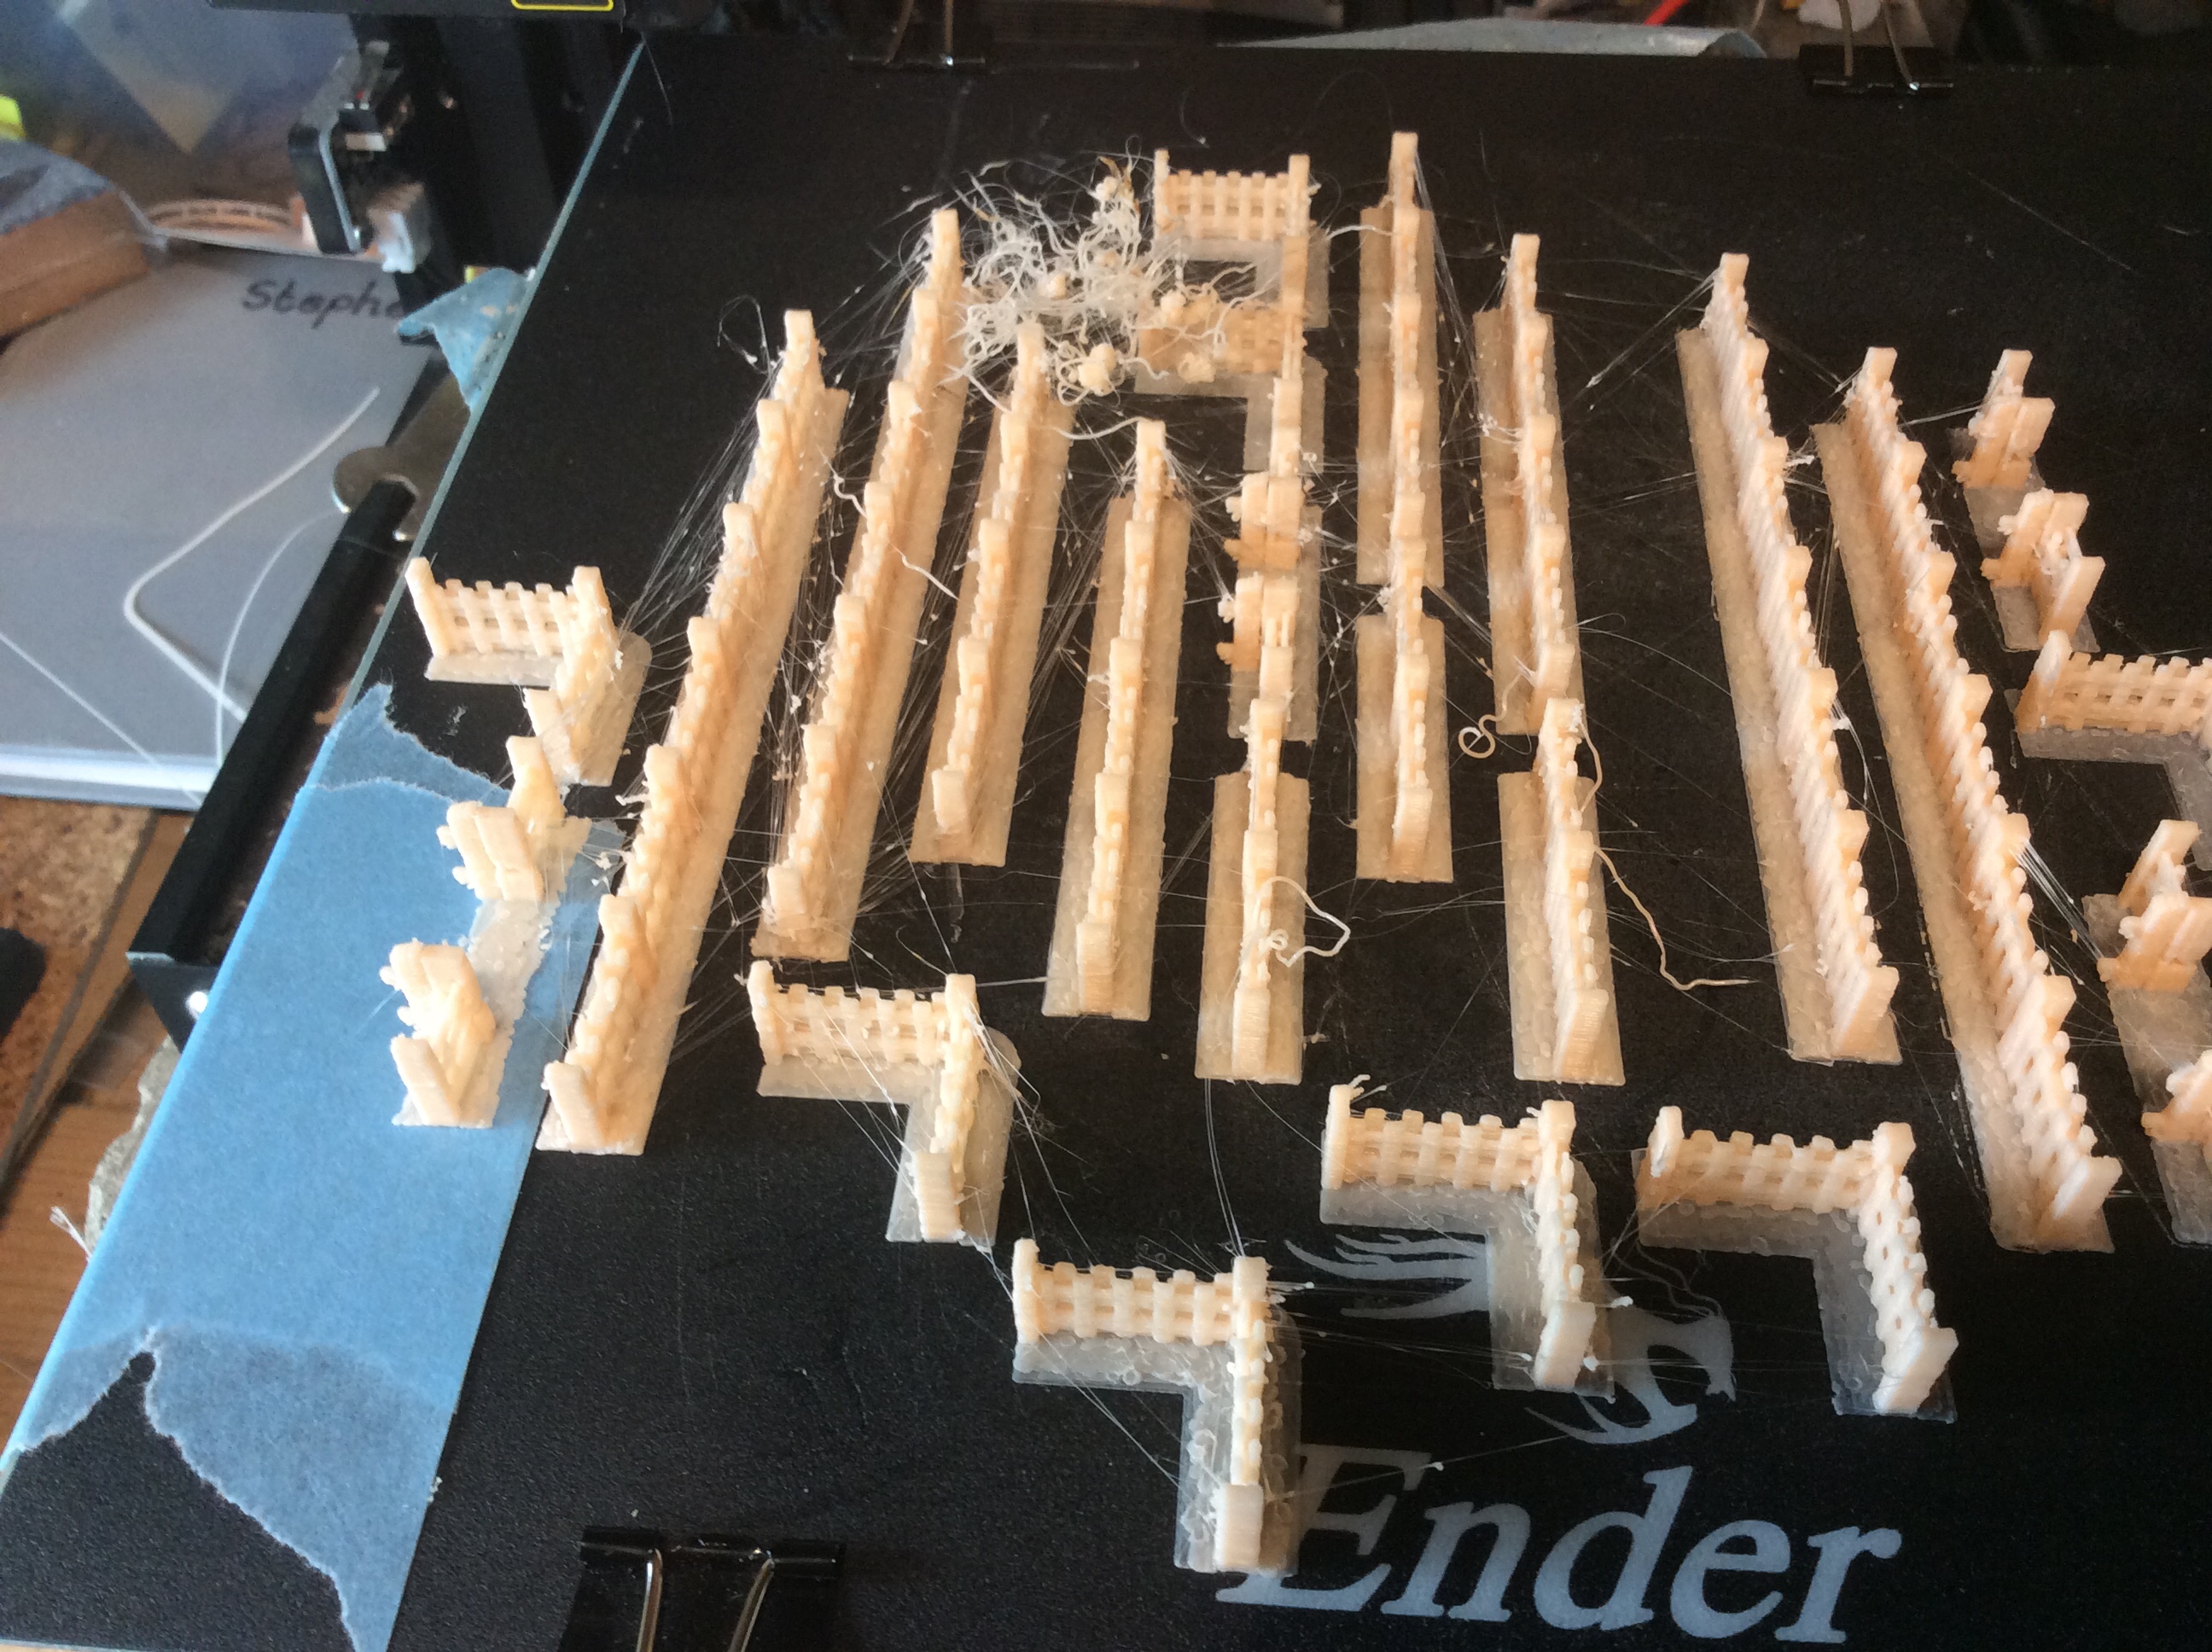
I also shrunk the wooden fences down to fit the 6mm scale too these were a bit trickier to print, luckily I did a test run of all the different bits, before the mammoth 13 hour print (3D printing certainly isn’t a fast affair).
Unfortunately the gate posts couldn’t take the strain at the top and both came off. I improvised with a bit of plastic rod…
These wooden fences were the ones I built in 3D builder to allow me to print them pre constructed for my 15mm village… I never thought I would be printing them for 6mm too.
So where do I go from here. First up some rice paddies. I am actually just going to print the 4’s that I did for the 15mm village (without the rice) I will give it a go with static crass as the crops and avoid the resin pour stage. I really do need a better system of making the static grass, that does not involve forking out £55 for a WWS one. I will have a play around with my cheap (tea strainer) one and see what I can come up with.
I also intend to see if I can build some of the 3DAlienWorlds farmhouses in 3D Builder and then shrink them down too. The ones I have really only work as town houses and not ones you would find in a rural setting. To be honest I could just buy the ones on 2D6 world’s, they aren’t that expensive but to buy enough for a couple of hampers then I am looking at over £30. Interestingly enough they have just brought out the stone walls in resin. But 3DAlienWorlds ones are spot on for me and I can also print as many as I like for pennies, plus it gives me a bit of a challenge 😂.
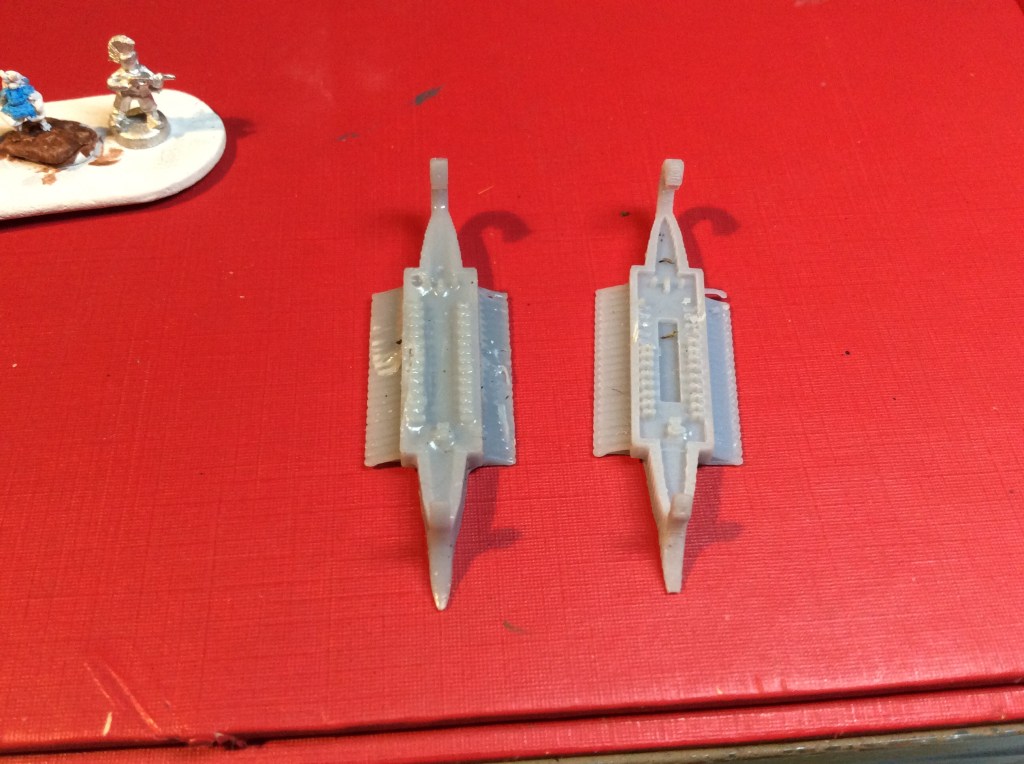
The title says it all really. Making sure that the ‘raw’ resin is removed from the parts is really important. You can tell from these two galleys…
I bet you cannot tell which one was cleaned the best!
Mikko very kindly gave me some advice and it certainly has made a difference. These things are really small, that is a 6mm miniature in the background. I have now got some new resin so will need to do a test print to begin with as this one is translucent green. I reckon that I need 9 seconds to get the best quality at the present layer height. I intend to try increasing the resolution and see what I can get out of it.
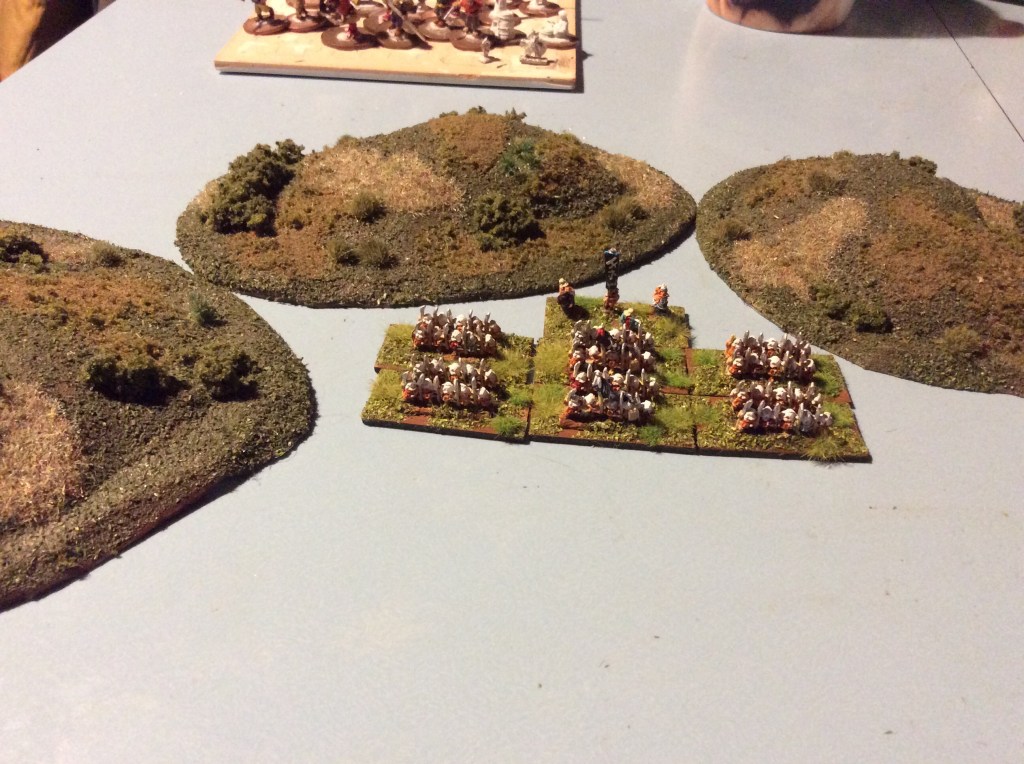
Tonight I finished the monks, added some of the tufts I made, rather than add the ones I bought as they are totally different. They are nice and irregular shaped, but wouldn’t match in with the ones before.
Here are the monks amongst the hills
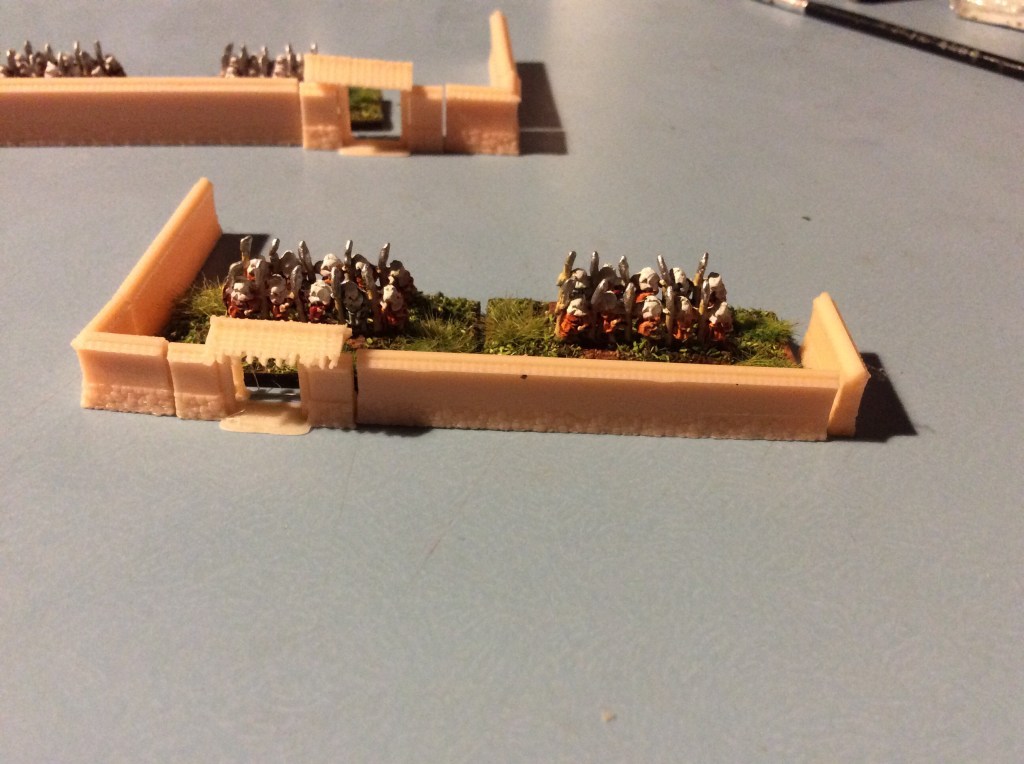
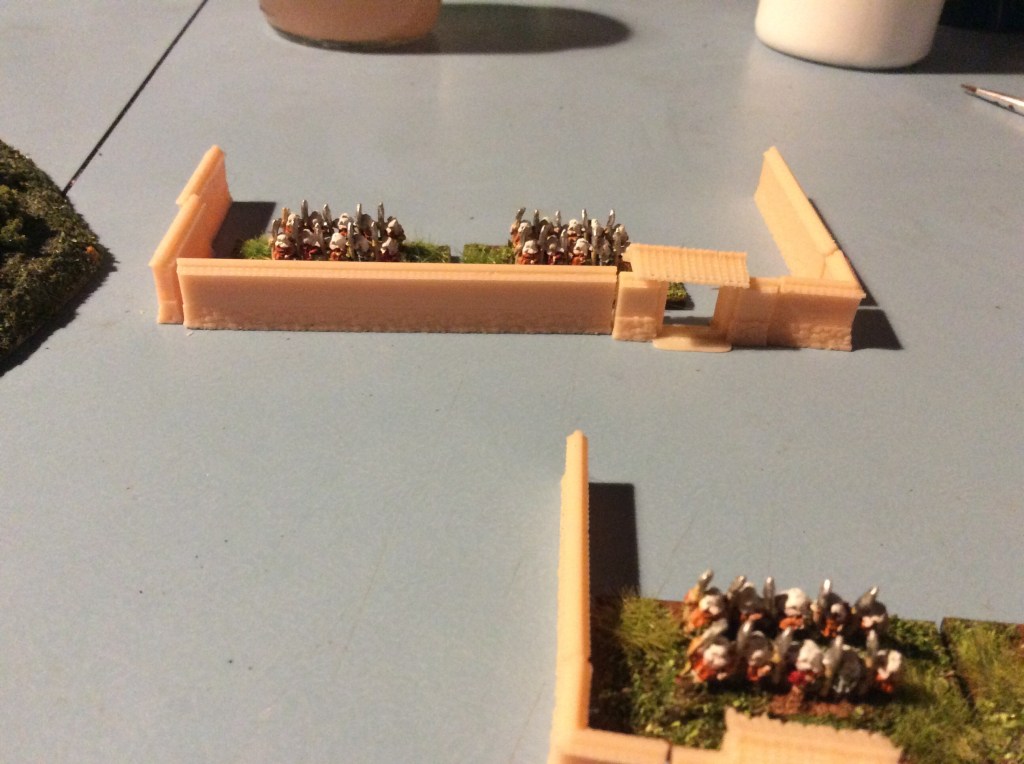
The other thing I did was to work on some of the 3DAlienWorlds walls. Rather than print then build I decided to build in 3D builder and then print them. This was a bit fiddly. Once the tops and bottoms were merged I Shrank them down to about 16% and printed them. This is them in the foreground.
Now I felt that they were a bit small so I bumped them up to 130%… Seen at the back of the photo below.as
As these are a bit tricky to see, I put them side by side.
Personally I prefer the larger one, but wondered what other people thought. The Files are saved so it isn’t a problem to bump them up,. Part of me thinks make them a bit larger again as a man on a horse would never get out of that gate 😂