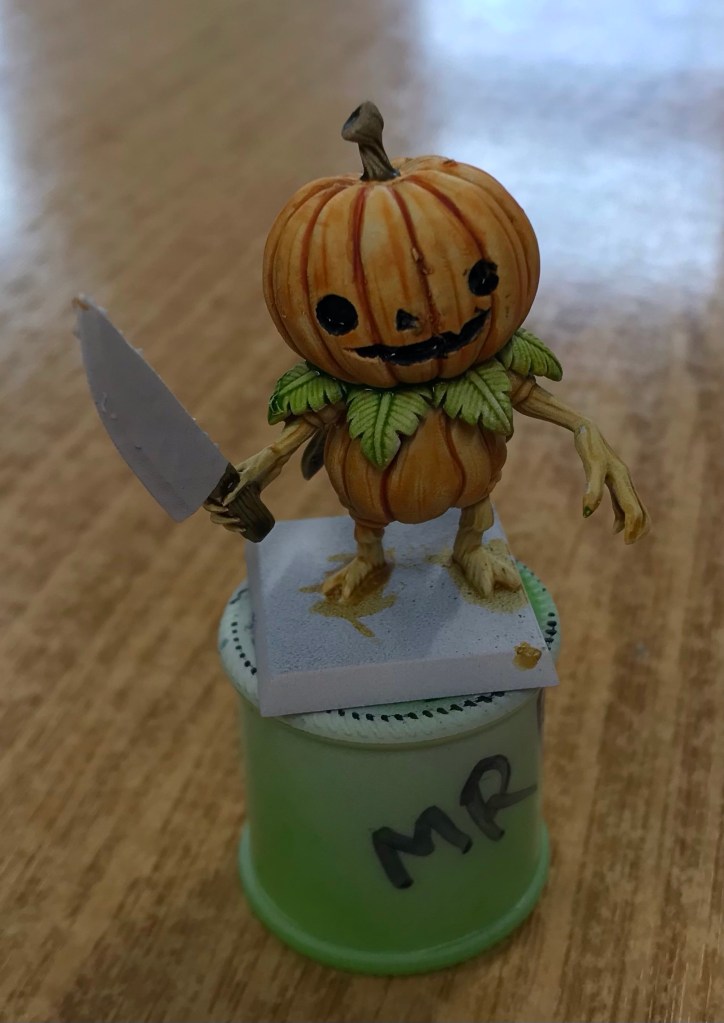
Geek club is still going strong… I saw these little guys on offer and bought them for the kids.

This was my effort…
It was a quite bright evening whilst leaving school…

Geek club is still going strong… I saw these little guys on offer and bought them for the kids.
This was my effort…
It was a quite bright evening whilst leaving school…
Well at the minute I am trying to use up the last of the filament spool so I wanted smaller bits. Today I went for objective markers and wooden beams.
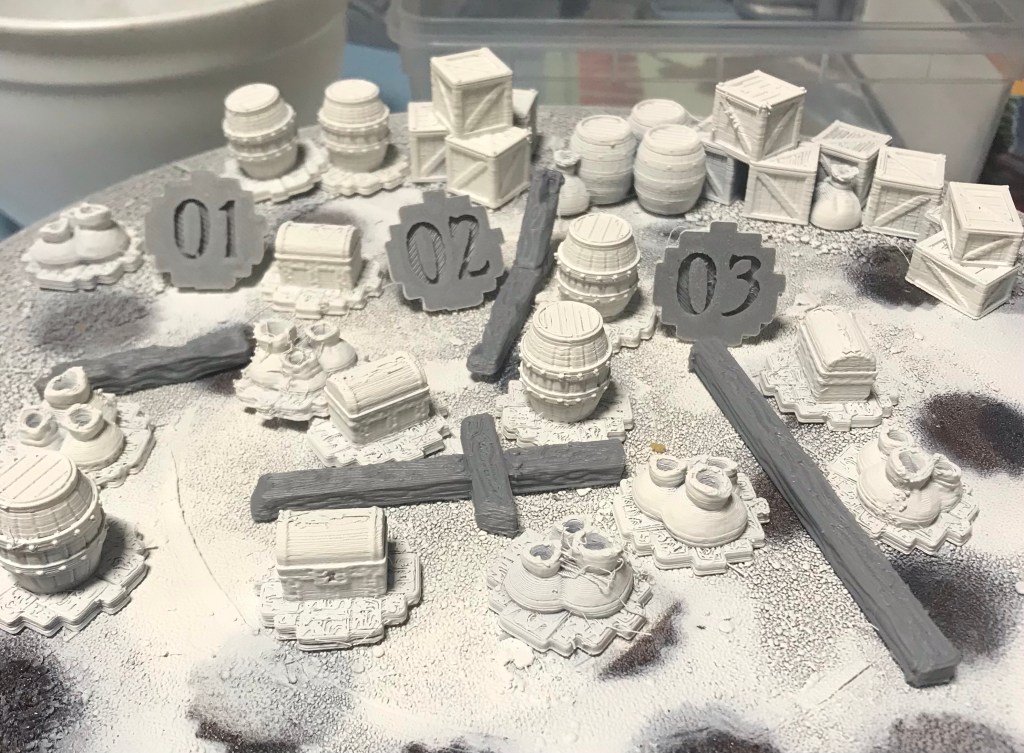
I went for three of the four designs for the markers. Each has a number on the bottom to support various sneaky things in game. I went for 1 to 6 for each one.
The crates etc in the background were printed the other day.
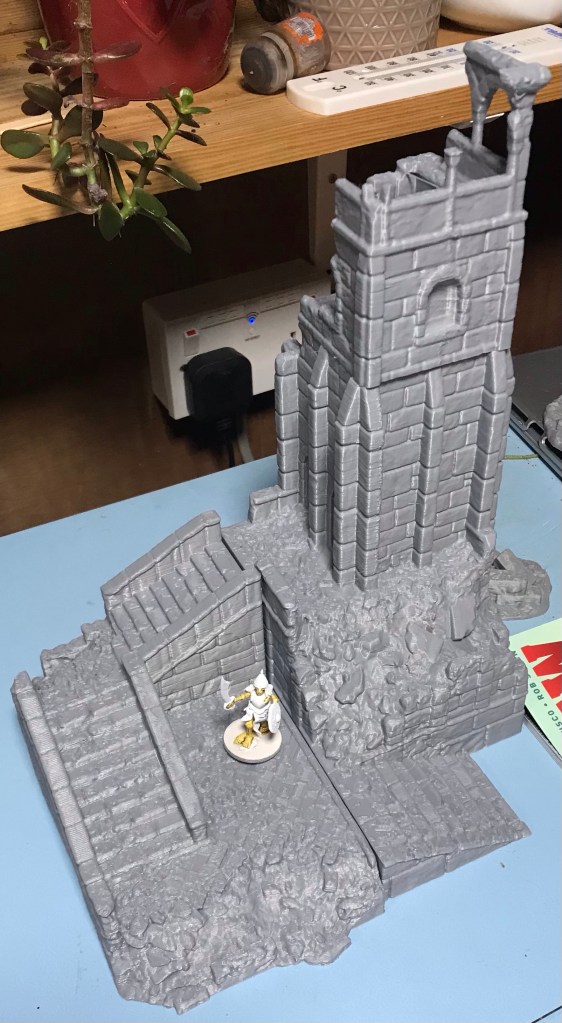
Well that is the tower finished. Part one was just under 19 hours, part two over 26 hours and part three came in at just under 7 hours. So all in about 52 hours… I am now going to have to purchase a new roll of filament too as this took up an awful lot.
On the tooth front, I ended back in at the dentist today as my face swelled right up and was really sore. They cleaned it out again and also redid the filling.
Here is mr Chipmunk!

The triage nurse wanted to see what the swelling looked like. I took the photo while on the phone to get.
Eighteen hours Forty nine minutes of printing led to the first part of the tower getting finished.
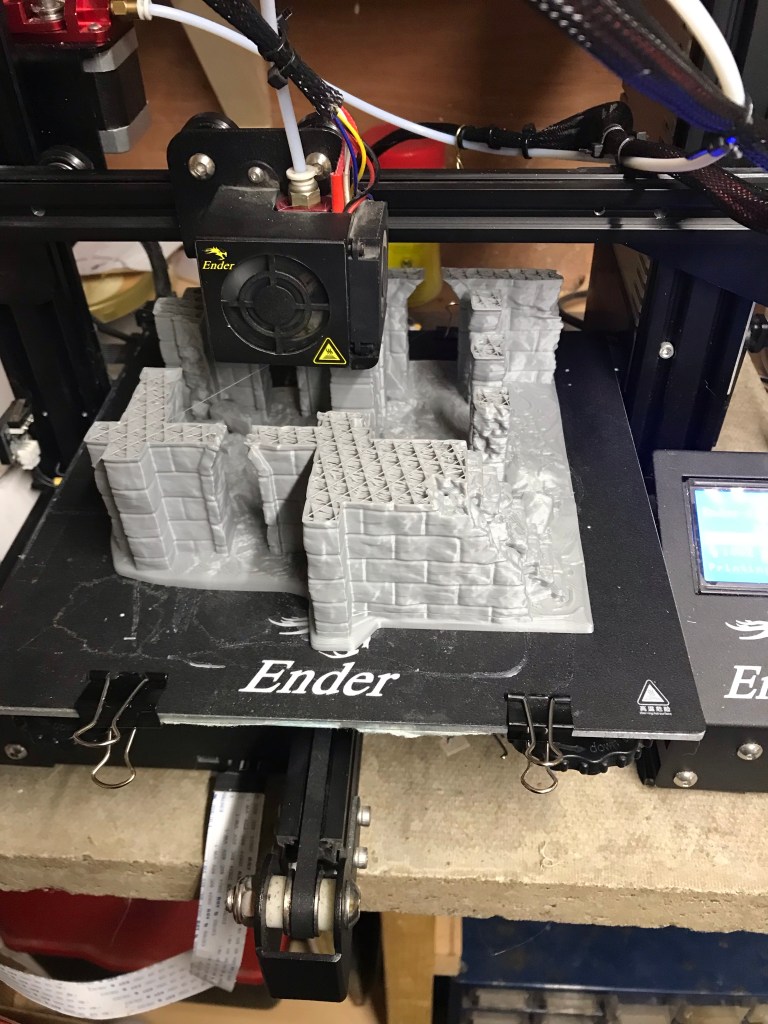
The tower will be on the right hand side. Based on the printer first layers the tower is the same length as this one. From what I remember there will be a rock face against the lower bit, but I honestly cannot remember what it looks like.
Fear not, this is not an order, but more a description of my latest prints.
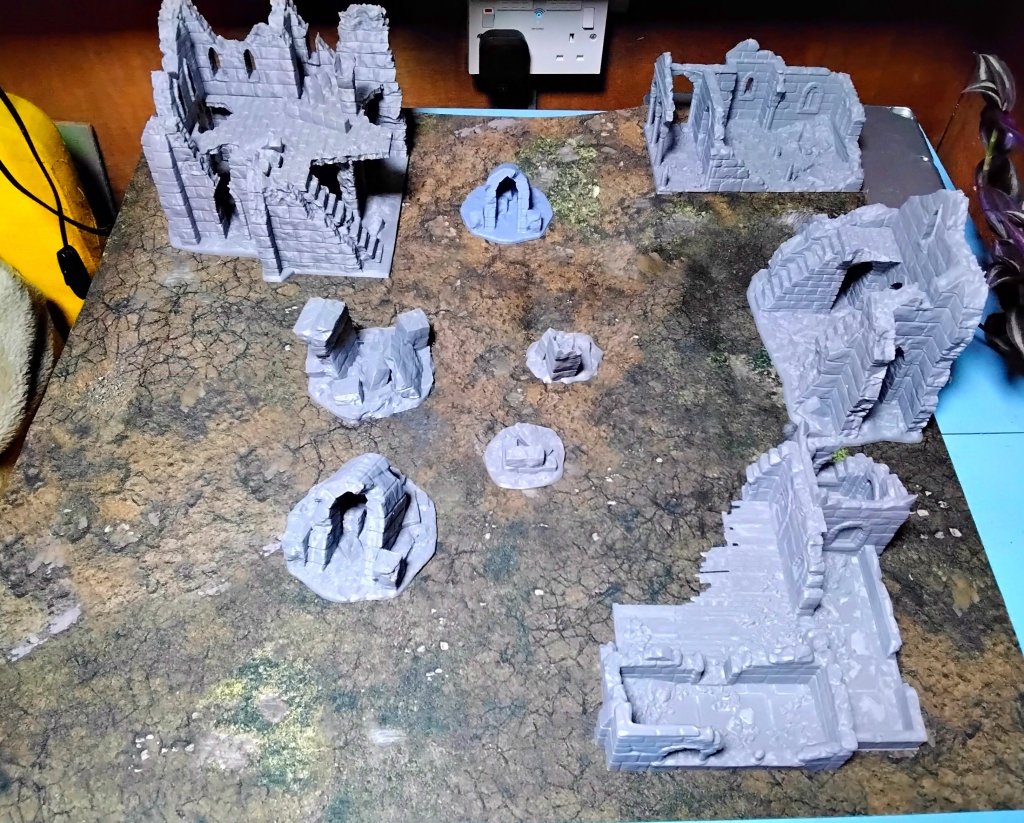
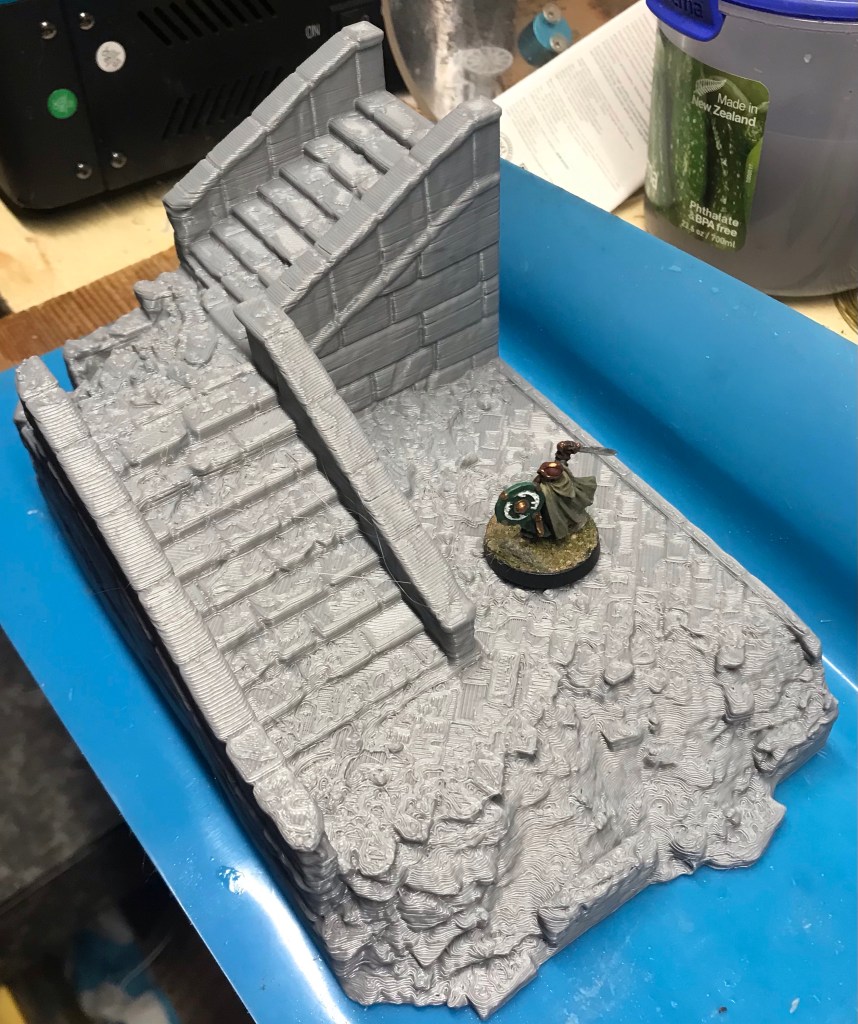
The four in the centre were done overnight. I put them on my 2 foot square terrain mat. So as you can see they are not tiny things. I am printing a second set off as I don’t I will have enough filament on the spool to do anything bigger. Over the next few days my plan is to do a lot more scatter style pieces to use up the remains of the roll.I
I will see what is in this range and then look at my stuff from Lovecraft or Highland Miniatures. Some scaling will have to be done with the Lovecraft miniatures as they are massive compared the these.
After purchasing various bits for the FDM printer I found two things, one – my motherboard won’t accept them and two – I got it working again!
So with a bit of swearing and faffing with the build plate on the fly I have managed to get some buildings printed. Now the centre one really needs redoing as it has printed badly. The columns at the front are really fragile.
I also had a power outage and somehow the printer actually got back on with it accurately (it is meant to, but sometimes what is meant is not what happens!) The one on the right is the affe Ted one here.
So here are the three new ones…
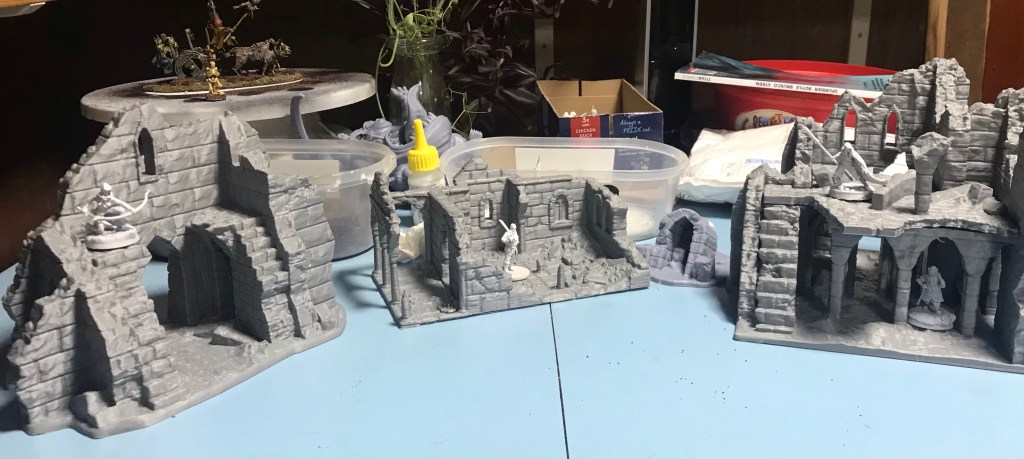
These are all from the Printing Goes Ever On. The one on the left is from an earlier download, the other two are from the ‘not’ Osgiliath set.
This photo shows my 20% infil. It was taken when he power came back on…
The right hand model has a first floor that comes off and was printed separately.
I am renting another one off right now. Four hours in… and I cannot really see the timeline moving… the FDM takes forever. The building on the right took 32 hours plus another 5+ for the separate floor.
In case you are wondering, the printer is sitting on a concrete paving slab. This is because I have to leave it on for so long.
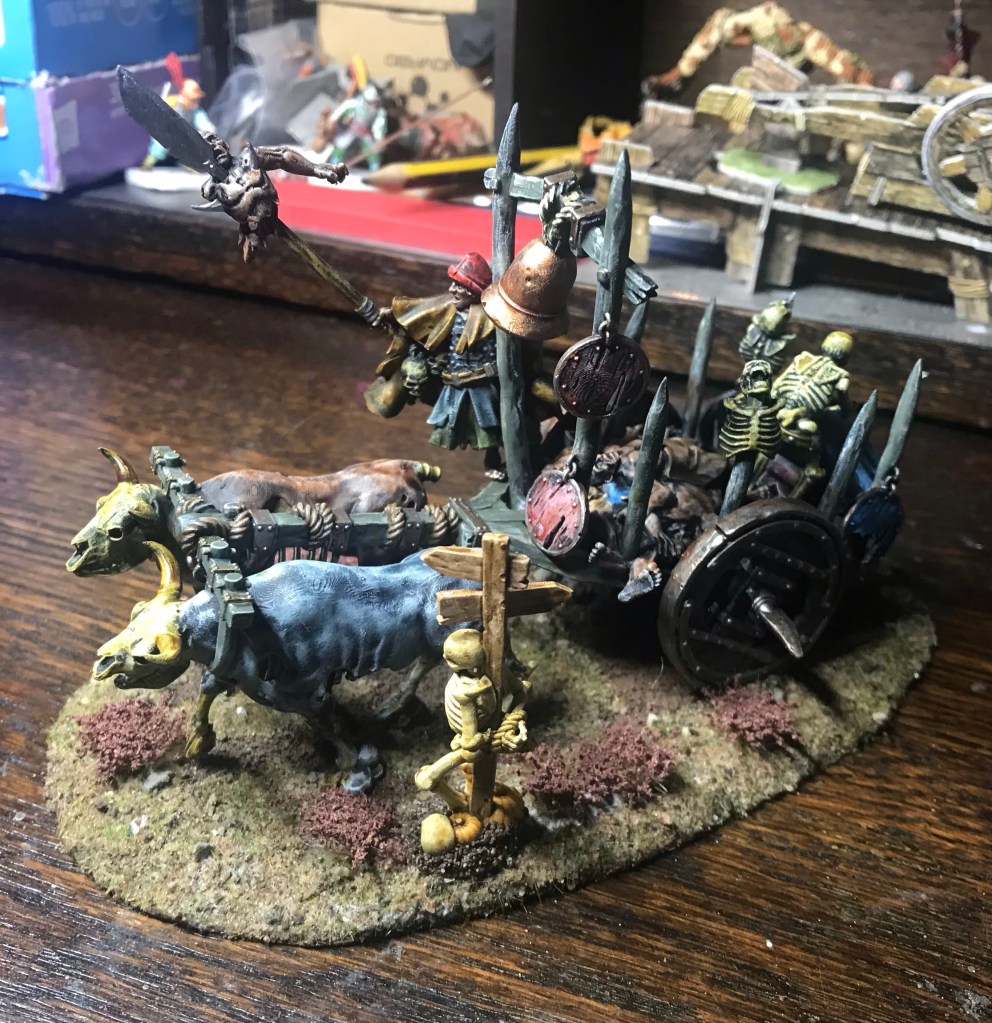
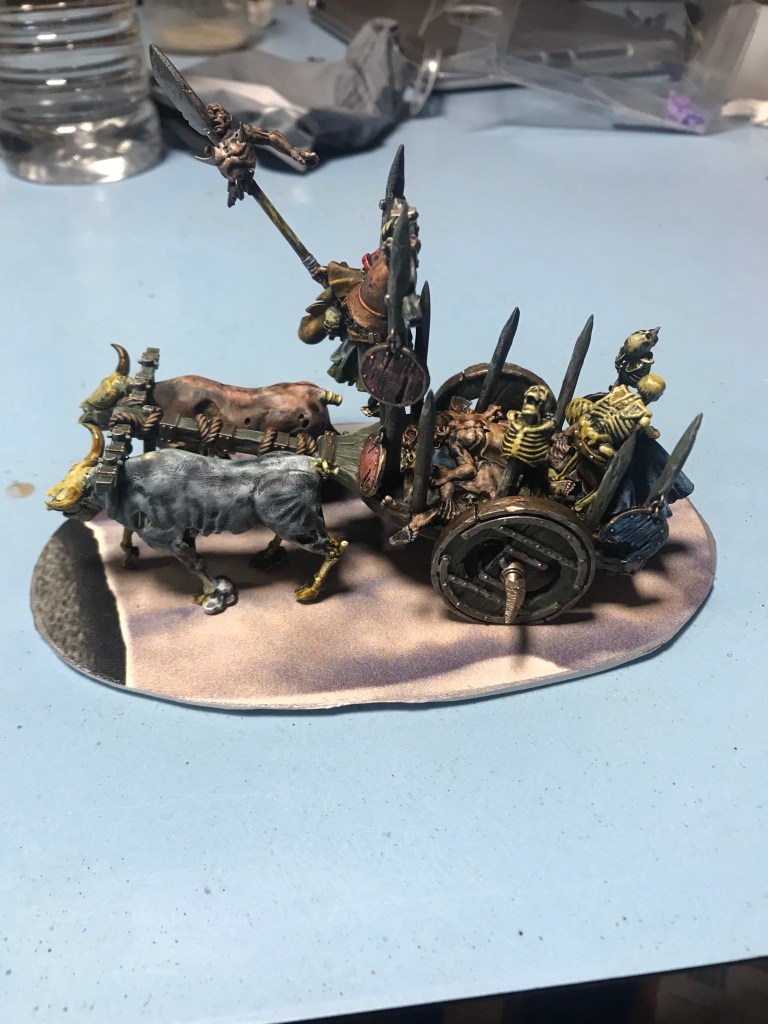
So I was bored and decided to get the base on the cart sorted rather than leaving it… so here it is in its almost finished stage…
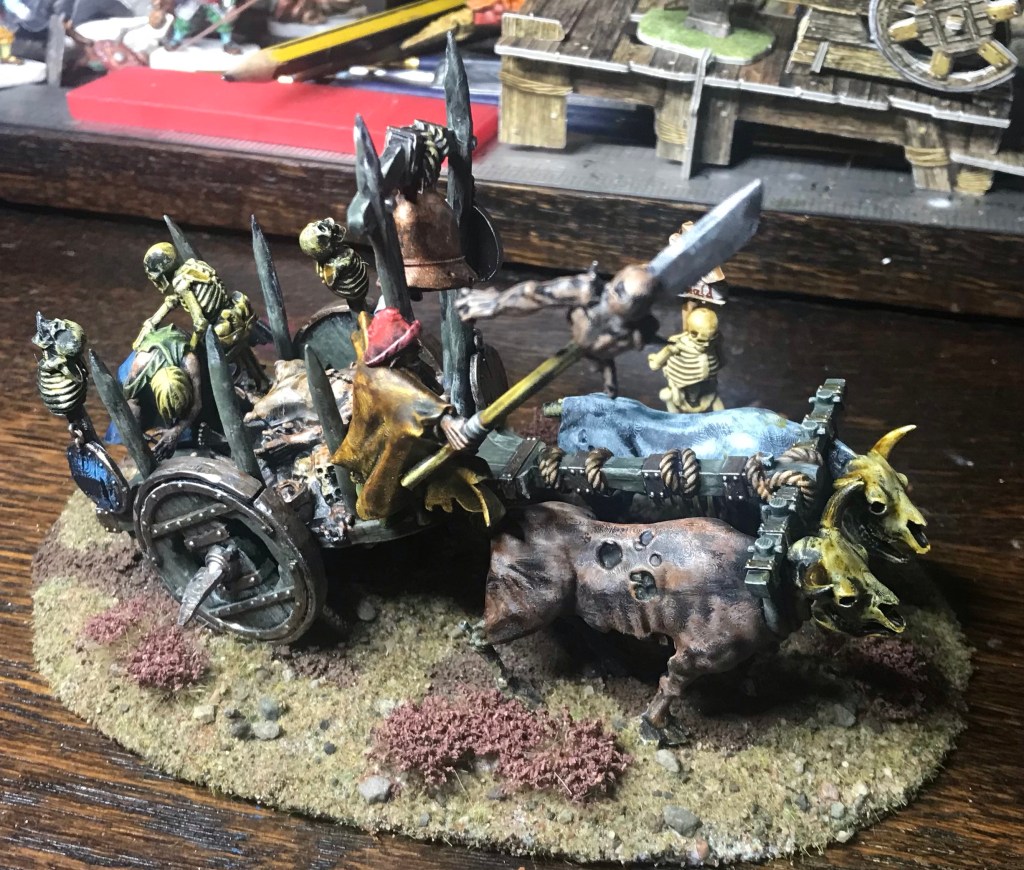
Really just the zombies and ravens to add to it.
So I eventually got around to getting a base started on the corpse cart…

I have got a couple of crows and a zombie to add to it as well as the completed skeleton signpost.

So as you can see I still need to add flock and tufts, but it is getting there.
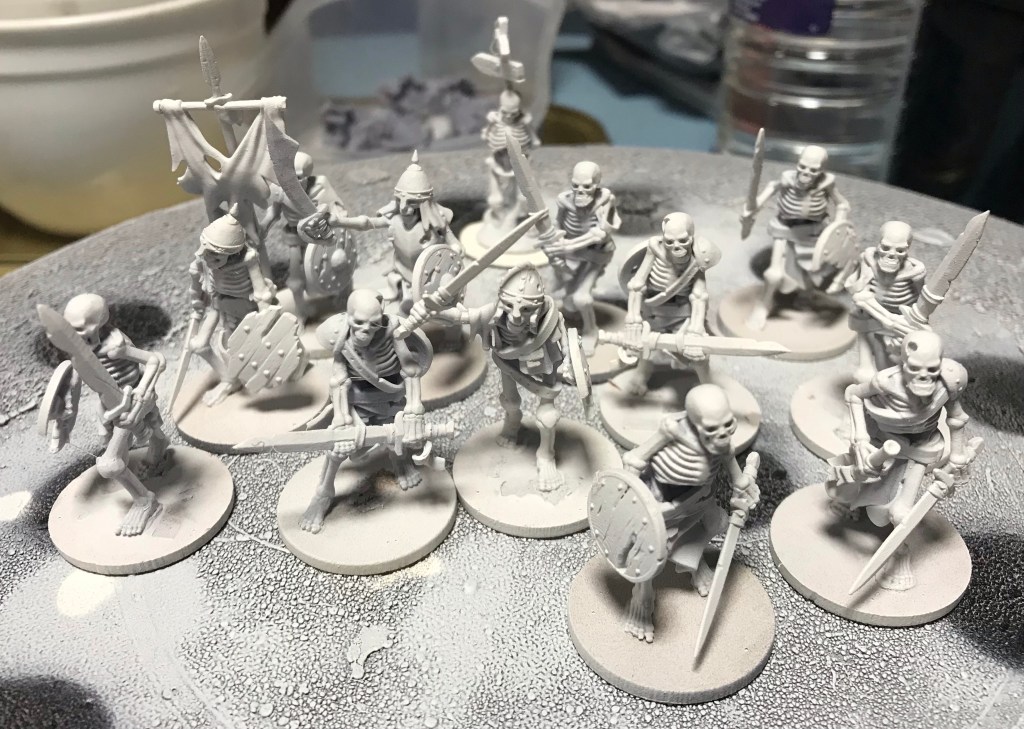
So I got the skeletons with swords onto my few remaining round bases… well actually I had to take some minis off four bases to make the full twelve. I could have used 2p’s but was concerned that the weight of the coin might cause damage to the swords etc.
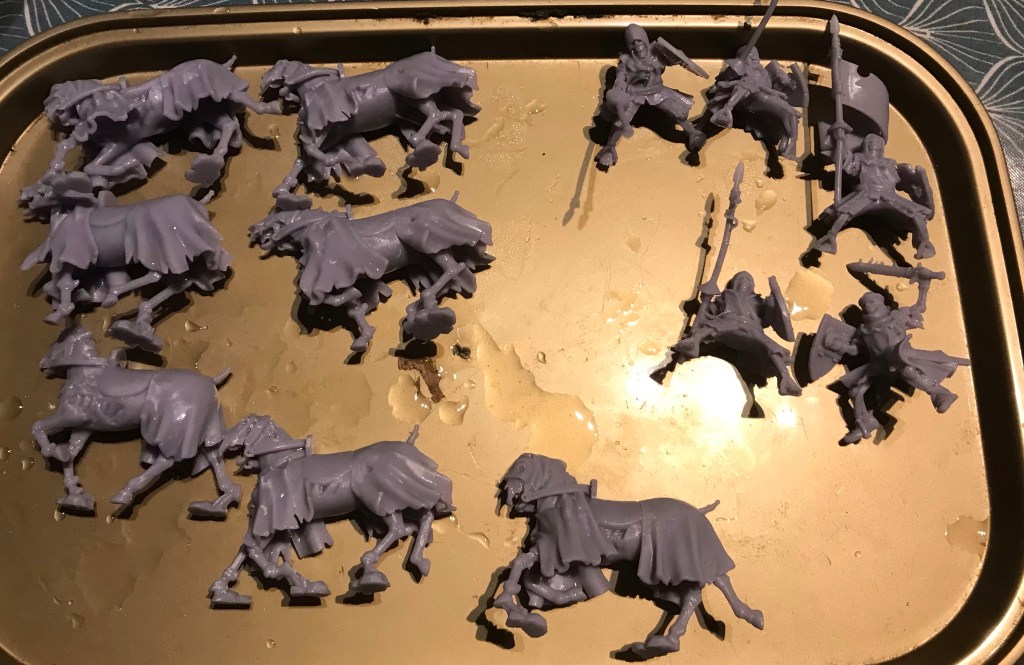
I also got the cavalry printed too… upon saying that. When I got them off their supports I realised that there were only five troops and six horses. There is a seventh horse. I am seeing if the female vampire from the Zombie dragon will fit on it.
I got a bit more done on the corpse cart too.
Today I worked on my undead cart. In this case i made a change from my usual painting styles. With this I undercoated black and then dry brushed white. This is something I did the early 2000’s using washes to go over a similar method of undercoat and dry brush. But never mind I digress.
I think this method really worked for this model. I am not sure that it will be my go to in the future, but who knows?
I am printing some more skeletons and ghouls. I might use it on the ghouls but not the skeletons as I want them to fit in with the previous parts of the army.
Anyway, here are a couple of of pics of the model nearing completion. Tomorrow I add some more colours to the bits I obviously missed.
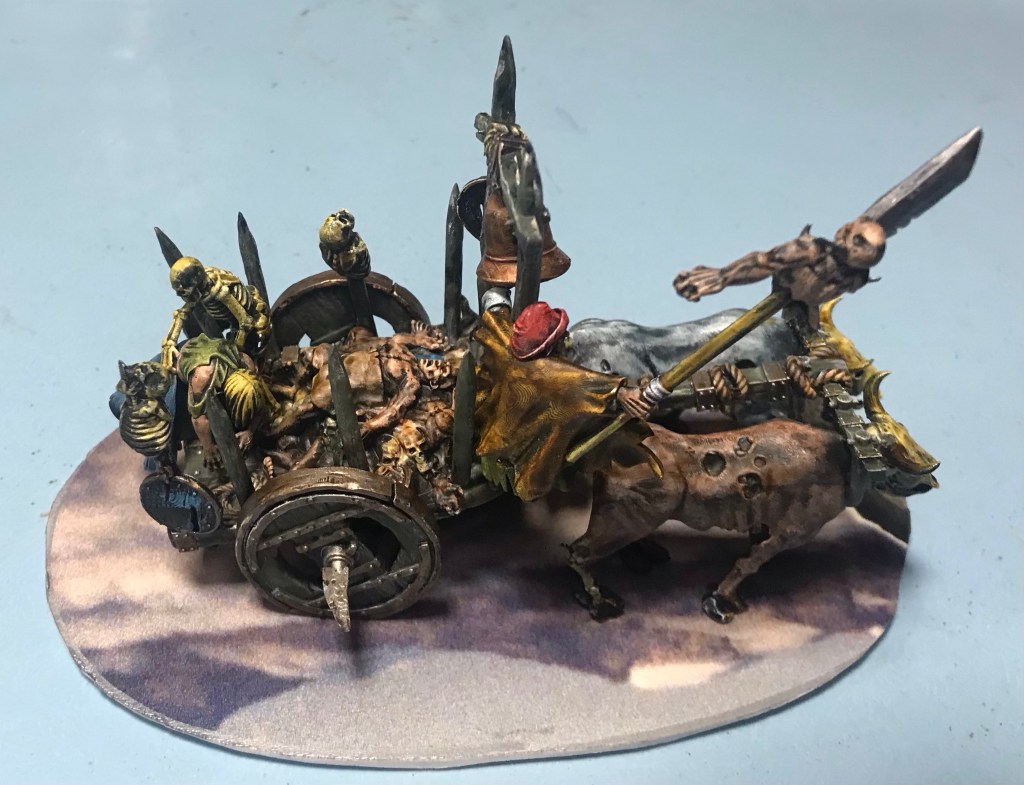
This was painted using both Contrast and dipping inks. Hopefully by tomorrow evening it will be finished, varnished and based.
