Scalians… Further Work

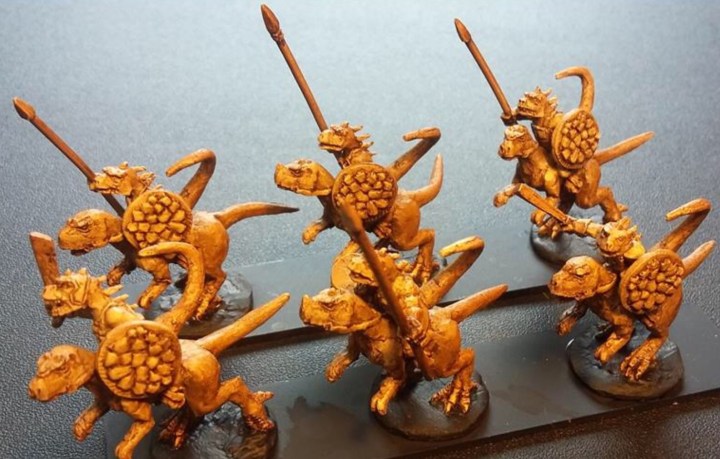
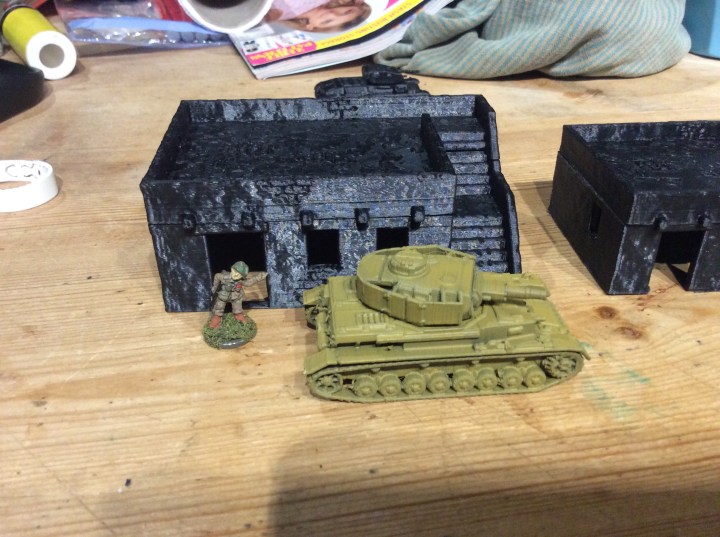
I managed some of the infantry and general today

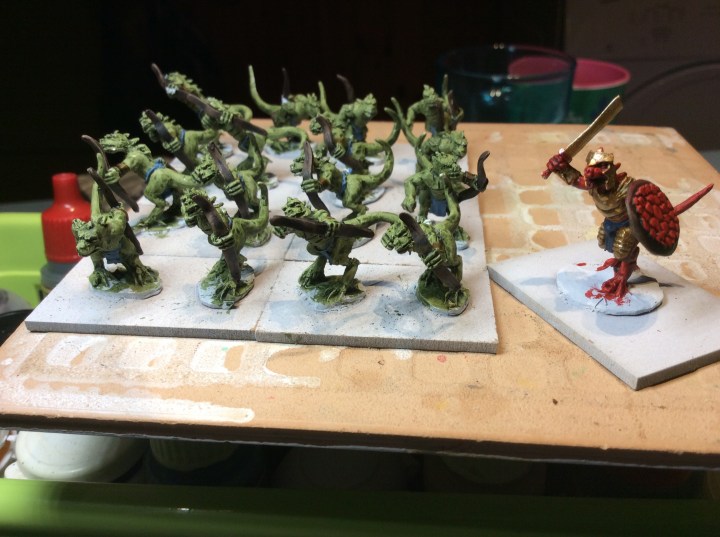
These still need a bit of work – first being to find all the bits I missed with the green paint. No matter how many times I look, I still spot things on the photo that were not painted. I think it might be that as the pain is wet it glistens, causing me to think the white bits are wet paint. I have just had another really close look and I am spotting more and more.

After a repaint of the green (it would seem), I need to paint the arrows in the quivers and then do some claws. A bit of highlighting wouldn’t go amiss on the bows. Then I can start on the swordsmen.

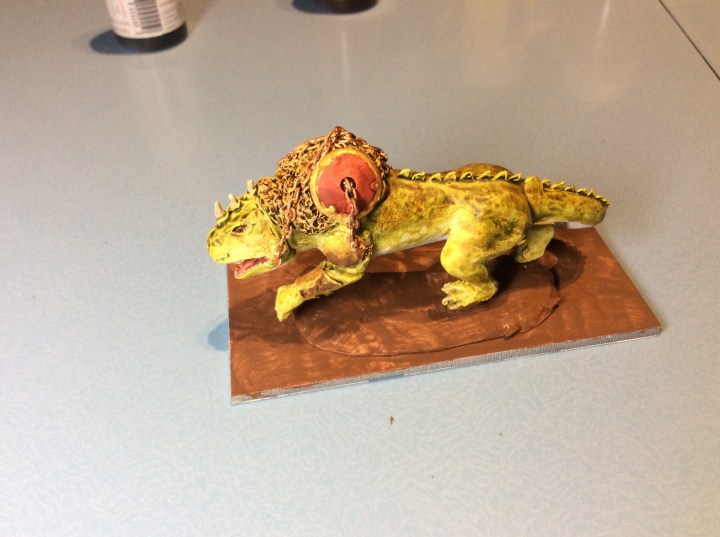
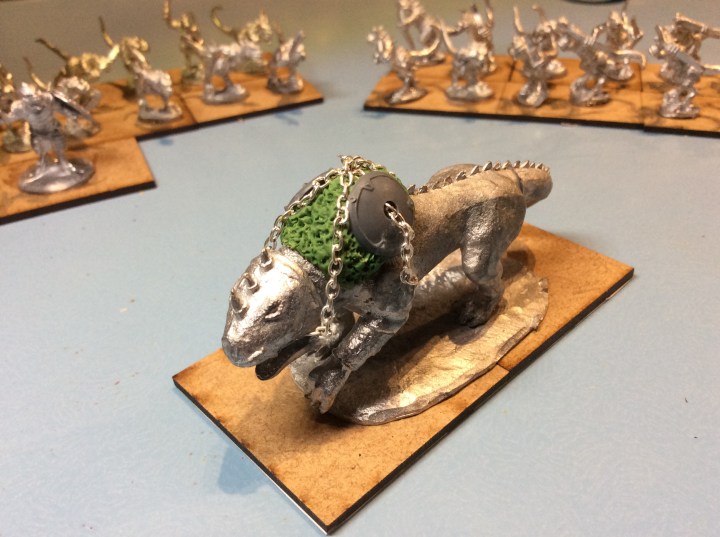
The other thing I did was darken down the fur on the big beastie. The chain and shield rims are now not blending in. I really need to tidy up the gold at the 11 o’clock on the shield though… I keep forgetting!

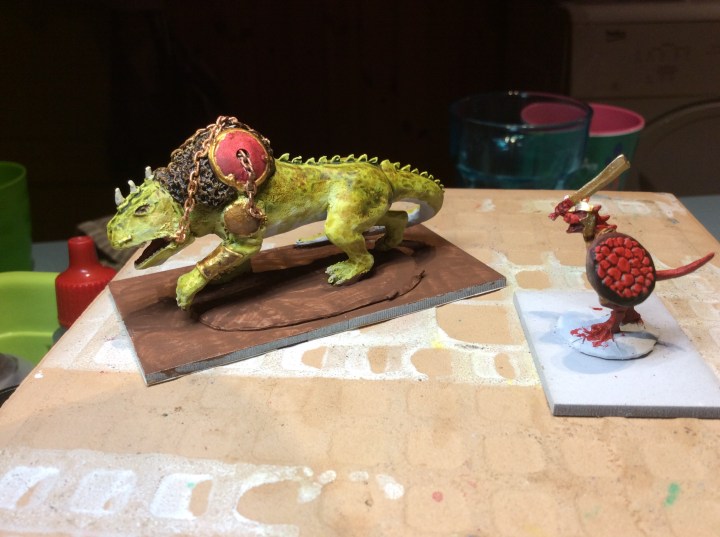
Am bit of highlighting on the general’s shield rim would help too. This is really where Contrast paint doesn’t work. Flat areas basically are a waste of time going for the ‘shove some paint on and voila – done’ approach.

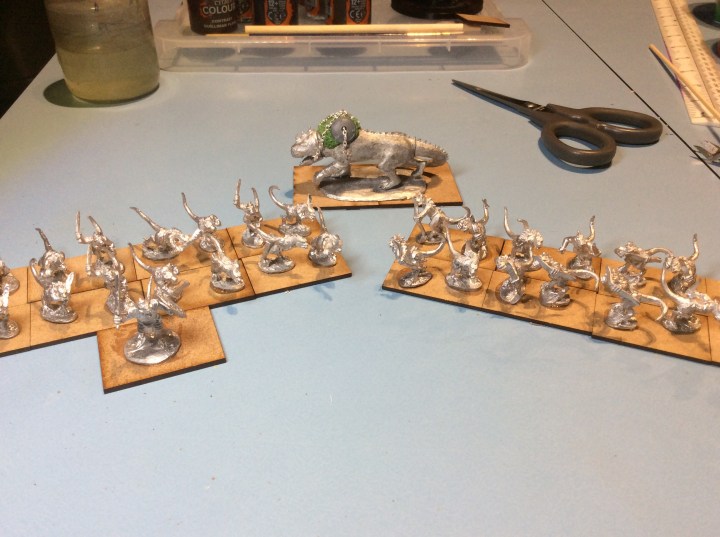
Tomorrow I will try and get this lot finished and then at least make a start on the sword armed ones.

Scalians – Work on the Big Beastie

So I managed to get some work done on the big beastie or Juggernex as it is called on the website 😁.

I am happy with the mottling on the skin, but less so with the rest. The contrast paint didn’t work so well on the shield. I will have to highlight them both. Not to mention the gold. The gold looks better in real life, the photo has almost blended it into the skin tone.

I will need to get it flocked up, but need to decide on what and how to do it with.

Once I get these ones painted then I think I will get the cavalry… half with bows and half with spears.

Luckily the UK distributor lives on Shetland.

I have a couple of evenings left before the hols, so hopefully I will get some more painted before I head off.

Scalians – Making a Start

I cracked on this evening and got the minis glued down onto the MDF bases. This took a bit longer than expected as these minis are large scale 15mm. So my normal 3 or 4 to a base looked wrong.

I got out the bases that I had and had a play about.

In the end I found some 25 x 40mm bases and went for two to a base. There are sixteen to a pack so two’s worked well.

In the end I ended up with eight x bows and eight x swords as well as a general and a large beastie thing.

As you can see from the photo above the large beastie had a bit of a makeover. This was because he was a bit lacklustre – to be frank he was actually boring and crappy. Which is really weird as the rest of them are lovely miniatures.

Where I put the saddle/pad were a set of straps from the legs that just fizzled out. It was almost as if a saddle was an optional extra. I checked on the website and I can’t find anything to go on it. He is a mix of lizard and mammal and there is very little texture to the skin, I really should blend in that tail section when the superglue has cured fully (who would like to bet I forget before spraying).

My attempt to titivate him is a bit off scale, but it was what I had lying around the shed at the time.

I have my source material ready for colour ideas!

The Lizardman Army was my favourite alongside the wood elves and definitely my favourite in Warmaster. Sadly they went the journey, but the Warmaster army did make me £250 which was used to buy a second hand SLR camera.

I will get these sprayed tomorrow morning and start on the painting tomorrow evening.

Desert House 5…Update

Well the shell is finished…

The roofs are on there temporarily. I will decide on which roofs to add later. The tower needs to have its top and roof added. So how did it get on…..

These bits were supposed to be attached. The window shutters were out too far I would guess and I forgot to extend the door into the doorway to secure that. But apart from that it seems fine.

Now I could give another one a bash, something a bit more complex again, they are cheap enough, bit as Dave pointed out I need to be able to paint everything = some of these bits are going to be tricky!

Problem with doing some more is that there are quite a few already!

I reckon I can squeeze another couple in before I have to stop printing and start painting. I also need to print half a dozen roofs as well as a whole pile of doors and window shutters.

Desert House 5

More of a complex than a house to be honest.

Having had a busy day, what with watching a very interesting dinosaur talk in Lerwick. We booked it a while ago. Typically my youngest came down with chickenpox and couldn’t go. Lucy and I went and had a good time. After a bit of shopping we came home and she asked me to help her build a castle and village on Minecraft, I don’t know why as she is getting much better than me 😱.

So instead of printing anything off I decided to do something a bit different. Instead of a courtyarded building I went for more of a complex.

This is on the printer right now, but this is the view in Cura…

It needs roofs printing as well as the tower top. To save time I embedded a door in the base of the tower. This one is a bit more complex in that it has walls inside walls to make the distances fit, I also did some scaling to make sure doors and windows fitted snuggly as well as increasing the height of the tower. As can be seen the shutters are protruding a bit more than the last one so they should be more visible.

Whereas the last few were printed at a 0.2mm layer height I have decided to go for 0.1mm for this one. This should give me a better print, but also increases the time of printing.

The 0.2 mm version would take 4 hours plus this one is doubling it to just shy of 10 hours. So by 07.00 tomorrow it should be finished.

This is what it looked like earlier…

Not very much to see really.

Tomorrow I will show the fruits of my labour… aka scratch building 21st century style.. Thanks John👍

Update at 23.30….

After 3 hours and 3 minutes we are this far…maybe 10mm high at best 😱

Desert Houses 4

More 3D Printing I am afraid…

Today I had half an hour and had a mess around with 3D builder. I had a go at adding a compound to a small house. I was really pleased with the result.

This took just over 2 hours to complete. The other thing I did was to add the window shutters and doors in the software rather than printing them separately and glueing them on. I had mixed success with this as some were too far forward, but as my wife pointed out it does look like they were sealed up.

The one on the right above was the original house.

The second one looks a bit more complex But in all honesty all I did was join a couple of houses together with a couple of walls. Again I added in the window shutters to the software, I forgot the doors. The bigger one took 3 hours 58 minutes (to be fair it is nearly twice the size of the other one).

I really enjoyed doing this. It also means that the compound walls are secure and won’t need glueing with visible joint lines.

I still need to print roofs for them both, but tomorrow I am going to have a go at something a bit bigger 😉.

Desert Houses 3

Today I printed off my conversion of a house with stairs with an added tower.

It worked ok, but I reckon the tower needs to be a bit bigger. I dropped it down by 50% too. I do reckon it needs to be bigger.

When you compare it with the two story house with domed roof you will see what I mean…

The door is tiny for a start. This can be easily rectified with a bit of card and a printed door but the height seems a bit naff too.

The other issue I have is the lack of texture on it. Not a problem on its own but it looks a bit weird stuck onto a textured building.

As I was printing off some more walls tonight it suddenly dawned on me that I could actually stick them in situ on the buildings in the software and print them as one.

I shall give it a go tomorrow.

Desert Houses 2

Another couple of houses printed today…

One with a domed roof and the other with stairs mirrored on the left.

On the post it notes are the time it took to print them. Today’s printing time a little under 6 hours. I forgot to check how long the walls took but let’s say 2 hours, so for 10 hours print time I have enough for a village. I have some already printed so half way there to my three villages.

Someone said to me the other day that the printers take too long. I can’t argue with the fact that a small domed house took two and a half hours to complete. But if I had purchased them online, it would be at least a week to get here. So my 2.33 doesn’t actually seem that long as I set it going, made sure the first layer was sticking well and voila off I went for some lunch and a bit if diggering.

Tonight the domed house with stairs was printing as I made tea, ate tea and watched some Allo Allo with the kids.

Tomorrow I am going to do a test print to see how they look painted up.

Regarding Allo Allo, I had forgotten how funny the first couple of series were. I have them on DVD. My eldest got some of the jokes but the other two saw funny things but didn’t necessarily understand the humour. Luckily I was able to side swipe the question about the egg whisk and celery!

Desert Houses

Technically this type of house is found throughout the Middle East, but as they are going to be for a desert war campaign I shall use the term.

With the laptop replaced I managed to slice a pile more buildings. I printed off the domed one as well as a pile of walls. These are from Terrain4Print. I liked the free one so purchased the rest.

It was the second attempt at the particular dwelling however, it would seem that about 5 minutes after I left it to it, the Bowden tube coupler (the bit that feeds the filament from the extruder to the hot end) had decided to unscrew itself so the filament ended up as a nice coil all over the back of the printer. I had to dump a metre at least as it had fractured and I didn’t want to take the risk of it shearing off in the tube. The rest went back on the spool and back through the machine.

The walls come in two lengths with one of the longer ones having an arched gateway in it. The little diddly wall in the middle is just one of the shorter ones reduced in size the slicer program.

The weird gate is actually the infill to help the printer, I could probably have got away with it (the house doorway and windows weren’t supported) but I decided to be careful as there were a number on the raft. This is it in situ and removed. It has left a bit of a mess when I ripped it out, but nothing 10 seconds with a knife won’t shift.

I will build some compounds like the following as well as individual buildings. These are just placed in situ, but it kind of gives the idea.

I will print off some more houses tomorrow and see where I get up to. I have got a tower from another designer. It is a bugger as I really don’t think it will work without support. My plan is to split it at the upper floor level and print it in two pieces then glue them back together again. Another idea is to combine it with larger building above. I will have a play around tomorrow to see what I can come up with.

Panzer II

I managed the panzer 2 earlier. This is different from all of the others in that the tracks are separate to the hull and turret.

I have a couple of problems with this print. Firstly, the tracks don’t match. I seem to have printed a D and an F track! It gets worse…. one is the right track and the other is the left… so all in all a total bugger up! The problem now, is that I can’t change anything without the slicer on the laptop… So my MKII’s will have to wait until repairs are made.

I also printed off a 50% scaled house with stairs. I can now compare like for like.

First up the 60% one…

And now the 50% version…

I reckon I will stick with the 50% versions as to me they look better.

My plan is to print a few and make some hamlets, which can be joined to make a larger village.

And finally another Somua… I was so sad about the MKII

This shows it still with the support in situ…

I will get on with doing a test paint of one of the houses.