Figure Storage/transport comparison

I have a couple of different figure storage systems….

I thought I would compare the two. These being a Kaiser Rushforth cardboard storage system and a battle foam bag version.

This proved to be more difficult than I thought as it was a bit like comparing oranges and apples. They are both fruit, but not alike at all.

Therefore, we shall go down the ‘what do you get for your money’ approach…

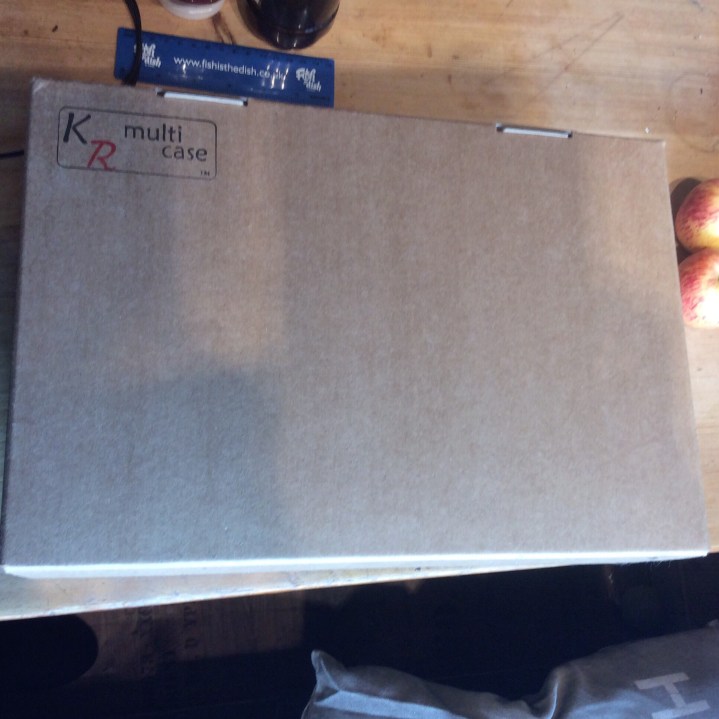
Starting with the KR multi case. The outer is made of a rigid cardboard with foam inserts for the figures. The box lid is held in place by the plastic handle. This one contains spaces for cavalry as well as infantry.

It has space for 36 cavalry and 80 infantry.

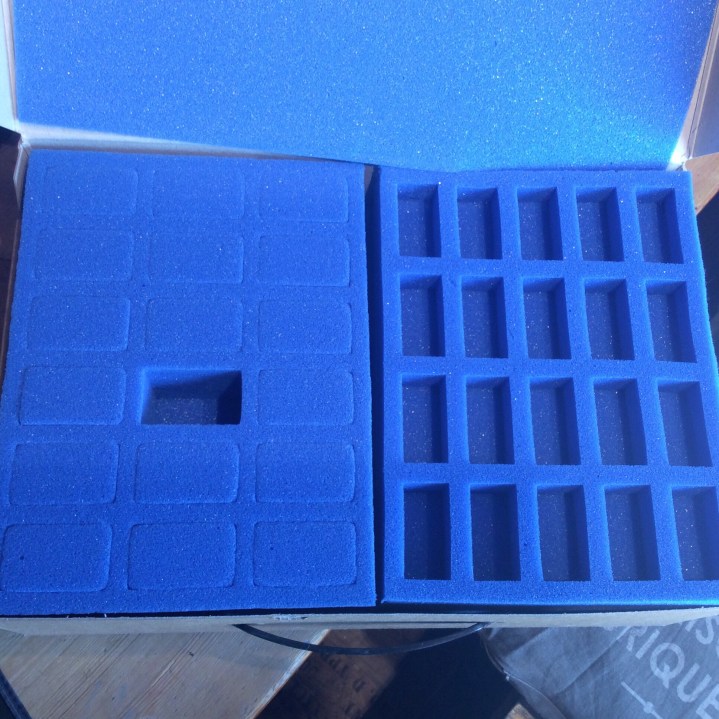
The infantry slots are quite tight and the figure with the sword extended doesn’t fit properly. However a quick snip with scissors would allow it.

The depth of the cavalry tray is about 50mm (2 inches) deep. This is my third case, one has all infantry spaces giving me 160 spaces. The second has space for 40 infantry as well as a pluck and store system where you can make your own shapes.

KR Multicases come in a whole range of styles and inserts.

https://www.krmulticase.com/

I got this case brand new for £25.99 with free postage. The other two were discounted and came in at £17.00 each with free postage.

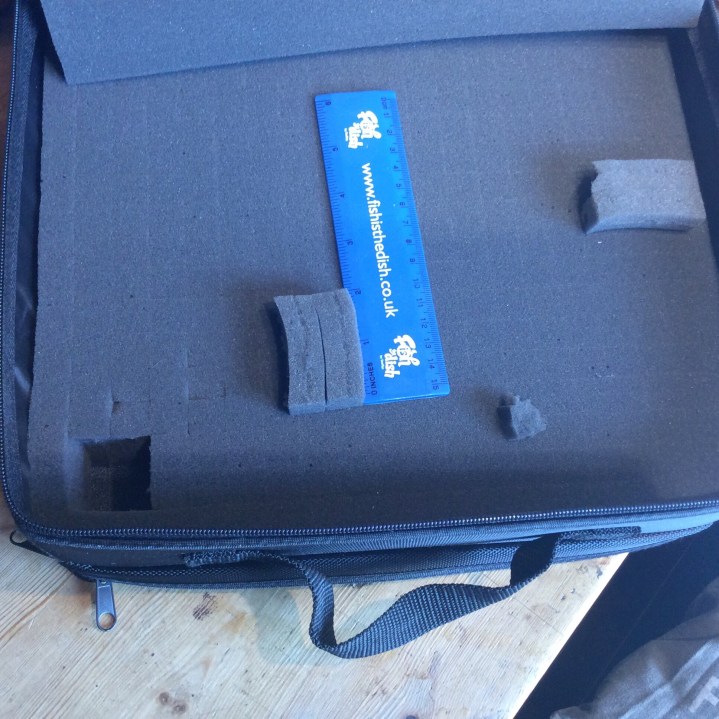
The battle foam case is a different thing altogether, although it contains a similar foam insert to the KR one, these are backed with a more rigid foam (seen in the image below). This allows the trays to be removed without sagging. The bag has a solid plastic edge to it giving further protection.

The top layer contains enough slots for 30 figures. These are bigger than the KR ones, but still the extended sword protrudes.

The bottom layer is a pluck and store system, allowing for cavalry or war machines etc. The depth of this layer being 50mm (2 inches) deep.

Where this case differs is that it also has space for rules etc as well as coming with a shoulder strap. There is also a 3 ring folder system for storing cards or poly pockets.

This case is designed for skirmish gaming. Indeed I will use if for my Frostgrave forces, or gladiators.

As for price. I bought this as it was on offer for £20.00 with £12.50 postage which does seem a little on the steep side. The full price case was £52.00. I saved £32.00.

http://battlefoam.com/

This bag has quite an impressive list of features.

It now comes down to what I think. Both cases work well enough. Personally I prefer the KR one, simply because I can fit more in it. £26.00 isn’t a bad price to hold 160 figures. However to be fair the Battle foam case is waterproof etc and the rules and dice fit in nicely.

As I said at the start you cannot compare the two as they are very different In the future I may get hold of a battle foam cardboard, but at a tenner more than the KR version I may not. The other option is to go for a KR skirmish bag. These are coming in at £32.00 so not a bad price, compared to the battle foam version. Would I pay over £50 to protect my figures. No. Not when I can protect them at half the price. I can carry a cardboard case and a messenger bag to hold everything in.

Bottom line is. “You pays your money and makes your choice.”

Birthday Present Finished

Well, I managed to get everything finished…

His Birthday is today.

3ce29b4a-2994-46bf-a34d-0e3760f8eb7f

They were a lot of fun to paint. It was tricky trying to match in my painting with that of someone elses, but I managed. The main problem was my snow compared to that of Alternative Armies, Mine is more powdery, theirs is more sparkly 🙂

I really enjoyed painting the Ferach in the background. they actually didn’t take much time at all as they are so swaddled in blankets etc. there was a lot of large areas of one colour. If I wasn’t setting my campaign further into the South then I may have splashed out on a unit or two.

They have come a fair old way from the bare metal a few weeks ago. I would have finished them long ago If I hadn’t got back into gaming on the console.

img_4201

To be honest,  the actual painting was finished a week ago, it is the bases that took the time…aka I don’t like doing bases. Most of mine are still waiting to be based.

This lunchtime I took a break from Quasi Napoleonic miniatures and set about building a trio of Char B tanks for another mate.

I got as far as this:

img_4370

There was a bit of a whoops on the rear wheels causing the gap in the attached tracks. Nothing a bit of green stuff won’t repair.

I am not looking forward to all of the fiddly bits, of which there are many!


Mr Otter Returns

He is checking the boundaries…

To his Otterman empire.

Its a dangerous undertaking for him though. Military munitions are found nearby.

It is amazing what your kids can find in the stream. According to the ministry of defence it is a flare/smoke round that has been discharged.

In the Pink… Painting Zombies

Not more zombies I hear you cry….

Yep afraid so.

img_4225

I ran into a bit of a problem with these last night. The red would just not cover effectively; this was after me coming down with repetitive strain injury shaking the bottle.

I went back to the old tried and tested method… make a nice pastel shade (in this case pink) and then cover with the required colour.

img_4275

It worked a treat and red cuffs and helmet crests are a nice vibrant red.

img_4276

However, looking at the pink, it did look rather good.  If I hadn’t already painted my units in blue I would have gone with the pink.


The other thing I managed to do was to fix this resin figure.

img_4258

He was one from my mate’s collection and painted by Alternative Armies. He had snapped off at the ankles.

It wasn’t just a case of superglue him back on as he was leaning at a bit of a funny angle. Therefore, I resorted to superglue and Bicarbonate of soda.

Luckily, I had a useful assistant who could lob the soda onto the superglue as I held the model in an appropriate position. The soda reacts instantly with the superglue leading to a hard, almost plastic bond. As it was his ankle, I did not file it down, as I wanted a larger surface area to hold together. Luckily, it looked like he had a bit of a raggedy bottom to his trousers.

With having to shake the paint bottle so much I am seriously considering one of these nail polish shakers!

Untitled


Pumpkin Patch

I had totally forgotten about this.

I found one of the spare ones in my newly filled shed and then found the completed base in one of the box files.

My shed has a very bright light, a DVD player with attached TV. Next up is a kettle 😁

I am still sorting out boxes so it does look a bit messy in this photo!

Finding a real Smuggler’s cave.

We had never heard about this 19th century smugglers cave even though living up here for 12 years. We found out about it today and set off on an expedition to find it.

We eventually did…

In the 19th century the fishermen didn’t own their own boats. The paid for them in the fish they caught. A friend of my wife has done some research and for every one boat registered another four were smuggling. The crews would go out in their sixareens to the fishing. This was a deadly job and a fair few tragedies happened around these shores. In July 1881 58 men were lost from Gloup when 10 boats foundered in an unexpected storm. Basically every able bodied man from the village was lost.

These clinker built boats would head out up to 40 miles off shore and then return. Some would stop off in Foula, an island off Shetland, sell or trade some of their fish for brandy and then head into their secret locations. They would Drop off the brandy and then head home. They would either return for it later or some of their accomplices would do it for them.

This cave was one such secret location. One end opens directly to the sea and is not visible from the nearby village of Hamnavoe. The other entrance is about 100 metres away and is well hidden amongst a jumble of rocks.

On the way back the kids just had to jump off every available rock…

We had an awesome afternoon out exploring somewhere around 7 miles from where we live.

A Great load of Crates

I love watching the crafting videos on YouTube. They are often on in the background whenever I am doing anything.

There are many very creative people out there. My Crates came about after watching Gareth over on DMG. He built a crate, which I thought was a cunning idea, and made my own version of it.

img_3826

A few weeks later DM Scotty showed an even easier way to make a crate – a wooden cube painted to look like a crate. I thought this was rather cunning so ordered a set of 10 x 20mm cubes and 10 x 25mm cubes to give it a go. The two sets cost about £5.50 with free postage. They came all the way from China with free postage (I still cannot work out how that is financially viable).

Anyway, move forward a few weeks. The dreaded flu struck and my various bits and pieces sat there. Whilst in the recovery phase I watched Dungeons and Gluesticks. John was making crates too (all three videos probably spanned 3 years).

John also used the basic wooden cube but instead of just painting it, he used a razor saw to cut grooves into the cube. He then added the cardstock around the sides. It did look rather good.

I decided to give his version a go last night.

img_3867

Mine are a bit rough and ready but they do indeed look like crates. I could probably use narrower strips of cardstock on the edges. However, seen on a table a metre away I don’t think it will really matter. I didn’t bother sawing into the sixth face of the cube as I am going to base a lot of them in groups to act as a line of sight blocker and/or cover.

I made another one today on my lunch break.

img_3869

They are indeed very easy to do; they take a bit of time but look the part and in my mind well worth the small amount of effort it takes to build them.


Below are links to the channels I mentioned above.

Gareth, Scotty and John

https://www.youtube.com/user/TheDMGinfo

https://www.youtube.com/user/theDMsCraft

https://www.youtube.com/channel/UCZvZvalRLgkGXmFTpHEJBiw

Another couple of channels I watch a lot are as follows:

Vannessa on the Crafting Muse https://www.youtube.com/channel/UC92IlSbAqZY-TQv5pa4V1nQ

Black Magic crafts https://www.youtube.com/channel/UC2Rlv-ug-mtnXuMwlpcqFgg

I have just started watching the following

Wyloch’s Craft https://www.youtube.com/channel/UCrKJd7jQ989DZvtf5C69mYA


Airbrushm

After nearly 5 weeks I switched on my airbrush for the first time.

Here we have a couple more Guard cavalry and a Ferach surgeon and a hussar Officer as well as Madame Boniface and Egor (they say he is a golem, but to me he is an Egor.

I purchased the airbrush primarily to undercoat figures and terrain. To be honest it took a little working out. For example you have to lift the dial to change pressure before turning it however the instructions don’t say that the name it and say turn to alter the pressure.

The back nut on the airbrush needed loosening a bit to get the paint to flow properly. But to be honest it took about 5 minutes to work everything out.

I deliberately purchased airbrush paint as I wanted to reduce the number of variables that I needed to work with straight off. There are loads of YouTube sessions showing how to make your own airbrush ready paint.

The temperature today is about 1.5 degrees and blowing a gale. Not good spray painting weather. The thing I loved about this airbrush was the control of it. I painted each one whilst holding onto the base. Yeah my glove got a bit of paint on it, but compared to a spray can? Hardly any at all!

The paint layer on the figures looks really smooth. So all in all I am a very happy person.

This is the one I bought. It isn’t a Badger or any of the other ‘top’ makes but it does what I want it to do and that is good enough for me.

https://www.ebay.co.uk/itm/COMPRESSOR-KIT-AIRBRUSHES-AIR-BRUSH-COMPRESSOR-AIRBRUSH-COMPRESSOR-KIT-132-128/370268372610?ssPageName=STRK%3AMEBIDX%3AIT&_trksid=p2057872.m2749.l2649

Still Ill

I havent so much as looked at my blog for a week due to having some horrible flu bug. I am sleeping on average 18 hours a day, haven’t eaten properly since Monday and am, to be honest, feeling a little glum 🙁

I have new toys in my airbrush and airbrush paints, new figures and all manner of fun things to do. Problem is I haven’t got the energy to do anything.

Stamps Again’

I tried out a stamp on foam board. Sadly it isn’t Dollar tree stuff. This the paper won’t come of style. Sadly I couldn’t find any black or grey card to test it on. By the looks of it, it does work well in the table 🤪.

There might be something in this… However I am not really sure what I would use them for. A few things I have learned from this is to make sure the paint goes on thick enough to leave a mark. I am using extra thick paint, I might see how a thinned down version works.

It looks better if there are no large splodges of colour. I tried colouring individual stones, but to be honest it doesn’t really work.

I painted a dark background and to be honest it looks much better.👍

I am pleased with the results so far.

Thanks DMScotty!

I blasted off another stamp which can be seen at the top of the photo below.

The advantages of the 10mm blue foam is that it is waterproof and can be washed under the tap. It is a bit sturdier too being twice the thickness of the foam board. It also has the advantage of not having to have the paper removed.

The advantage of the foam board is that I can get it locally, it is easier to put even pressure on too.

I will have to make a 3×3 tile and compare the two types.

I do particularly like the planks.