
Slight size change. Sort of half way between the larger and smaller versions. The squared paper helped get the angles right for the templates.
Slight size change. Sort of half way between the larger and smaller versions. The squared paper helped get the angles right for the templates.
Coffins R Us!
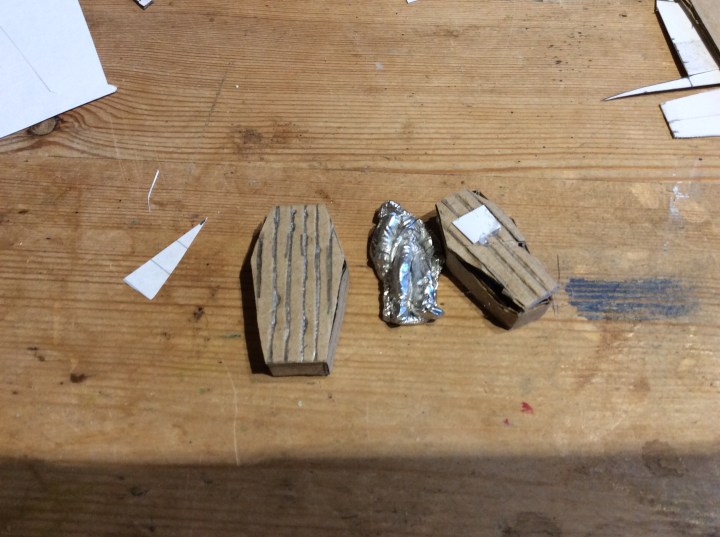
I decided to give a couple of coffins a go. They are really just test pieces to see how I get on.
Both are made out of thin corrugated card. I am still not sure on which size to do. I decided to break up the smaller one . The figure is one of my Flintloque casualty ones.
I might also have a go with some thin balsa wood that I have and see how that works too.
I got the idea from DM Scotty. (His look loads better than mine)
As work has been hectic of late and I just about have time to eat some lunch I decided to do something speedy.


Basically some more potion bottles like the ones on the right above.
Not quite sure what I am going to do with them all, but I am sure I will come up with something 🙂
After watching a YouTube video on making books, I decided to have a try.


basically I used 2 types of card; a thicker and a thinner piece.

I cut about a cm wide length of thick card and about a 12 -13mm length of thin card. I also made some bigger and smaller books by simply increasing and reducing the size of the card cut.
I cut two rectangles of the ticker card and then stuck them together. These were, in turn, glued to the end of the thin card strip. I made sure I had a little border of thin card around the edge.


Once this was dry I folded over the extra length of thin card and glued in place. It was simply a case of cutting off the extra length to match the first bit.


I did try experimenting with a book mark by placing a piece of post it note between the two thicker pieces, but I made it a bit wide and it just looked wrong.
I left it all to dry and then painted the pages in bone white (basically cream) and then the covers in various muted colours.
The open book followed a similar principal but in this case the pieces of thicker card were glued side by side with a small gap in between them.

I cut a piece of post it note to the same width as the thicker card.
I added the extra pages by adding glue to the gap and pushing it in with a cocktail stick. in this case I added a second piece (making sure it was slightly longer to allow for the squishing into the gap)

Basically paint as before.
I used a ultra fine sharpie to add writing by doing little scribbles.
The idea came from:
Gareth has some really good simple ideas (mainly for D&D, but to be honest it can be used for anything mini wise)
Vanessa at the Crafting Muse is another fave…. Well worth checking them out. (The video below is my next piece 🙂 )
I made a start on these today.
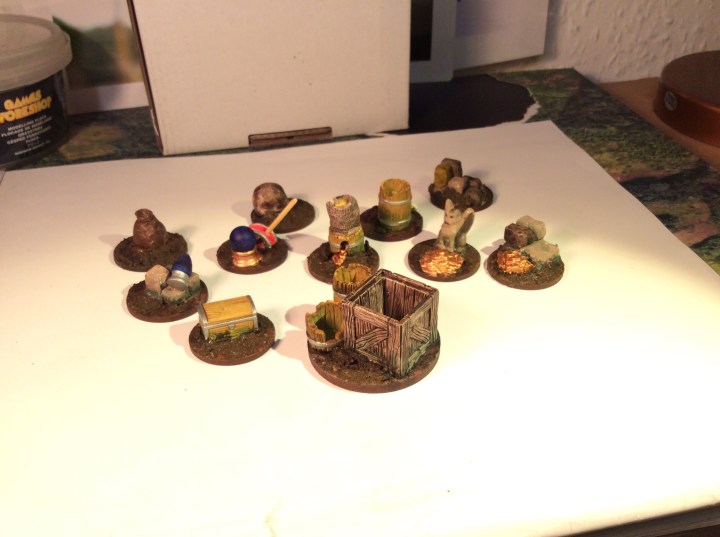
apologies for the naff photo.
On the whole they are painted in washes apart from the metallics. They still need a bit doing to them but I am happy with them so far.
Later on tonight I will get them highlighted and based up. As they are a wash over plaster (albeit a very hard plaster) I will need to get them varnished to stop them chipping.
Was having a chat with my family last night and in the midst of these chats I doodled (is that the correct word for something 3D) this.
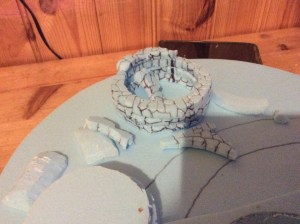
I have since added a small annex. I might add some more.
To be honest it was quite therapeutic. The thick black line is to ensure the bits go together properly. Really not sure what I am going to do with it…. make it a ruined broch, a small hut, or even a planticrub:
https://www.shetlanddialect.org.uk/john-j-grahams-shetland-dictionary.php?word=1825
in case you were wondering.😏😏😏
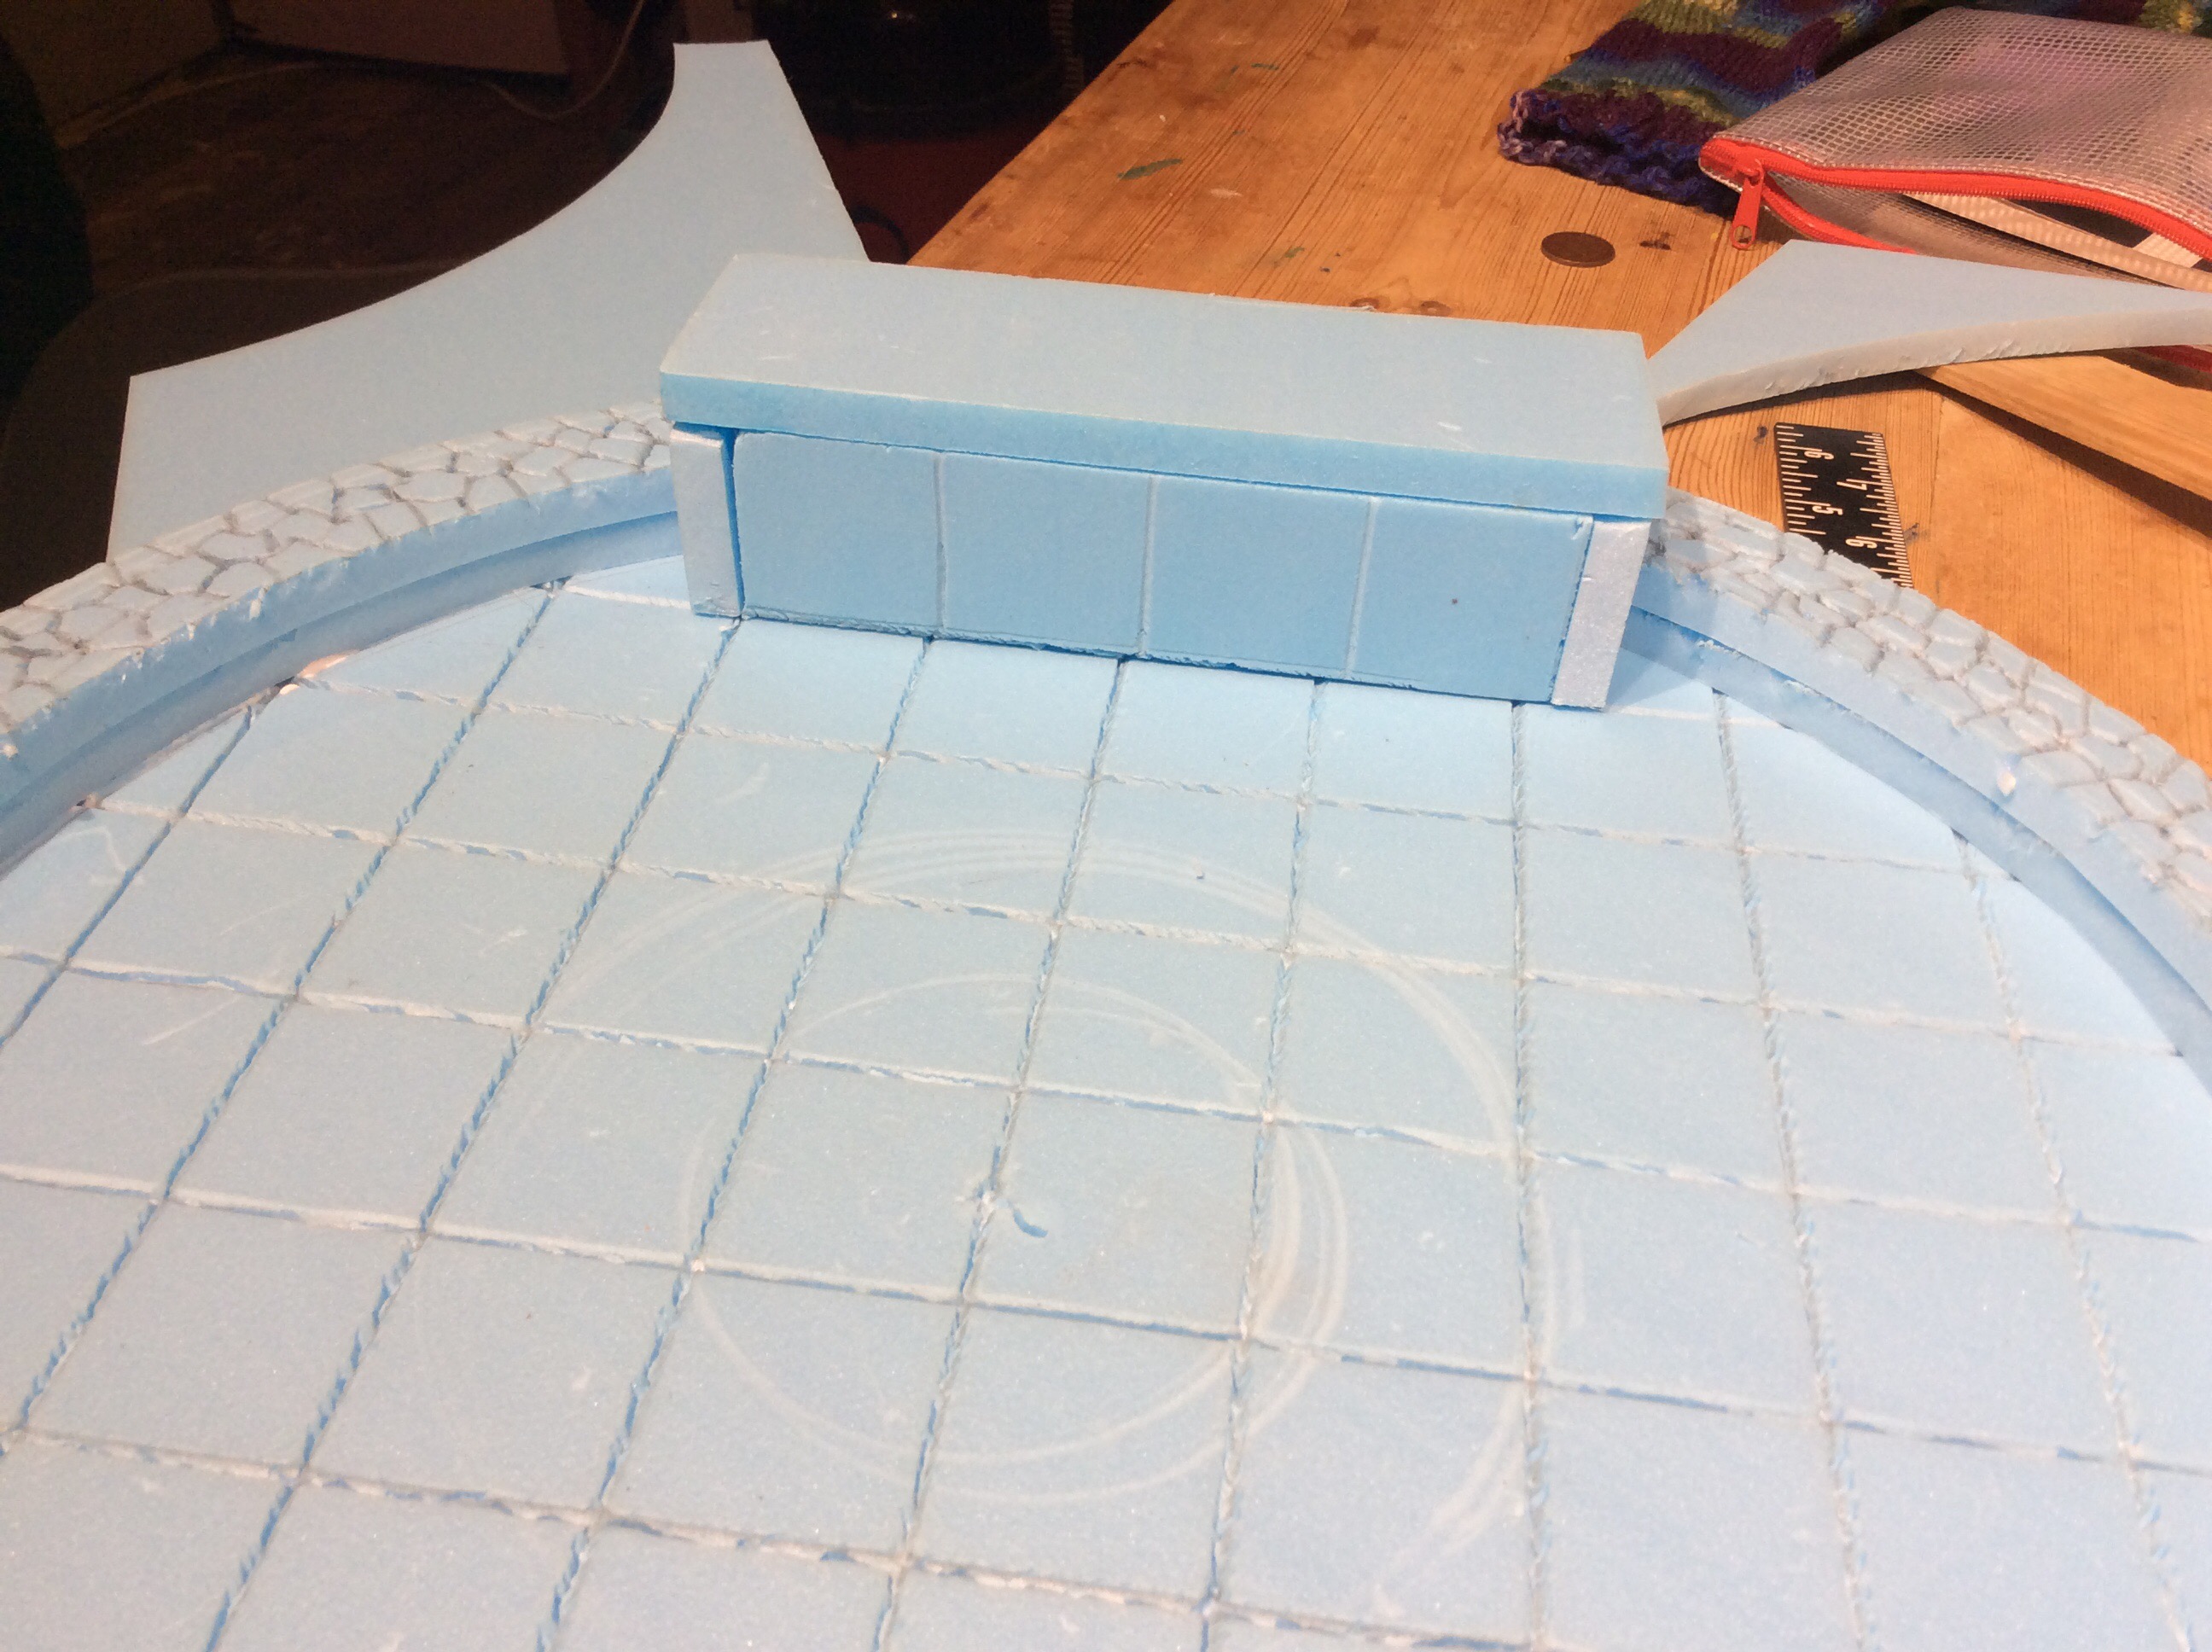
As you can tell, Gladiators are my next big thing, well actually they have already been a thing for years. Now as mentioned on a previous post or two Ludus Gladiatorius comes with absolutely everything you need to play the game. But for the Games day I decided to make a simple provincial arena.
This is being made out of 10mm extruded polystyrene. For speed I decided to do squares instead of hexagons.
This will have an internal planked wall (and possibly external) the gates will be under the dais at the back. To be honest for speed I haven’t really bothered with a way in, but this may change 🤣.


Regarding Ludus Gladiatorius. Doug from EM4 replied to my email stating that LG II is sold out and there aren’t that many of LG left either, but that a new version was in the pipeline with ‘lots of goodies’.
I will most certainly be waiting for it to come out, You can never have too many gladiators 👍.
EM4 has loads of good stuff at really good prices. It is well worth giving them a look for both Painted and unpainted figures.
http://www.em4miniatures.com/acatalog/Pre-painted_Miniatures.html
I saw this cunning idea on the terrain tutor Facebook group. I thought I would give it a go. I cut some squares out of EPVC and sloped the edges. I then basically glue gunned a pile of Pistachios onto these bases.
I then mixed up some Milliput and smoothed this on with plenty of water. I added a bit of texture with one of the tool’s handles and then rolled up some longthin sausages and let these twist themselves up and stuck them onto the bases or draped them around the eggs.


